
In this blog, we are going to cover creating datasets and configuring snapshots after you’ve already set up pools on FreeNAS.

A dataset is like a directory or a folder in your storage pool. When a user or application accesses the dataset, they will only be able to view or modify files that are in that dataset. Users can view or edit files depending on the permissions of the dataset and of the files and folders therein. We will talk about dataset permissions in the next section.
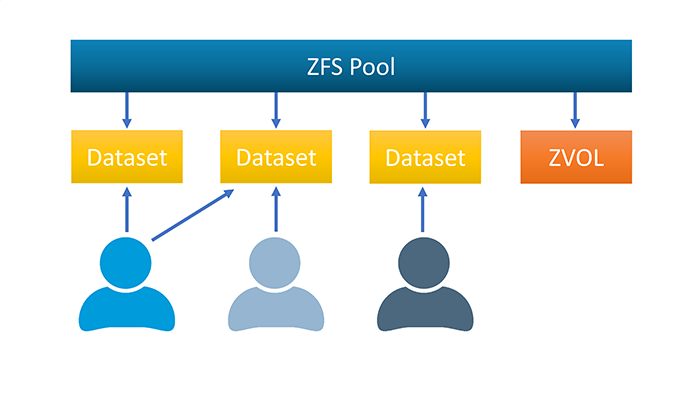
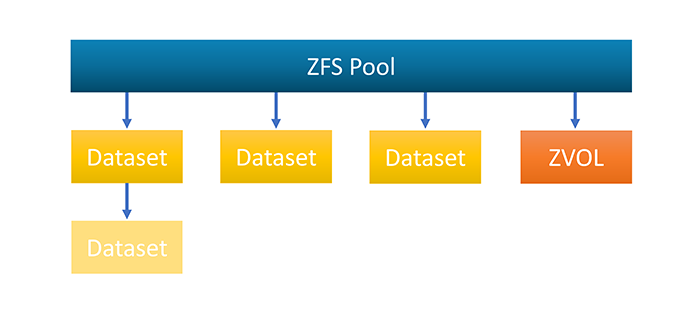
A dataset gives you a bit more control over how its data is stored than a traditional folder would. For example, each dataset can have different compression, deduplication, or quota settings. These settings can be applied separately from the rest of the file systems. Just like with folders, datasets can be nested within one another. Nested datasets can either inherit properties from their “parent” dataset or be set with their own, unique properties.
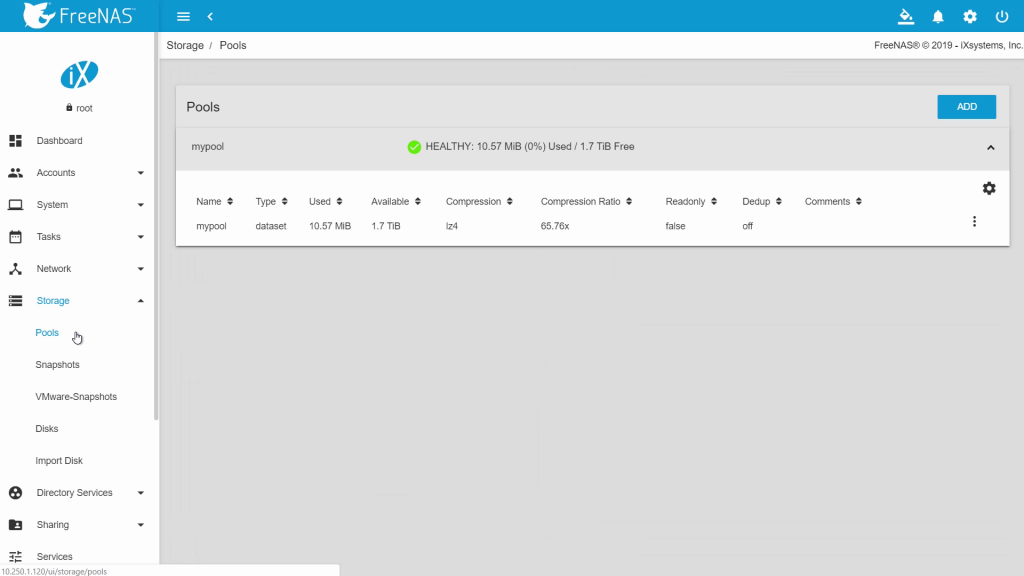
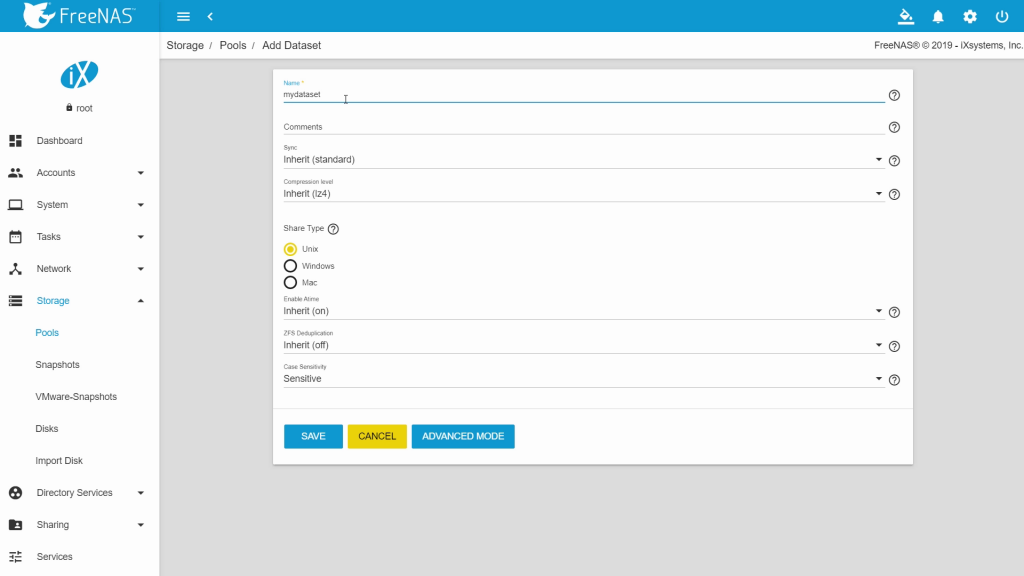
First, go to “Storage” then “Pools”. Click the arrow to expand the pool. This will show a list of datasets on that pool. It will also show any ZVOLs that you may have created for iSCSI shares. Both zvols and iSCSI will be covered in a later video. Click the three dots on the right then click “Add Dataset”. Give the dataset a name; we will call it “mydataset”. We recommend that you leave the compression level as lz4, which is both capacity efficient and performs well. Choose the Share Type that matches the type of system you will access the share from. If you click “ADVANCED MODE”, you can define a quota for this specific dataset. When you are done, click “SAVE”.
Next, we are going to make a ZFS snapshot. A snapshot preserves your data exactly as it was the instant it was created.

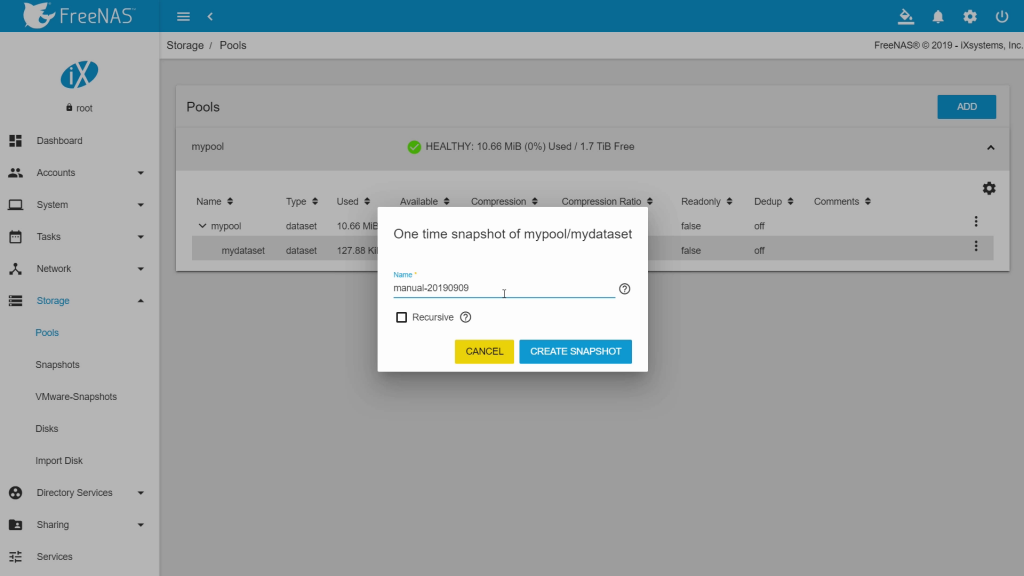
Go back to “Storage”, then “Pools”. Expand the pool to show a list of the datasets. Click the three dots on the right for the pool or dataset you want to create a snapshot for, then click “Create Snapshot”. Give it a name. Checking the Recursive box will set it to include child datasets of the chosen dataset. Then click “Create Snapshot”.
Once the snapshot is created, the filesystem state at that time is preserved. As the live filesystem data is changed, the snapshot will remain static. The snapshot will only consume disk space equal to the amount of data that has changed since the snapshot was taken. For example, if you snapshot a dataset with 100TB of data, the snapshot initially takes up only a few kilobytes for its metadata. If you then change 1GB of data from the live dataset by deleting it or modifying it, the snapshot will take up 1GB of disk space.
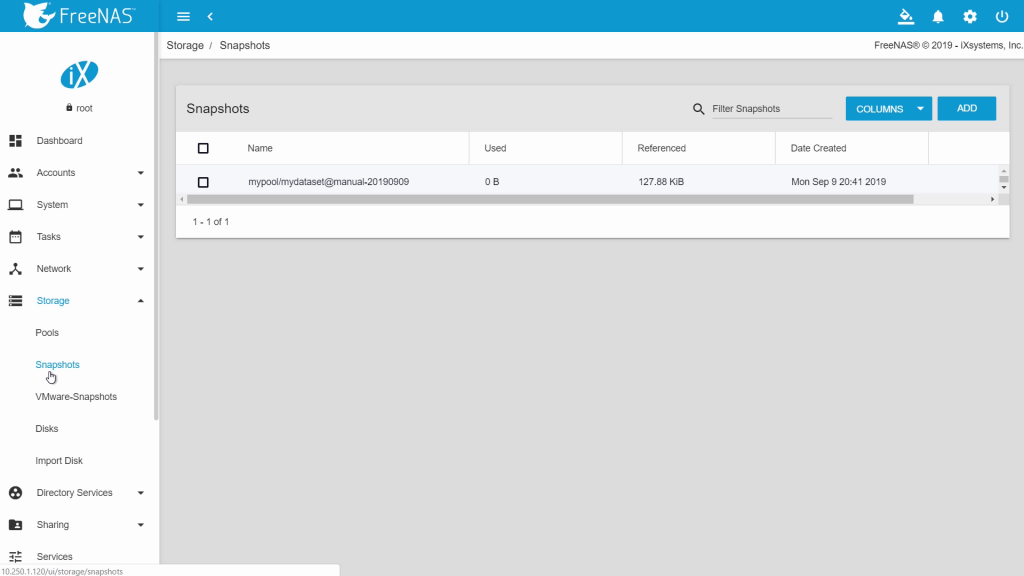
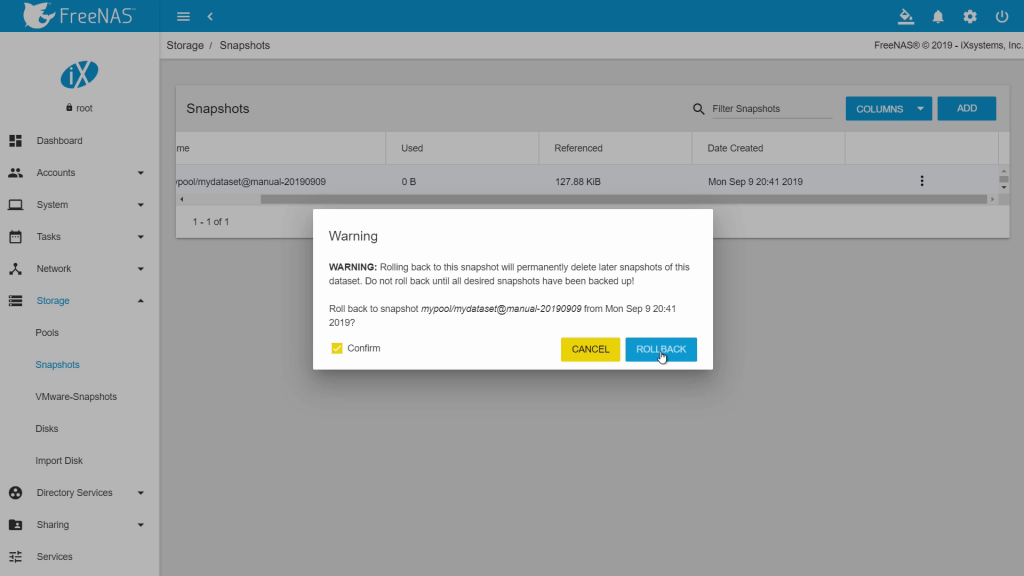
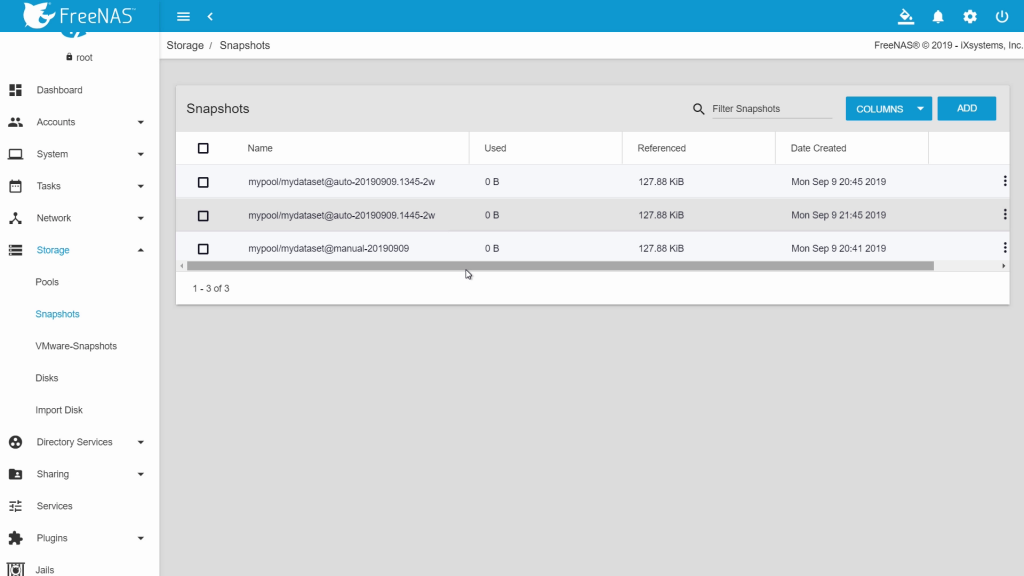
Now let’s look at how to restore your volume to that snapshot. Before performing this step, note that doing so permanently deletes all data added after that snapshot. Go to “Storage”, then “Snapshots”. Here you will see a list of the manual and automatic snapshots. Select the snapshot you want to rollback to and click the three dots, then click “Rollback”. It will ask you if you want to continue with the rollback. Click “Yes”.
Cloning a Snapshot
An alternative to rolling back to a previous snapshot is to clone the snapshot. You might do this if you need to retrieve old data, but do not want to undo all changes since the snapshot. The cloned dataset can be deleted once you are done retrieving data.
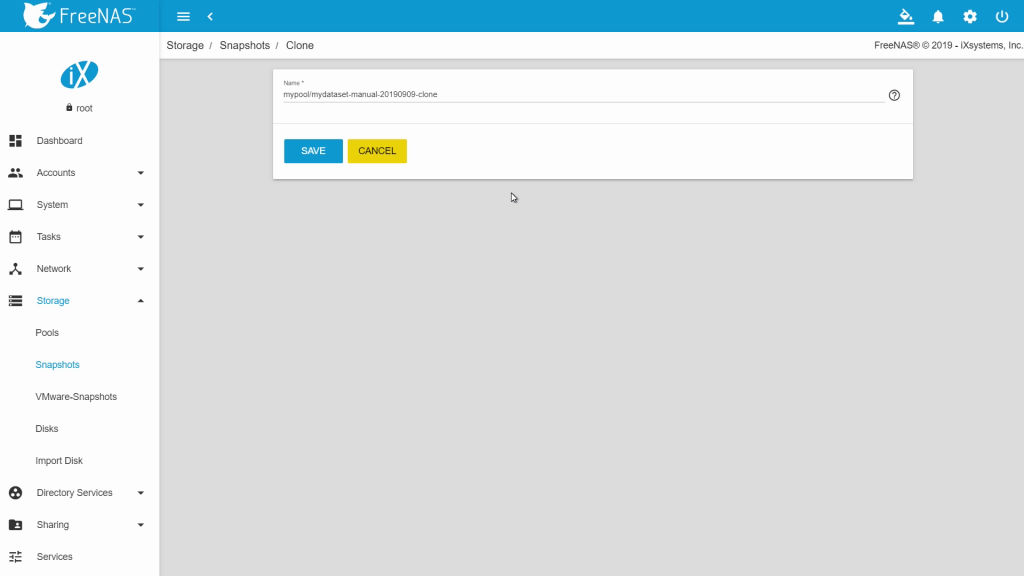
Select the snapshot you want to clone and click the three dots, then click “Clone”. It will generate the name of the original snapshot with “clone” added. Click “Save” to continue. You’ll now be taken to the “Pools” window. When you clone the snapshot, it creates a dataset with a copy of what the snapshot of the dataset contained. Note that this clone is writable, too! Cloned snapshots are also a great way to create test environments with existing data.
Periodic Snapshot Tasks
If you don’t want to manually create snapshots every time you want to preserve your dataset’s state, you can take snapshots automatically. Go to “Tasks” then “Periodic Snapshot Tasks”. Click “Add”. You can choose a Pool or Dataset from the drop-down list that you want to create an automatic snapshot for. Choose the lifetime and frequency of the snapshots.
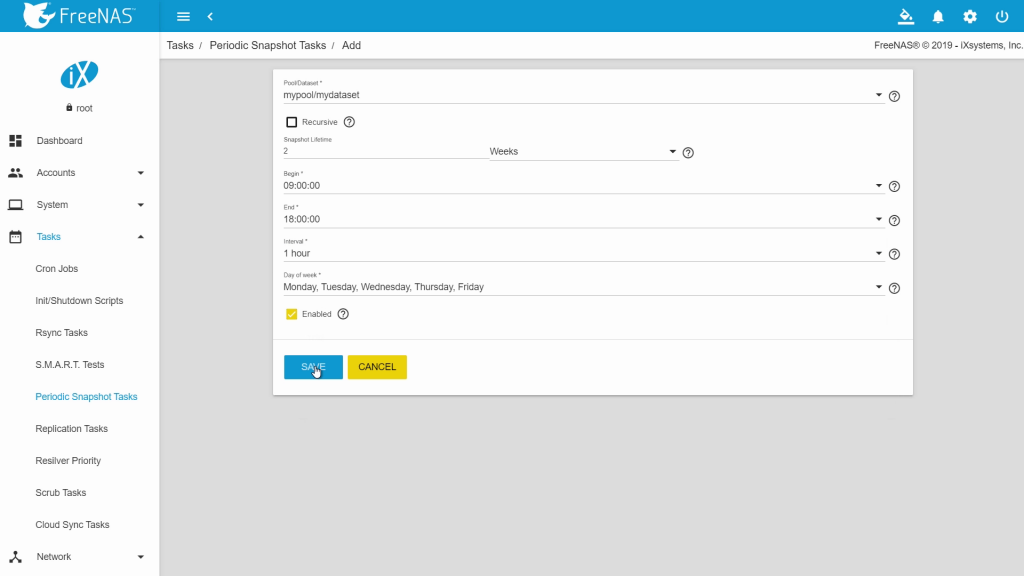
Make sure the “Enabled” box is checked. When you are done click “SAVE”. You should now see an entry under the Periodic Snapshot Tasks. In this example, they will be created every hour from 9AM to 6PM Monday through Friday. They have a lifetime of 2 weeks before they are deleted automatically.
Thank you for reading this tutorial! Be sure to check out our other tutorial videos on our YouTube channel.