dublea
Dabbler
- Joined
- May 27, 2015
- Messages
- 33
I've spent the past couple weekends teaching myself RancherOS and Docker for the intended purpose of migrating my Plex from a Jail to a Docker container. In this guide, we will install and configure a RancherOS VM, spin up Plex, Tautulli (formally plexpy,) and Plex Requests containers. Additionally, I will also be walking you through backing up and migrating your current Plex data from a Plugin or Jail install.
[EDIT 12.3.2018] I found the the better section to place this How-To would be the Resources section. Plans are being made to migrate this guide. Additionallyu, I will be adding details how to set up Deluge w/ OpenVPN, Couchpotato, Sickrage, and many others! If you can, please provide suggestions.
[EDIT 18.3.2018] I am still working on writing up the new How-To. While doing so, I expanded the options for choice of VM & Will elaborate on leveraging some Rancher\Docker features in a multi-host Rancher setup. Considering all this new information, it will take time to capture all the info while I set this up in my Homelab.
[EDIT 25.3.2018] I've got all but Nextcloud documented and posting the guide now!
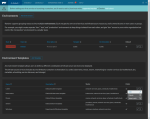
Installing RancherOS VM:
Log into your FreeNAS and go to VMs

Select Add VM

VM Type: Change to
Name:
Description:
Virtual CPUs:
Memory Size (MiB):
Autostart:
OK to save. You can then select the VM and then Devices at the bottom

Select the RAW device and then Edit at the bottom

Raw File: Provide a path to a
Disk boot:
Password:
Disk size:
Start the VM! It will download and install the image. You will now want to access your FreeNAS's shell through your preferred method. Now to access VM's shell by running:
You may have to hit enter to get the RancherOS login

Login with the username '
Reboot the VM by running '
Run the following to install the Rancher container so we can access the Web UI:
Once that completes, go to http://{Your_Static_IP}:8080 and go to Add Host. Verify and save the Host Registration URL. Enter the IP for the new host, copy the command and run it in the RancherOS shell

Got to Admin > Access Control and select Local Authentication

Enter in your information and Enable Local Auth. RancherOS VM is now installed!
Items to address for Migration
Now to disable some Plex features for the server migration. You will want to go to Settings > Server > Library and disable
Manual Jail Install:
Plugin Jail Install:
If you do not have a share, you will want to create one to copy your Plex data to.
I migrated my
Mounting Media and Backup storage CIFS
I also want to mirror the paths I have in my jail with the new container. In the FreeNAS WebUI, Go to Jails and select Storage. Mine was mounted at
Press
Once you've configured the file to your needs, press
Run the following to merge the file into the config
Reboot the VM by running '
Configure and install Plex container
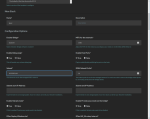
Go to INFRASTRUCTURE > Containers > Add Container

Name:
Description:
Select Image*:
+ Port Map:
Add two Environment Variables

Auto Restart=
HOSTNAME=
TZ=
PLEX_CLAIM=
Configure Volumes

Configure Networking

Network:
DNS:
Hostname:
Domain Name:
Resolving Servers:
You should now be able to Create the container. It will download and configure the container. You should now be able to access it at http://{Docker_IP}:32400
Completing the data migration
Once you've verified you can access the Plex Wizard first webapge, go ahead and stop the container. Back in the RancherOS shell, navigate to
In this case the
Delete the current
Now, lets copy the Jails
Next we need to adjust the file permissions by running
After everything was done, I was able to start the pms container and access the WebUI just as if it were in my jail! Remember to enable
Log into your FreeNAS and go to VMs
Select Add VM
VM Type: Change to
Docker VMName:
Give it a nameDescription:
{Optional}Virtual CPUs:
Min of 1Memory Size (MiB):
Min of 2048Autostart:
EnableOK to save. You can then select the VM and then Devices at the bottom
Select the RAW device and then Edit at the bottom
Raw File: Provide a path to a
.IMG file. You must enter the full filename after the path but the install will create it.Disk boot:
EnablePassword:
Provide a password. When we access RancherOS via shell, this is the password we will use.Disk size:
Enter the size of the diskStart the VM! It will download and install the image. You will now want to access your FreeNAS's shell through your preferred method. Now to access VM's shell by running:
cu -l /dev/nmdm#B (Replace # with number listed in /dev/)You may have to hit enter to get the RancherOS login
Login with the username '
rancher' and the password you configured earlier for the RAW device. Next you will want to configure a static IP. First run ' ifconfig' to get your interface name ( eth0 be default.) Then run the following after modifying what you need to depending on your network configuration:[/b] sudo ros config set rancher.network.interfaces.eth0.address 10.1.10.15/24
sudo ros config set rancher.network.interfaces.eth0.gateway 10.1.10.1
sudo ros config set rancher.network.interfaces.eth0.mtu 1500
sudo ros config set rancher.network.interfaces.eth0.dhcp falseReboot the VM by running '
sudo reboot'. You should be able to SSH into the VM now instead of going the FreeNAS's shell.Run the following to install the Rancher container so we can access the Web UI:
sudo docker run -d --restart=unless-stopped -p 8080:8080 rancher/serverOnce that completes, go to http://{Your_Static_IP}:8080 and go to Add Host. Verify and save the Host Registration URL. Enter the IP for the new host, copy the command and run it in the RancherOS shell
Got to Admin > Access Control and select Local Authentication
Enter in your information and Enable Local Auth. RancherOS VM is now installed!
Items to address for Migration
Now to disable some Plex features for the server migration. You will want to go to Settings > Server > Library and disable
Empty trash automatically after every scan in your Plex Jail. Thanks to Where is the Plex Media Server data directory located? we also know the following:Manual Jail Install:
${JAIL_ROOT}/usr/local/plexdata/Plex Media ServerPlugin Jail Install:
${JAIL_ROOT}/var/db/plexdata/Plex Media Server/If you do not have a share, you will want to create one to copy your Plex data to.
I migrated my
Plex Media Server folder to an existing Backup share via shell like this: # In a shell, navigate to your plexdata folder and run the following to compress folder
tar -zcvf pms.tar.gz "Plex Media Server/"
# Copy .tar.gz file to share.
cp -R /mnt/Jails/plex/usr/local/plexdata/pms.tar.gz /mnt/Volume01/Backup/plexdataMounting Media and Backup storage CIFS
I also want to mirror the paths I have in my jail with the new container. In the FreeNAS WebUI, Go to Jails and select Storage. Mine was mounted at
/media and I will want to do the same with RancherOS. We will create a .YAML file and merge it into the config. vi mount.yamlPress
i to enter insert mode. mounts:
- - //{FreeNAS}/Backup/plexdata
- /config/plexdata
- cifs
- username={Username},password={Password},iocharset=utf8,_netdev
- - //{FreeNAS}/Media
- /media
- cifs
- username={Username},password={Password},iocharset=utf8,_netdevOnce you've configured the file to your needs, press
ESC and then :x to save and close the file.Run the following to merge the file into the config
sudo ros config merge -i mount.yamlReboot the VM by running '
sudo reboot'. You can then run ' sudo df -h' to verify everything mounted correctly.Configure and install Plex container
Go to INFRASTRUCTURE > Containers > Add Container
Name:
pmsDescription:
{Optional}Select Image*:
plexinc/pms-docker+ Port Map:
32400:32400Add two Environment Variables
Auto Restart=
AlwaysHOSTNAME=
pmsTZ=
TimezonePLEX_CLAIM=
claim-https://www.plex.tv/claim/Configure Volumes
 /media/config:/config

/media/Media:/media

/media/transcode:/transcode
Configure Networking
Network:
HostDNS:
Enable Rancher DNS service discoveryHostname:
{Hostname}Domain Name:
{Domain}Resolving Servers:
{DNS}You should now be able to Create the container. It will download and configure the container. You should now be able to access it at http://{Docker_IP}:32400
Completing the data migration
Once you've verified you can access the Plex Wizard first webapge, go ahead and stop the container. Back in the RancherOS shell, navigate to
/media/config/Library/Application Support and run ls -l to view UID:GID drwxr-xr-x 8 sshd input 4096 Mar 11 05:05 Plex Media ServerIn this case the
UID:GID is sshd:input.Delete the current
Plex Media Server folder by running sudo rm -R "Plex Media Server"Now, lets copy the Jails
Plex Media Server to /media/config/Library/Application Support in the container by running sudo cp /media/Backup/plexdata/pms.tar.gz "/media/config/Library/Application Support/" This took some time! cd "/media/config/Library/Application Support/"
sudo gunzip pms.tar.gz && sudo tar -xvf pms.tar Must perform two commands as z is missing from tar in RancherOS. If someone knows a better way... sudo rm pms.tarNext we need to adjust the file permissions by running
sudo chown -R sshd:input "/media/config/Library/Application Support/*"After everything was done, I was able to start the pms container and access the WebUI just as if it were in my jail! Remember to enable
Empty trash automatically after every scan in Settings > Server > Library. Be sure and allow your PMS to re-process all your media.
Last edited: