
- Joined
- Feb 6, 2014
- Messages
- 5,112
Here at iX, we’re big fans of open-source alternatives to commercial software - so when we heard that LinusTechTips was featuring the open-source media library manager Jellyfin on their YouTube channel, we were excited to check it out.
Unfortunately, there’s one piece missing from the puzzle - there’s no official solution for running a Jellyfin server under TrueNAS CORE. But for the growing number of you in the TrueNAS Community who have migrated to or installed TrueNAS SCALE, our new Linux-based version of TrueNAS, there’s an easy way to set up a Jellyfin server with just a few clicks.
Since the release of TrueNAS SCALE on 2/22/22, hundreds of users have downloaded the Docker image available at jellyfin.org. On TrueNAS SCALE Bluefin, this Docker image - like other installed apps - requires specific settings for persistent storage to be presented safely and securely. The second and easier Jellyfin option is to use the TrueCharts App catalog as described here.
The first step you’ll need to do, if you haven’t already, is to define a storage pool for your applications. This is where Jellyfin (and any other apps) will be stored on your TrueNAS machine. You’ll be prompted to do this automatically on your first visit to the Apps page.
Next, we’ll add the TrueCharts catalog to the TrueNAS SCALE lists. Choose the Manage Catalogs tab, then the Add Catalog button.

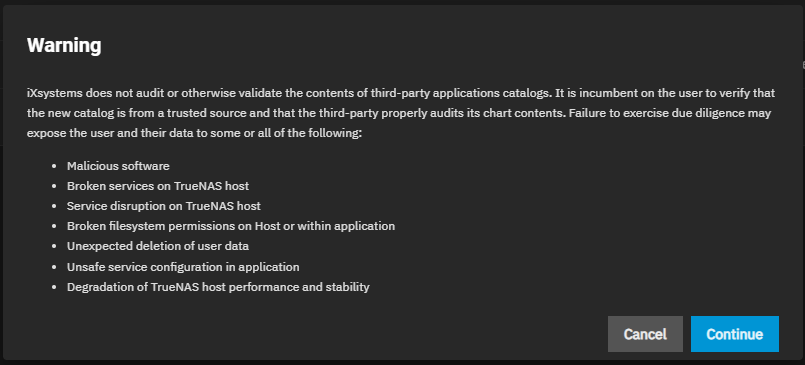
You’ll receive a warning dialog, requesting that you confirm that you want to add a third-party catalog. Use caution when adding catalogs, and only add software from a trusted source.
Populate the new sidebar with the following information:
Name:
Repository:
Preferred Trains:
Branch:
Click the Save button, and wait for the catalog to refresh. This might take a few minutes, and is dependent on the speed of your network connection.
Before you install the Jellyfin container, you’ll need to configure your media folder(s) for sharing with the application. The default security behavior in TrueNAS SCALE 22.12 “Bluefin” prevents direct visibility of the host storage (such as your existing
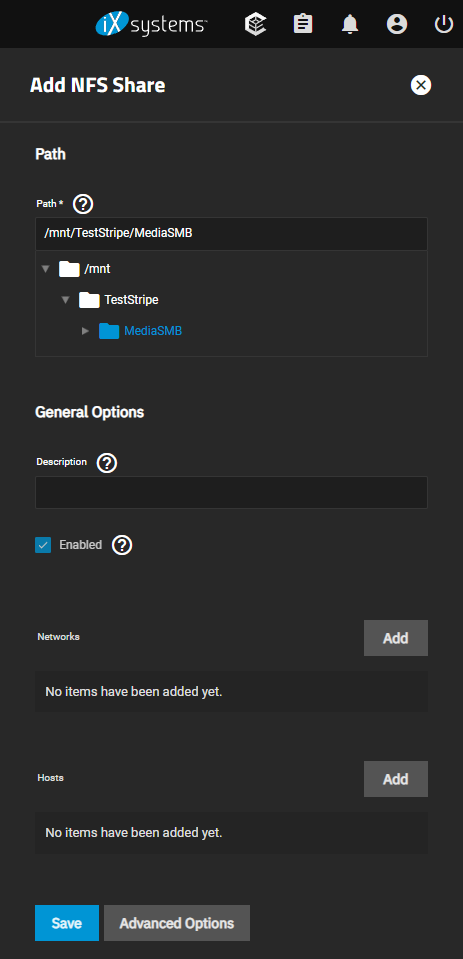
Choose the Shares option from the left pane, and then choose to Add a UNIX (NFS) Share. Select the dataset that contains your media library, and choose the Save option. If you’ve saved different types of media in different folders, you’ll have to repeat the Add process again. Take note of each path that you’re sharing over NFS, as you’ll need them later on.
Sharing is caring - but unless the
If you already have media present in these folders, you’ll have to check the Apply Permissions Recursively checkbox - otherwise, Jellyfin will only be able to gain access to the main folder, not the files themselves.
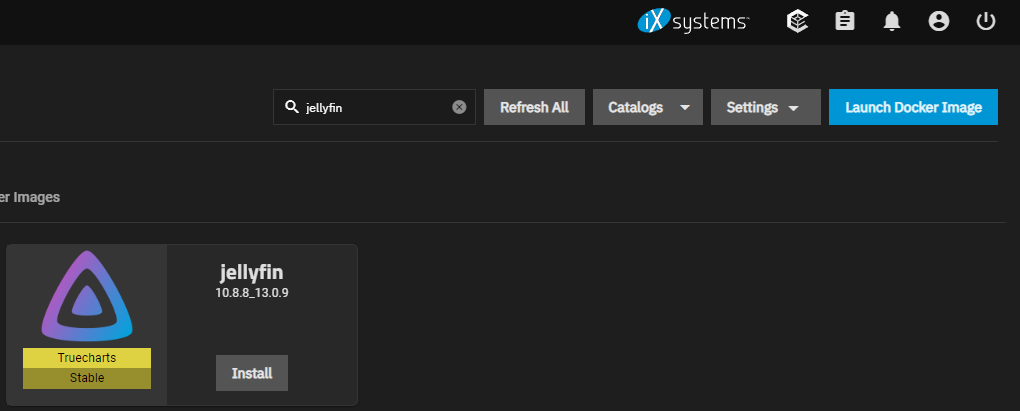
Now that you’ve got the media folder shared through NFS, we’ll be able to deploy the Jellyfin application and make the files visible inside the container. Hop back to Apps, choose the Available Applications tab, and search for
Click the Install button, and you’ll be prompted to set up the Jellyfin software. Most of the settings can be left at the default values, but ensure you select the correct timezone before scrolling down to the Networking and Services section. Take note of the default port (8096) that Jellyfin is listening on, and move down to Storage and Persistence.
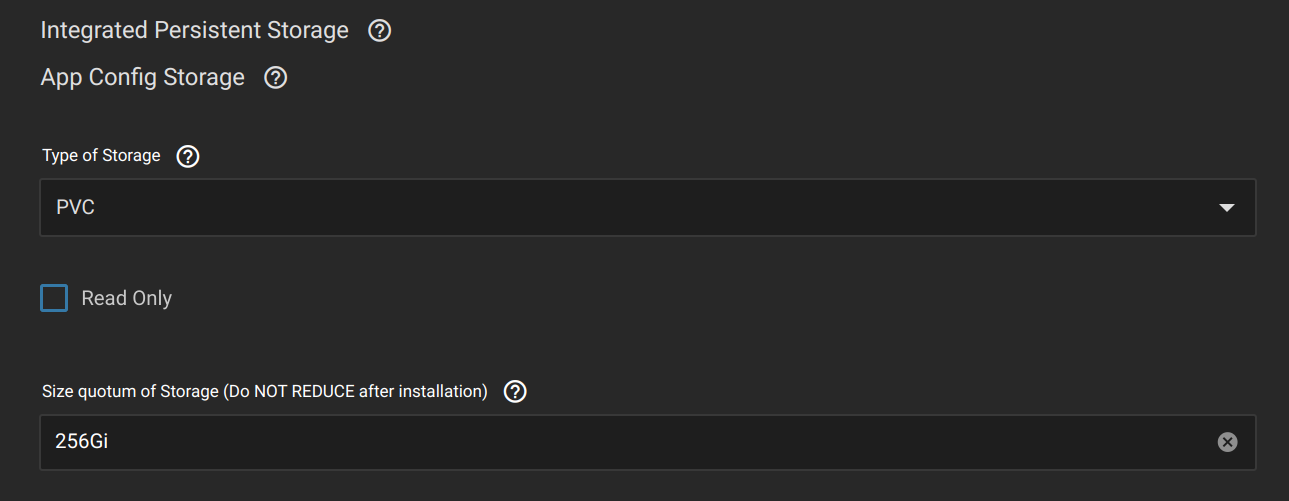
The Jellyfin software itself will have some integrated configuration storage included with a “PVC” storage type - make sure not to change this, as it’s the preferred and supported option from TrueCharts.
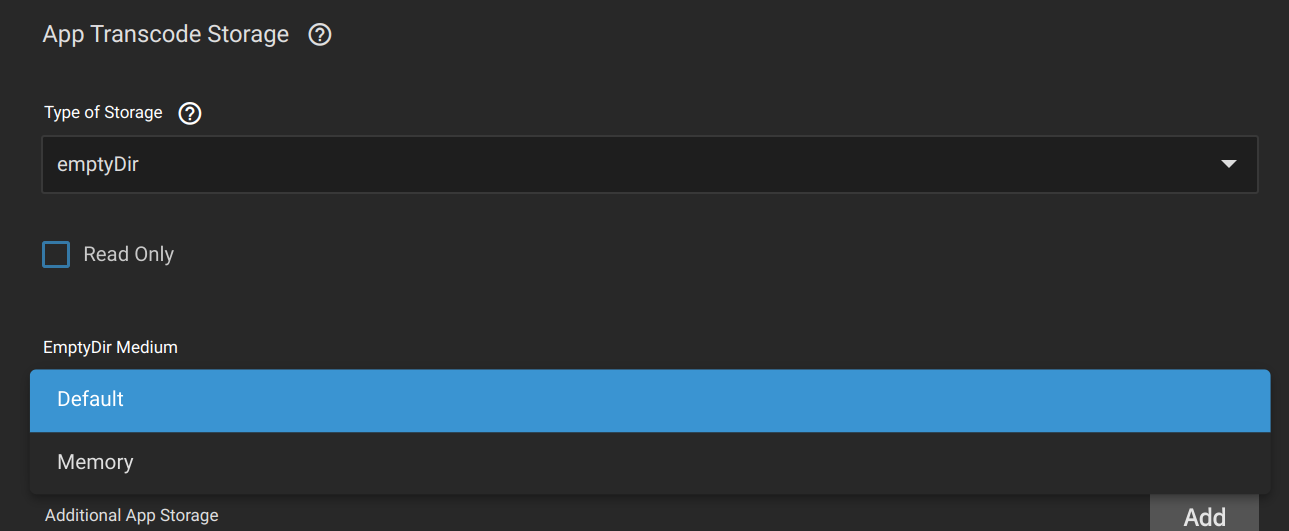
Change the App Transcode Storage to the
More advanced users with a large amount of RAM in their TrueNAS machine might consider changing the transcoding space to use the
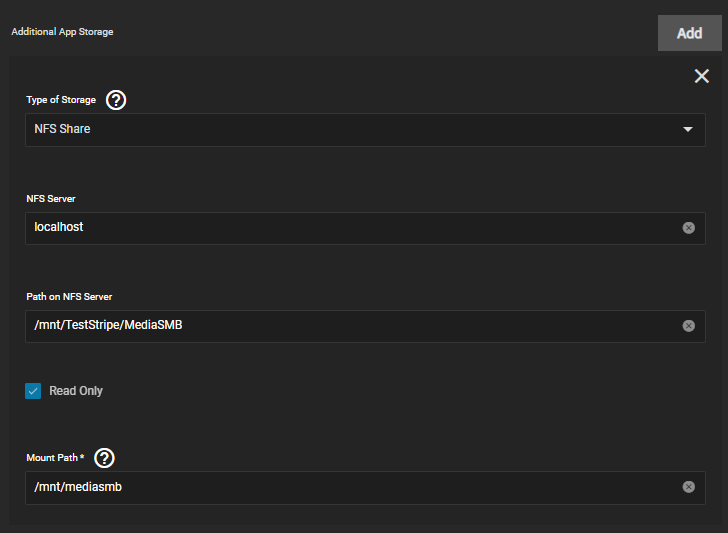
What we’re most interested in is the Additional App Storage option; find and click the Add button right next to it.
Select an
Repeat this process for each additional media folder you have.
If you have a GPU in your TrueNAS system that’s capable of video transcoding in hardware, you can add it to Jellyfin under the Resources and Devices section.
Scroll to the bottom of the window and click Save.
Once you hit Save, the process of downloading and setting up Jellyfin will begin. Switch back to the Installed Applications tab, and wait for the application to switch from
Select your language, define a user to be used for administrative purposes in Jellyfin (as well as your first playback) and then choose the Add Media Library button. Choose the media type (or as best as you can match it) and click the (+) sign beside Folders to add a Mount Path that you shared over NFS from above.

If required, add more media libraries - music, TV shows, photos - and then click Next. Set your default metadata language for obtaining media information from the Internet, and leave the Allow remote connections to this server option checked - otherwise, you won’t be able to view anything you just made available. Click on Finish and you’ll be sent to the dashboard, where you can log in as the user you set up during the wizard, and start watching your shows!
If you need help with joining the hundreds of users with Jellyfin running on TrueNAS, feel free to request assistance in the TrueNAS SCALE Apps subforum. You can also reach out to the TrueCharts team at https://truecharts.org/contact, in case you need any help deploying Jellyfin from the catalog.
For further information on operating Jellyfin itself, start with their Quick Start Guide available at https://jellyfin.org/docs/general/quick-start/
Unfortunately, there’s one piece missing from the puzzle - there’s no official solution for running a Jellyfin server under TrueNAS CORE. But for the growing number of you in the TrueNAS Community who have migrated to or installed TrueNAS SCALE, our new Linux-based version of TrueNAS, there’s an easy way to set up a Jellyfin server with just a few clicks.
Since the release of TrueNAS SCALE on 2/22/22, hundreds of users have downloaded the Docker image available at jellyfin.org. On TrueNAS SCALE Bluefin, this Docker image - like other installed apps - requires specific settings for persistent storage to be presented safely and securely. The second and easier Jellyfin option is to use the TrueCharts App catalog as described here.
The first step you’ll need to do, if you haven’t already, is to define a storage pool for your applications. This is where Jellyfin (and any other apps) will be stored on your TrueNAS machine. You’ll be prompted to do this automatically on your first visit to the Apps page.
Next, we’ll add the TrueCharts catalog to the TrueNAS SCALE lists. Choose the Manage Catalogs tab, then the Add Catalog button.
You’ll receive a warning dialog, requesting that you confirm that you want to add a third-party catalog. Use caution when adding catalogs, and only add software from a trusted source.
Populate the new sidebar with the following information:
Name:
truechartsRepository:
https://github.com/truecharts/catalogPreferred Trains:
stable and enterpriseBranch:
mainClick the Save button, and wait for the catalog to refresh. This might take a few minutes, and is dependent on the speed of your network connection.
Before you install the Jellyfin container, you’ll need to configure your media folder(s) for sharing with the application. The default security behavior in TrueNAS SCALE 22.12 “Bluefin” prevents direct visibility of the host storage (such as your existing
/mnt/Pool/Media) by default - so we’ll need to make it accessible through the Network File System (NFS) protocol.Choose the Shares option from the left pane, and then choose to Add a UNIX (NFS) Share. Select the dataset that contains your media library, and choose the Save option. If you’ve saved different types of media in different folders, you’ll have to repeat the Add process again. Take note of each path that you’re sharing over NFS, as you’ll need them later on.
Sharing is caring - but unless the
apps user has access to the directory, you won’t be able to see your media. Go to the Datasets window, select your dataset, and choose Edit on the lower-right corner of the Permissions pane. In the Edit ACL window, choose to Add Item - take care not to change anything that already exists - and grant the apps user Read rights to your media folder.If you already have media present in these folders, you’ll have to check the Apply Permissions Recursively checkbox - otherwise, Jellyfin will only be able to gain access to the main folder, not the files themselves.
Now that you’ve got the media folder shared through NFS, we’ll be able to deploy the Jellyfin application and make the files visible inside the container. Hop back to Apps, choose the Available Applications tab, and search for
jellyfin
Click the Install button, and you’ll be prompted to set up the Jellyfin software. Most of the settings can be left at the default values, but ensure you select the correct timezone before scrolling down to the Networking and Services section. Take note of the default port (8096) that Jellyfin is listening on, and move down to Storage and Persistence.
The Jellyfin software itself will have some integrated configuration storage included with a “PVC” storage type - make sure not to change this, as it’s the preferred and supported option from TrueCharts.
Change the App Transcode Storage to the
emptyDir type, with the Default storage medium.More advanced users with a large amount of RAM in their TrueNAS machine might consider changing the transcoding space to use the
Memory storage medium. Note that this can potentially consume a large amount of memory if you’re streaming high-definition video content, or multiple streams at the same time.
What we’re most interested in is the Additional App Storage option; find and click the Add button right next to it.
Select an
NFS Share for the type of storage, and enter localhost for your NFS server. Enter the path to your media folder, making sure to match the capitalization, and then provide and take note of a Mount Path that your Jellyfin server will access it through. Mark this as Read Only.
Repeat this process for each additional media folder you have.
If you have a GPU in your TrueNAS system that’s capable of video transcoding in hardware, you can add it to Jellyfin under the Resources and Devices section.
Scroll to the bottom of the window and click Save.
Once you hit Save, the process of downloading and setting up Jellyfin will begin. Switch back to the Installed Applications tab, and wait for the application to switch from
Deploying to Active - once it does, click the Open button to launch the Jellyfin welcome portal.Select your language, define a user to be used for administrative purposes in Jellyfin (as well as your first playback) and then choose the Add Media Library button. Choose the media type (or as best as you can match it) and click the (+) sign beside Folders to add a Mount Path that you shared over NFS from above.
If required, add more media libraries - music, TV shows, photos - and then click Next. Set your default metadata language for obtaining media information from the Internet, and leave the Allow remote connections to this server option checked - otherwise, you won’t be able to view anything you just made available. Click on Finish and you’ll be sent to the dashboard, where you can log in as the user you set up during the wizard, and start watching your shows!
If you need help with joining the hundreds of users with Jellyfin running on TrueNAS, feel free to request assistance in the TrueNAS SCALE Apps subforum. You can also reach out to the TrueCharts team at https://truecharts.org/contact, in case you need any help deploying Jellyfin from the catalog.
For further information on operating Jellyfin itself, start with their Quick Start Guide available at https://jellyfin.org/docs/general/quick-start/