- Joined
- May 19, 2017
- Messages
- 1,829
Hi everyone,
As you may recall, I have been casting about for a replacement to my Mini XL case, which is just a little too restrictive re: air flow for the HGST drives I like using. Using default BIOS settings, the HGSTs hit 50*C during scrubs and even normal operations keep them toasty.
A upgrade to a more powerful 120mm fan in the rear (thank you, Robert12!) helped things somewhat. Now the drives only hit 40*C during scrubs, but that still will not help drive longevity. So, I first bought a NZXT H440, as it has lots of internal drive space (11x3.5"!). But I don't like the piggy-back hard drive mounting system or the lack of an space between the front fans and the drives. The case may make a good hackintosh case some day, however.
On the surface, the Norco RPC-431 looks like a pretty good compromise regarding air flow, disk capacity, size, etc. It's basically a short 4U server, with two beefy handles up front, a perforated intake, etc. Where it differs is the depth and in that it uses a standard ATX power supply instead of the skinny ones that supermicro and iX like to use.
In the following posts, I go over what I tried to make this case work. However, I'll cut to the chase by concluding that this Norco product is a terrible candidate for a FreeNAS server. Besides the filled hard drive rack interfering with my ATX power supply (i.e. you cannot lower the rack once the drives are in place), I also question the design intent where there is no space between hard drives once they have been installed in the rack. Basically, your 3x3 array of 3.5" hard drives would only be cooled from the front and to some limited extent (based on which drive we're looking at) from the sides. Particularly the drive in the center of that array would likely get toasted during a scrub.
So... you have been warned. Below then, my journey begins.
The case came in a fairly bomb-proof double cardboard box with plenty of polystyrene and a plastic bag around the case. The case is steel and features a protective plastic layer (LDPE?) on much of it.
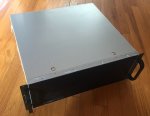
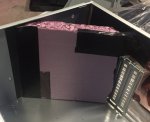
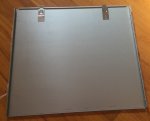
The top is held in place with four screws as well as two depressable latches. I'm inclined to toss the screws and just rely on gravity and the latches going forward. Here is a shot of the underside of the cover, illustrating the latches.
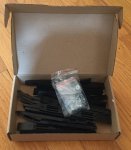
Installation instructions are non-existent. Norco has nothing on their site either. Besides the case, the only thing inside the box are these drive sled runners. These are affixed with screws to the hard drives, then the sleds are clicked into the case.
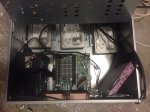
Underneath the cover, there is plenty of room for a mini ITX board like the C2750D4I found in the Mini XL. There is room for two 80mm fans in the rear to complement the two 120mm fans already installed in the front. The sheet metal you see in the front/top is the HDD cage, which is non-removable, unless you enjoy drilling out rivets.
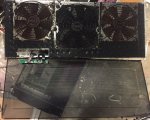
Based on past experience, I want to ensure better air flow and no re-circulation through the front. I'll remove the two OEM fans in favor of three Noctua PWM models... question is whether those will fit... the drive cage rotates so closely to the front fans that the corner of the HDD cage touches the OEM fan bodies as it rotates. Thus, if the Noctuas are deeper than OEM, I'm out of luck.
Electrically speaking, two of those fans would be attached to the two front fan headers on the motherboard, the center one will be attached to CPU fan header #1. With some ducting on the underside of the enclosure, the air flow should be fairly shared between the three hard drive stacks. The center stack would then direct its flow right over the motherboard CPU heat sink.

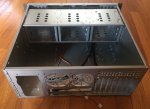
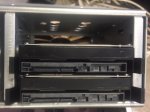
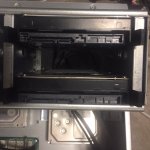
The case advertises room for a 2.5" drive as well, a bracket for which you can see on the underside of the drive tray once you rotate it up. Six screws fix the rotating tray until you remove them. I'm inclined to leave them aside as well.
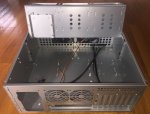

Not sure what those silicone grommets on the 2.5" bracket are for but presume they have to do with isolating a 2.5" drive? The whole lack of documentation gets a bit old when it comes to figuring out details like this one. In this regard, the guides that iXsystems publish are light years ahead - easy to follow, thorough, and nicely illustrated.
Unlike the mini XL, the 3.5" drives are not easily hot-swappable. Plus, there is no backplane for them to click into. Instead, you will have to hook up nine drives worth of hard drive cables, which can easily create a rats nest. Unfortunately, cable management is non-existent as well. Accommodating the rotating cage potentially presents some trouble.
Overall, I think this case is a good value thus far as it's available for about $80. Besides the fan upgrade, I'm also looking into shaping the air flow with a fiberglassed insert (much like SuperMicro does much more elegantly with some see-through plastic in their larger 4U enclosures). In my next entry, I'll detail the installation process.
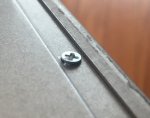
The case has some very rough edges, however. Other reviewers noted issues with tolerances, such as screw holes for rack glides being in the wrong places. Can't comment on that (won't be using rack glides) but several screws stood proud, either because they were cross-threaded or the metal sheets below did not align. Either bothers me as misalignments and cross-threadings invariably lead to stripped screws.
As you may recall, I have been casting about for a replacement to my Mini XL case, which is just a little too restrictive re: air flow for the HGST drives I like using. Using default BIOS settings, the HGSTs hit 50*C during scrubs and even normal operations keep them toasty.
A upgrade to a more powerful 120mm fan in the rear (thank you, Robert12!) helped things somewhat. Now the drives only hit 40*C during scrubs, but that still will not help drive longevity. So, I first bought a NZXT H440, as it has lots of internal drive space (11x3.5"!). But I don't like the piggy-back hard drive mounting system or the lack of an space between the front fans and the drives. The case may make a good hackintosh case some day, however.
On the surface, the Norco RPC-431 looks like a pretty good compromise regarding air flow, disk capacity, size, etc. It's basically a short 4U server, with two beefy handles up front, a perforated intake, etc. Where it differs is the depth and in that it uses a standard ATX power supply instead of the skinny ones that supermicro and iX like to use.
In the following posts, I go over what I tried to make this case work. However, I'll cut to the chase by concluding that this Norco product is a terrible candidate for a FreeNAS server. Besides the filled hard drive rack interfering with my ATX power supply (i.e. you cannot lower the rack once the drives are in place), I also question the design intent where there is no space between hard drives once they have been installed in the rack. Basically, your 3x3 array of 3.5" hard drives would only be cooled from the front and to some limited extent (based on which drive we're looking at) from the sides. Particularly the drive in the center of that array would likely get toasted during a scrub.
So... you have been warned. Below then, my journey begins.
The case came in a fairly bomb-proof double cardboard box with plenty of polystyrene and a plastic bag around the case. The case is steel and features a protective plastic layer (LDPE?) on much of it.

The top is held in place with four screws as well as two depressable latches. I'm inclined to toss the screws and just rely on gravity and the latches going forward. Here is a shot of the underside of the cover, illustrating the latches.

Installation instructions are non-existent. Norco has nothing on their site either. Besides the case, the only thing inside the box are these drive sled runners. These are affixed with screws to the hard drives, then the sleds are clicked into the case.

Underneath the cover, there is plenty of room for a mini ITX board like the C2750D4I found in the Mini XL. There is room for two 80mm fans in the rear to complement the two 120mm fans already installed in the front. The sheet metal you see in the front/top is the HDD cage, which is non-removable, unless you enjoy drilling out rivets.
Based on past experience, I want to ensure better air flow and no re-circulation through the front. I'll remove the two OEM fans in favor of three Noctua PWM models... question is whether those will fit... the drive cage rotates so closely to the front fans that the corner of the HDD cage touches the OEM fan bodies as it rotates. Thus, if the Noctuas are deeper than OEM, I'm out of luck.
Electrically speaking, two of those fans would be attached to the two front fan headers on the motherboard, the center one will be attached to CPU fan header #1. With some ducting on the underside of the enclosure, the air flow should be fairly shared between the three hard drive stacks. The center stack would then direct its flow right over the motherboard CPU heat sink.


The case advertises room for a 2.5" drive as well, a bracket for which you can see on the underside of the drive tray once you rotate it up. Six screws fix the rotating tray until you remove them. I'm inclined to leave them aside as well.


Not sure what those silicone grommets on the 2.5" bracket are for but presume they have to do with isolating a 2.5" drive? The whole lack of documentation gets a bit old when it comes to figuring out details like this one. In this regard, the guides that iXsystems publish are light years ahead - easy to follow, thorough, and nicely illustrated.
Unlike the mini XL, the 3.5" drives are not easily hot-swappable. Plus, there is no backplane for them to click into. Instead, you will have to hook up nine drives worth of hard drive cables, which can easily create a rats nest. Unfortunately, cable management is non-existent as well. Accommodating the rotating cage potentially presents some trouble.
Overall, I think this case is a good value thus far as it's available for about $80. Besides the fan upgrade, I'm also looking into shaping the air flow with a fiberglassed insert (much like SuperMicro does much more elegantly with some see-through plastic in their larger 4U enclosures). In my next entry, I'll detail the installation process.

The case has some very rough edges, however. Other reviewers noted issues with tolerances, such as screw holes for rack glides being in the wrong places. Can't comment on that (won't be using rack glides) but several screws stood proud, either because they were cross-threaded or the metal sheets below did not align. Either bothers me as misalignments and cross-threadings invariably lead to stripped screws.
Last edited:


