Unable to boot via Legacy BIOS - planned support?

rodrigue10

Cadet
Joined
Sep 30, 2020
Messages
5
I have some older server hardware that does NOT have UEFI support. (Supermicro X8DTH-if)
Anyone know if there is any thoughts/plans to make TrueNAS SCALE compatible/bootable with legacy bios?
The current .ISO file is UEFI only. (from what I can tell when making the USB via Rufus utility).
I'm not able to install on bare metal because of this...would like to be able to try out the virtualization and containers(when available).

Any thoughts on this topic would be appreciated.

Thanks!
 

groveraus

Cadet
Joined
Aug 23, 2020
Messages
5
I had a similar situation and went back to a CD-ROM/DVD and was able to install and then runs fine.
 

rodrigue10

Cadet
Joined
Sep 30, 2020
Messages
5
groveraus,

I'll give that a try to see if I have any luck....fortunately I didn't strip the DVD drive on this system in lieu of putting a SSD in it's place!
 

rssfed23

Cadet
Joined
Sep 9, 2020
Messages
9
I wouldn't use Rufus personally. I've found that to really mangle things that have a custom boot setup.
balenaEtcher worked fine for me, but just DD or direct write the image onto a USB and you'll be good to go.

All my SCALE rigs are non-UEFI (could never get it to work in UEFI mode) and legacy bios support is definitely there!
 

rodrigue10

Cadet
Joined
Sep 30, 2020
Messages
5
Well, I tried both suggested options and they both appear to load the boot loader without any hiccups on my hardware.
Not sure why Rufus wouldn't work for me... I'm was able to use if for the TrueNAS Core ISO and the Legacy support option shows.

Anyway, I'll keep balenaEtcher in my toolbox for future reference!

Thanks for the suggestions and help finding a solution!
 

FosCo

Dabbler
Joined
Sep 20, 2020
Messages
23
For me Rufus worked in dd mode with SCALE, not in .iso mode. With CORE it worked only in .iso mode.
 

wultyc

Cadet
Joined
Nov 9, 2021
Messages
1
I wouldn't use Rufus personally. I've found that to really mangle things that have a custom boot setup.
balenaEtcher worked fine for me, but just DD or direct write the image onto a USB and you'll be good to go.

All my SCALE rigs are non-UEFI (could never get it to work in UEFI mode) and legacy bios support is definitely there!

Hey rssfed23 I have a question, maybe you can help me with

How did you come up with MBR installation media? I have a HP Microserver Gen 8 and I want to install TrueNAS Scale on it. I found that it can only boot from drives with MBR partition table.

First I tried to create a usb key with rufus and didn't worked. I used the IPMA (via iLO software) port to load the image and the main drive came up with GPT partition table. Then I tried to create a USB drive with MBR partition table and write the image with DD but in the end it converted the drive into GPT again.

Here my procedure

First create the partition table as MBR
Code:
root@shika:~# fdisk -l
Disk /dev/sdb: 14.61 GiB, 15682240512 bytes, 30629376 sectors
Disk model: Ultra
Units: sectors of 1 * 512 = 512 bytes
Sector size (logical/physical): 512 bytes / 512 bytes
I/O size (minimum/optimal): 512 bytes / 512 bytes
Disklabel type: gpt
Disk identifier: 0931B253-01BA-4C84-95D2-48BBB193C1D1

Device       Start     End Sectors  Size Type
/dev/sdb1       64     287     224  112K Microsoft basic data
/dev/sdb2      288    6047    5760  2.8M EFI System
/dev/sdb3     6048 3128707 3122660  1.5G Apple HFS/HFS+
/dev/sdb4  3128708 3129307     600  300K Microsoft basic data

root@shika:~# fdisk /dev/sdb

Welcome to fdisk (util-linux 2.36.1).
Changes will remain in memory only, until you decide to write them.
Be careful before using the write command.

GPT PMBR size mismatch (3129355 != 30629375) will be corrected by write.
The device contains 'iso9660' signature and it will be removed by a write command. See fdisk(8) man page and --wipe option for more details.

Command (m for help): o

Created a new DOS disklabel with disk identifier 0xd6d06c08.
The device contains 'iso9660' signature and it will be removed by a write command. See fdisk(8) man page and --wipe option for more details.

Command (m for help): w

The partition table has been altered.
Calling ioctl() to re-read partition table.
Syncing disks.

root@shika:~# fdisk -l
Disk /dev/sdb: 14.61 GiB, 15682240512 bytes, 30629376 sectors
Disk model: Ultra
Units: sectors of 1 * 512 = 512 bytes
Sector size (logical/physical): 512 bytes / 512 bytes
I/O size (minimum/optimal): 512 bytes / 512 bytes
Disklabel type: dos
Disk identifier: 0xd6d06c08


Then write the image using DD
Code:
root@shika:/tmp/truenas# ls
TrueNAS-SCALE-22.02-RC.1-1.iso
root@shika:/tmp/truenas# dd bs=4M if=./TrueNAS-SCALE-22.02-RC.1-1.iso of=/dev/sdb conv=fdatasync status=progress
1598029824 bytes (1.6 GB, 1.5 GiB) copied, 76 s, 21.0 MB/s
382+1 records in
382+1 records out
1602230272 bytes (1.6 GB, 1.5 GiB) copied, 149.078 s, 10.7 MB/s


When I checked with gdisk it were GPT again, but besides that everything looks fine
Code:
root@shika:~# gdisk -l /dev/sdb
GPT fdisk (gdisk) version 1.0.6

Partition table scan:
  MBR: protective
  BSD: not present
  APM: not present
  GPT: present

Found valid GPT with protective MBR; using GPT.
Disk /dev/sdb: 30629376 sectors, 14.6 GiB
Model: Ultra
Sector size (logical/physical): 512/512 bytes
Disk identifier (GUID): 0931B253-01BA-4C84-95D2-48BBB193C1D1
Partition table holds up to 176 entries
Main partition table begins at sector 20 and ends at sector 63
First usable sector is 64, last usable sector is 3129310
Partitions will be aligned on 4-sector boundaries
Total free space is 3 sectors (1.5 KiB)

Number  Start (sector)    End (sector)  Size       Code  Name
   1              64             287   112.0 KiB   0700  Gap0
   2             288            6047   2.8 MiB     EF00  EFI boot partition
   3            6048         3128707   1.5 GiB     AF00  HFSPLUS
   4         3128708         3129307   300.0 KiB   0700  Gap1


Do you know what I'm doing wrong?
 

dlbogdan

Dabbler
Joined
Jul 21, 2017
Messages
16
Same problem here.
I need to install SCALE instead of CORE which worked fine on this exact machine (Microserver G8 Xeon, LSI card and 4xSAS 6TB drives, booting from two 64 GB USB drives), since 2015, 24/7.
Any way to force MBR instead of GPT partitioning when installing ?
 

dlbogdan

Dabbler
Joined
Jul 21, 2017
Messages
16
I fixed the issue. It wasn't actually about MBR partitioning as that was being taken care of setting up the protective MBR partition as bootable, making the old and buggy HP bios to go ahead and boot from the GPT partition.
In my case it was about the udev settle not being enough of a wait before doing those lsblk functions inside the truenas-install script, and in some cases, the script is not waiting at all before issuing a lsblk.
I suspect this is why people commonly think truenas is "fussy" about USB drives as probably some drives are faster than others (mines are from 2015, and have worked fine with FreeNAS and then TrueNAS CORE up until now.
Another error was being presented by zpool create that it couldn't find the device path. Same underlying cause, there has to be a wait before that so that some asynchronous parts of the OS catches up before issuing the zpool create command.

Anyway, I did some modifications to the truenas-install script (see where it is with #which truenas-install, can't remember).
It's quite simple in the end:
at the blue wizzard installation screen, press CTRL+C to get the bash prompt. DON'T USE the included function to get the shell as the script would be still running and we want to modify that, don't we..


edit the truenas-install script
#vi `which truenas-install`

then put a sleep 1 just after the 3rd partition being created with sgdisk. you can spot it as it has -n3 between its arguments
put another sleep 1 after the udev settle, and before a lsblk command, just search for settle
and then in another function, can't remember the name. that uses lsblk, put a sleep 1 just before the lsblk.
then search for zpool create and put another sleep 1 before that.

then exit saving the file and issue a:
BOOTMODE=bios truenas-install

answer NO at the UEFI question and off you go with the installer.
If you're using ILO like I did with virtual DVD passed through the HTML5 virtual remote console, be sure to regularly click on various ILO tabs from time to time as to not let it log off, cutting out your DVD iso and abruptly ending the installation.

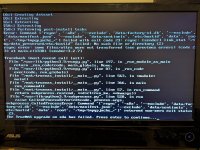
when it's finally complete (my installation wrote a few warnings at the end about a process being stuck for 240 seconds, it's fine) just issue a reboot command and that's it.


sorry for not being really concrete here but I just wrote from my memory what I did, am not going to do it again very soon as it took about 1 hour or so to complete.
 

dlbogdan

Dabbler
Joined
Jul 21, 2017
Messages
16
and now it's time to go back to the trusty CORE because it seems my sas drives are formated with DIF and cannot import the pool in SCALE.
I've seen posts about formatting, and while this is my 2nd backup NAS, going through with hours and hours with reformatting the drives and then restoring data from the 1st NAS, not worth it.
I wanted linux on this NAS (thus the struggle with installing SCALE), because I've aquired a TAPE drive for my 3rd backup/archive (and a different medium) and wanted to use this for the tape creation.

I'll just use my workstation instead, as tapes seem to have easier for the eyes support in windows anyway (aheem Veeam). I'm done using tar ages ago. My hands hurt only thinking about it.
 
Last edited:

hobbyist

Cadet
Joined
Nov 2, 2023
Messages
2
I decided to create an account for this thread. I feel like I am blocked on this exact issue. I have a sabertooth x58 and it won't support a UEFI BIOS. I tried installing the legacy bios and it fails.
I tried learning vim to test out this "fix" and I keep messing up between command mode and the write mode. I am unable to proceed further.
Is there someone who had recent success with legacy bios install lately?
 

hobbyist

Cadet
Joined
Nov 2, 2023
Messages
2
I have manage to install truenas scale by using another thread technique.
Here is a recap:
In the case of SCALE, it is bootable only if you upgrade from CORE to SCALE via ISO ("Install/Upgrade" > "Upgrade Install" > "Install in new boot environment"). It is not possible to boot after "Fresh Instal" and "Format the boot device".

Ideally a clean install should be able to manage a legacy boot install, but it doesn't. Now just doing upgrade and install in new boot environment didn't work. I think I tried a hail Mary where I did a "fresh install" into a new boot environment. I know this sounds weird, but when the installer fails it gets stuck with parts of the previous state still initialized. Anyway without core being first installed the scale install isn't going to work for legacy bios. I have been at it trying to do it for two weeks and I'm happy I found this guy summing it up and finding this way of completing the install.

The linked picture was of the upgrade into new boot environment failing. Like I said I tried the fresh install as a: "oh well might as well if I'm going to re-install core" and when I saw the same option to use the new boot environment, I used it and it worked. Hopefully this can help out someone else too.
 

Attachments

  • PXL_20231105_004052843.jpg
    PXL_20231105_004052843.jpg
    345.2 KB · Views: 77
Top