SOLVED One disk's serial number not showing in Web GUI

Status
Not open for further replies.

danb35

Hall of Famer
Joined
Aug 16, 2011
Messages
15,504
Well, I violated one of the fundamental rules of science: only change one variable at a time. I had FreeNAS 9.2.1.9 running on the hardware in my sig (X9SCL-F, E3-1230V2, 32 GB, 3 x 2 TB RAIDZ1 + 3 x 3 TB RAIDZ1) without any trouble, except that it's running out of space. So I ordered a M1015/9211-8i, appropriate cabling, and 6 x WD Red 4 TB disks. While I had the case open, I also installed the second USB stick for a mirrored install of 9.3, and upgraded to 9.3 (currently on FreeNAS-9.3-STABLE-201412142326).

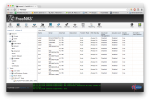
I flashed the 9211-8i to IT mode with the P16 firmware, installed all the disks, and moved two of the existing disks to the 9211-8i rather than the motherboard SATA ports. All the disks are seen by the system, and my existing pool works just fine. I can read SMART data on all the disks. However, in the Web GUI, one of the new disks doesn't report a serial number (screen shot attached).

I remember seeing a thread about this recently, but now that I look for it, I can't find it.

Here's the SMART data for the disk in question:
Code:
[root@freenas2] ~# smartctl -a /dev/da0
smartctl 6.3 2014-07-26 r3976 [FreeBSD 9.3-RELEASE-p5 amd64] (local build)
Copyright (C) 2002-14, Bruce Allen, Christian Franke, www.smartmontools.org

=== START OF INFORMATION SECTION ===
Model Family:     Western Digital Red (AF)
Device Model:     WDC WD40EFRX-68WT0N0
Serial Number:    WD-WCC4E0PVTXJH
LU WWN Device Id: 5 0014ee 260917d50
Firmware Version: 82.00A82
User Capacity:    4,000,787,030,016 bytes [4.00 TB]
Sector Sizes:     512 bytes logical, 4096 bytes physical
Rotation Rate:    5400 rpm
Device is:        In smartctl database [for details use: -P show]
ATA Version is:   ACS-2 (minor revision not indicated)
SATA Version is:  SATA 3.0, 6.0 Gb/s (current: 6.0 Gb/s)
Local Time is:    Mon Dec 22 08:29:21 2014 EST
SMART support is: Available - device has SMART capability.
SMART support is: Enabled

=== START OF READ SMART DATA SECTION ===
SMART overall-health self-assessment test result: PASSED

General SMART Values:
Offline data collection status:  (0x00)    Offline data collection activity
                    was never started.
                    Auto Offline Data Collection: Disabled.
Self-test execution status:      ( 241)    Self-test routine in progress...
                    10% of test remaining.
Total time to complete Offline 
data collection:         (54780) seconds.
Offline data collection
capabilities:             (0x7b) SMART execute Offline immediate.
                    Auto Offline data collection on/off support.
                    Suspend Offline collection upon new
                    command.
                    Offline surface scan supported.
                    Self-test supported.
                    Conveyance Self-test supported.
                    Selective Self-test supported.
SMART capabilities:            (0x0003)    Saves SMART data before entering
                    power-saving mode.
                    Supports SMART auto save timer.
Error logging capability:        (0x01)    Error logging supported.
                    General Purpose Logging supported.
Short self-test routine 
recommended polling time:     (   2) minutes.
Extended self-test routine
recommended polling time:     ( 548) minutes.
Conveyance self-test routine
recommended polling time:     (   5) minutes.
SCT capabilities:           (0x703d)    SCT Status supported.
                    SCT Error Recovery Control supported.
                    SCT Feature Control supported.
                    SCT Data Table supported.

SMART Attributes Data Structure revision number: 16
Vendor Specific SMART Attributes with Thresholds:
ID# ATTRIBUTE_NAME          FLAG     VALUE WORST THRESH TYPE      UPDATED  WHEN_FAILED RAW_VALUE
  1 Raw_Read_Error_Rate     0x002f   200   200   051    Pre-fail  Always       -       0
  3 Spin_Up_Time            0x0027   100   253   021    Pre-fail  Always       -       0
  4 Start_Stop_Count        0x0032   100   100   000    Old_age   Always       -       4
  5 Reallocated_Sector_Ct   0x0033   200   200   140    Pre-fail  Always       -       0
  7 Seek_Error_Rate         0x002e   100   253   000    Old_age   Always       -       0
  9 Power_On_Hours          0x0032   100   100   000    Old_age   Always       -       24
 10 Spin_Retry_Count        0x0032   100   253   000    Old_age   Always       -       0
 11 Calibration_Retry_Count 0x0032   100   253   000    Old_age   Always       -       0
 12 Power_Cycle_Count       0x0032   100   100   000    Old_age   Always       -       4
192 Power-Off_Retract_Count 0x0032   200   200   000    Old_age   Always       -       2
193 Load_Cycle_Count        0x0032   200   200   000    Old_age   Always       -       10
194 Temperature_Celsius     0x0022   117   115   000    Old_age   Always       -       35
196 Reallocated_Event_Count 0x0032   200   200   000    Old_age   Always       -       0
197 Current_Pending_Sector  0x0032   200   200   000    Old_age   Always       -       0
198 Offline_Uncorrectable   0x0030   100   253   000    Old_age   Offline      -       0
199 UDMA_CRC_Error_Count    0x0032   200   200   000    Old_age   Always       -       0
200 Multi_Zone_Error_Rate   0x0008   100   253   000    Old_age   Offline      -       0

SMART Error Log Version: 1
No Errors Logged

SMART Self-test log structure revision number 1
Num  Test_Description    Status                  Remaining  LifeTime(hours)  LBA_of_first_error
# 1  Short offline       Completed without error       00%         7         -

SMART Selective self-test log data structure revision number 1
 SPAN  MIN_LBA  MAX_LBA  CURRENT_TEST_STATUS
    1        0        0  Not_testing
    2        0        0  Not_testing
    3        0        0  Not_testing
    4        0        0  Not_testing
    5        0        0  Not_testing
Selective self-test flags (0x0):
  After scanning selected spans, do NOT read-scan remainder of disk.
If Selective self-test is pending on power-up, resume after 0 minute delay.


Any suggestions on how to address this? It doesn't seem too critical of a problem, but it also doesn't seem right, and I'd be concerned that the system might not monitor the rest of the SMART data on this disk.
 

Attachments

  • Screen Shot 2014-12-22 at 8.22.51 AM.png
    Screen Shot 2014-12-22 at 8.22.51 AM.png
    277.3 KB · Views: 386

Sir.Robin

Guru
Joined
Apr 14, 2012
Messages
554
Yeah, i have filed a bug two times on this matter. Known bug amongst several peeps.
Serial on da0 is missing in GUI. This was seen in 9.1 and fixed at some time... but reappeared in 9.2 something.
At wich point i refiled the bug. Still present in 9.3 though...
 

danb35

Hall of Famer
Joined
Aug 16, 2011
Messages
15,504
Would that be Bug 5418? Looks like pretty much the same issue.

Looks like (based on that bug report) doing "python /usr/local/www/freenasUI/tools/sync_disks.py da0" from the command line as root corrects, or at least masks, the problem. It seems to have done the trick for me.
 
Last edited:

Sir.Robin

Guru
Joined
Apr 14, 2012
Messages
554
That is mine yes :)

Seeing through it... i am gven a couple of commands that fixed the issue... gonna trie them again...
 

Sir.Robin

Guru
Joined
Apr 14, 2012
Messages
554
This fixes it:

Code:
python /usr/local/www/freenasUI/tools/sync_disks.py da0
 

Jailer

Not strong, but bad
Joined
Sep 12, 2014
Messages
4,977
I was probably the one that reported this behavior recently in this post. I had that problem but couldn't find a solution (not knowledgeable enough to figure it out on my own) so I ended up backing everything up and destroying the pool and starting over with a fresh install. That solved the problem for me.

My only issue with it was my scheduled smart test wouldn't run on da0. Have you confirmed that your tests are running after fixing the serial number issue? Did they work before you did?
 

Z300M

Guru
Joined
Sep 9, 2011
Messages
882

Ericloewe

Server Wrangler
Moderator
Joined
Feb 15, 2014
Messages
20,194
This fixes it:

Code:
python /usr/local/www/freenasUI/tools/sync_disks.py da0

Sounds like something that should be run on reboot...
 

danb35

Hall of Famer
Joined
Aug 16, 2011
Messages
15,504
My only issue with it was my scheduled smart test wouldn't run on da0. Have you confirmed that your tests are running after fixing the serial number issue? Did they work before you did?
In my case, da0 is newly installed and still in the burn-in phase. It'll run manually-initiated SMART tests, but I don't have any scheduled on it yet.
 

danb35

Hall of Famer
Joined
Aug 16, 2011
Messages
15,504
My only issue with it was my scheduled smart test wouldn't run on da0. Have you confirmed that your tests are running after fixing the serial number issue? Did they work before you did?
Now that burnin is done and the new disks are part of the pool, I can confirm that scheduled SMART tests are running. I can't say whether they were working before I fixed the issue.
 

philiplu

Explorer
Joined
Aug 10, 2014
Messages
58
I've also got the missing serial number on da0. That might have something to do with the SMART tests not running on that drive, but I'm not sure about that. The SMART issue seems to be a problem with generating /etc/local/smartd.conf on a reboot. Whenever I reboot, the entry for da0 is bad there:

Code:
[phil@Marvin ~]$ cat /etc/local/smartd.conf
################################################
# smartd.conf generated by /etc/ix.rc.d/ix-smartd
################################################
/dev/da1 -a -n never -W 0,0,40 -m <redacted> -s L/(01|02|03|04|05|06|07|08|09|10|11|12)/(01|15)/(1|2|3|4|5|6|7)/(01)
/dev/da1 -a -n never -W 0,0,40 -m <redacted> -s S/(01|02|03|04|05|06|07|08|09|10|11|12)/(03|07|10|14|17|21|24|28|31)/(1|2|3|4|5|6|7)/(23)
... same for da2-da6
/dev/da7 -a -n never -W 0,0,40 -m <redacted> -s L/(01|02|03|04|05|06|07|08|09|10|11|12)/(01|15)/(1|2|3|4|5|6|7)/(01)
/dev/da7 -a -n never -W 0,0,40 -m <redacted> -s S/(01|02|03|04|05|06|07|08|09|10|11|12)/(03|07|10|14|17|21|24|28|31)/(1|2|3|4|5|6|7)/(23)
/dev/da0 -a -n never -W 0,0,40 -m <redacted>


Note the lack of any short or long test parameters for da0.

If I then go to Tasks/SMART Tests and edit either the Long or Short Self-Test entries (just double-click an item, then press OK in the dialog), smartd.conf will be regenerated with the correct entry for da0.
 
Last edited:

Z300M

Guru
Joined
Sep 9, 2011
Messages
882
Fixed it for me too.
BUT after the most recent update da13 is also missing in the GUI, but executing that python script after editing it to access da13 instead of da0 did not have the desired result.

EDIT: Ooops! Never mind: da13 is a temporarily USB-connected drive I'd forgotten about.
 
Last edited:

Bidule0hm

Server Electronics Sorcerer
Joined
Aug 5, 2013
Messages
3,710
Hi,

First I want to thank everyone for the research on this bug ;)

So, the problems with doing python /usr/local/www/freenasUI/tools/sync_disks.py da0 and then updating manually the SMART task are that it requires to do this manually and it's not persistent after a reboot.

As it's easy to forget to do this after a reboot, especially after a few months, I found a solution relatively simple. What we want to do is to make a copy of the smartd.conf file, to correct it, and then to replace the bad smartd.conf at each boot by the corrected version.

Edit: Philiplu has found a far better solution and I confirmed that it works, see here https://forums.freenas.org/index.ph...mart-tests-not-always-done.27620/#post-177965 I'll let my old guide below in a spoiler, maybe it can be useful for someone one day...
Disclaimer: Although there is very little chance that something goes wrong you will do this at your own risk.

EDIT: THIS DOESN'T WORK! but it doesn't harm either. I don't know why it has worked on more than 4 or 5 reboots just to test it + a reboot not related, the da0 drive has correctly accomplished a scheduled SMART test and then missed the last two scheduled tests after some others reboots. I think maybe I've to add a restart of the deamon after copying the good conf. For now don't follow this guide, it's useless.

0) Open the shell in the GUI or SSH to the server (you must be root or be able to sudo)
1) If you are on FreeNAS 9.2.* or less mount the filesystem writable (type mount -uw /)
2) Type cd /root
3) Type cp /etc/local/smartd.conf smartd.conf.bak
4) Type cp /etc/local/smartd.conf smartd.conf.good
5) Type nano smartd.conf.good (or use any other editor you like)
6) You should see a content like this one:
Code:
################################################
# smartd.conf generated by /etc/ix.rc.d/ix-smartd
################################################
/dev/da0 -a -n never -W 0,40,45 -m john.doe@gmail.com -s
/dev/da1 -a -n never -W 0,40,45 -m john.doe@gmail.com -s S/(01|02|03|04|05|06|07|08|09|10|11|12)/(07|12|22|27)/(1|2|3|4|5|6|7)/(06)
/dev/da1 -a -n never -W 0,40,45 -m john.doe@gmail.com -s L/(01|02|03|04|05|06|07|08|09|10|11|12)/(02|17)/(1|2|3|4|5|6|7)/(04)
/dev/da2 -a -n never -W 0,40,45 -m john.doe@gmail.com -s S/(01|02|03|04|05|06|07|08|09|10|11|12)/(07|12|22|27)/(1|2|3|4|5|6|7)/(06)
/dev/da2 -a -n never -W 0,40,45 -m john.doe@gmail.com -s L/(01|02|03|04|05|06|07|08|09|10|11|12)/(02|17)/(1|2|3|4|5|6|7)/(04)
/dev/da3 -a -n never -W 0,40,45 -m john.doe@gmail.com -s S/(01|02|03|04|05|06|07|08|09|10|11|12)/(07|12|22|27)/(1|2|3|4|5|6|7)/(06)
/dev/da3 -a -n never -W 0,40,45 -m john.doe@gmail.com -s L/(01|02|03|04|05|06|07|08|09|10|11|12)/(02|17)/(1|2|3|4|5|6|7)/(04)
/dev/da4 -a -n never -W 0,40,45 -m john.doe@gmail.com -s S/(01|02|03|04|05|06|07|08|09|10|11|12)/(07|12|22|27)/(1|2|3|4|5|6|7)/(06)
/dev/da4 -a -n never -W 0,40,45 -m john.doe@gmail.com -s L/(01|02|03|04|05|06|07|08|09|10|11|12)/(02|17)/(1|2|3|4|5|6|7)/(04)
/dev/da5 -a -n never -W 0,40,45 -m john.doe@gmail.com -s S/(01|02|03|04|05|06|07|08|09|10|11|12)/(07|12|22|27)/(1|2|3|4|5|6|7)/(06)
/dev/da5 -a -n never -W 0,40,45 -m john.doe@gmail.com -s L/(01|02|03|04|05|06|07|08|09|10|11|12)/(02|17)/(1|2|3|4|5|6|7)/(04)
/dev/da6 -a -n never -W 0,40,45 -m john.doe@gmail.com -s S/(01|02|03|04|05|06|07|08|09|10|11|12)/(07|12|22|27)/(1|2|3|4|5|6|7)/(06)
/dev/da6 -a -n never -W 0,40,45 -m john.doe@gmail.com -s L/(01|02|03|04|05|06|07|08|09|10|11|12)/(02|17)/(1|2|3|4|5|6|7)/(04)
/dev/da7 -a -n never -W 0,40,45 -m john.doe@gmail.com -s S/(01|02|03|04|05|06|07|08|09|10|11|12)/(07|12|22|27)/(1|2|3|4|5|6|7)/(06)
/dev/da7 -a -n never -W 0,40,45 -m john.doe@gmail.com -s L/(01|02|03|04|05|06|07|08|09|10|11|12)/(02|17)/(1|2|3|4|5|6|7)/(04)

As you can see da0 is different.
7) Copy the line from another disk which has the same SMART test you want to apply to da0 and change the disk id at the beginning of the line by da0
8) You should obtain something like this:
Code:
################################################
# smartd.conf generated by /etc/ix.rc.d/ix-smartd
################################################
/dev/da0 -a -n never -W 0,40,45 -m john.doe@gmail.com -s S/(01|02|03|04|05|06|07|08|09|10|11|12)/(07|12|22|27)/(1|2|3|4|5|6|7)/(06)
/dev/da0 -a -n never -W 0,40,45 -m john.doe@gmail.com -s L/(01|02|03|04|05|06|07|08|09|10|11|12)/(02|17)/(1|2|3|4|5|6|7)/(04)
/dev/da1 -a -n never -W 0,40,45 -m john.doe@gmail.com -s S/(01|02|03|04|05|06|07|08|09|10|11|12)/(07|12|22|27)/(1|2|3|4|5|6|7)/(06)
/dev/da1 -a -n never -W 0,40,45 -m john.doe@gmail.com -s L/(01|02|03|04|05|06|07|08|09|10|11|12)/(02|17)/(1|2|3|4|5|6|7)/(04)
/dev/da2 -a -n never -W 0,40,45 -m john.doe@gmail.com -s S/(01|02|03|04|05|06|07|08|09|10|11|12)/(07|12|22|27)/(1|2|3|4|5|6|7)/(06)
/dev/da2 -a -n never -W 0,40,45 -m john.doe@gmail.com -s L/(01|02|03|04|05|06|07|08|09|10|11|12)/(02|17)/(1|2|3|4|5|6|7)/(04)
/dev/da3 -a -n never -W 0,40,45 -m john.doe@gmail.com -s S/(01|02|03|04|05|06|07|08|09|10|11|12)/(07|12|22|27)/(1|2|3|4|5|6|7)/(06)
/dev/da3 -a -n never -W 0,40,45 -m john.doe@gmail.com -s L/(01|02|03|04|05|06|07|08|09|10|11|12)/(02|17)/(1|2|3|4|5|6|7)/(04)
/dev/da4 -a -n never -W 0,40,45 -m john.doe@gmail.com -s S/(01|02|03|04|05|06|07|08|09|10|11|12)/(07|12|22|27)/(1|2|3|4|5|6|7)/(06)
/dev/da4 -a -n never -W 0,40,45 -m john.doe@gmail.com -s L/(01|02|03|04|05|06|07|08|09|10|11|12)/(02|17)/(1|2|3|4|5|6|7)/(04)
/dev/da5 -a -n never -W 0,40,45 -m john.doe@gmail.com -s S/(01|02|03|04|05|06|07|08|09|10|11|12)/(07|12|22|27)/(1|2|3|4|5|6|7)/(06)
/dev/da5 -a -n never -W 0,40,45 -m john.doe@gmail.com -s L/(01|02|03|04|05|06|07|08|09|10|11|12)/(02|17)/(1|2|3|4|5|6|7)/(04)
/dev/da6 -a -n never -W 0,40,45 -m john.doe@gmail.com -s S/(01|02|03|04|05|06|07|08|09|10|11|12)/(07|12|22|27)/(1|2|3|4|5|6|7)/(06)
/dev/da6 -a -n never -W 0,40,45 -m john.doe@gmail.com -s L/(01|02|03|04|05|06|07|08|09|10|11|12)/(02|17)/(1|2|3|4|5|6|7)/(04)
/dev/da7 -a -n never -W 0,40,45 -m john.doe@gmail.com -s S/(01|02|03|04|05|06|07|08|09|10|11|12)/(07|12|22|27)/(1|2|3|4|5|6|7)/(06)
/dev/da7 -a -n never -W 0,40,45 -m john.doe@gmail.com -s L/(01|02|03|04|05|06|07|08|09|10|11|12)/(02|17)/(1|2|3|4|5|6|7)/(04)

There is two lines per disk because I run two tests, a short (who begins with S/) and a long (who begins with L/).
9) Save the changes and quit the editor (in nano do Ctrl + O, Enter, Ctrl + X)
10) If you are on FreeNAS 9.2.* or less remount the filesystem readonly (type mount -ur /), this will take some time, let it terminate.
11) Go to the WebGUI
12) Click on Tasks, then on Init/Shutdown Scripts and then on Add Init/Shutdown Scripts
13) Fill the settings like this:
Code:
Type: Command
Command: cp /root/smartd.conf.good /etc/local/smartd.conf
When: Post Init

14) Click OK
15) Reboot
16) Open the shell in the GUI or SSH to the server
17) Type cat /etc/local/smartd.conf
18) You should see the same content than at the step 8). If you do then everything is OK :D If you don't, post your problem and which step gone wrong.

Note that there is virtually no risks but in case something goes wrong delete the init/shutdown script in the GUI, type cp /root/smartd.conf.bak /etc/local/smartd.conf in a shell and then reboot.

Caveats:
- This fixes only the smart tests, the serial will still be missing and the da0 disk will still be unselected in the SMART tests in the GUI. You can theoretically fix the GUI by making a script who edit the database but it's relatively risky and not very useful.
- If you want to change the SMART tests and/or the SMART service settings in the GUI you'll have to redo the steps 0, 2 and 4 of this tutorial after.
 
Last edited:

philiplu

Explorer
Joined
Aug 10, 2014
Messages
58
I managed to track down both why, once a serial # goes missing in the web GUI, it stays that way, and why smartd.conf gets regenerated incorrectly on a reboot. Check out Bug #8034. Update #1 in that bug entry has a simple fix for at least the smartd.conf side of things.
 

Z300M

Guru
Joined
Sep 9, 2011
Messages
882
I managed to track down both why, once a serial # goes missing in the web GUI, it stays that way, and why smartd.conf gets regenerated incorrectly on a reboot. Check out Bug #8034. Update #1 in that bug entry has a simple fix for at least the smartd.conf side of things.
After the last two or three updates (which of course required a reboot) all my drive serial numbers are showing in the GUI without any user intervention.
 

Bidule0hm

Server Electronics Sorcerer
Joined
Aug 5, 2013
Messages
3,710
They fixed the bug in one of the last updates, it's now marked as resolved ;)
 
Status
Not open for further replies.
Top