
- Joined
- Nov 12, 2015
- Messages
- 1,471
TrueNAS SCALE Fans,
Like many of you I’m a bit of a nerd (total shocker I know) who’s into things like CryptoCurrency. I recently got Chia setup on TrueNAS SCALE and wanted to share how I did this for others who may be interested as well. For this walkthrough I was using TrueNAS SCALE nightly images, but the process will be similar on 21.04-ALPHA.1.
To prepare your TrueNAS SCALE system for Chia farming, you first will want to create some datasets. In this example we create a parent dataset tank/chia, and then nested datasets of tank/chia/config and tank/chia/plots. These will be exposed to your container and keep your configuration and plots persistent across upgrades.

With the datasets prepared, next step is to navigate to the Apps page and click on the Launch Docker Image button.

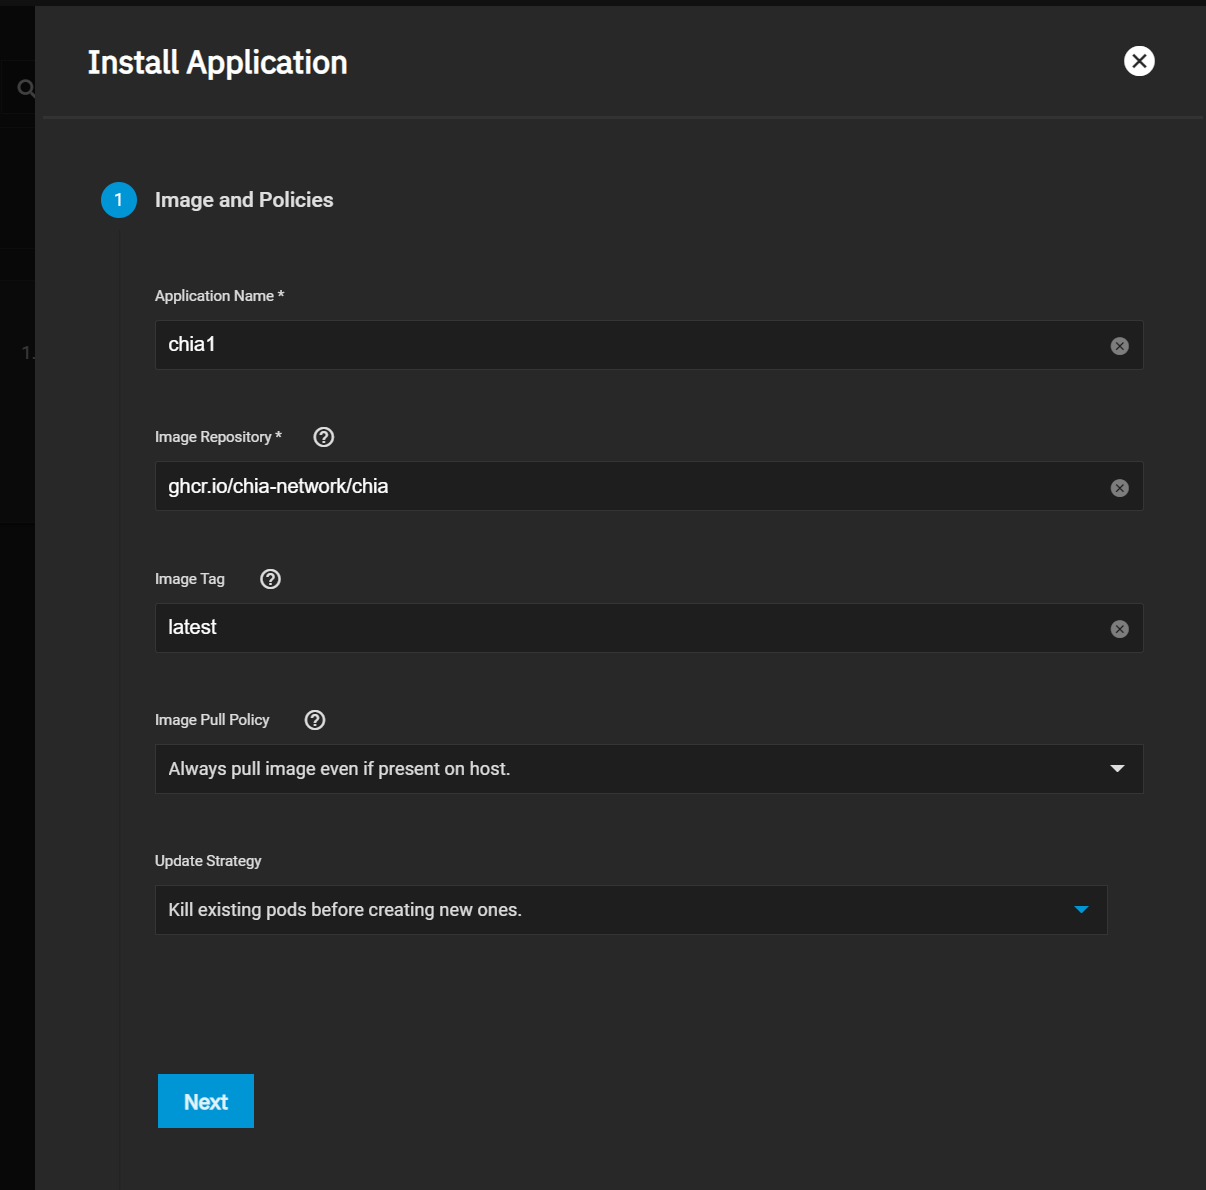
On the first section of the wizard, we will begin by setting the following parameters:
Name: chia1
Image Repository: ghcr.io/chia-network/chia
Image Tag: latest
Update Strategy: Kill existing pods before creating new ones
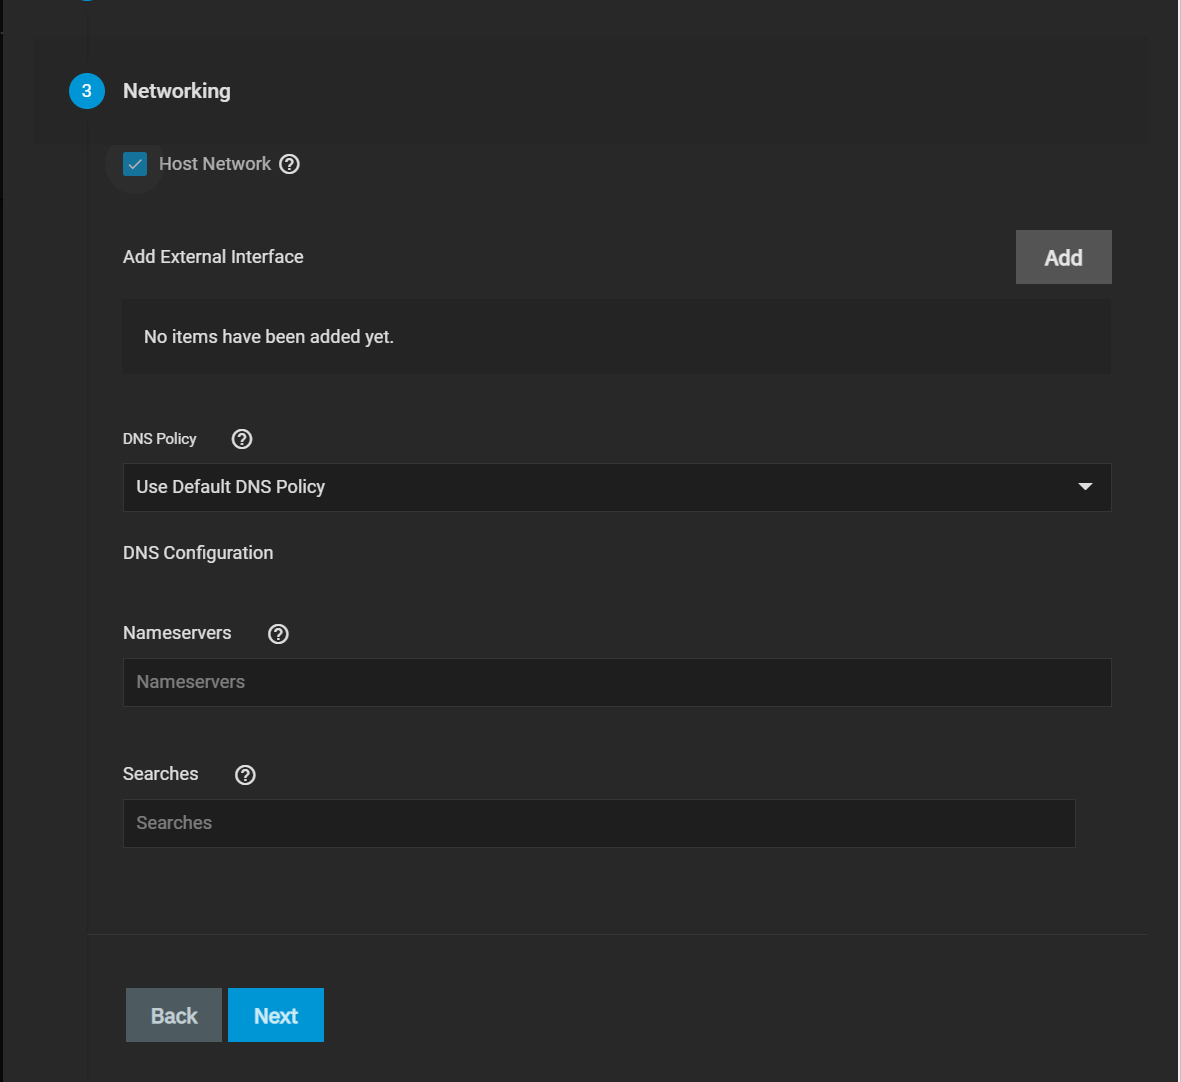
Click Next until you reach the Networking section. Here we will be using the Host Network option. Select it and click Next.
NOTE: Chia network often requires that port 8444 be exposed to the outside world. Please refer to your router documentation on how to best port-forward 8444 to your TrueNAS SCALE system.
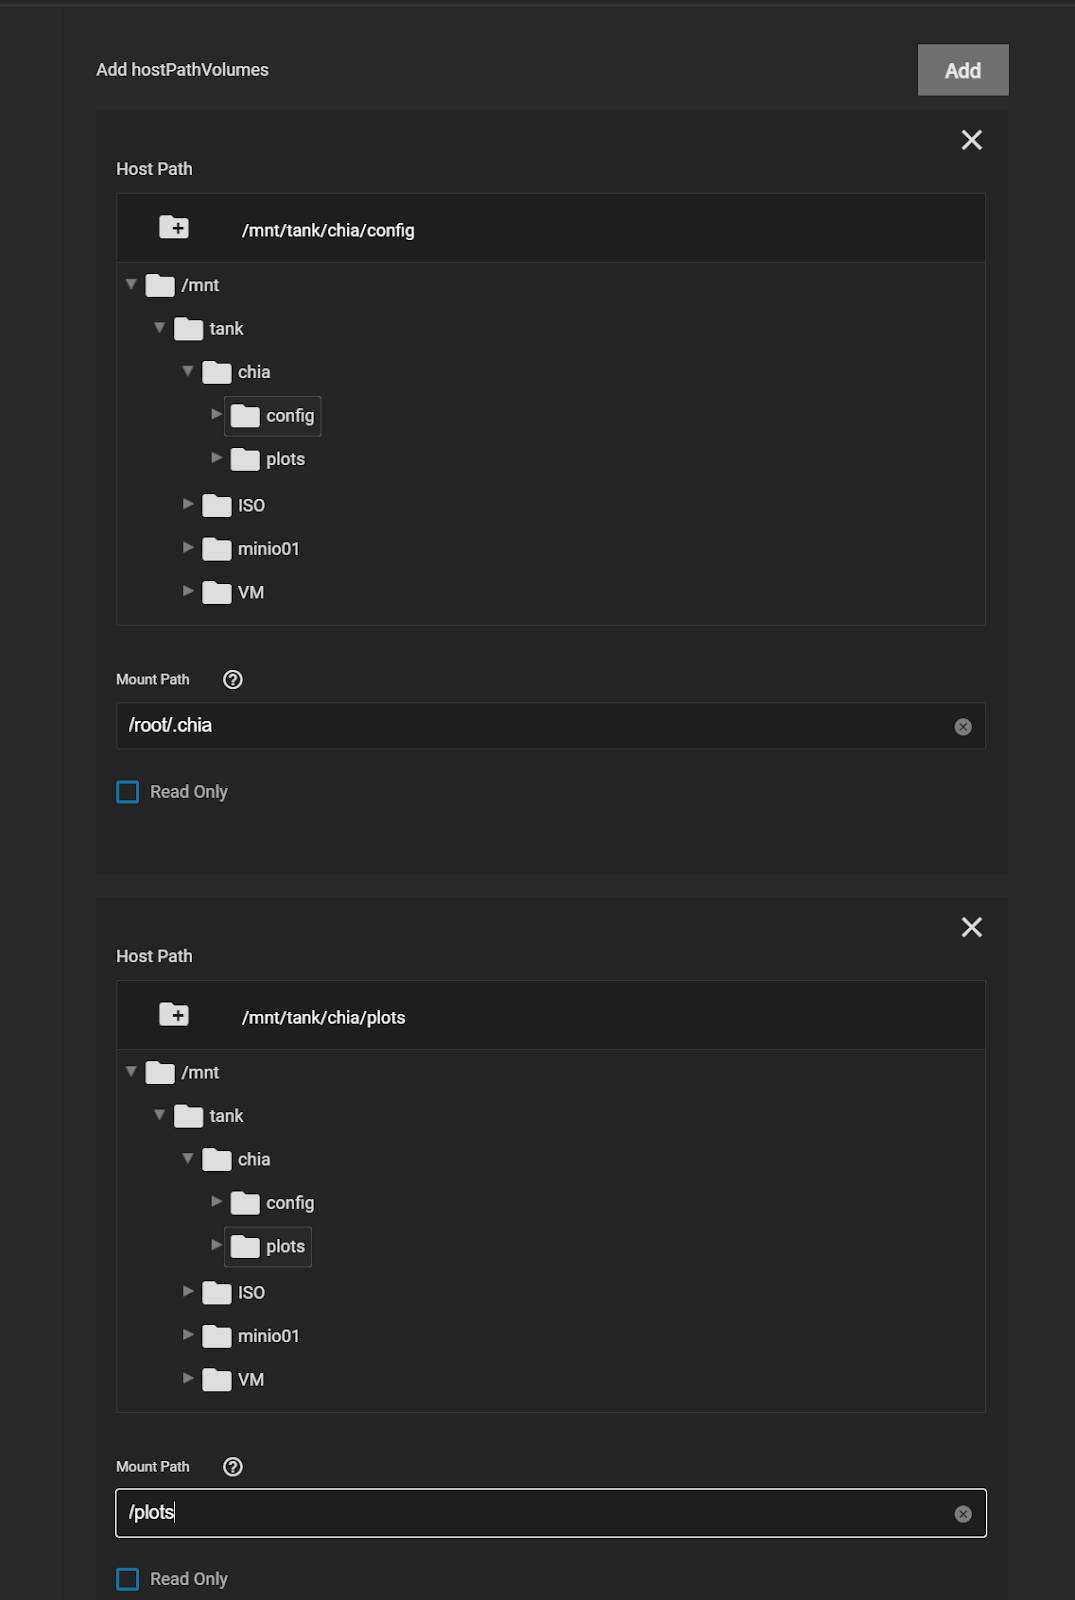
Keep clicking Next until you get to the Host Path Volumes section. Here you will now expose the datasets we previously created to the container. Create two entries for the following, replacing <tank> with your pool name.
Host Path: /mnt/<tank>/chia/config
Mount Path: /root/.chia
Host Path: /mnt/<tank>/chia/plots
Mount Path: /plots
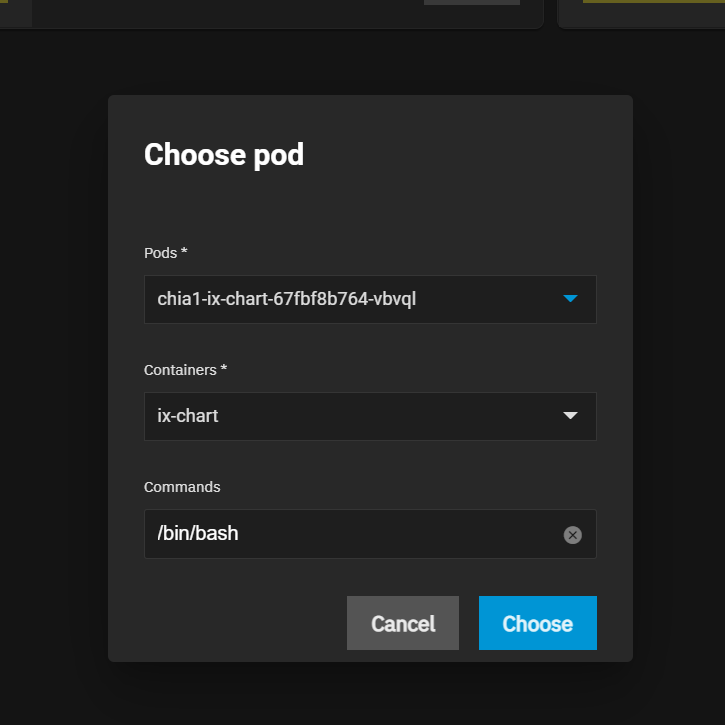
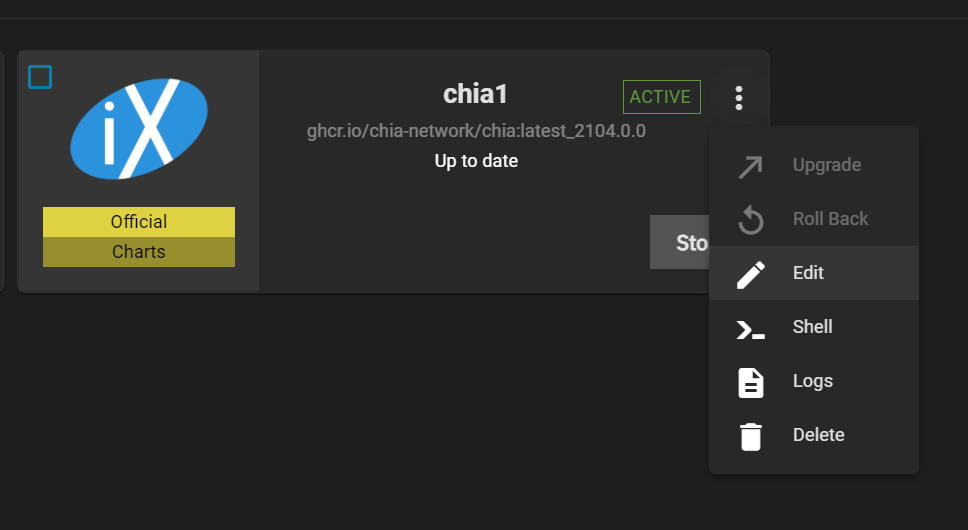
Continue though the wizard and create the new application. After a minute or two the new chia1 container will be started and listed as “ACTIVE”. At this point we need to click the three-dot menu on the top-right and launch the Shell.

Take the defaults for the pod (There is only one) and use the selected /bin/bash shell.
The first time Chia launches, it will automatically create a new private key set which is for your plotting, as well as wallet. However this will not get preserved across container restarts. To make sure your keys and wallet persist, we need to save the Mnemonic Seed which was magically created and make sure it gets used at each container initialization. To do this, start by displaying the current key information:
# /chia-blockchain/venv/bin/chia keys show --show-mnemonic-seed
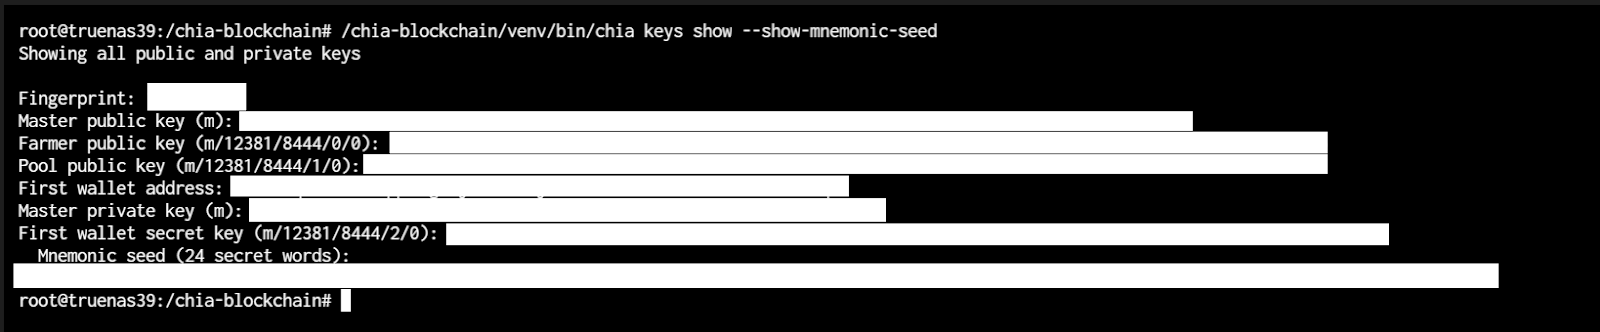
If you entered the command correctly, you should see some output that looks like the above screenshot (minus the redaction of course)
You’ll want to make a backup copy of the information provided here for your reference in case you lose the keyfile somewhere along the line. To make sure the same key is used for this container going forward, we will be saving the mnemonic-seed phrase to one of our host volumes on TrueNAS.
Copy and paste the 24 secret words of the mnemonic seed into a new shell command:
# echo "my unique 24 secret words here" > /plots/keyfile
With this done, exit the shell and go back to the Installed Apps page and click Edit on your Chia container.
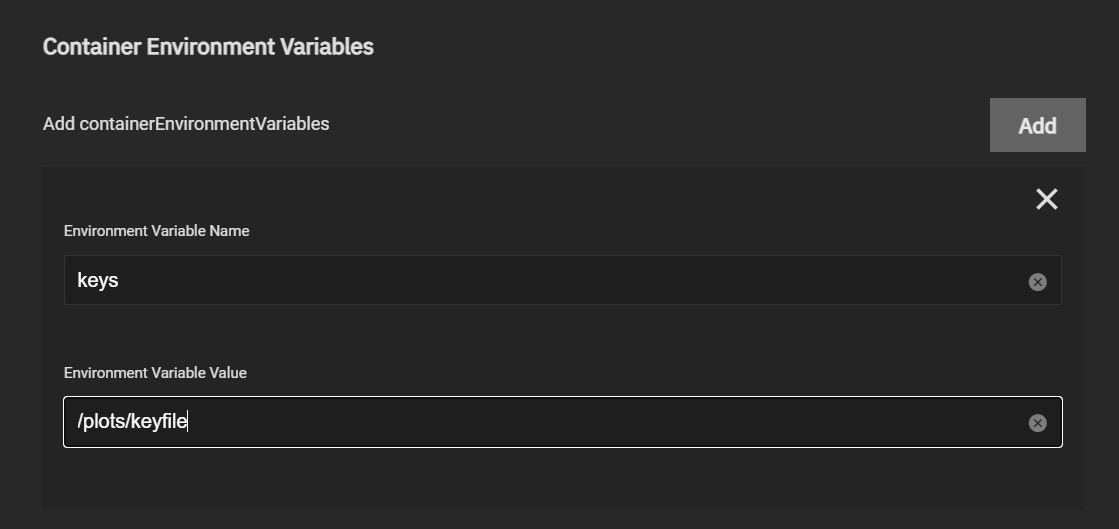
Scroll down until you find the Container Environment Variables section and add a new variable as shown below:
Environment Variable Name: keys
Environment Variable Value: /plots/keyfile
NOTE: There is a bug in SCALE 21.04-ALPHA and later where you cannot set Environment variables via the UI. (Might be fixed in nightly images by the time you are reading this). To work-around you can instead use the following command from the TrueNAS Shell:
# midclt call -job chart.release.update chia1 '{"values": {"containerEnvironmentVariables": [{"name": "keys", "value": "/plots/keyfile"}]}}'
Save the change, and the chia container should restart automatically. To confirm your changes have persisted you can log into the containers shell again and run the same “/chia-blockchain/venv/bin/chia keys show --show-mnemonic-seed” command to show your keys. If the keys are identical to what you previously recorded, then congratulations you are done! This Chia container will persist across reboots, upgrades and re-deployments.
At this point you are all ready to begin farming Chia. This is a CLI process and beyond the scope of this quick how-to, but I recommend you start by reading up on their CLI reference materials, Quick Start guide and other documentation.
Like many of you I’m a bit of a nerd (total shocker I know) who’s into things like CryptoCurrency. I recently got Chia setup on TrueNAS SCALE and wanted to share how I did this for others who may be interested as well. For this walkthrough I was using TrueNAS SCALE nightly images, but the process will be similar on 21.04-ALPHA.1.
To prepare your TrueNAS SCALE system for Chia farming, you first will want to create some datasets. In this example we create a parent dataset tank/chia, and then nested datasets of tank/chia/config and tank/chia/plots. These will be exposed to your container and keep your configuration and plots persistent across upgrades.
With the datasets prepared, next step is to navigate to the Apps page and click on the Launch Docker Image button.
On the first section of the wizard, we will begin by setting the following parameters:
Name: chia1
Image Repository: ghcr.io/chia-network/chia
Image Tag: latest
Update Strategy: Kill existing pods before creating new ones
Click Next until you reach the Networking section. Here we will be using the Host Network option. Select it and click Next.
NOTE: Chia network often requires that port 8444 be exposed to the outside world. Please refer to your router documentation on how to best port-forward 8444 to your TrueNAS SCALE system.
Keep clicking Next until you get to the Host Path Volumes section. Here you will now expose the datasets we previously created to the container. Create two entries for the following, replacing <tank> with your pool name.
Host Path: /mnt/<tank>/chia/config
Mount Path: /root/.chia
Host Path: /mnt/<tank>/chia/plots
Mount Path: /plots
Continue though the wizard and create the new application. After a minute or two the new chia1 container will be started and listed as “ACTIVE”. At this point we need to click the three-dot menu on the top-right and launch the Shell.
Take the defaults for the pod (There is only one) and use the selected /bin/bash shell.
The first time Chia launches, it will automatically create a new private key set which is for your plotting, as well as wallet. However this will not get preserved across container restarts. To make sure your keys and wallet persist, we need to save the Mnemonic Seed which was magically created and make sure it gets used at each container initialization. To do this, start by displaying the current key information:
# /chia-blockchain/venv/bin/chia keys show --show-mnemonic-seed
If you entered the command correctly, you should see some output that looks like the above screenshot (minus the redaction of course)
You’ll want to make a backup copy of the information provided here for your reference in case you lose the keyfile somewhere along the line. To make sure the same key is used for this container going forward, we will be saving the mnemonic-seed phrase to one of our host volumes on TrueNAS.
Copy and paste the 24 secret words of the mnemonic seed into a new shell command:
# echo "my unique 24 secret words here" > /plots/keyfile
With this done, exit the shell and go back to the Installed Apps page and click Edit on your Chia container.
Scroll down until you find the Container Environment Variables section and add a new variable as shown below:
Environment Variable Name: keys
Environment Variable Value: /plots/keyfile
NOTE: There is a bug in SCALE 21.04-ALPHA and later where you cannot set Environment variables via the UI. (Might be fixed in nightly images by the time you are reading this). To work-around you can instead use the following command from the TrueNAS Shell:
# midclt call -job chart.release.update chia1 '{"values": {"containerEnvironmentVariables": [{"name": "keys", "value": "/plots/keyfile"}]}}'
Save the change, and the chia container should restart automatically. To confirm your changes have persisted you can log into the containers shell again and run the same “/chia-blockchain/venv/bin/chia keys show --show-mnemonic-seed” command to show your keys. If the keys are identical to what you previously recorded, then congratulations you are done! This Chia container will persist across reboots, upgrades and re-deployments.
At this point you are all ready to begin farming Chia. This is a CLI process and beyond the scope of this quick how-to, but I recommend you start by reading up on their CLI reference materials, Quick Start guide and other documentation.
