
jimmy_1969
Cadet
- Joined
- Sep 27, 2015
- Messages
- 7
Background
The use-case is rather straight forward. Rather than installing BHYVE VM instances from scratch every time, it would be nice to be able to configure once, and then clone to new VM instances every time we make a new deployment.
I spend a few days researching this topic, and testing the new VM clone feature in FreeNAS, but the end result was poor. I found a multitude of questions online regarding BHYVE VM cloning, but no solutions that I could easily apply in a FreeNAS context. The new clone feature did not work for me either. I could clone a VM but the cloned instance didn't want to start. Spent hours trying to figure out a way to troubleshoot BHYVE in FreeNAS but found nothing tangible (where are the BHYVE logs?!#?!).
This prompted me to develop my own work-flow, where I try to leverage the (classic) GUI as much as possible, combined with a few CLI interactions to fill the functional gaps. This method might not be everyone's cup of tea, but hopefully it is easy enough for non-expert users to give it a go.
High Level Work-Flow
Some users have reported that booting a fresh installation of a CentOS7 guest VM will result failure, and ending up at the UEFI shell instead. This is a known issue and the work-around can be found here.
Method of Procedure
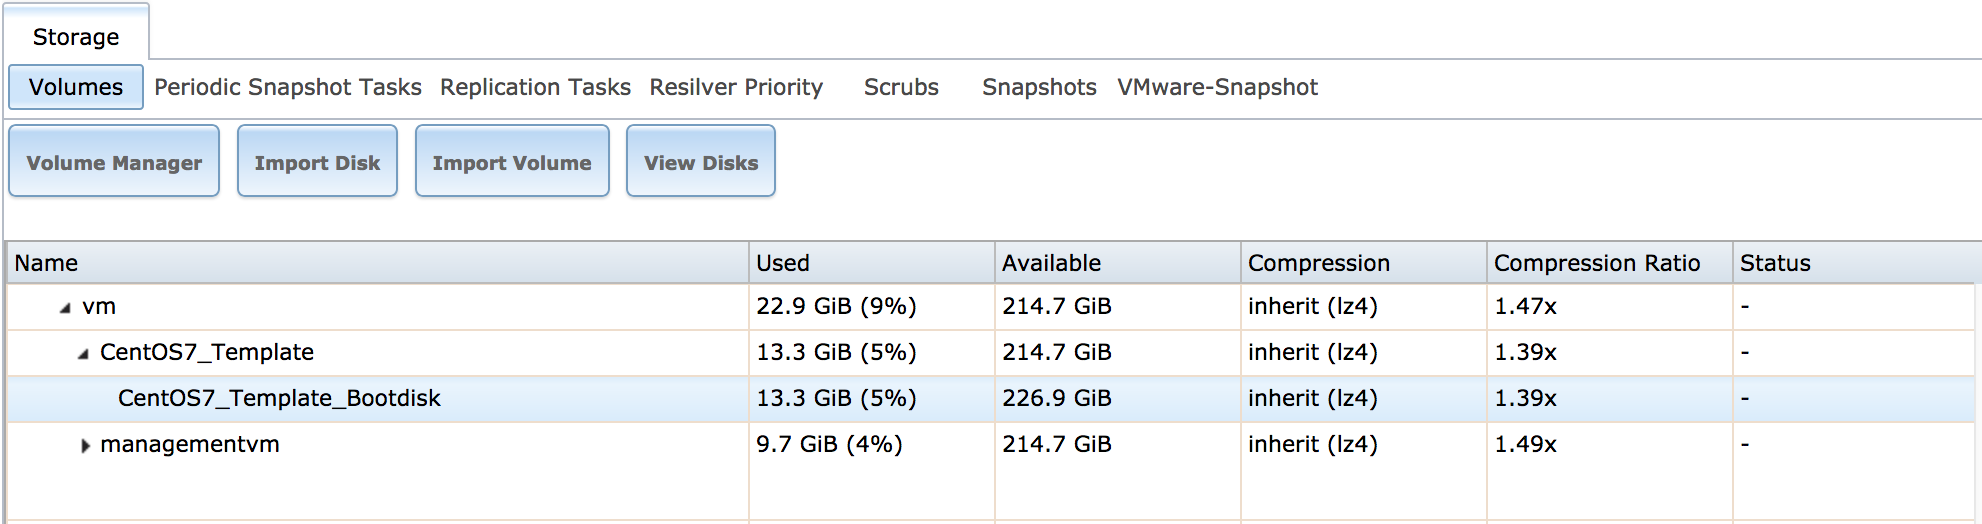
1. Create a new VM template dataset, e g 'CentOS7_Template'
2. Create a new ZVOL inside the dataset to be used as boot drive. Specify:
3. Create a new template VM, e g 'CentOS7_Template'
4. Select 'Devices' and 'Add Device' and specify:
6. Next, we will make a snapshot in the event we later want to rollback to the initial install state. Stop the VM. Then go to 'Storage' and select the template dataset, e g 'CentOS7_Template', and 'Create Snapshot'. Specify:
7. Log in to your FreeNAS server's command prompt. We will assume using a SUDO enabled account.
8. Locate the template dataset.
9. Create a new recursive snapshot of the VM template dataset (we could have used the initial snapshot but this way the same procedure will apply even after the template has been modified/updated).
10. Clone the dataset by using zfs send/receive. The new VM instance's dataset is specified on the receiving side, e g 'bigvolume/vm/NewCentOS7VM'
11. Locate the new cloned dataset. Note that the cloned ZVOL still has its original name.
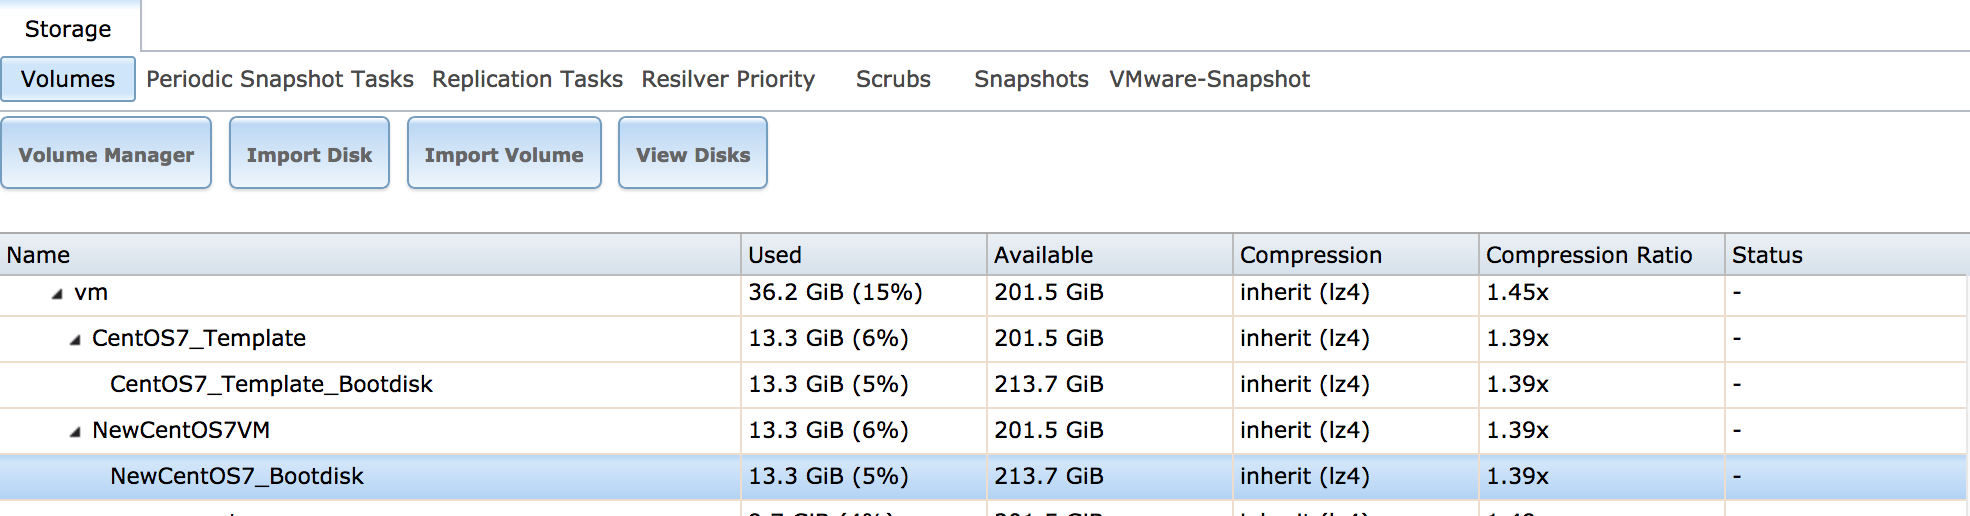
12. Rename the cloned ZVOL to reflect the new VM instance, e g 'NewCentOS7VM_Bootdisk'.
The new cloned ZVOL shown in below picture.
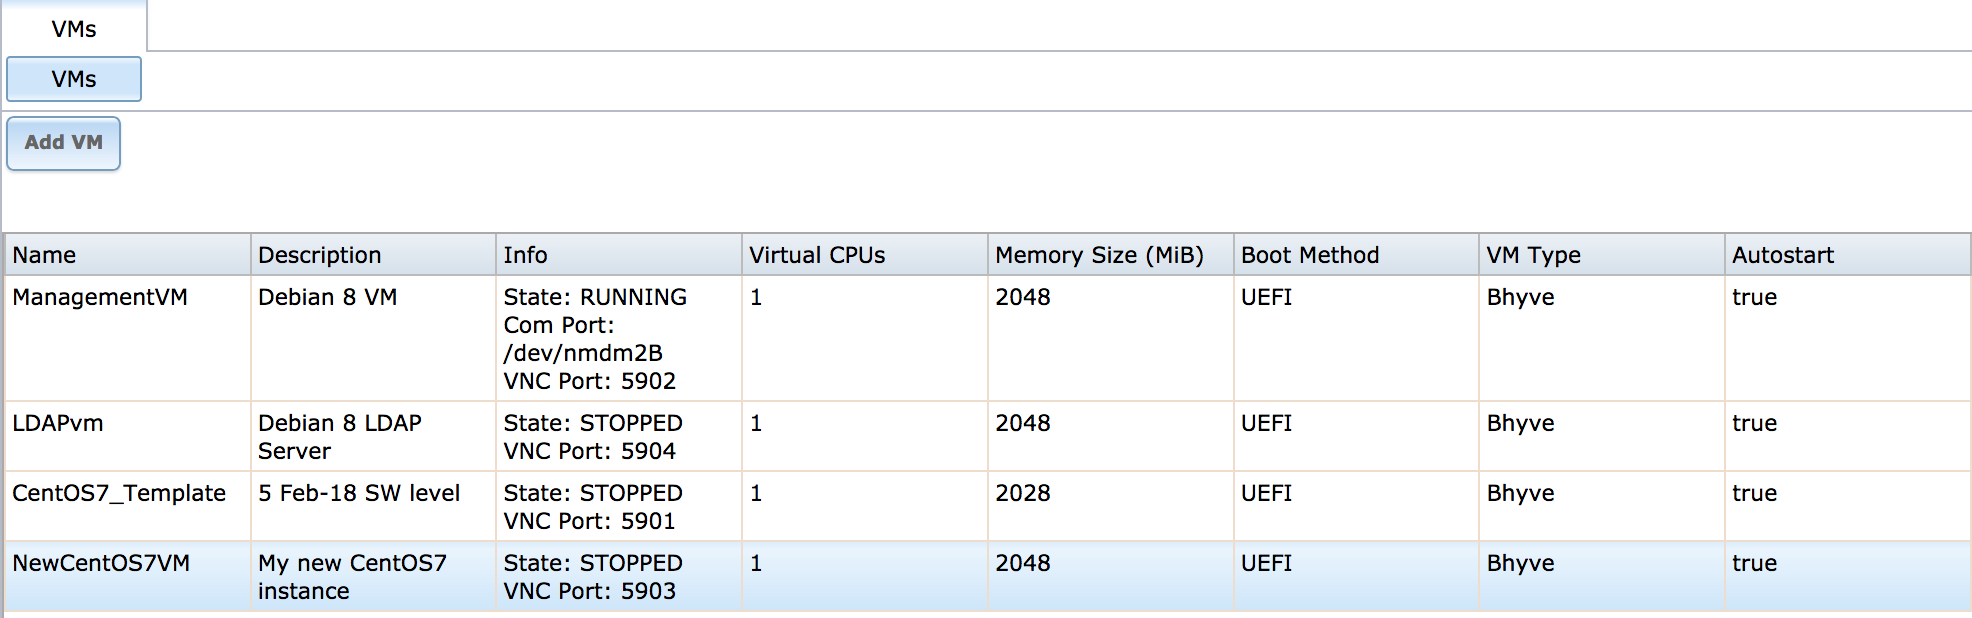
13. Next step is to create the new VM instance. Go to GUI menu 'VMs', and select 'Add VM'. Specify:
OPTIONAL
Depending on your IP configuration, you might have to change MAC address of the new instance's NIC to avoid IP address conflicts. Edit the NIC device to allocate a unique MAC address if required.
15. Start the new VM and log in using VNC.
16. Change the hostname of the new VM instance, e g 'newcentos7vm'.
17. Re-create SSH keys (to ensure they are unique) by deleting the existing ones and restarting SSH service.
18. [CentOS Specific] NetworkManager can loose IP connectivity if it is based on a cloned configuration. UUID and UDEV configurations typically doesn't play nicely after being cloned. If running in headless mode or if eth0 never changes, NetworkManager isn't needed. So let us disabled it and use good old Network package instead, which should work right out-of-the-box.
You might want to add "NM_CONTROLLED=no" in your ifcfg-eth0 file to ensure that in the event NetworkManager is ever activated again, the eth0 device will still operate independently.
19. Stop the new VM instance.
20. Create a snapshot of the new VM instance to facilitate future rollback to initial state. Select 'Storage', and the new instance dataset, and 'Create Snapshot'.
Specify:
Conclusion
The described work-flow supports cloning of VMs and all new instances are recognized by the GUI. Suggestions to improve or simplify the procedure is most welcome.
Best Regards
//Jimmy
The use-case is rather straight forward. Rather than installing BHYVE VM instances from scratch every time, it would be nice to be able to configure once, and then clone to new VM instances every time we make a new deployment.
I spend a few days researching this topic, and testing the new VM clone feature in FreeNAS, but the end result was poor. I found a multitude of questions online regarding BHYVE VM cloning, but no solutions that I could easily apply in a FreeNAS context. The new clone feature did not work for me either. I could clone a VM but the cloned instance didn't want to start. Spent hours trying to figure out a way to troubleshoot BHYVE in FreeNAS but found nothing tangible (where are the BHYVE logs?!#?!).
This prompted me to develop my own work-flow, where I try to leverage the (classic) GUI as much as possible, combined with a few CLI interactions to fill the functional gaps. This method might not be everyone's cup of tea, but hopefully it is easy enough for non-expert users to give it a go.
High Level Work-Flow
- Create a template VM
- Configure it according to your requirements
- Clone the template VM to create new instances
Some users have reported that booting a fresh installation of a CentOS7 guest VM will result failure, and ending up at the UEFI shell instead. This is a known issue and the work-around can be found here.
Method of Procedure
1. Create a new VM template dataset, e g 'CentOS7_Template'
2. Create a new ZVOL inside the dataset to be used as boot drive. Specify:
- Name, e g 'CentOS7_Template_Bootdisk'
- Size, e g 12 GB
3. Create a new template VM, e g 'CentOS7_Template'
4. Select 'Devices' and 'Add Device' and specify:
- VM, e g 'CentOS7_Template'
- Type: 'Disk'
- ZVOL: newly created template, e g 'CentOS7_Template_Bootdisk'
- Mode: 'VirtIO'
6. Next, we will make a snapshot in the event we later want to rollback to the initial install state. Stop the VM. Then go to 'Storage' and select the template dataset, e g 'CentOS7_Template', and 'Create Snapshot'. Specify:
- Recursive Snapshot: Select the box
- Snapshot Name: e g Initial_Install-20180205
7. Log in to your FreeNAS server's command prompt. We will assume using a SUDO enabled account.
8. Locate the template dataset.
 sudo zfs list | grep bigvolume/vm

Password:

bigvolume/vm												36.2G   201G	96K  /mnt/bigvolume/vm

bigvolume/vm/CentOS7_Template							   13.2G   201G	88K  /mnt/bigvolume/vm/CentOS7_Template

bigvolume/vm/CentOS7_Template/CentOS7_Template_Bootdisk	 13.2G   214G  1.06G  -
9. Create a new recursive snapshot of the VM template dataset (we could have used the initial snapshot but this way the same procedure will apply even after the template has been modified/updated).
sudo zfs snapshot -r bigvolume/vm/CentOS7_Template@backup10. Clone the dataset by using zfs send/receive. The new VM instance's dataset is specified on the receiving side, e g 'bigvolume/vm/NewCentOS7VM'
sudo zfs send -R bigvolume/vm/CentOS7_Template@backup | sudo zfs receive -Fv bigvolume/vm/NewCentOS7VM11. Locate the new cloned dataset. Note that the cloned ZVOL still has its original name.
 sudo zfs list | grep bigvolume/vm

Password:

bigvolume/vm												36.2G   201G	88K  /mnt/bigvolume/vm

bigvolume/vm/CentOS7_Template							   13.3G   201G	88K  /mnt/bigvolume/vm/CentOS7_Template

bigvolume/vm/CentOS7_Template/CentOS7_Template_Bootdisk	 13.3G   214G  1.06G  -

bigvolume/vm/NewCentOS7VM								   13.2G   201G	88K  /mnt/bigvolume/vm/NewCentOS7VM

bigvolume/vm/NewCentOS7VM/CentOS7_Template_Bootdisk		 13.2G   214G  1.06G  -
12. Rename the cloned ZVOL to reflect the new VM instance, e g 'NewCentOS7VM_Bootdisk'.
sudo zfs rename bigvolume/vm/NewCentOS7VM/CentOS7_Template_Bootdisk bigvolume/vm/NewCentOS7VM/NewCentOS7_Bootdisk
The new cloned ZVOL shown in below picture.
13. Next step is to create the new VM instance. Go to GUI menu 'VMs', and select 'Add VM'. Specify:
- VM Type: 'Virtual Machine' (Default)
- Name: e g 'NewCentOS7VM'
- Comment: e g 'My new CentOS7 instance'
- Config Virtual CPUs and Memory Size as per your requirements
- Boot Method: UEFI (Default)
- Autostart: Select box
- VM, e g 'NewCentOS7VM'
- Type: 'Disk'
- ZVOL: newly cloned ZVOL, e g 'NewCentOS7VM_Bootdisk'
- Mode: 'VirtIO'
OPTIONAL
Depending on your IP configuration, you might have to change MAC address of the new instance's NIC to avoid IP address conflicts. Edit the NIC device to allocate a unique MAC address if required.
15. Start the new VM and log in using VNC.
16. Change the hostname of the new VM instance, e g 'newcentos7vm'.
hostnamectl set-hostname newcentos7vm17. Re-create SSH keys (to ensure they are unique) by deleting the existing ones and restarting SSH service.
 rm -f /etc/ssh/ssh_host*key*

systemctl restart sshd
18. [CentOS Specific] NetworkManager can loose IP connectivity if it is based on a cloned configuration. UUID and UDEV configurations typically doesn't play nicely after being cloned. If running in headless mode or if eth0 never changes, NetworkManager isn't needed. So let us disabled it and use good old Network package instead, which should work right out-of-the-box.
 chkconfig NetworkManager off

chkconfig network on
You might want to add "NM_CONTROLLED=no" in your ifcfg-eth0 file to ensure that in the event NetworkManager is ever activated again, the eth0 device will still operate independently.
19. Stop the new VM instance.
20. Create a snapshot of the new VM instance to facilitate future rollback to initial state. Select 'Storage', and the new instance dataset, and 'Create Snapshot'.
Specify:
- Recursive Snapshot: Select the box
- Snapshot Name: e g Initial_Install-20180205
Conclusion
The described work-flow supports cloning of VMs and all new instances are recognized by the GUI. Suggestions to improve or simplify the procedure is most welcome.
Best Regards
//Jimmy
Last edited: