- Joined
- May 28, 2011
- Messages
- 10,996
Install the FreeNAS development software
**** NOTE: The repository location has changed since FreeNAS 9.x so these instructions will not work as indicated however they can still be a guide ****
Did you copy your .vmdk file before you started this section?
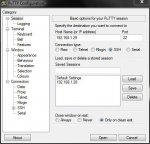
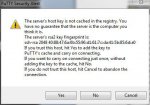
1a) To do all future work we will use SSH via Putty because it is much easier to run from a terminal than the VM directly. You can minimize the VM to get it off the desktop. For my DHCP my IP address is 192.168.1.29, yours will likely be different. You should get a security alert, say Yes.

1b) (Screen Shot 2)

2) Now log on as yourself or Joe in my case. Next type “su” and hit Enter and insert the root password. This will make you root.
3) Time to install required packages. Just copy from here and in the Putty window right click your mouse and it will paste the entire text. The time to add these packages will depend on your internet speed.
4) Type “rehash” and Enter.
5) Type “mkdir /usr/local/freenas” and Enter.
6) Type “reboot” or “shutdown –p now”. The new files installed need to be loaded via rebooting before you can build.
7) If you haven’t heeded my advice to make a back of the VM hard drive file, you need to make a copy here. The VM hard drive file size can get crazy and the easiest way to recover is just restore the VM file .vmdk then continue. To make a copy you need to shut down the VM and then copy the .vmdk. I like to ZIP the file as it’s much smaller.
Building your FreeNAS
1) Log in as super user or root into your SSH terminal (Putty for me).
NOTE: I have created a script listed below which will automate the following steps. You can use the script or do it manually. I do provide the manual method since it demonstrates the steps to build the FreeNAS files.
2) These are the manual commands to download the main trunk files:

3) Actual Build manual steps:
Script
The script should be located in the /usr/local/freenas/ directory. To run it type "cd /usr/local/freenas" and "sh fbuild.sh" for a listing of switches.
Here are the current options:
Useage: sh fbuild.sh [-switch]
-b [-386] = Build, do not update any SVN files.
-bu [-386] = Build, Update BSD Source & Port files.
-buildrev revision [-386] [Server#] = Builds a designated revision of FreeNAS.
-clean [-386]= Delete compiled files (.xz .iso .sha)
-delete = Delete ALL Trunk files.
-deleteobj = Delete both obj.amd64 and obj.i386 directories if they exist.
-deletesvn = Delete all FreeNAS (SVN) source code.
-freebsd = Update FreeBSD and installed ports collection.
-h [-m] = Displays Full Help Info. -m displays one page at a time.
-list = List major build files created.
-loadrev revision [Server#] = Same as -buildrev, loads SVN files, no building.
-s [Server#] = Update SVN Trunk files only - No build.
-sb [-386] [Server#] = Update SVN Trunk files only then build.
-sbu [-386] [Server#] = Update SVN Trunk, BSD Source/Port, and build.
-sha = Create SHA256 hash for all .xz build files.
Building Branches (New Functions)
-brs branch# [-u] = Download branch/update.
Add 'x' after any build option to use local server LOCALCVSUP
-bx or -sbx or -sbux or buildrevx.
-bbu[x] = Build Branch Update: Different build switches from trunk builds.
Note: Default build is 64-bit. Switch -386 Creates 32-bit code.
And example usage would be: sh fbuild.sh -sb
This would download the current trunk and build it.
sh fbuild.sh -s
Just download the main FreeNAS program. This is handy to allow tweaking the code before building it.
sh fbuild.sh -delete
Delete everything so you can start from scratch.
sh fbuild.sh -deleteobj
Handy to remove all compiled data so you can force compiling everything again.
sh fbuild.sh -deletesvn
Maybe you tweaked on something and just want to start from scratch again, but without downloading all the FreeBSD files. This just deletes the base FreeNAS code.
sh fbuild.sh -buildrev 8515
This will build r8515. This is great to build an older revision because sometimes the developers break the software this helps at times when your testing.
sh fbuild.sh -brs 8.0.3
This will build the branch for 8.0.3.
If you setup a local CVSUP or just have an alternate CVSUP you would like to use often, modify the script LOCALCVSUP to your alternate site. I have a small local CVSUP which saves a great deal of time downloading source and ports code. To use this alternate location just append "x" to your build function where specified. Example:
sh fbuild.sh -bx
If you find the script is not working, odds are the developers made another change in how the build process is performed. Toss a message up here and someone will guide you and it will prod me into updating the script.
**** NOTE: The repository location has changed since FreeNAS 9.x so these instructions will not work as indicated however they can still be a guide ****
Did you copy your .vmdk file before you started this section?
1a) To do all future work we will use SSH via Putty because it is much easier to run from a terminal than the VM directly. You can minimize the VM to get it off the desktop. For my DHCP my IP address is 192.168.1.29, yours will likely be different. You should get a security alert, say Yes.

1b) (Screen Shot 2)

2) Now log on as yourself or Joe in my case. Next type “su” and hit Enter and insert the root password. This will make you root.
3) Time to install required packages. Just copy from here and in the Putty window right click your mouse and it will paste the entire text. The time to add these packages will depend on your internet speed.
Code:
pkg_add -r subversion
pkg_add -r cdrtools
pkg_add -r python
5) Type “mkdir /usr/local/freenas” and Enter.
6) Type “reboot” or “shutdown –p now”. The new files installed need to be loaded via rebooting before you can build.
7) If you haven’t heeded my advice to make a back of the VM hard drive file, you need to make a copy here. The VM hard drive file size can get crazy and the easiest way to recover is just restore the VM file .vmdk then continue. To make a copy you need to shut down the VM and then copy the .vmdk. I like to ZIP the file as it’s much smaller.
Building your FreeNAS
1) Log in as super user or root into your SSH terminal (Putty for me).
NOTE: I have created a script listed below which will automate the following steps. You can use the script or do it manually. I do provide the manual method since it demonstrates the steps to build the FreeNAS files.
2) These are the manual commands to download the main trunk files:
a. Type “cd /usr/local/freenas/” and Enter.
b. Type “svn co https://freenas.svn.sourceforge.net/svnroot/freenas/trunk” and Enter. You will get this message and type “p” and Enter.
And a few minutes later you end up with a screen like so which indicates the revision you will be building.3) Actual Build manual steps:
a. Type “cd trunk” and Enter.
b. Type “setenv FREEBSD_CVSUP_HOST cvsup3.freebsd.org” and Enter.
d. Type “sh build/create_iso.sh” and Enter. This is you last thing to build if you want an iso image.
4) Locate your files at “cd /usr/local/freenas/trunk/obj.amd64”. This is where Filezilla comes in handy because you can copy the files directly to your computer (out of the VM).Script
The script should be located in the /usr/local/freenas/ directory. To run it type "cd /usr/local/freenas" and "sh fbuild.sh" for a listing of switches.
Here are the current options:
Useage: sh fbuild.sh [-switch]
-b [-386] = Build, do not update any SVN files.
-bu [-386] = Build, Update BSD Source & Port files.
-buildrev revision [-386] [Server#] = Builds a designated revision of FreeNAS.
-clean [-386]= Delete compiled files (.xz .iso .sha)
-delete = Delete ALL Trunk files.
-deleteobj = Delete both obj.amd64 and obj.i386 directories if they exist.
-deletesvn = Delete all FreeNAS (SVN) source code.
-freebsd = Update FreeBSD and installed ports collection.
-h [-m] = Displays Full Help Info. -m displays one page at a time.
-list = List major build files created.
-loadrev revision [Server#] = Same as -buildrev, loads SVN files, no building.
-s [Server#] = Update SVN Trunk files only - No build.
-sb [-386] [Server#] = Update SVN Trunk files only then build.
-sbu [-386] [Server#] = Update SVN Trunk, BSD Source/Port, and build.
-sha = Create SHA256 hash for all .xz build files.
Building Branches (New Functions)
-brs branch# [-u] = Download branch/update.
Add 'x' after any build option to use local server LOCALCVSUP
-bx or -sbx or -sbux or buildrevx.
-bbu[x] = Build Branch Update: Different build switches from trunk builds.
Note: Default build is 64-bit. Switch -386 Creates 32-bit code.
And example usage would be: sh fbuild.sh -sb
This would download the current trunk and build it.
sh fbuild.sh -s
Just download the main FreeNAS program. This is handy to allow tweaking the code before building it.
sh fbuild.sh -delete
Delete everything so you can start from scratch.
sh fbuild.sh -deleteobj
Handy to remove all compiled data so you can force compiling everything again.
sh fbuild.sh -deletesvn
Maybe you tweaked on something and just want to start from scratch again, but without downloading all the FreeBSD files. This just deletes the base FreeNAS code.
sh fbuild.sh -buildrev 8515
This will build r8515. This is great to build an older revision because sometimes the developers break the software this helps at times when your testing.
sh fbuild.sh -brs 8.0.3
This will build the branch for 8.0.3.
If you setup a local CVSUP or just have an alternate CVSUP you would like to use often, modify the script LOCALCVSUP to your alternate site. I have a small local CVSUP which saves a great deal of time downloading source and ports code. To use this alternate location just append "x" to your build function where specified. Example:
sh fbuild.sh -bx
If you find the script is not working, odds are the developers made another change in how the build process is performed. Toss a message up here and someone will guide you and it will prod me into updating the script.

