CrashPlan FreeNAS Plugin install
Information provided by…..
https://forums.freenas.org/index.php?threads/tested-crashplan-4-5-setup.41418/
https://gist.github.com/desimone/7073074
http://support.code42.com/CrashPlan/4/Configuring/Using_CrashPlan_On_A_Headless_Computer
http://support.code42.com/CrashPlan..._On_A_Headless_Computer#Locations_Of_.ui_info
https://github.com/sirkkalap/freenas-crashplan-howto
https://forums.freenas.org/index.php?threads/crashplan-not-updating.40374/
https://forums.freenas.org/index.php?threads/crashplan-on-freenas-9-3.26487/
Keep in mind that I have never done a how to before. This is my first time. I usually have my own set of notes but I thought this would be handy for other people going through the same struggles that I have.
During the process I am also installing, updating and confirming that things are working on a fresh system that did not have CrashPlan installed. These are the steps I went through to get CrashPlan installed, updated and working.
This is for people that want to backup their local desktop to their FreeNAS server.
I'm sure with this information you should also be able to tell your server to backup to your friends' server(s) by connecting to your FreeNAS CrashPlan plugin and telling it what folders to backup and where.
First install the CrashPlan Plugin via your FreeNAS server Web GUI
Once installed expand the “Plugin” tree on the left and click on “CrashPlan”

This should bring up the Eula agreement. Scroll to the bottom of this agreement (read through it) and click agree if you agree to the terms.
If you do not agree then proceed no further.

Once you have completed these steps then open up a shell to CrashPlan as we are going to need to update it and retrieve information from it.
You can either use Putty (my preference) or click on Jails at the top of the FreeNAS GUI and then select CrashPlan_1 and then click on the shell icon at the bottom of the screen.

Putty.... If you are using the FreeNAS web GUI command prompt (shell) skip to updating....
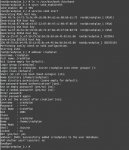
I am going to connect via Putty/SSH to FreeNAS. Once connected to FreeNAS you will need to "jls" in the command prompt to find the JID for the crashplan plugin. In this case it is ID 2...

Updating.....
At the command prompt type;
and hit enter. This will put you at the command prompt of your crashplan plugin
Once in we will run updates...
Code:
portsnap fetch extract
portsnap fetch update && pkg upgrade
Then we will follow the guidelines laid out here...
https://forums.freenas.org/index.php?threads/tested-crashplan-4-5-setup.41418/
From Martin Aspeli
...Install bash:
Code (text):
- $ jexec crashplan_1 /bin/tcsh
Then symlink the bash binary to /bin/bash (this is used by a CrashPlan upgrade script):
Here we need to install Bash.....
Code (text):
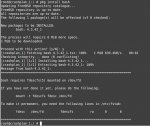
1: $ pkg install bash

Then create a link for bash...
Code (text):
- $ ln -s /usr/bin/bash /bin/bash
We then need to enable SSH in the jail, and create a user that can be used to SSH in.
Code (text):
- $ sysrc sshd_enable=YES
- $ service sshd start
- $ adduser crashplan
The default values are just fine for the crashplan user. Be sure to set a STRONG password for your crashplan user.
If you forget the password or loose it, you can always reset the password by logging into your FreeNAS server, connect to your CrashPlan command prompt and use the command "passwd crashplan" and then enter your new password.
Even though later we will not be using SSH to connect the CrashPlan application to the server, having a SSH user is still handy and does not need to be publicly exposed. I would only use it for local network access.

We're now going to upgrade CrashPlan in-place from the version installed by the FreeNAS plugin, to the same version as the client version. These steps worked for me, but clearly may not work forever with different versions of CrashPlan, so take precaution. If it all goes wrong, you can always blow away the plugin jail and try again.
Code (text):
- $ cd /usr/pbi/crashplan-amd64/share/crashplan
- $ wget --no-check-certificate http://download.code42.com/installs/linux/install/CrashPlan/CrashPlan_4.6.0_Linux.tgz
-
$ tar -xf CrashPlan_4.6.0_Linux.tgz
-
$ cd crashplan-install
-
$ cpio -idv < CrashPlan_4.6.0.cpi
- $ service crashplan onestop
- $ cd ..
- $ rm -r lib*
- $ cp -r crashplan-install/lib* . (DO NOT FORGET THE ".")
- $ sysrc crashplan_enable=YES
- $ service crashplan start
At this point, there should be a file in "/var/lib/crashplan/.ui_info" inside the crashplan_1 jail. You will need values from this, so print it to the console and copy it somewhere safe:
Here's how mine looks (almost...):
Code (text):
- $ cat /var/lib/crashplan/.ui_info
- 4243,(CrashPlan Plugin Key),127.0.0.1
There are three bits of information here, separated by commas: a port (4243), a GUID string (the long middle one), and the IP address where CrashPlan is running.
At this point I edited the file and changed it to (Your Port),(your ID is here, do not change this),0.0.0.0
Use your favorite file editor. Mine is nano so I installed nano.
Code:
pkg install nano
nano /var/lib/crashplan/.ui_info
Note that this file is a bit prone to getting over-written by the CrashPlan GUI, so keep a copy of it in case you need to re-create it.
The key in this file may also change every time the service restarts on either the server or the workstation in question.
We also want to edit /etc/rc.conf and change IPv6 stuff to no unless you are using IPv6. I am not...
and while we're at it, if "Crashplan_enable="YES" is not there then add it to the file. It would look something like this....
Code:
portmap_enable="NO"
sshd_enable="YES"
sendmail_enable="NO"
sendmail_submit_enable="NO"
sendmail_outbound_enable="NO"
sendmail_msp_queue_enable="NO"
devfs_enable="YES"
devfs_system_ruleset="devfsrules_common"
inet6_enable="NO"
ip6addrctl_enable="NO"
crashplan_enable="YES"
You also want to edit the /usr/pbi/crashplan-amd64/share/crashplan/conf/my.service.xml file and change "<serviceHost>127.0.0.1</serviceHost>" to "<serviceHost>0.0.0.0</serviceHost>"
Code:
nano /usr/pbi/crashplan-amd64/share/crashplan/conf/my.service.xml
Before we proceed much further we need to mount where the backups are going to go to the jail.
I will be putting backups in /mnt/Backups within the CrashPlan plugin. This will be mounted to /mnt/Tank/Backups in FreeNAS

At this point, if you want to backup stuff from your server to another location you could mount, say /mnt/Tank/Users (or what ever you want) to /mnt/Outgoing (or what ever you want to name it) but mark this mount point as "Read Only" because there's no reason to write to it if it is being backed up somewhere else. But that is not what I'm doing in this article. I am trying to create a backup point for multiple machines because people just don't seem to like to use network locations for storing data.
At this point, if you don't already have CrashPlan installed on your machine you need to do so.
There are lots of resources on the web for installing CrashPlan on your machine. All you need to do at this point is install it before you can continue on.
I am using Windows in this case so I downloaded and installed CrashPlan.
http://www.code42.com/crashplan/download/
Once installed you will need to either log in with an existing user account or create a new one.
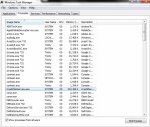
Once installed and logged in you should exit the application and kill the process. You can do this by opening the task managed (in Windows) and go to the processes tab, select "CrashPlanService" and click "End Process". This ensures the application is not running so configuration changes can be made to the application....

Now we need to edit the ui_info file on the your local machine so that YOUR CrashPlan app will connect to the server so you can point where your backups will go and so you can get the friend code of your crashplan plugin.
I am using Windows machines but here are the locations for the file for.....
http://support.code42.com/CrashPlan..._On_A_Headless_Computer#Locations_Of_.ui_info
- Windows Vista, 7, 8, 10, Server 2008, and Server 2012
- Installed for everyone: C:\ProgramData\CrashPlan\.ui_info
To view this hidden folder, open Windows Explorer and paste the path in the address bar.
- Installed per user: C:\Users\<username>\AppData\<Local|Roaming>\CrashPlan\.ui_info
To view this hidden folder, open Windows Explorer and paste the path in the address bar.
- Windows XP
- Installed for everyone: C:\Documents and Settings\All Users\Application Data\CrashPlan\.ui_info
To view this hidden folder, open Windows Explorer and paste the path in the address bar.
- Installed per user: C:\Documents and Settings\<username>\Application Data\CrashPlan\.ui_info
To view this hidden folder, open Windows Explorer and paste the path in the address bar.
- OS X:
- Installed for everyone: /Library/Application Support/CrashPlan/.ui_info
- Installed per user: ~/Library/Application Support/CrashPlan/.ui_info
- Linux: /var/lib/crashplan/.ui_info
- Solaris: /var/lib/crashplan/.ui_info
To see the "ProgramData" folder in Windows you will need to "Show hidden files, folders and drives"
You can do this by going to Organize -> Folder and Search Options -> View tab -> and select the radio button next to "Show hidden files, folders and drives.
Now you need to open the ".ui_info" file.
I personally just open Notepad then drag the file into Notepad

This will give you the port, your key and the IP address that your CrashPlan app works from.
Take note of this as we will need to change it back later.
I personally just right clicked the file, drug it to a empty space and told it to "Copy Here" so that I had a backup copy of the file.
Now we are going to change the port, key and the IP for the app to the port, key and IP of your CrashPlan server plugin. In my case it is 4255,(insert server plugin key here),172.16.0.200

Then save the file and open the CrashPlan application. This is where I had the most trouble. Connecting to the server and/or the application seeing the server at all. On another machine where I was doing the testing I had to actually reboot in order for the machine to even see the server or anything else for that matter on my network. Sometimes the application wouldn't even be able to access the network and would give me a network error.
I ended up giving up at this point and called it a night. I shut my desktop off and went to bed, came back the next day, fired up the application and it was connected to the plugin.
If you start having problems at this point then reboot the desktop and just in case restart the plugin on the server. (This will change your key on the server. You will need to use "cat /var/lib/crashplan/.ui_info" to see the key again)
You can restart the plugins by going to "Jails" in your FreeNAS web GUI, select the CrashPlan plugin and at the bottom of the screen click the yellow circle.
When your desktop/laptop comes back up you may need to edit the .ui_info file again and replace the port, key and IP address with the port, key and IP address of your CrashPlan plugin.
If you successfully connect then the application will ask you to register or to login with an existing user account. If you have an account then login in. If you don't have an account then create a new one.
At this point you need to go to "Settings" and setup your CrashPlan plugin configurations.
Then go to "Destinations" -> "Folders" hit "Select" and select your backup destination. Mine was /mnt/Backups
Once you are satisfied with your configuration of your CrashPlan plugin then go to "Settings" -> "General" and click on "Configure" then click "Change" to change your Backup Code. This is to refresh it. Take note of this code!!
Now you will need to exit the CrashPlan application and go back to the .ui_info file and change it back to it's default. Change it back to what it was before you changed it.
Once changed and/or saved, re-open your CrashPlan app and click on "Destinations" -> "Friends" and enter the backup code of your CrashPlan plugin that you just took note of and click "Start Backup"
You now are backing up to you FreeNAS CrashPlan Plugin. You can now share this code while valid with any other machine/friend that you want to backup to your plugin.
I hope this helps and I hope it wasn't very confusing. It is late and I am tired at the writing of this how to.


