Struggling to create a FreeNAS-11.2 VM in iohyve/bhyve

adrianwi

Guru
Joined
Oct 15, 2013
Messages
1,231
I always liked having a VirtualBox VM running the future releases of FreeNAS, but now I'm on 11.4-U4 I need to try and do that in bhyve.

I had a go using the WUI, but wasn't sure what I was doing, so tried using the CLI where I'd successfully created a ubuntu VM.

Created VM and configured as below:

Code:
iohyve create freenas 8G
iohyve set freenas ram=4G cpu=1 os=freebsd loader=grub-bhyve
iohyve install freenas FreeNAS-11.2-MASTER-201805240453-c9f2aa4.iso


When I come to start it though, I'm just getting a grub> prompt in the console. This is probably something really easy to fix, but I can't seem to find anything online to help.

Thanks!
 

KrisBee

Wizard
Joined
Mar 20, 2017
Messages
1,288
FreeNAS-11.2-MASTER no longer uses GRUB, it now uses the same loader as freebsd which is UEFI aware. Or at least it does if you upgrade a FreeNAs 11.1-U4 to the nightly chain. But I see the download site shows there are GRUB and non-GRUB version, yet your problem is that no GRUB cgf file is being found on the iso you've used.

But really, you'll find it easier/quicker to create VMs using the WebUI. The concept is no different to using Virtualbox, only the mechanics and sequence is changed. The FreeNAS guide is pretty clear.

I tend to start by creating the zvol(s) that act as the VM's disk(s), otherwise the sequence is as per the guide. In the case of a FreeNAS VM you'd want one zvol to act as the disk device you'll install FreeNAS on and a separate zvol for each disk device you intend to attach to the VM to acts as a data drive.

Select UEFI as the boot method when you first create the FreeNAS VM, then add your devices. Add a VNC device and check the "web VNC" box for ease of use.
 
Last edited:

KrisBee

Wizard
Joined
Mar 20, 2017
Messages
1,288
Once again, what I assumed & expected to work in FreeNAS, doesn't.

You can use either the non-grub or grub latest FreeNas 11.2 iso to install freenas via the
Webui using UEFI boot onto a single disk. But post install the VM will not boot successfully if any data disks are attached to the VM.

Looks to be a possible problem with bhyve UEFI firmware, as you can install and run the same lastest FreeNas 11.2 master in UEFI mode under both virtualbox and KVM with all the data disks you want.

I don't have iohyve on my system any longer since moving from FreeNAS 9 to 11. There is a possible third way, which is rather convoluted. This would use bhyve commands at the CLI to install the grub version of the lastest 11.2, but then use UEFI-CSM to boot the VM from the WebUI.
 

KrisBee

Wizard
Joined
Mar 20, 2017
Messages
1,288
OK, forget my "third way" suggestion. It can work to create a linux VM ( and may be other OS) that will boot using UEFI-CSM after install, but not for FreeNAS.

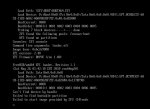
I've even wasted time and bandwidth by first creating a FreeNAs 11.1-U4 VM via the webUI. It will install and boot OK with multiple attached disks (zvols) in UEFI mode. Then changed to the nigthlies and update the working VM. End result is a VM which does not boot in UEFI mode. You're left at the FreeBSD loader shell as per attached screen. This is what happens if you start with either of the latest FreeNAS 11.2 iso.

I don't know my way round the FreeBSD loader, so I called it a day. Did I just do more testing the FreeNAS devs?
 

Attachments

  • FNMASTERVM.jpeg
    FNMASTERVM.jpeg
    57.6 KB · Views: 725

adrianwi

Guru
Joined
Oct 15, 2013
Messages
1,231
Wow, thanks!

I'll try and digest some of that next week and give it another go...
 

adrianwi

Guru
Joined
Oct 15, 2013
Messages
1,231
Patience, you must have patience :D

I gave this another go this morning and reached the same point as you in post #3. Using the WUI I:

  • created the VM
  • attached 1 disk (to use for boot)
  • attached CD and mounted .iso file (the -non-GRUB version wouldn't even install)
This allowed me to install FreeNAS 11.2 and after shutting down and removing the CD device FreeNAS starts and I can access the new WUI. If I shut down and try and add some storage devices (additional zvols I'd created next to the boot one) then FreeNAS won't boot and I just get the same screen you posted in #4

Back to square one?
 

KrisBee

Wizard
Joined
Mar 20, 2017
Messages
1,288
@AdrianWilliamson I have a solution. Apart from the fact I should have mentioned yesterday that when using iohyve you should be using bhyveload and not grub-bhyve as the os loader, there was one option I hadn't tried which combines use of the WebUI and CLI.

First create and install the VM as you have described, but during the install make sure to select a BIOS install and not a UEFI install. It will not boot post install, so this is were you have to switch to the CLI.

To boot a bhyve VM you either need to use a bootloader, such as grub-bhyve or bhyveload or a bootrom. It's the later that is used in the background when you select either UEFI or UEFI-CSM as the boot method for a VM. ( bootrom,/usr/local/share/uefi-firmware/BHYVE_UEFI_CSM.fd or bootrom,/usr/local/share/uefi-firmware/BHYVE_UEFI.fd )

But as we have just created a VM that has been install without UEFI support we have to use "bhyveload" at the CLI. This takes two steps.

Load the FreeBSD kernel with a command like:

bhyveload -m 1024M -d /dev/zvol/NasPool/VM/fnmaster -c /dev/nmdm20A fnmaster &


Then boot the virtual machine with a command like:

bhyve -c 4 -m 1024M -A -H -P \
-s 0:0,hostbridge \
-s 1:0,lpc \
-s 2:0,ahci-hd,/dev/zvol/NasPool/VM/fnmaster \
-s 3:0,ahci-hd,/dev/zvol/NasPool/VM/fndisk1 \
-s 4:0,virtio-net,tap20 \
-l com1,/dev/nmdm20A \
fnmaster


Then switch to a second terminal (screen of tmux makes this easier) and connect to your booting VM with:

cu -l /dev/nmdm20B


You can, if you wish, create and install the freenas VM using the CLI with a command like:
bhyve -c 4 -m 1024M -A -H -P \
-s 0:0,hostbridge \
-s 1:0,lpc \
-s 2:0,ahci-cd,/mnt/NasPool/home/chris/FreeNAS-11.2-MASTER-201805250605-b71c9d0.iso \
-s 3:0,ahci-hd,/dev/zvol/NasPool/VM/fnmaster \
-s 4:0,virtio-net,tap20 \
-s 29,fbuf,tcp=0.0.0.0:5910,w=800,h=600,wait \
-l bootrom,/usr/local/share/uefi-firmware/BHYVE_UEFI.fd \
fnmaster &


The webui is effectively building these command strings in the background, but using top/htop/ps never shows the full command string run by the middleware. You'd connect to this VM with a vnc client pointing to <ip of freenas box>:5910

Apart from explaining the command format in more detail, I should point out a couple of gotchas. As this is for testing, you don't want to upset the functioning of other VM creation and use via the webUI. So the assumption is the FreeNAS VM I've called fnmaster will use device tap20 for its virtual NIC. You have to create this manually and this tap device has to be added to the bridge which is auto created by using/starting other VMs via the webUI and defaults to bridge0. Do this with:


ifconfig tap20 create
ifconfig bridge0 addm tap20


Automating the running of this VM would need scripts in both init and shutdown with some thought given to have to check if device bridge already existed. You may need to check and destroy already runing or failed to boot VMs when testing, use:

ls -la /dev/vmm
bhyvectl --vm=<vm name > --destroy


I have not tested if such a VM is updateable.
 
Last edited:

adrianwi

Guru
Joined
Oct 15, 2013
Messages
1,231
Firstly, thanks again for the detailed reply! It's getting well beyond my FreeNAS capabilities :D

Having a future version of FreeNAS running in a VM is what I'd call a 'nice to have' in that it's helpful seeing what's coming soon, but not essential.

It's a bit frustrating, after upgrading from 9.10.1-U1 (which still ran VirtualBox, even if it wasn't 'supported') to 11.1-U4, that the VM functionality still seems a long way from the simplicity of the VirtualBox jail, which in my experience was rock solid and worked beautifully. I had various Linux distros, FreeNAS and base FreeBSD versions I could fire up to play with, all managed through a very simple WUI. 9.10.1-U1 must be over 12 months old now, and iohyve/bhyve still don't feel like a great replacement.

I'll probably just park it for now, but having the ability to play with future versions of FreeNAS in a VM really should be something people can do relatively simply through the WUI.

Thanks again though!
 

KrisBee

Wizard
Joined
Mar 20, 2017
Messages
1,288
@AdrianWilliamson Considering you've invested in an excellent classic supermicro/xeon server setup, something I don't have the cash for, I understand your frustration with the software. On the plus side you've learnt a little more about creating/using VMs via the FreeNAs 11.1-U4 webUI.

If the all bhyve commands seem a little complex at the moment, then can it all be done using iohyve with a simpler set of commands? The short answer to that is yes!

I put iohyve back on my test system and there seems to be no conflict with using/creating VMs via the WebUI.

Returning to your starting point:
Code:
iohyve create freenas 8G iohyve set freenas ram=4G cpu=1 os=freebsd loader=grub-bhyve iohyve install freenas FreeNAS-11.2-MASTER-201805240453-c9f2aa4.iso


How do you start this installed VM ? Answer, change the loader from grub-bhyve to bhyveload. There are two conditions for this to work:

1. The iso used is not the non-grub variant.
2. "BIOS Boot" is selected while you're installing FreeNas 11.2 in the VM.


In my example, I used iohyve to install FreeNAS 11.2 in a VM called fnmaster. After shutdown I added two data disks and changed the boot loader:

Code:
root@freenas:/ # iohyve add fnmaster 5G
Creating new zvol for fnmaster...
root@freenas:/ # iohyve add fnmaster 5G
Creating new zvol for fnmaster...
root@freenas:/ # iohyve info fnmaster
Guest		   Size  CPU  RAM	Pool	 VMM?  Running  rcboot?
fnmaster		-	 2	1024M  NasPool  YES   NO	   NO
fnmaster/disk0  10G   -	-	  NasPool  -	 -		-
fnmaster/disk1  10G   -	-	  NasPool  -	 -		-
fnmaster/disk2  10G   -	-	  NasPool  -	 -		-

(appears to show wrong disk sizes - they are correct on the storage tab on the UI of the FreeNAS host)

Code:
root@freenas:/ # iohyve set fnmaster loader=bhyveload
root@freenas:/ # iohyve start fnamster


Switch to second screen to view boot messages and console setup menu by connecting to VM with:
iohyve console fnmaster
 

adrianwi

Guru
Joined
Oct 15, 2013
Messages
1,231
AMAZING!

Thanks so much for all your help - I now have a FreeNAS 11.2 VM to play with. Seems to boot fine using bhyveload and I have 2 small disks mirrored in a pool :D

The new UI still doesn't seem to like Safari, but appears to be fine using Chrome. I've created a test user, added a dataset and created a AFP share and all working fine. I might even try to update it...

Thanks again for your help!!!
 

KrisBee

Wizard
Joined
Mar 20, 2017
Messages
1,288
Glad it's sorted and you're up and running ....
 

adrianwi

Guru
Joined
Oct 15, 2013
Messages
1,231
I've just built a new box, with slightly newer specs. running 11.2-U7 and was trying to get this running again.

I'd kind of hoped this would just be simple through the WUI now, but it seems not and I can't get this method to work either.

Surely it's shouldn't be so hard to run a FreeNAS VM on FreeNAS for testing the latest version but not break anything important?

Did anyone manage to do this?

Thanks
 

KrisBee

Wizard
Joined
Mar 20, 2017
Messages
1,288
Which guest OS and what's the problem? Creating a VM via the WebUI in 11.2-U7 ought to be straightforward but bhyve does have limitations. Whether you could/should still use iohyve in 11.2-U7 I couldn't say.
 

adrianwi

Guru
Joined
Oct 15, 2013
Messages
1,231
Sorry, just trying to virtualise FreeNAS 11.3-RC1.

When I try and do what I've done for I've done for other VMs, when it starts, I end up with a small white cursor in the top left-hand corner of the VNC window and no FreeNAS installation screen. I've tried various attempts using your instructions above, not of which seem to work now in 11.2-U7, although I'd got it working using iohyve in 11.1-U4. I'd prefer to see them all listed in the WUI, so not use iohyve.

Thanks
 

KrisBee

Wizard
Joined
Mar 20, 2017
Messages
1,288
I've not made much use of VMs in FreeNAS recently, but if your FreeNAS 11.3-RC1 VM has multiple disks then perhaps the bhyve limitations discussed in this thread still apply. Have you been able to repeat the steps in #6 above with success?
 

KrisBee

Wizard
Joined
Mar 20, 2017
Messages
1,288
OK, I see the problem and there's a simple workaround ... just testing now.

When booting the instal iso:

1 hit space for pause when viewing boot screen via VNC.
2. return to webui and access VM via "serial".
3. complete install and shutdown VM.

now to boot VM

4. remove CDROM device from VM and reboot.


Not tested with any virtual data disks yet.

Edit:

Added two virutal data disk to VM via the webUI using device numbers higher than the virtual OS disk. VM boots OK and all dsk devices are seen inside VM and a pool can be created.
 
Last edited:

adrianwi

Guru
Joined
Oct 15, 2013
Messages
1,231
Superstar! Thanks for fixing this again, and you're right - so simple! I would have never even tried that!!

I only ever add a couple of virtual disks, but it lets me play around with the new stuff without risking my system.

Thank you!
 

KrisBee

Wizard
Joined
Mar 20, 2017
Messages
1,288
No risk? Well, I suppose that's true unless such a VM crashes with unwanted side effects. Looks like there might have been some useful tweaks under the hood wrt to previous FreeNAS version when it comes to assigning multiple disks to a VM. You can see this in the middleware log, eg:

Code:
[2019/12/15 10:09:11] (DEBUG) VMService.run():266 - Starting bhyve: bhyve -A -H -w -c 4 -m 4096 -s 0:0,hostbridge -s 31,lpc -l com1,/dev/nmdm28A -l bootrom,/usr/local/share/uefi-firmware/BHYVE_UEFI.fd -s 29,fbuf,vncserver,tcp=192.168.0.88:5729,w=800,h=600,,wait -s 30,xhci,tablet -s 4,virtio-net,tap0,mac=00:a0:98:4d:89:2f -s 3:0,virtio-blk,/dev/zvol/NasPool/FNtest-36z18n -s 3:1,virtio-blk,/dev/zvol/NasPool/FNtestd1 -s 3:2,virtio-blk,/dev/zvol/NasPool/FNtestd2 28_FNtest


I don't remember seeing multiple disks assigned to a single slot before as in 3:0, 3:1 etc.

You don't have to use a VNC device at all in this case.
 
Top