@AdrianWilliamson I have a solution. Apart from the fact I should have mentioned yesterday that when using iohyve you should be using bhyveload and not grub-bhyve as the os loader, there was one option I hadn't tried which combines use of the WebUI and CLI.
First create and install the VM as you have described, but during the install make sure to select a BIOS install and not a UEFI install. It will not boot post install, so this is were you have to switch to the CLI.
To boot a bhyve VM you either need to use a bootloader, such as grub-bhyve or bhyveload or a bootrom. It's the later that is used in the background when you select either UEFI or UEFI-CSM as the boot method for a VM. ( bootrom,/usr/local/share/uefi-firmware/BHYVE_UEFI_CSM.fd or bootrom,/usr/local/share/uefi-firmware/BHYVE_UEFI.fd )
But as we have just created a VM that has been install without UEFI support we have to use "bhyveload" at the CLI. This takes two steps.
Load the FreeBSD kernel with a command like:
bhyveload -m 1024M -d /dev/zvol/NasPool/VM/fnmaster -c /dev/nmdm20A fnmaster &
Then boot the virtual machine with a command like:
 bhyve -c 4 -m 1024M -A -H -P \

-s 0:0,hostbridge \

-s 1:0,lpc  \

-s 2:0,ahci-hd,/dev/zvol/NasPool/VM/fnmaster \

-s 3:0,ahci-hd,/dev/zvol/NasPool/VM/fndisk1 \

-s 4:0,virtio-net,tap20 \

-l com1,/dev/nmdm20A \

fnmaster
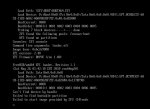
Then switch to a second terminal (screen of tmux makes this easier) and connect to your booting VM with:
cu -l /dev/nmdm20B
You can, if you wish, create and install the freenas VM using the CLI with a command like:
 bhyve -c 4 -m 1024M -A -H -P \

-s 0:0,hostbridge \

-s 1:0,lpc  \

-s 2:0,ahci-cd,/mnt/NasPool/home/chris/FreeNAS-11.2-MASTER-201805250605-b71c9d0.iso \

-s 3:0,ahci-hd,/dev/zvol/NasPool/VM/fnmaster \

-s 4:0,virtio-net,tap20 \

-s 29,fbuf,tcp=0.0.0.0:5910,w=800,h=600,wait \

-l bootrom,/usr/local/share/uefi-firmware/BHYVE_UEFI.fd \

fnmaster &
The webui is effectively building these command strings in the background, but using top/htop/ps never shows the full command string run by the middleware. You'd connect to this VM with a vnc client pointing to <ip of freenas box>:5910
Apart from explaining the command format in more detail, I should point out a couple of gotchas. As this is for testing, you don't want to upset the functioning of other VM creation and use via the webUI. So the assumption is the FreeNAS VM I've called fnmaster will use device tap20 for its virtual NIC. You have to create this manually and this tap device has to be added to the bridge which is auto created by using/starting other VMs via the webUI and defaults to bridge0. Do this with:
ifconfig tap20 create

ifconfig bridge0 addm tap20
Automating the running of this VM would need scripts in both init and shutdown with some thought given to have to check if device bridge already existed. You may need to check and destroy already runing or failed to boot VMs when testing, use:
 ls -la /dev/vmm

bhyvectl --vm=<vm name >  --destroy
I have not tested if such a VM is updateable.