
wr00
Dabbler
- Joined
- Jan 31, 2015
- Messages
- 13
First off, I am by no means an expert of FreeNAS. This was just something that caused me a few problems while setting it up. I noticed a lot of the guides I ran across on Google tended to be confusing.
Somethings I am going to assume:
1.) You know how to operate (generally) a SSH client like Bitvise
2.) You already have access via SSH with a password
3.) You are logged in as root (please, don’t be exposed to the internet)
4.) You have sort of text editor, like nano
5.) This is a fresh install
First thing, login the SSH as root. Once in, type the following command:
From there, it will ask
Just leave this blank and press enter
Next, it is going to ask for a passphrase. You can leave this empty, though I suggest against it.
Ok, great; the keys have been created. Let's jump over to the .ssh directory:
Now we need to open the file containing our private key. I will be using nano:
Copy the key that was located in that file, then head to your FreeNAS GUI. From there, go to Services (at the top), then click configure on the SSH service, click "Advanced Mode" and paste the key you copied in the box for "Host Private Key"
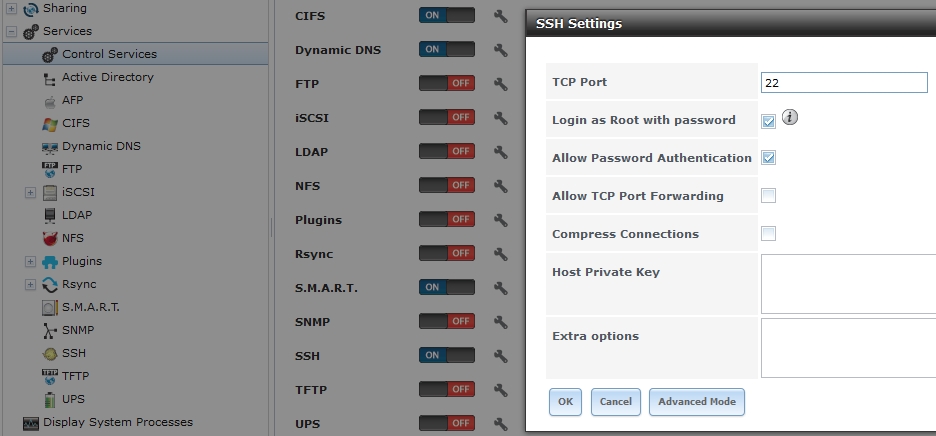
While you're there, I suggest changing the port from the default 22 to something else.
Great, were almost done. Now we need to go back to our SSH client and copy the public key to the authorized_keys file. (assuming you are still in the /.ssh directory)
Finally, delete the id_rsa file if you'd like
And you're done. I would suggest restarting SSH from the server GUI.
If you have any questions, feel free to ask, I'll do my best to answer them.
Somethings I am going to assume:
1.) You know how to operate (generally) a SSH client like Bitvise
2.) You already have access via SSH with a password
3.) You are logged in as root (please, don’t be exposed to the internet)
4.) You have sort of text editor, like nano
5.) This is a fresh install
First thing, login the SSH as root. Once in, type the following command:
Code:
ssh-keygen -t rsa
From there, it will ask
Code:
Enter file in which to save the key (/root/.ssh/id_rsa):
Just leave this blank and press enter
Next, it is going to ask for a passphrase. You can leave this empty, though I suggest against it.
Code:
Enter passphrase (empty for no passphrase):
Enter same passphrase again:
Ok, great; the keys have been created. Let's jump over to the .ssh directory:
Code:
cd ~/.ssh
Now we need to open the file containing our private key. I will be using nano:
Code:
nano id_rsa
Copy the key that was located in that file, then head to your FreeNAS GUI. From there, go to Services (at the top), then click configure on the SSH service, click "Advanced Mode" and paste the key you copied in the box for "Host Private Key"
While you're there, I suggest changing the port from the default 22 to something else.
Great, were almost done. Now we need to go back to our SSH client and copy the public key to the authorized_keys file. (assuming you are still in the /.ssh directory)
Code:
cp id_rsa >> authorized_keys
Finally, delete the id_rsa file if you'd like
Code:
rm id_rsa
And you're done. I would suggest restarting SSH from the server GUI.
If you have any questions, feel free to ask, I'll do my best to answer them.
Last edited: