All,
just wanted to share my setup with everybody ... There have already been multiple threads on the used hardware, so I will not go into that detail. What I use the FreeNAS server for is as a big timecapsule (for 3 macs - one is my media server) and as a backup for files. So nothing spectacular regarding performance etc is needed.
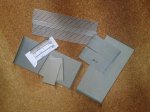
I wanted to share my DIY 19" case ... Since I wanted to put my server into my rack and I didn't find any adequate case I decided to build my own. My requirements were that it should fit on a 19" tray and have a 2U hight. So after designing it I had the sheet metal (1.5mm thickness) cut to size. Here are the parts:
Step 1:
build two cages for three drives each. The space between the drives is around 2mm (similar to backplanes):
Step 2:
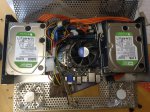
Now attach the two cages to the base and put the board between them. I put the drives on the edge just for balance and symmetry reasons:
Step 3:
Put the lid on ...
the back (yes its all a tight fit):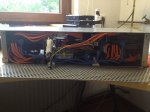
the front (both fans sit in front of the drive cages) :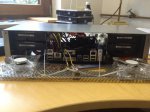
Step 4:
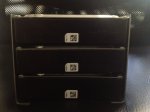
Closed front: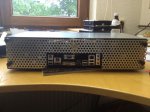
Since the front an the back are metal mesh there is no issue regarding cooling and airflow. Since the case will be in a closed rack dust isn't an issue (thats what I hope).
Step 5:
In action (I like blue lights ....) :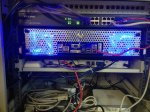
The server has been in action now for 2 days and the drives are running at around a temperature of 35C and the CPU at 45C. So nothing to worry about.
Hope this inspires
Alexander
just wanted to share my setup with everybody ... There have already been multiple threads on the used hardware, so I will not go into that detail. What I use the FreeNAS server for is as a big timecapsule (for 3 macs - one is my media server) and as a backup for files. So nothing spectacular regarding performance etc is needed.
I wanted to share my DIY 19" case ... Since I wanted to put my server into my rack and I didn't find any adequate case I decided to build my own. My requirements were that it should fit on a 19" tray and have a 2U hight. So after designing it I had the sheet metal (1.5mm thickness) cut to size. Here are the parts:

Step 1:
build two cages for three drives each. The space between the drives is around 2mm (similar to backplanes):

Step 2:
Now attach the two cages to the base and put the board between them. I put the drives on the edge just for balance and symmetry reasons:

Step 3:
Put the lid on ...
the back (yes its all a tight fit):

the front (both fans sit in front of the drive cages) :

Step 4:
Closed front:

Since the front an the back are metal mesh there is no issue regarding cooling and airflow. Since the case will be in a closed rack dust isn't an issue (thats what I hope).
Step 5:
In action (I like blue lights ....) :

The server has been in action now for 2 days and the drives are running at around a temperature of 35C and the CPU at 45C. So nothing to worry about.
Hope this inspires
Alexander
