TrueNAS Virtualized with ESXi

This article describes deploying a TrueNAS virtual machine (VM) in a VMWare ESXi environment. ESXi version 8 is shown in this article.

Before You Begin

Before starting configuration work in VMWare:

  • Allocate a drive or a few drives in your server cluster for the TrueNAS virtual machine. The anticipated storage needs for your deployment determines the size and number of drives you need.

  • Download the .iso file from the TrueNAS.com downloads page.

  • Visit the TrueNAS hardware guide and take note of the minimum system requirements. Note the information in the Memory and Storage Device Sizing sections.

    The hardware guide provides guidance on how much memory, the number of CPUs, and drive size you need to configure.

  • Determine your data storage requirements. Consider the number of storage pools and the type of storage you need for your deployment or how you plan to use the TrueNAS. See Setting Up Storage for information on pool layouts.

    Determine the number of virtual hard drives (vmdks) you want to create when setting up your virtual machine. For example, if you want a mirror layout you need to add a minimum of three drives, one for the boot drive and two for the mirrored storage. If you want a mirror with a hot spare, you need to add a minimum of four drives, one for the boot drive, two for the mirrored storage and one for the hot spare.

  • Configure your network per your system requirements. Have the information ready when you configure your TrueNAS global network settings in the web interface.

Deploying TrueNAS in VMWare ESXi

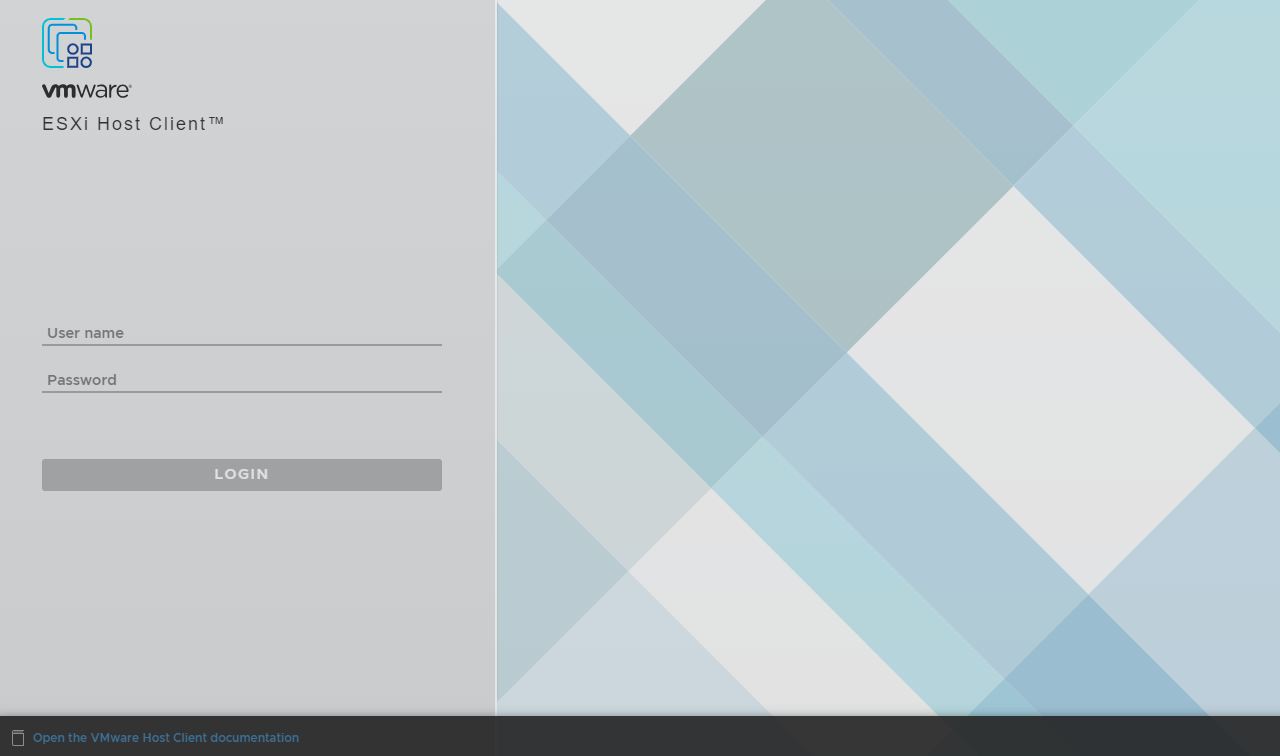
Launch your VMware ESXi interface using your login credentials.

VMWare ESXi Login Screen
Figure 1: VMWare ESXi Login Screen

Setting Up Storage

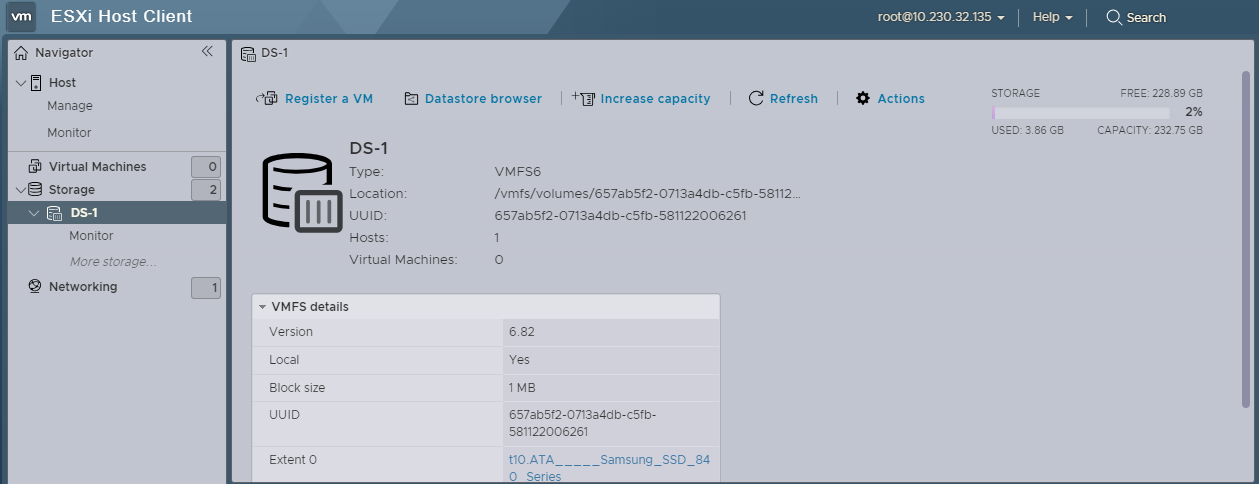
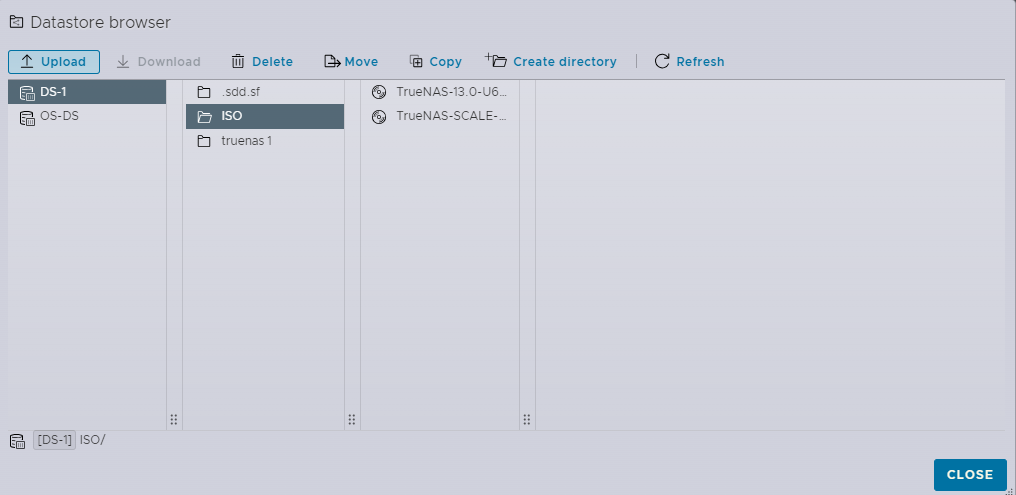
Set up the storage needed for the new VM. First click on Storage and then the drive allocated for TrueNAS. Create the datastore directories for the ISO media and the TrueNAS virtual machine.

Need more help setting up storage? Click here.
  1. Select Storage on the navigation panel on the left side of the screen.

  2. Select the drive you allocated for the TrueNAS VM. The example uses DS-1. The detailed view for this drive displays.

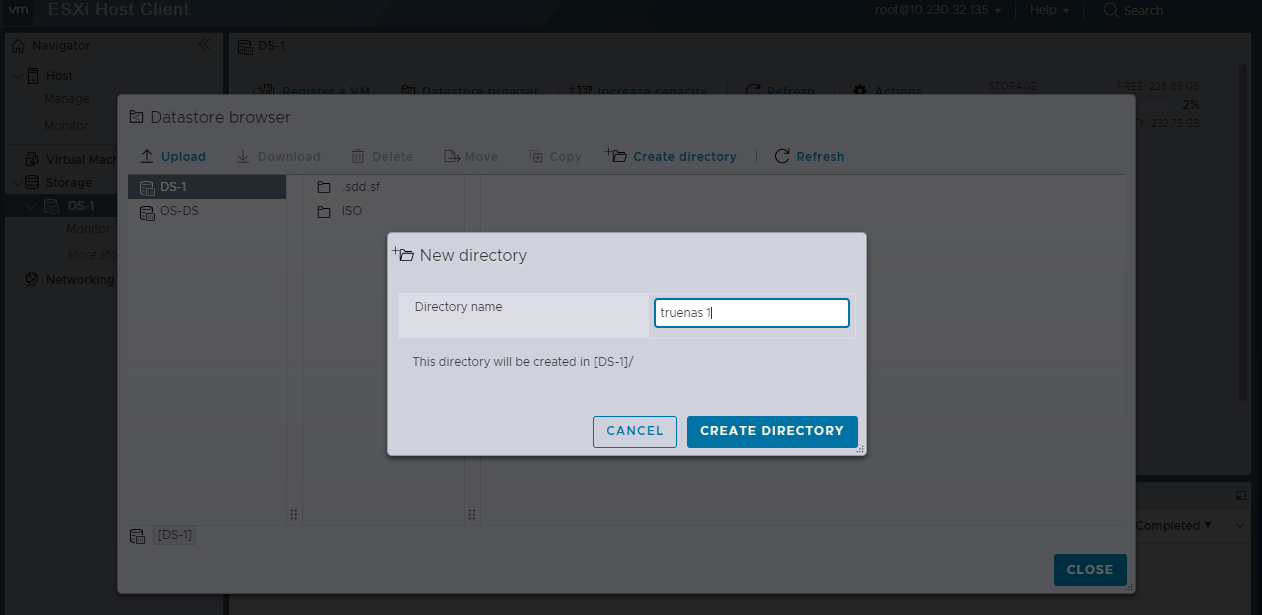
  3. Click Datastore Browser to open the browser window, and then click Create directory. Enter the name of the directory in the New Directory dialog.

    Add two directories. The first directory is for TrueNAS storage needs the other for the TrueNAS .iso file you downloaded. Choose a name that is easy to identify on a list of virtual machines. The example uses truenas 1 as the directory name for the storage needs. Click Create directory in the New directory dialog to create the directory.

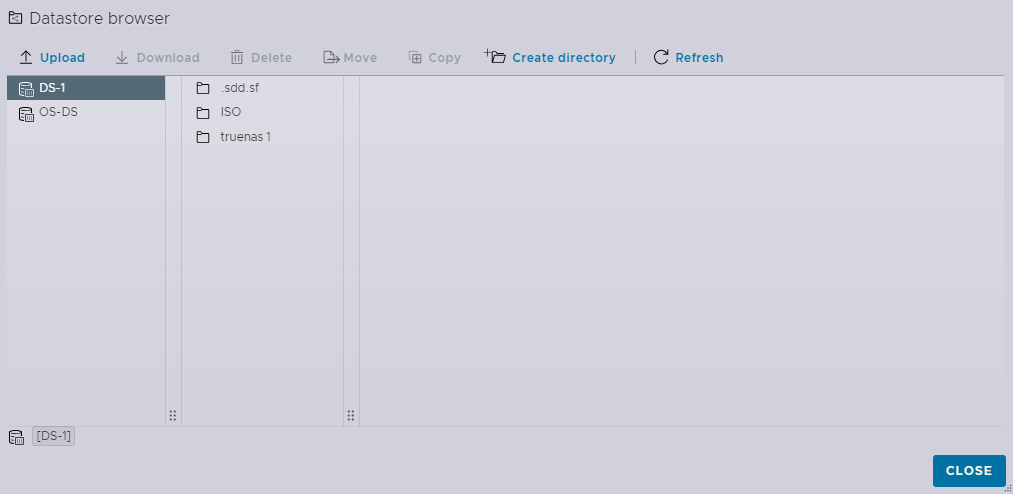
    Click Create directory again to open the New directory dialog to create the second new directory. When finished you should have both directories listed in the Datastore Browser window.

Uploading the TrueNAS ISO

After creating the ISO directory, upload the TrueNAS .iso file to the ISO directory.

Select the directory created for the .iso file and then click Upload.

Upload TrueNAS ISO File
Figure 6: Upload TrueNAS ISO File

Creating the Virtual Machine

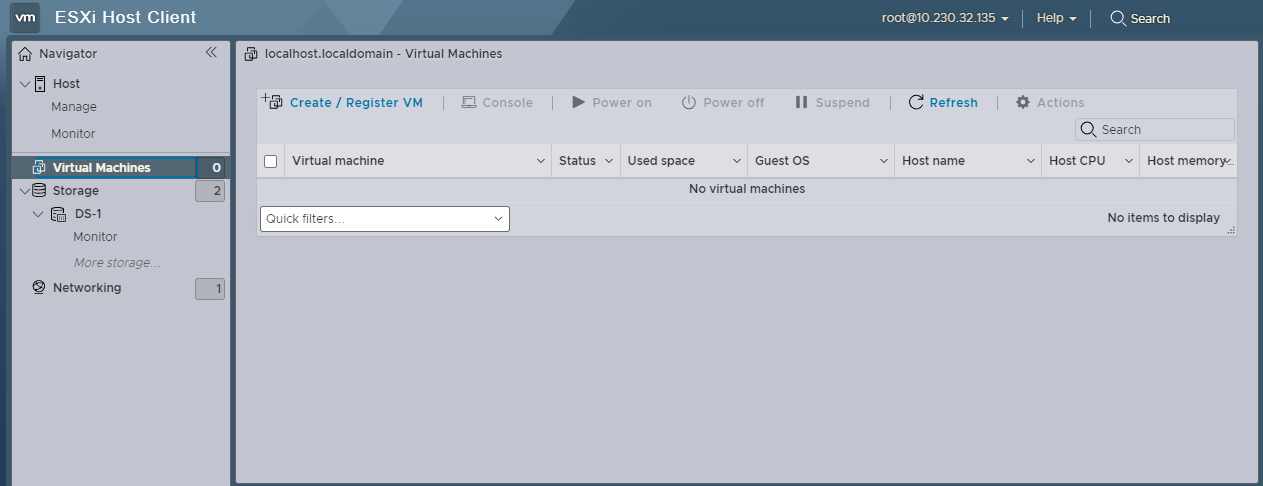
After setting up the storage needs, create the new virtual machine. Select Virtual Machines on the navigation panel on the left side of the screen.

Virtual Machines Screen
Figure 7: Virtual Machines Screen

Select the storage drive for the TrueNAS VM and then click Create/Register VM. The New virtual machine creation wizard displays. Use these settings:

  • On the Select a name and guest OS wizard screen, select Linux for Guest OS family and then Debian GNU/Linux 6 (64-bit) on the Guest OS Version dropdown list.

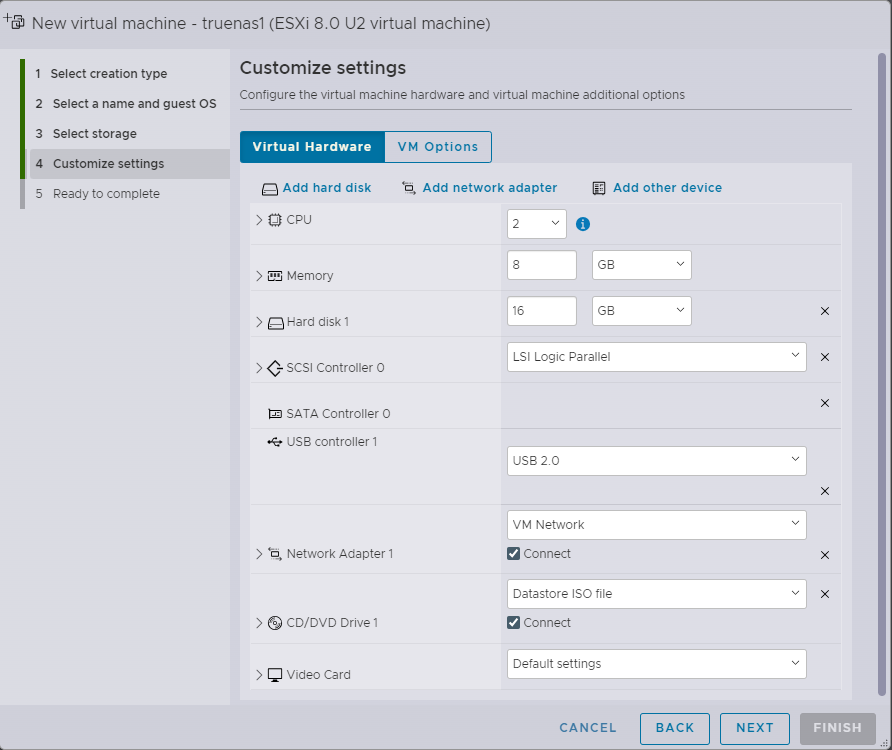
  • On the Customize settings wizard screen set CPU to 2, set Memory to 16 GB, and Hard disk 1 to 16 GB.

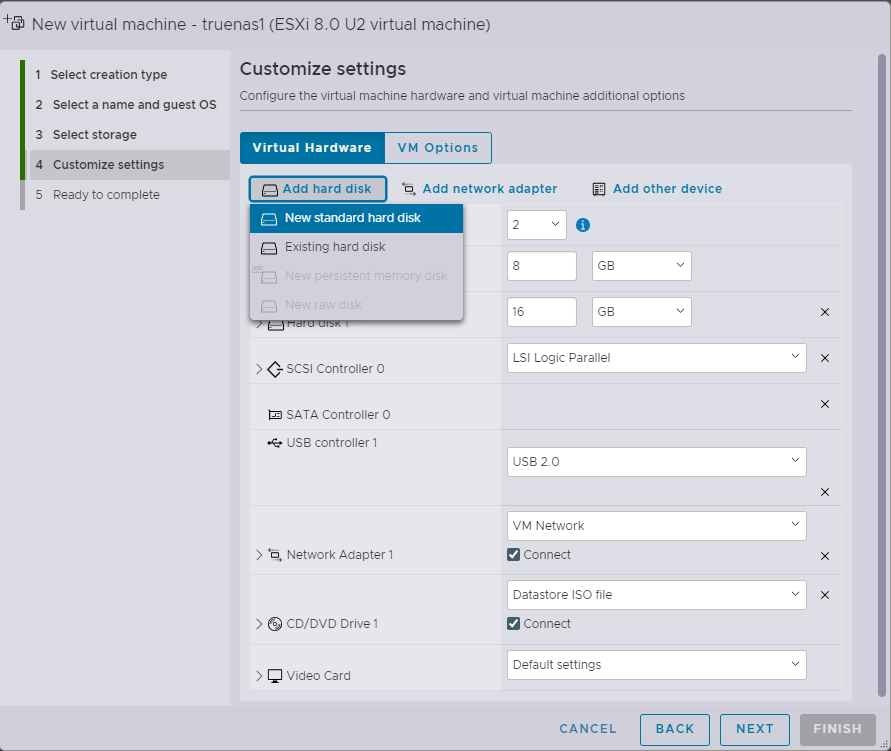
    You need a minimum of two drives set to at least 16 GB. To add a drive, click Add hard disk.

    You can add more hard drive now or use the Edit option to add drives later after saving the new virtual machine. To create a mirror layout you need at least three hard drives, one for boot and two to create the mirrored storage. Add as many hard drives as you need to create your desired storage layout. You can add more drives later after you install TrueNAS.

Need more help using the ESXi VM Wizard? Click here.

To create the virtual machine for your TrueNAS, from the Virtual Machines screen:

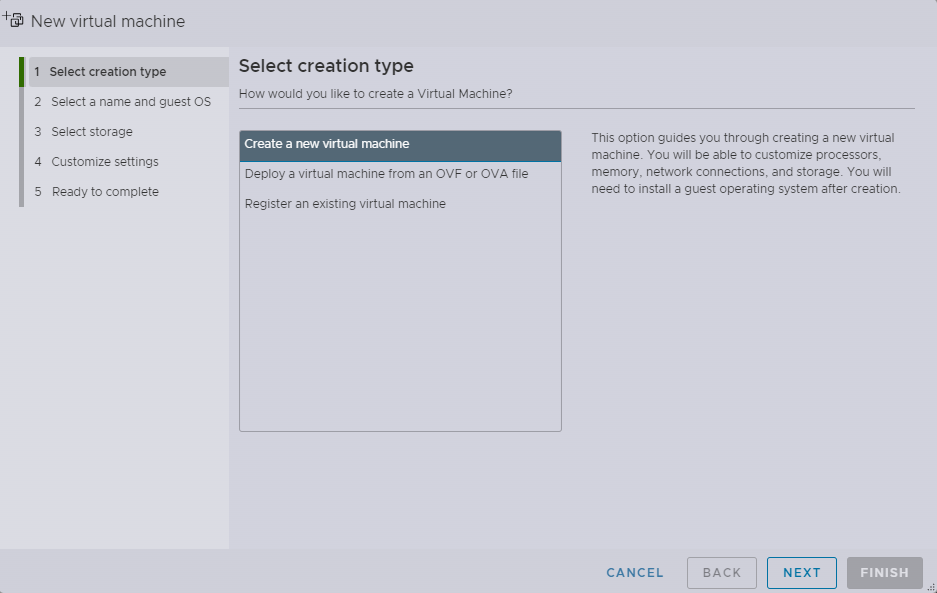
  1. Click Create/Register VM to display the configuration wizard. On the Select creation type screen select Create a new virtual machine and then click Next.

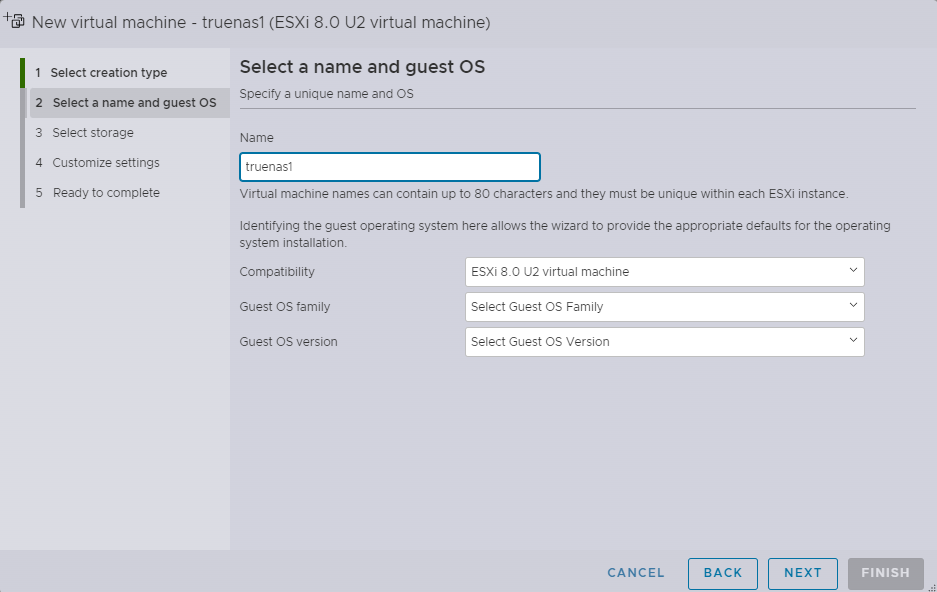
  2. Configure the VM name and guest OS settings. Type the name for the TrueNAS VM. Use the name you gave the new directory. The example uses truenas1.

    Select Linux for Guest OS family and then Debian GNU/Linux 6 (64-bit) on the Guest OS Version dropdown list.

    Click Next

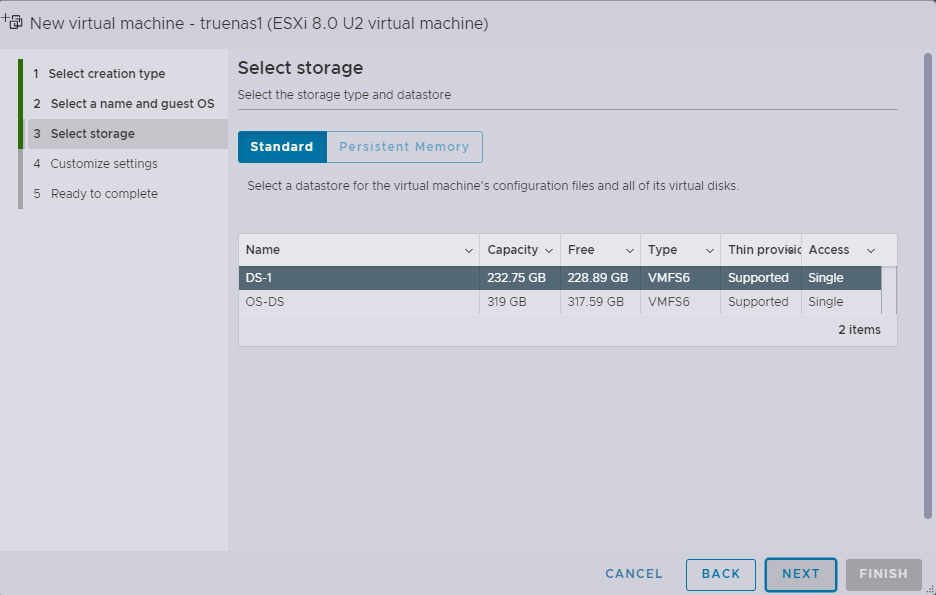
  3. Select the storage drive you allocated for the TrueNAS VM. The example uses DS-1. Click Next

  4. Enter these settings in the Customize settings screen.

    SettingValue Description
    CPU2
    Memory8 GB
    Hard disk 116 GB. This first disk is the boot disk.
    CD/DVD Drive 1Select Datastore ISO file from the dropdown list of options.
    1. Add the second required disk. Click Add hard disk and select either New standard hard disk or Existing hard disk to add a second hard drive.

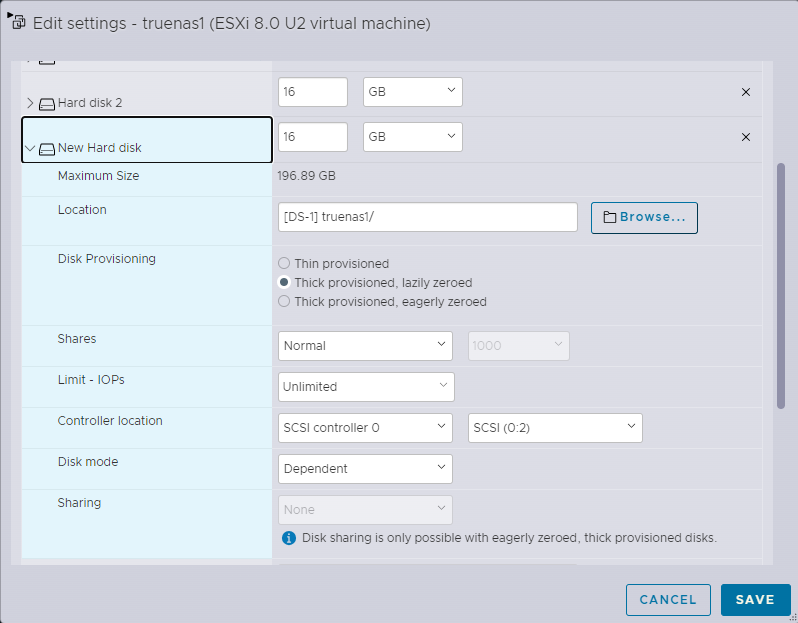
      In the New Hard disk row set the disk to 16 GB at a minimum.

      Click on the New Hard disk row to expand it. If the Location field does not display the drive and directory you created for TrueNAS, click Browse to open the Select directory window and select the directory for your TrueNAS deployment. Click on Select to change the location and close the Select directory window and return to the VM wizard screen.

      Change any other disk drive settings you want or need to change for your hard disk drive hardware.

      If needed, click Add hard disk again to add more hard drives if you want to equip your VM with more than the minimum required number of drives.

      In order to prevent potential errors when importing your pool, a custom parameter should be set to allow VMware to provide serial numbers for virtual hard disks. Click on the VM Options tab, and then click on Advanced to expand this section. Next to the Configuration Parameters section, click on Edit Configuration. Click Add parameter. In the Key column, enter disk.EnableUUID and enter TRUE in the Value column. Click OK.

      Click Next to finish creating the VM. You can use the Edit option later to add more drives to support your TrueNAS deployment.

      Each storage layout has different disk minimum disk requirements. See Setting Up Storage for information on pool layouts.

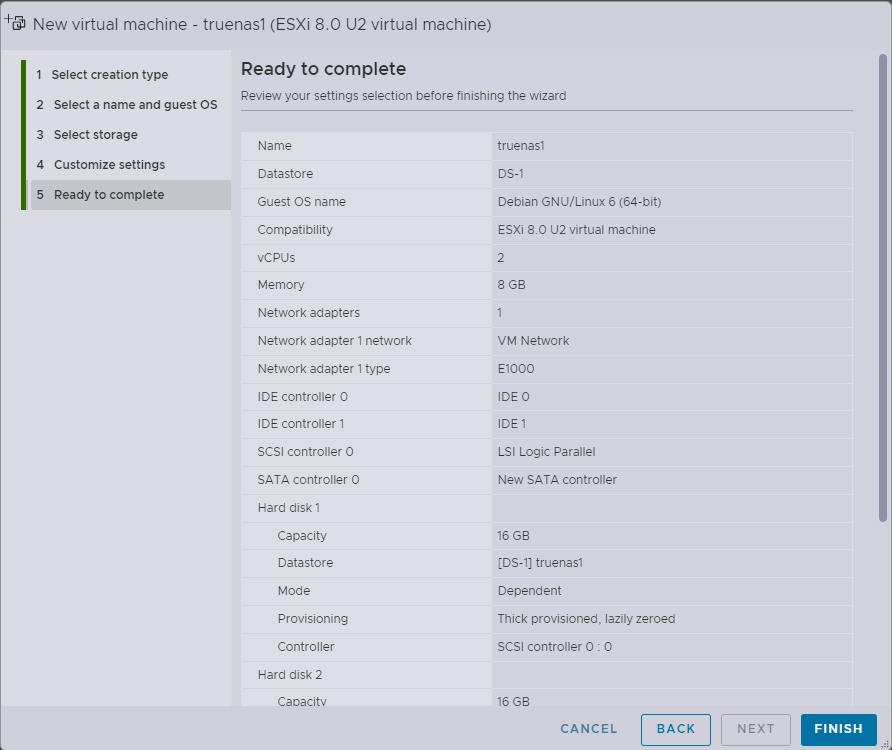
    2. Review the Ready to Complete screen to verify the settings are correct for your deployment.

      Click Finish. The new TrueNAS VM displays on the list of virtual machines.

Reviewing the New TrueNAS VM

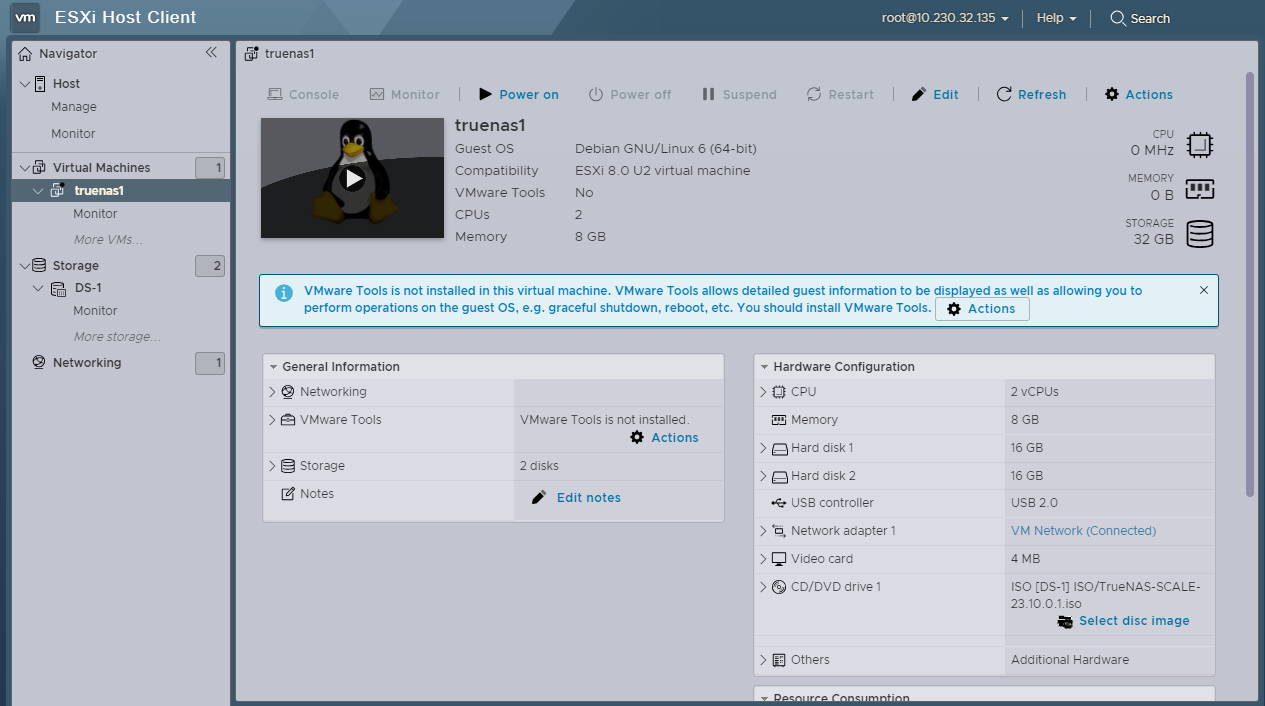
To view the VM details screen click on the VM name.

TrueNAS VM Details
Figure 15: TrueNAS VM Details

You can now edit your TrueNAS VM to change any setting or add more hard drives to support your deployment, or you can proceed to installing TrueNAS.

Installing TrueNAS

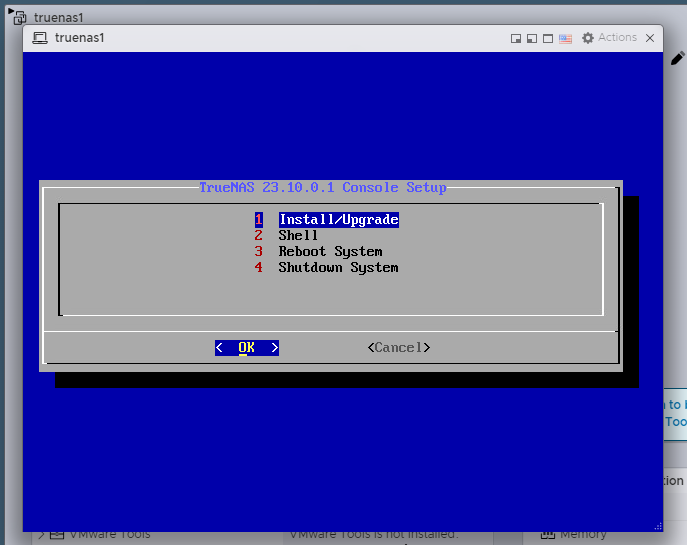
Click Power on and then click Console to display the dropdown list of console options. When the console opens, it displays the TrueNAS Console Setup screen.

TrueNAS Console Setup
Figure 16: TrueNAS Console Setup

Follow the installation instructions to complete the installation of TrueNAS.

Editing the Virtual Machine

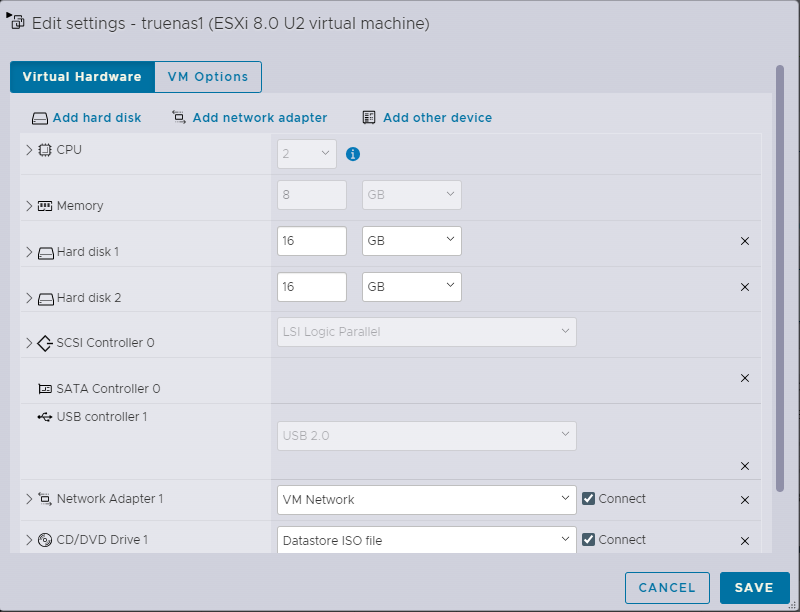
You can edit your VM settings after you complete the initial setup. You can add new hard drives to your VM using the edit option found on the VM details screen. Click Edit to display the Editing Settings screen.

TrueNAS VM Details
Figure 17: TrueNAS VM Details

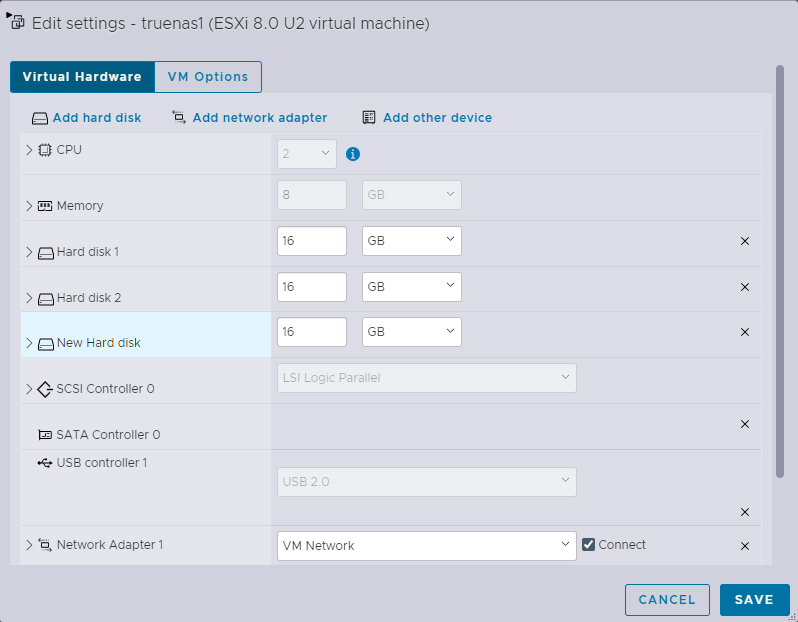
Click Add hard disk and select the option you want to use. For a new drive select New standard hard disk. A New Hard disk row displays and is highlighted.

New Hard Disk Row
Figure 18: New Hard Disk Row

To edit the hard disk details click on the row to expand it and display the drive settings you can configure.

New Hard Disk Settings
Figure 19: New Hard Disk Settings