




TrueNAS Development Documentation
This content follows experimental development changes in TrueNAS 28, a future version of TrueNAS.
Use the Product and Version selectors above to view content specific to a stable software release.
Advanced Settings Screen
24 minute read.
Advanced settings have reasonable defaults in place. A warning message displays for some settings advising of the dangers of making changes. Changing advanced settings can be dangerous when done incorrectly. Use caution before saving changes.
Make sure you are comfortable with ZFS, Linux, and system configuration, backup, and restoration before making any changes.
The Advanced Settings screen provides configuration options for the console, syslog, audit, kernel, sysctl, storage (system dataset pool), replication, WebSocket sessions, cron jobs, init/shutdown scripts, NTP servers, allowed IP addresses, isolated GPU device(s), self-encrypting drives, and global two-factor authentication.
You can download or upload your system configuration files from this screen.
The TrueNAS UI has several fields that allow users to write custom scripts. When a user writes a password into a custom script, the password is provided in cleartext form within system debug files, creating a serious security concern.
We do not recommend using custom scripting on TrueNAS, as it is a highly advanced feature for expert storage administrators and can lead to security breaches.
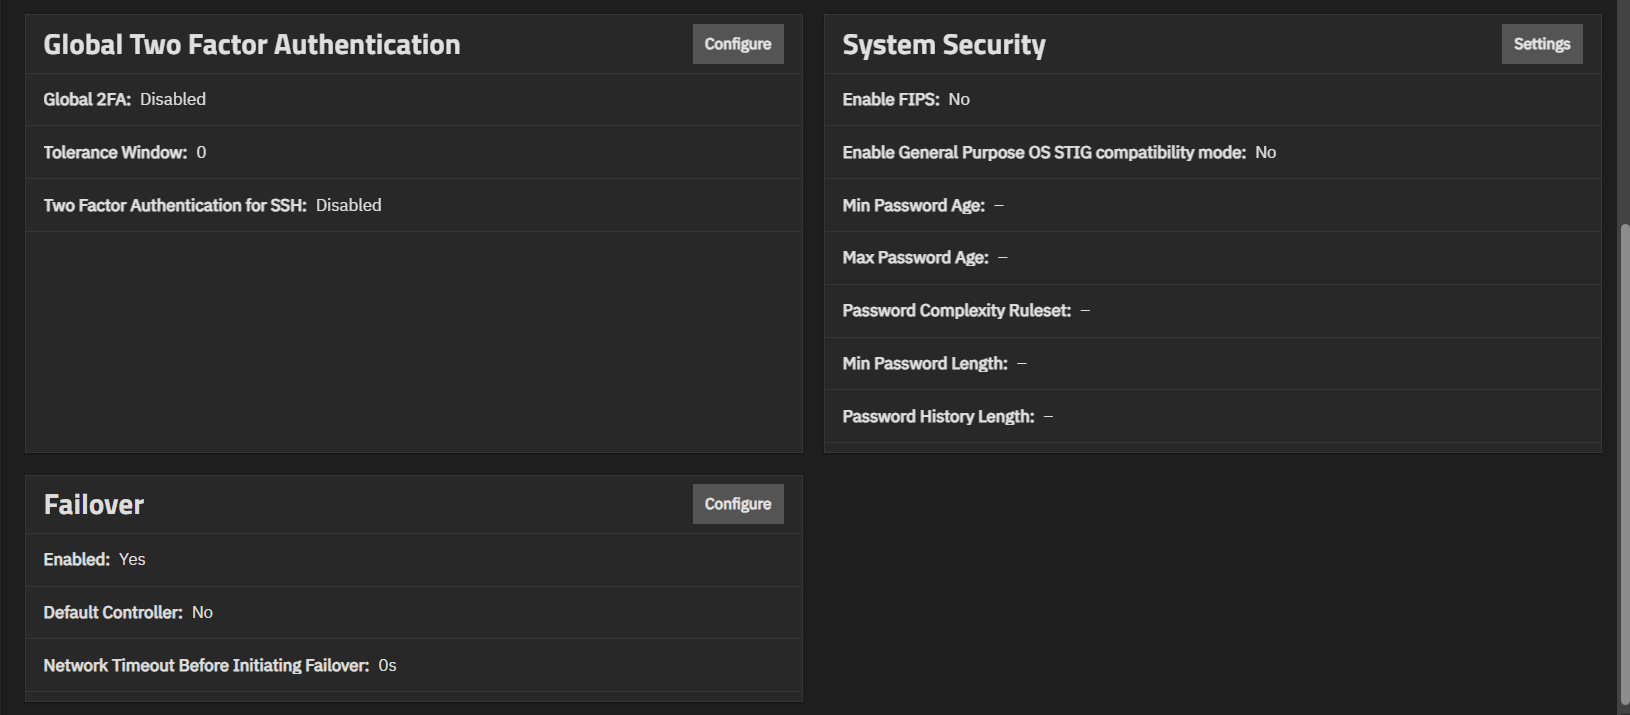
Enterprise-licensed systems include configuration options for STIG and FIPS security, and failover when the system is a High Availability system.
The Manage Configuration dropdown shows two options: one to download the system config file and the other to upload a system config file. The option to reset system settings to the default configuration shows after uploading a configuration file.
Download File opens the Save Configuration dialog, where users can download the current system configuration to their local machine.
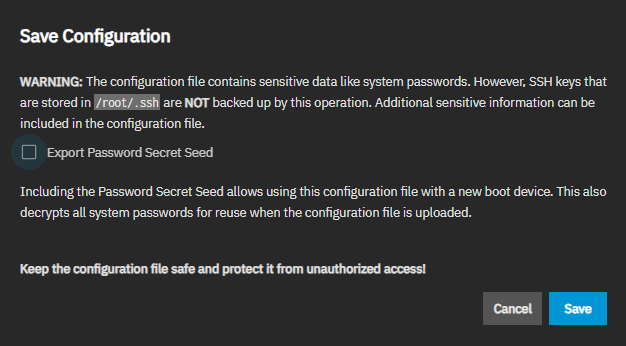
The Export Password Secret Seed option is selected by default. It stores hashes of the passwords sufficient for authentication in the system, but does not store user passwords. The secret seed is used to decrypt encrypted fields in the TrueNAS configuration database. Various fields are encrypted because they might contain sensitive information such as cryptographic certificates, passwords (not user login passwords), or weak hashing algorithms (for example, NT hashes of SMB users). When a config file is restored without the secret seed, encrypted fields are set to empty values. This means various services can be broken due to the missing information. Examples are SMB via local accounts and apps.
The Upload File option opens the Upload Config dialog, which allows users to choose a previously saved TrueNAS configuration to replace the current system configuration. This is useful when restoring system configuration settings after a clean install of a TrueNAS release.
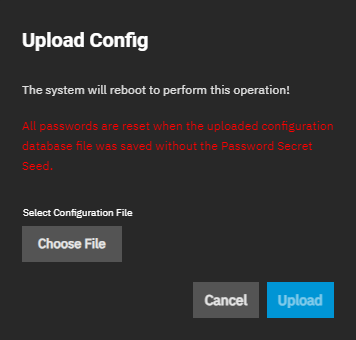
Choose File opens a file browser window to locate the downloaded and saved configuration file. After selecting the file, the Upload Config window opens. Upload starts the upload of the selected configuration file.
All passwords are reset if the uploaded configuration file was saved without Export Password Secret Seed enabled.
The Reset to Defaults option opens the Reset Configuration dialog. Using Resetting to Defaults returns the system configuration to factory settings and restarts the system. Users must set a new login password.
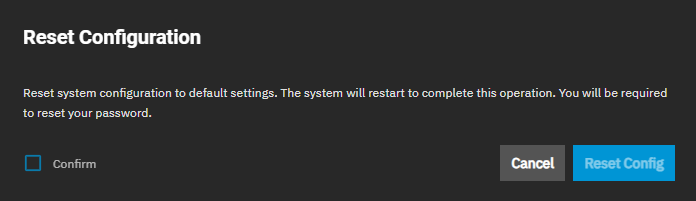
Save the current system configuration with the Download File option before resetting the configuration to default settings.
Not saving the system configuration before resetting it can result in losing data that is not backed up and losing the ability to revert to the previous configuration.
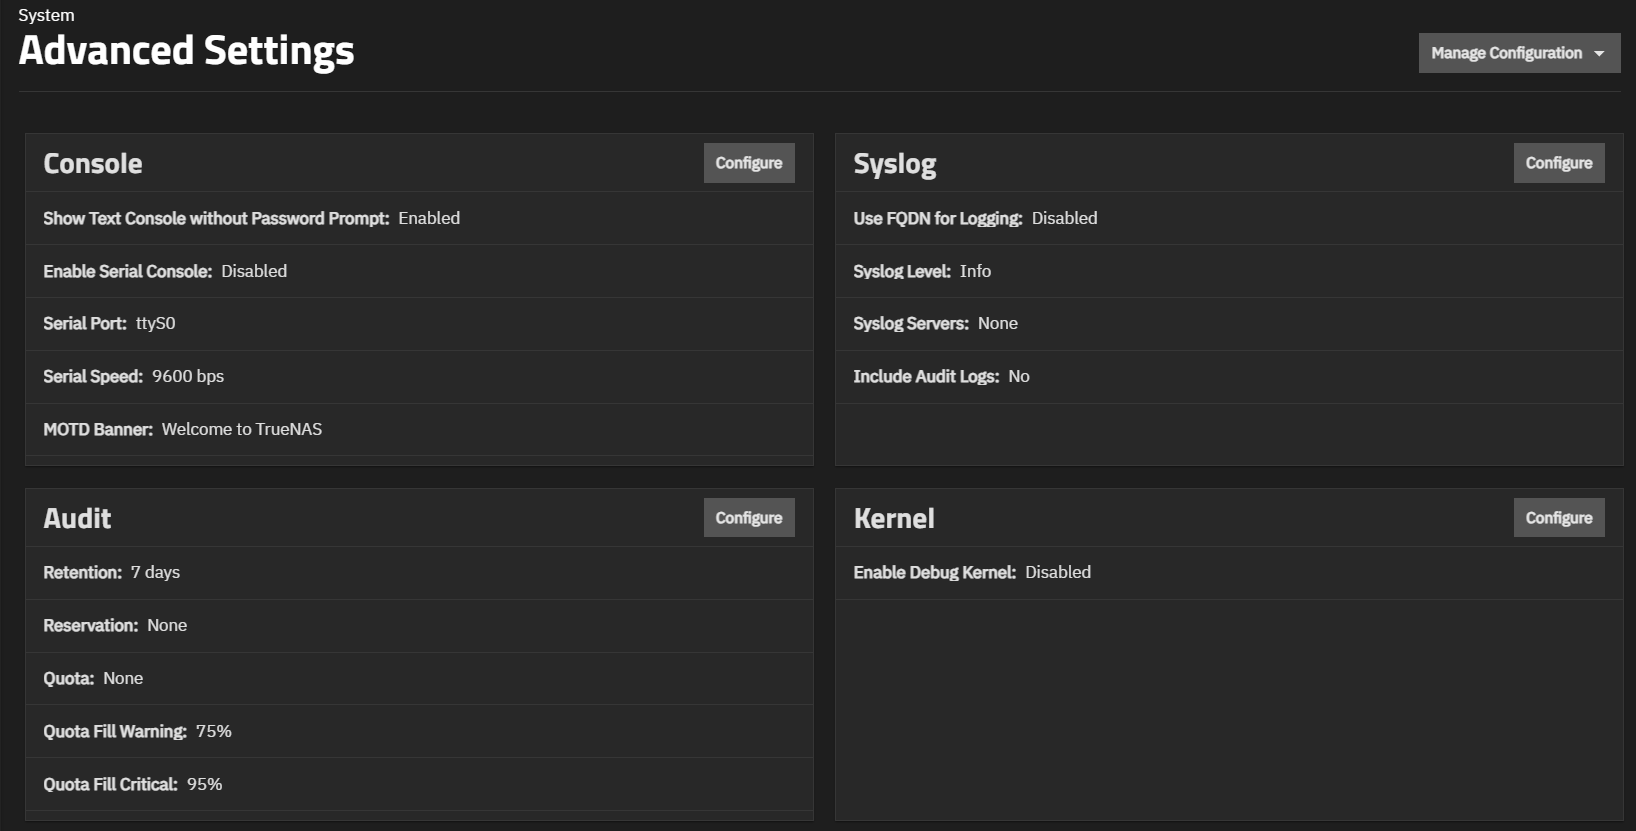
The Console card shows the current console settings for TrueNAS, which cover setting a password prompt for the text console, enabling/disabling the serial console, the current serial port number and speed, and any banner text entered in the MOTD Banner field.
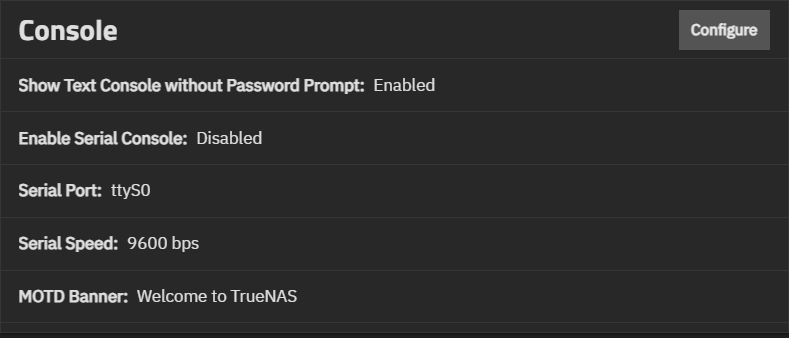
Configure opens the Console configuration screen.
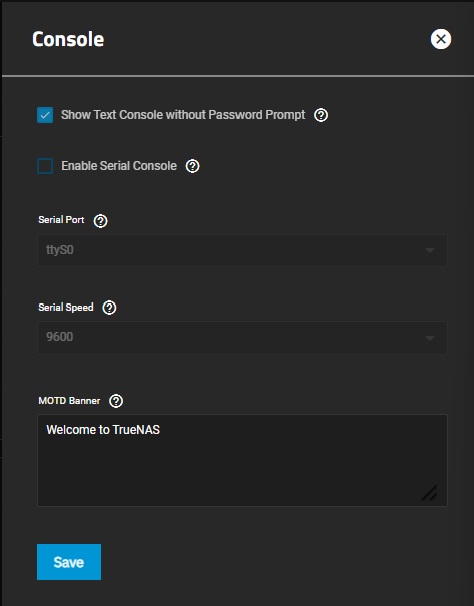
Console settings configure how the Console Setup menu displays, the serial port it uses and the port speed, and the banner users see when accessing it.
The Syslog card displays the existing system logging settings that specify how and when the system sends log messages to system log (syslog) servers. TrueNAS allows configuring an array of two syslog servers. Each server can have its own host, transport, and TSL certificate setting.
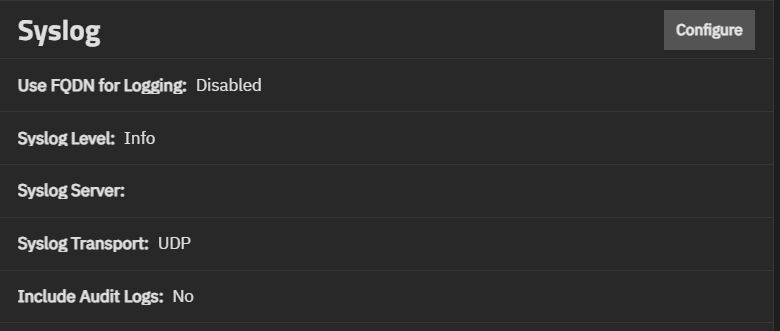
Configure opens the Syslog configuration screen.
The Syslog settings specify the logging level the system uses to record system events to the boot device. Sets whether to use a fully qualified domain name (FQDN) for logging and if audit logs are included. There is also an option to configure a remote syslog server for recording system events.
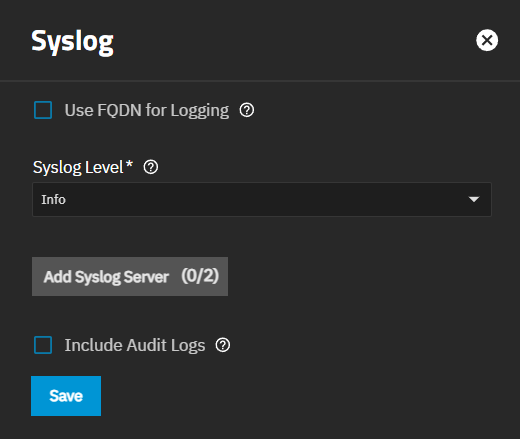
Add Syslog Server (0/1) shows syslog server setting that allow entering the remote syslog server DNS hostname or IP address and setting the transport protocol.
Remove Server in the block of syslog server settings removes the configured syslog server.
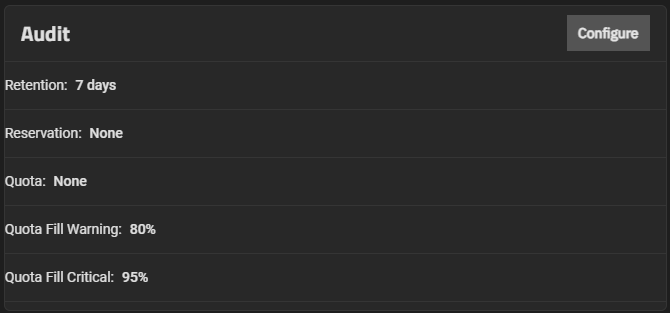
The Audit card displays the current audit storage and retention policy settings. The public-facing TrueNAS API allows querying audit records, exporting audit reports, and configuring audit dataset settings and retention periods.
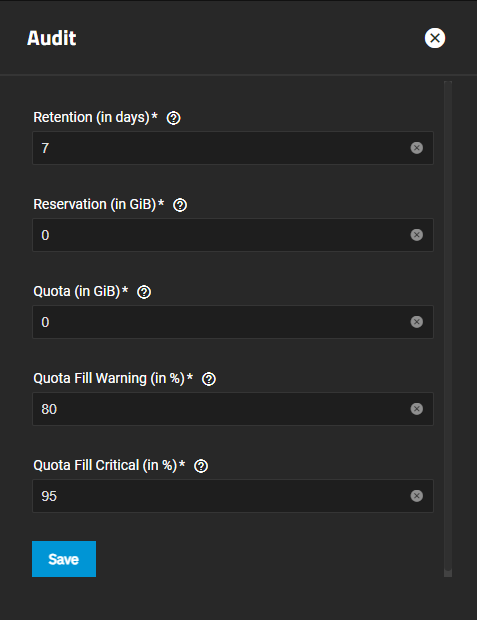
The Audit configuration screen sets the retention period, reservation size, quota size and percentage of used space in the audit dataset that triggers warning and critical alerts.
Click Configure to open the Audit configuration screen and manage storage and retention policies
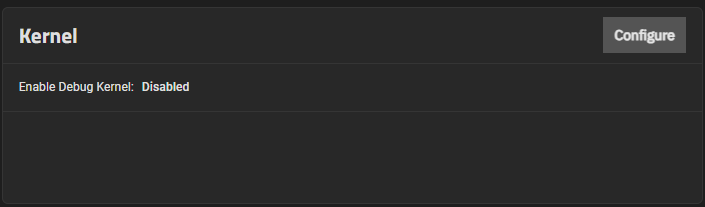
The Kernel card shows options for configuring the Linux kernel installed with TrueNAS.
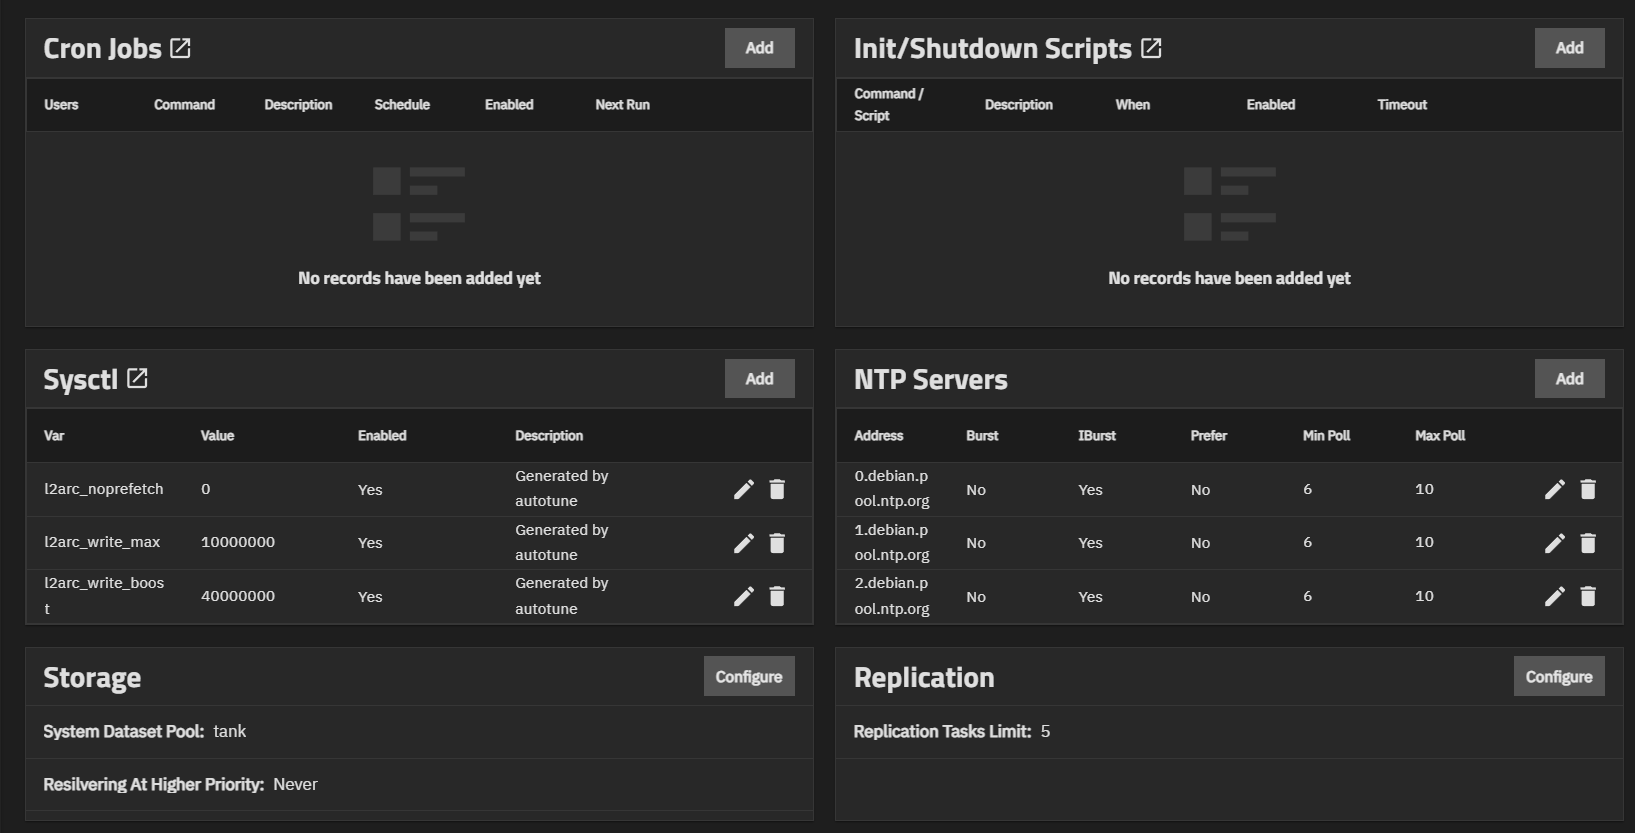
The Cron Jobs card displays No Cron Jobs configured until you add a cron job, and then it shows the information on the cron job(s) configured on the system.
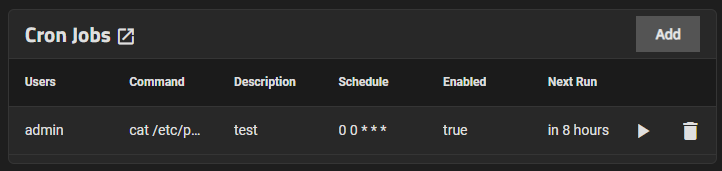
Clicking on the card header opens the Cron Jobs screen with a list view of any configured jobs, the Columns dropdown with options to change the columns shown in the table, and the Add button.
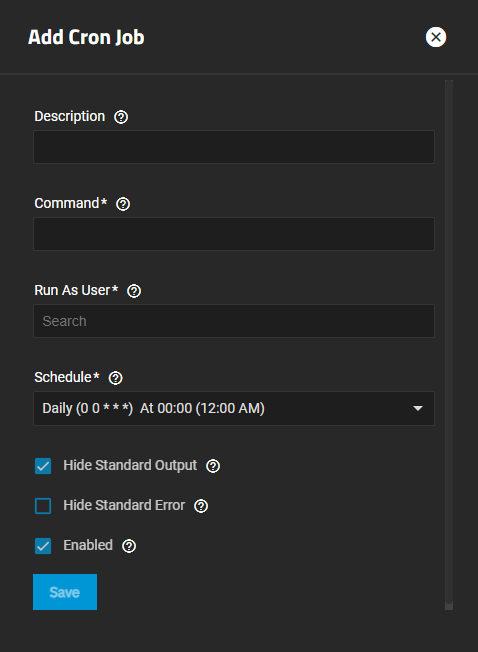
Add opens the Add Cron Job configuration screen.
Click on any job listed in the card to open the Edit Cron Jobs configuration screen populated with the settings for that cron job.
The Add Cron Job and Edit Cron Job configuration screens display the same settings.
Cron Jobs let users configure jobs that run specific commands or scripts on a regular schedule using cron(8). Cron jobs help users run repetitive tasks.
The Init/Shutdown Scripts card displays No Init/Shutdown Scripts configured until you add either a command or script; then the card lists the scripts configured on the system.
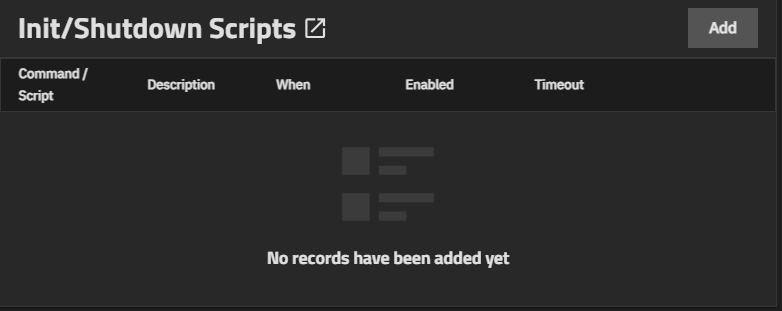
Clicking on the card header opens the Init/Shutdown Scripts screen with a list view of any configured scripts, the Columns dropdown with options to change the columns shown in the table, and the Add button.
Any script listed is a link that opens the Edit Init/Shutdown Script configuration screen populated with the settings for that script.
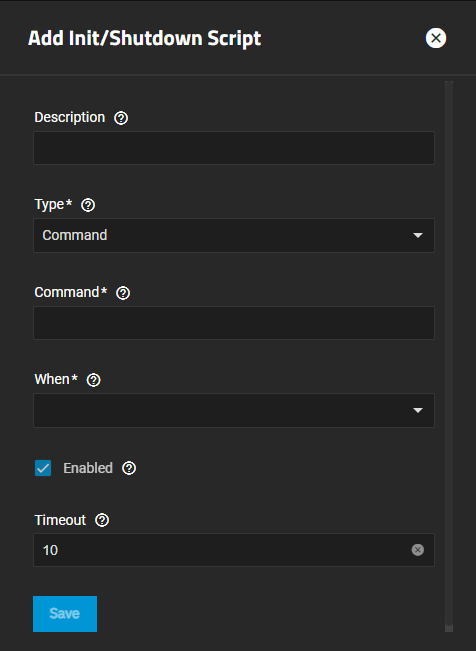
Add opens the Add Init/Shutdown Script configuration screen.
Init/Shutdown Scripts lets users schedule commands or scripts to run at system startup or shutdown.
The Tunable card shows the existing sysctl settings on the system.
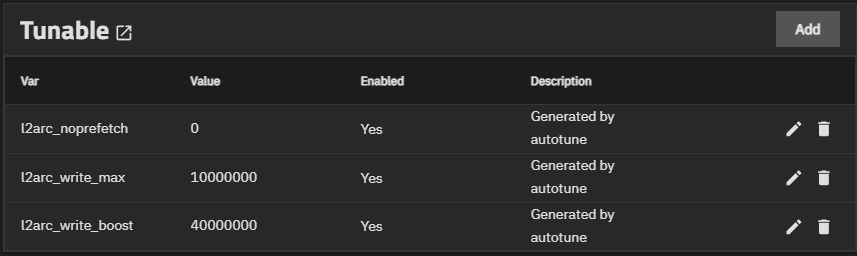
Clicking on the card header opens the Tunables screen with a list view of any configured scripts, the Columns dropdown with options to change the columns shown in the table, and the Add button.
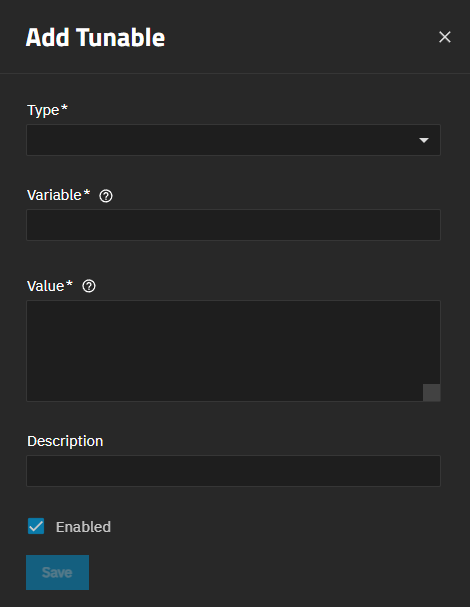
Add to add a tunable that configures a kernel module parameter at runtime.
The Add Tunable configuration screen allows setting up tunables to configure Linux kernel parameters at runtime, UDEV rules for detected hardware, or ZFS module parameters for the ZFS kernel module on Linux.
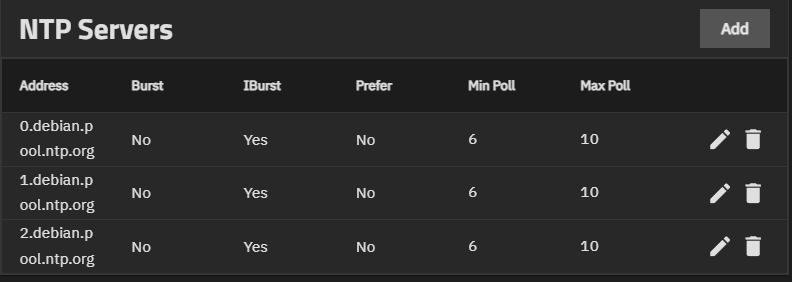
The NTP Servers card allows users to add Network Time Protocol (NTP) servers. These sync the local system time with an accurate external reference. By default, new installations use several existing NTP servers. TrueNAS supports adding custom NTP servers.
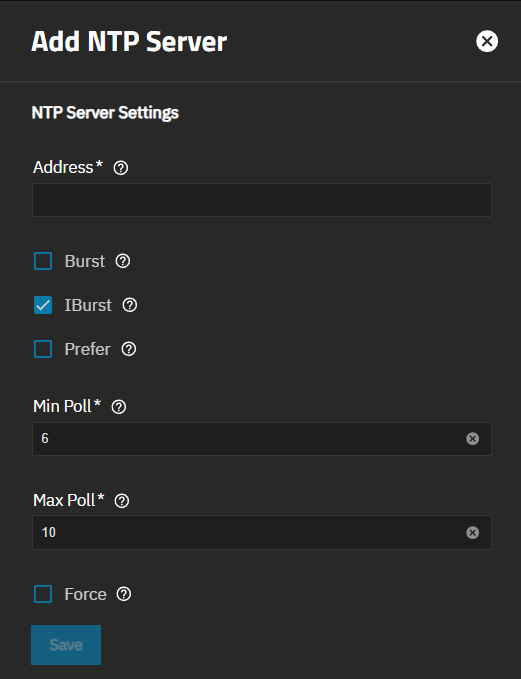
The Add NTP Server screen shows Network Time Protocol (NTP) server settings that sync the local TrueNAS system with an accurate external reference. By default, new installations use several existing NTP servers. TrueNAS supports adding custom NTP servers.
Add, on the NTP Servers card, opens the Add NTP Server screen.
Storage card shows the pool configured as the system dataset pool, and allows users to select the storage pool they want to hold the system dataset. The system dataset stores core files for debugging and keys for encrypted pools. It also stores Samba4 metadata, such as the user and group cache and share-level permissions.
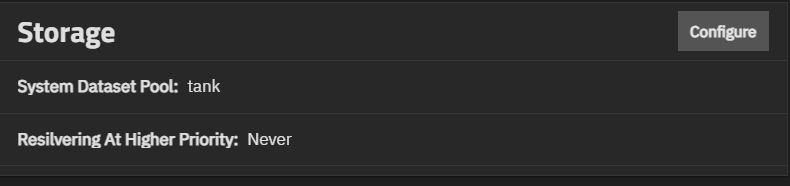
It also shows the resilvering priority setting.
Configure opens the Storage Settings configuration screen.
The Storage Settings screen shows the current system dataset and resilvering priority.
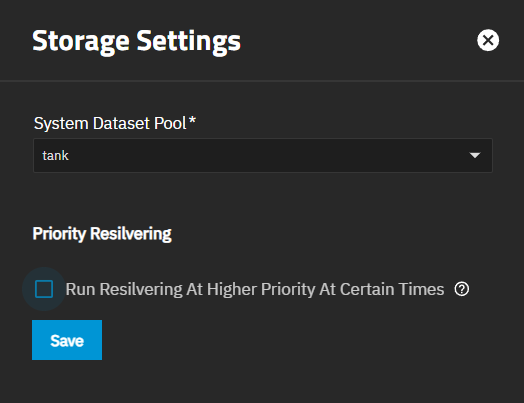
System Dataset Pool sets the pool to hold the system dataset, including core files for debugging, encrypted pool keys, and Samba4 metadata. If one pool exists, it is auto-configured or select one from the dropdown list. It can move to an unencrypted pool or an encrypted pool without a passphrase. It can move to a key-encrypted pool but cannot change encryption type after. It cannot move to a passphrase-encrypted pool.
Run Resilvering At Higher Priority At Certain Times Enables a resilvering priority schedule. Only shows Days/From/To fields when selected. Is not enabled by default. Enabling shows additional fields to set the time and date to resilver the system dataset pool disks.
Days of the Week shows a dropdown list of day options. From and To set the time range in which a resilver can run.
Save implements setting changes.
The Replication card displays the number of replication tasks that can execute simultaneously on the system. It allows users to adjust the maximum number of replication tasks the system can perform simultaneously.
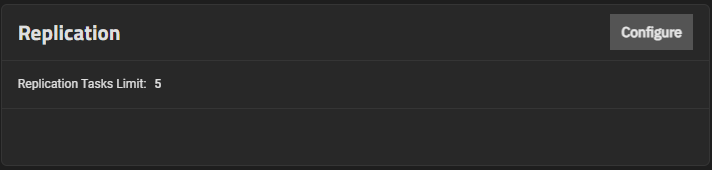
Click Configure to open the Replication configuration screen.
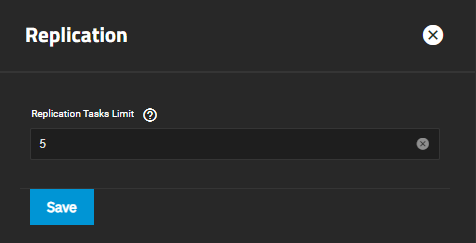
Replication Tasks Limit sets the maximum number of replication tasks being executed simultaneously.
Save retains changes and closes the screen.
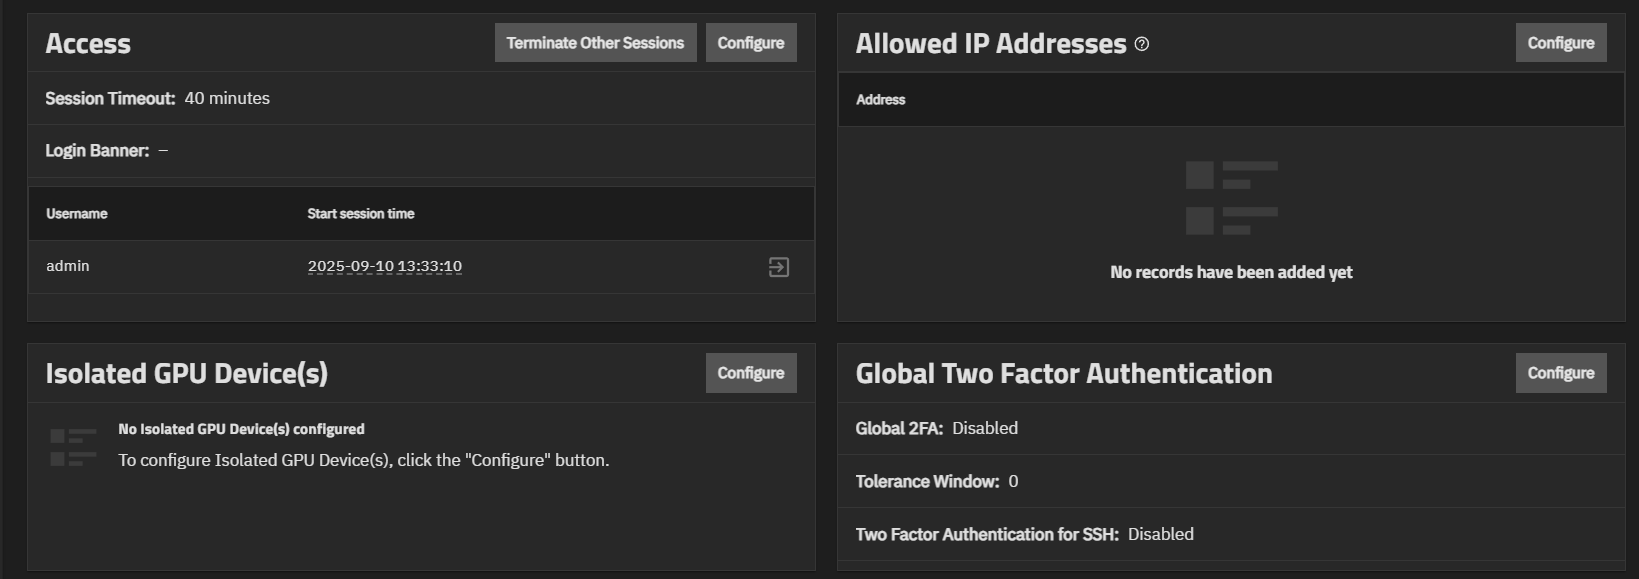
The Access widget shows a list of all active sessions, including the current logged-in user session and the time it started.
The Login Banner shows the custom text entered on the Access Settings screen. This text shows before the login screen. When configured, users see the login banner and must click Continue to show the TrueNAS login splash screen.
Administrators can manage other active sessions and configure the session timeout for their accounts.
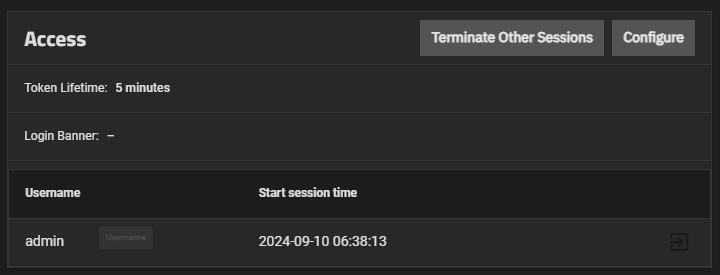
Terminate Other Sessions ends all sessions except the current session. It opens the Terminate session dialog. Click Confirm then Continue to end other sessions. This does not terminate the currently logged-in administration user session.
The logout icon is inactive for the currently logged-in administrator session and active for any other current sessions. It cannot be used to terminate the currently logged-in active administrator session.
The Start session time shows the configured token duration for the current session (default is 300 seconds, or five minutes). TrueNAS logs out user sessions that are inactive for longer than the configured token setting for the user. New activity resets the token counter.
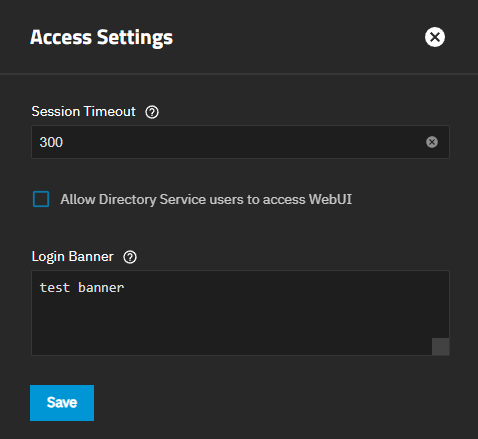
To change settings, click Configure to open the Access Settings screen, where you can add a login banner.
If the configured session timeout is exceeded, TrueNAS displays a Logout dialog with the exceeded ticket lifetime value and the time the session is scheduled to terminate.
Logout Dialog
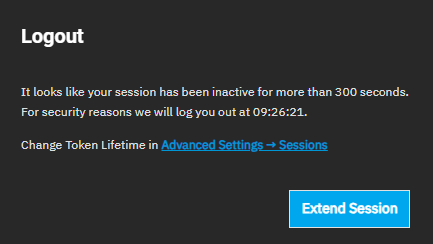
Extend Session resets the token counter. If the button is not clicked, TrueNAS terminates the session automatically and returns to the login screen.
Configure opens the Access Settings screen.
The Access Settings screen allows users to configure a login banner.
Login Banner sets the text message shown before the TrueNAS login screen. Maximum 4096 characters, including spaces. Long text wraps and can use carriage returns. Leave empty to show the login screen without a banner.
Continue on the banner screen, closes the screen before it shows the login splash screen.
Allow Directory Service users to access WebUI shows on Enterprise-licensed systems. When enabled, TrueNAS automatically creates a new entry, named as the domain admin group, in the Privileges screen table. For example, if the domain is ad03.mydomain.net, a group of that name is listed as well as any of the groups AD creates on the system.
The Allowed IP Addresses card displays IP addresses and networks added to the system that are allowed to use the API and UI. If this list is empty, then all IP addresses are allowed to use the API and UI.
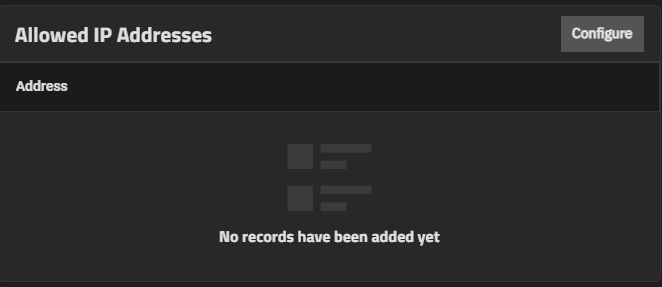
Configure opens the Allowed IP Addresses configuration screen.
Entering an IP address into the allowed IP address list denies access to the UI or API for all other IP addresses not listed.
Only use when limiting system access to a single or a limited number of IP addresses. Leave the list blank to allow all IP addresses.
Add, next to Allowed IP Addresses, shows the IP Address/Subnet field. IP Address/Subnet specifies the IP address and subnet of allowed addresses. Make sure the first address and/or subnet includes your current client system. Enter a specific IP address, for example, 192.168.1.1, for individual access, or use an IP address with a subnet mask, like 192.168.1.0/24, to define a range of addresses. Multiple addresses can be entered. Click Add for each entry.
Save retains setting changes and closes the screen. A Restart Web Service dialog opens. Confirm activates Continue. Continue restarts the web UI and applies changes.
UI management of Self-Encrypting Drives (SED) is an Enterprise-licensed feature in TrueNAS 25.04 (and later) that requires an active SED license. SED configuration options are not visible in the TrueNAS Community Edition. Community users wishing to implement SEDs can continue to do so using the command line sedutil-cli utility.
The Self-Encrypting Drive (SED) card shows when the system has self-encrypting drives and is licensed for SED.

Configure opens the Self-Encrypting Drive configuration screen.
The Self-Encrypting Drive configuration screen allows users to set the ATA security user and create a SED global password.
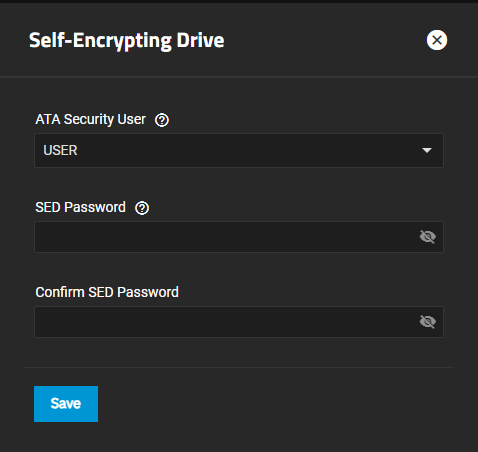
For more information on SEDs, see Managing Self-Encrypting Drives (SED), Importing Pools, and the Import Pool content in the Storage Dashboard Screens articles.
The Isolated GPU Device(s) card displays any isolated graphics processing unit (GPU) device(s) configured on your system.
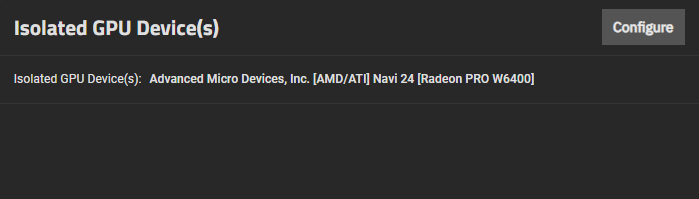
Configure opens the Isolated GPU PCI Ids screen or opens the NVIDIA Drivers screen if TrueNAS is equipped with an NVIDIA GPU.
The Isolate GPU PCI IDs card shows GPU devices added in TrueNAS. It allows users to isolate additional GPU devices for use by a configured container or a VM.
Configure opens the Isolated GPU PCI Ids screen or opens the NVIDIA Drivers screen if TrueNAS is equipped with an NVIDIA GPU.
GPU shows GPU options you can select and isolate for a virtual machine (VM). TrueNAS must have at least two GPUs to isolate a GPU: one allocated to the host system for system functions and/or applications, and the other available to isolate for use by a VM.
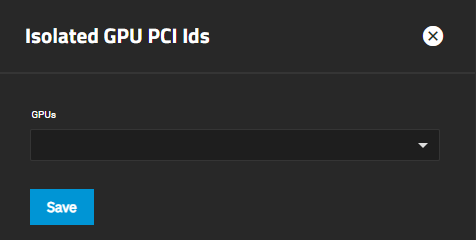
Save retains the changes and closes the screen.
To allocate an isolated GPU device, select it while creating or editing the VM configuration. When allocated to a VM, the isolated GPU connects to the VM as if it were physically installed in that VM, and it becomes unavailable for any other allocations.
The NVDIA Drivers card shows the status of NVIDIA GPU support in TrueNAS. When TrueNAS is not equipped with an NVIDIA GPU device, the status shows as disabled.
NVIDIA GPU support is required before containers or VMs can use NVIDIA GPUs for graphics acceleration or computation.

Configure opens the NVIDIA Drivers configuration screen.
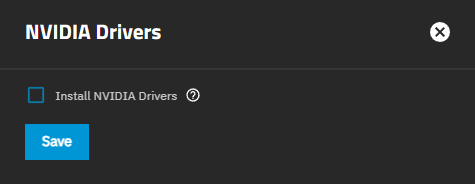
Enable NVIDIA GPU Support enables NVIDIA support for containers and VMS.
Save retains the changes and closes the screen.
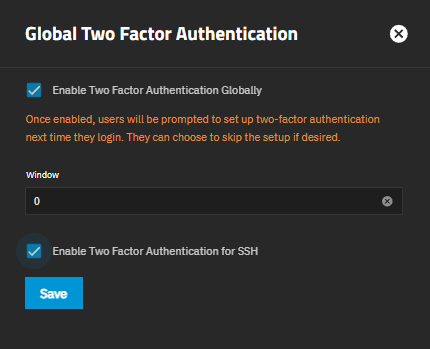
The Global Two Factor Authentication card shows the status of global two-factor authentication, the tolerance window, and the status of two-factor authentication for SSH sessions. It provides access to the configuration screen that allows you to set up two-factor authentication (2FA) for your system.
The card displays the following read-only setting information:
| Field | Description |
|---|---|
| Global 2FA | Shows whether Global 2FA is enabled or disabled. |
| Tolerance Window | Shows the current tolerance window value. |
| Two Factor Authentication for SSH | Shows whether 2FA for SSH is enabled or disabled. |
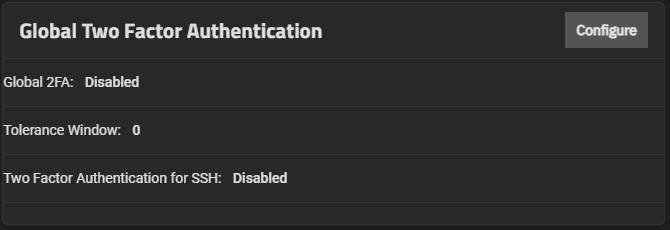
Configure opens the Global Two Factor Authentication configuration screen.
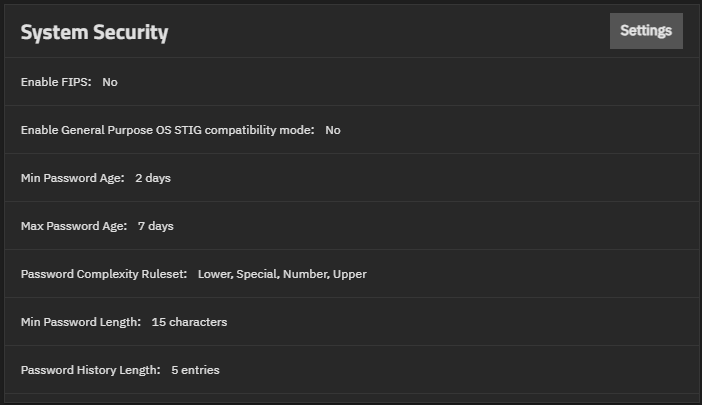
The System Security card allows administrators of Enterprise-licensed systems to enable or disable FIPS 140-2 compliant algorithms, STIG compliance, and other administrator account rules.
Administrators considering enabling STIG and FIPS security settings should contact TrueNAS Support before making any changes!
Changing FIPS or STIG settings requires a system restart to apply the setting changes. High Availability (HA) systems restart the standby controller and then show a prompt to failover and restart the primary controller.
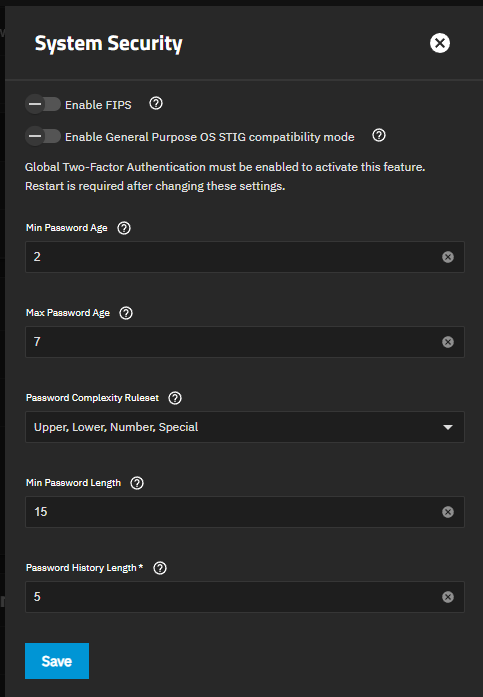
Settings opens the System Security configuration screen.
Enable FIPS enables or disables FIPS enforcement in TrueNAS.
Enable TrueNAS STIG compatibility mode enables or disables the STIG compliance implementation in TrueNAS. This function requires two-factor authentication and configuring a one-time password for a full-permissions admin user before enabling STIG compatibility. The one-time password option is found on the Credentials > Users screen. After selecting the user, Generate One-Time Password shows on the Password card.
The following are administrator password settings:
Name Description Min Password Age Sets the minimum days a password must be used before it can be changed in Enterprise systems. Max Password Age Sets the maximum days a password can be used before it must be changed in Enterprise systems. TrueNAS warns seven days before expiration. Password Complexity Ruleset Sets the required character types for administrator passwords in Enterprise systems. Choose between Upper, Lower, Number, and Special character requirements. Min Password Length Specifies the minimum number of characters administrator passwords for Enterprise systems. Must be at least 8 characters. Password History Length Secifies the number of previous passwords to remember to prevent reusing passwords in Enterprise systems. Range is between 1 and 10.
The Failover card, which only shows on Enterprise-licensed HA systems, shows the status of failover, the default controller, and the network timeout before TrueNAS initiates failover.
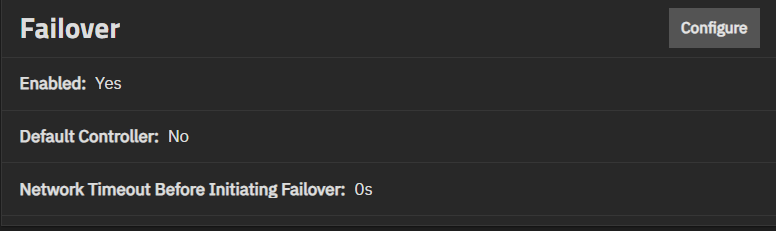
Configure opens the Failover configuration screen.
The Failover screen shows settings used on TrueNAS Enterprise (HA) systems to turn the failover function on or off, sync the primary and standby controllers, and allow administrator users to configure failover. The main menu option and screen only display on Enterprise (HA) systems with the correct license applied.
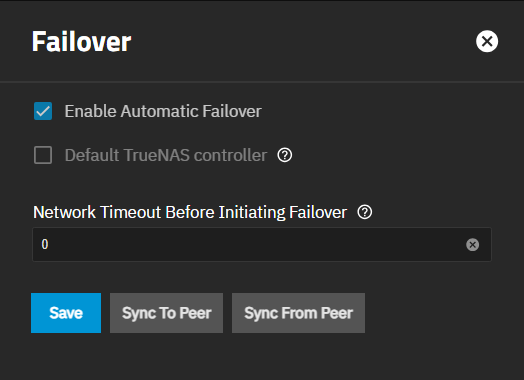
Sync To Peer initiates a sync operation that copies over the primary controller configuration to the standby controller. Opens the Sync To Peer dialog to confirm the operation.
Sync From Peer initiates a sync operation that copies over the standby controller configuration to the primary controller.
| Setting | Description |
|---|---|
| Enable Automatic Failover | Enables automatic failover in Enterprise HA systems. Clearing disables. |
| Default TrueNAS controller | Sets the current active controller as default when both controllers are online and HA is enabled in Enterprise HA systems. Briefly interrupts services. Leave unselected on the default TrueNAS controller and allow the system to fail over to change the default controller. This process also briefly interrupts system services. |
| Network Timeout Before Initiating Failover | ets the number in seconds to wait after a network failure before triggering a failover in Enterprise HA systems. The default value is 0, which means failover occurs immediately or after two seconds when the system is using a link aggregate. |
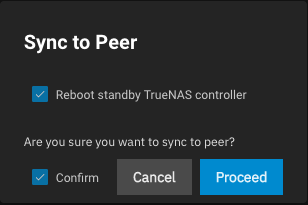
Sync To Peer and Sync From Peer buttons each open a confirmation dialog before TrueNAS performs the operation requested.
| Setting | Description |
|---|---|
| Reboot standby TrueNAS controller | Select to cause the standby controller to restart after the sync operation completes. |
| Are you sure you want to sync to peer? | Confirms the action along with the Confirm checkbox. |
| Confirm | Select to confirm you want to perform the sync-to-peer operation. |
| Proceed | Begins the sync operation. |