SMB Shares Screens
16 minute read.
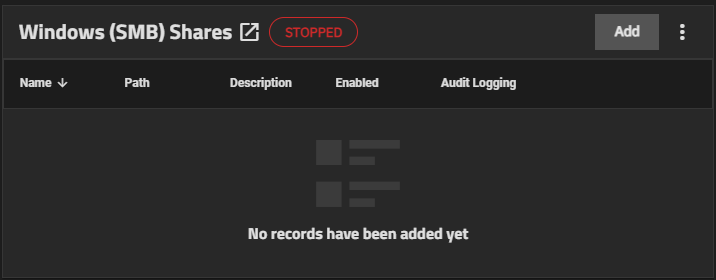
If you have not added SMB shares to the system, the SMB widget shows No records have been added yet.
Add at the top right of the widget opens the Add SMB screen where you configure SMB shares.
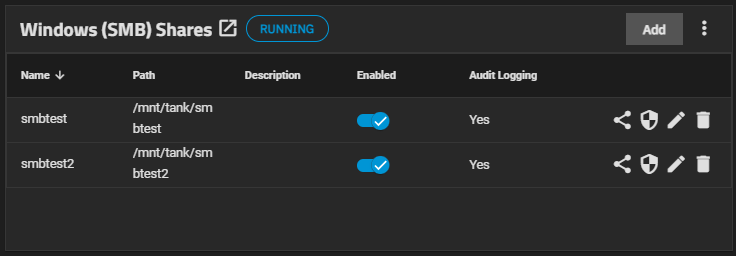
After adding an SMB share, it displays on the widget.
The Windows (SMB) Shares toolbar shows the status of the SMB service as either STOPPED (red) or RUNNING (blue). Before adding the first share, the STOPPED status displays in the default color.
The Windows (SMB) Shares header is a link that opens the Sharing > SMB screen.
The icon displays four options available to SMB shares in general:
- Turn Off/ON Service toggle shows Turn Off Service when the SMB service is enabled, and changes to Turn On Service when the SMB service is disabled.
- Config Service opens the SMB configuration screen.
- SMB Sessions opens the SMB Status screen with four tabs: Sessions, Locks, Shares, and Notifications.
- Audit Logs opens the Audit screen with a predefined filter for and showing the SMB share logs.
Each SMB share row includes a toggle that provides quick access to enable or disable the share, and four icons for different individual share functions:
- Edit Share ACL icon opens the Edit Share ACL screen.
- Edit Filesystem ACL icon opens the Edit ACL screen.
- edit icon opens the Edit SMB screen.
- opens the Delete dialog.
The Windows (SMB) Shares toolbar displays the status of the SMB service as either STOPPED (red) or RUNNING (blue). Before adding the first share, the STOPPED status displays in the default color.
Click on the widget header to open the Sharing > SMB details screen.
Add opens the Add SMB share configuration screen.
The icon displays four options available to SMB shares in general:
- Turn Off Service that shows when the SMB service is enabled and that toggles to Turn On Service when the SMB service is disabled.
- Config Service that opens the SMB configuration screen.
- SMB Sessions that opens the SMB Status screen with four tabs: Sessions, Locks, Shares, and Notifications.
- Audit Logs that opens the Audit screen with a predefined filter for and showing the SMB share logs.
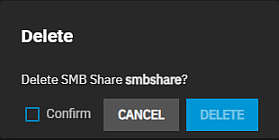
The trash can icon opens the Delete dialog.
Select Confirm to activate the Delete button.
The Sharing > SMB screen lists all SMB shares added to the system. It shows three function buttons, SMB Sessions, Columns, and Add.
SMB Sessions opens the SMB Status screen.
Columns shows a set of options to customize the list view. Options include Unselect All, Path, Description, Enabled and Reset to Defaults.
Add opens the Add SMB configuration screen.
Enabled indicates the share status as enabled or disabled. When enabled, the share path is available when the SMB service is active. If disabled, the share is disabled but not deleted from the system.
Audit Logging indicates whether auditing for the share is enabled or disabled.
The displays a dropdown list of options for each share:
- Edit opens the Edit SMB screen.
- Edit Share ACL opens the Edit Share ACL screen.
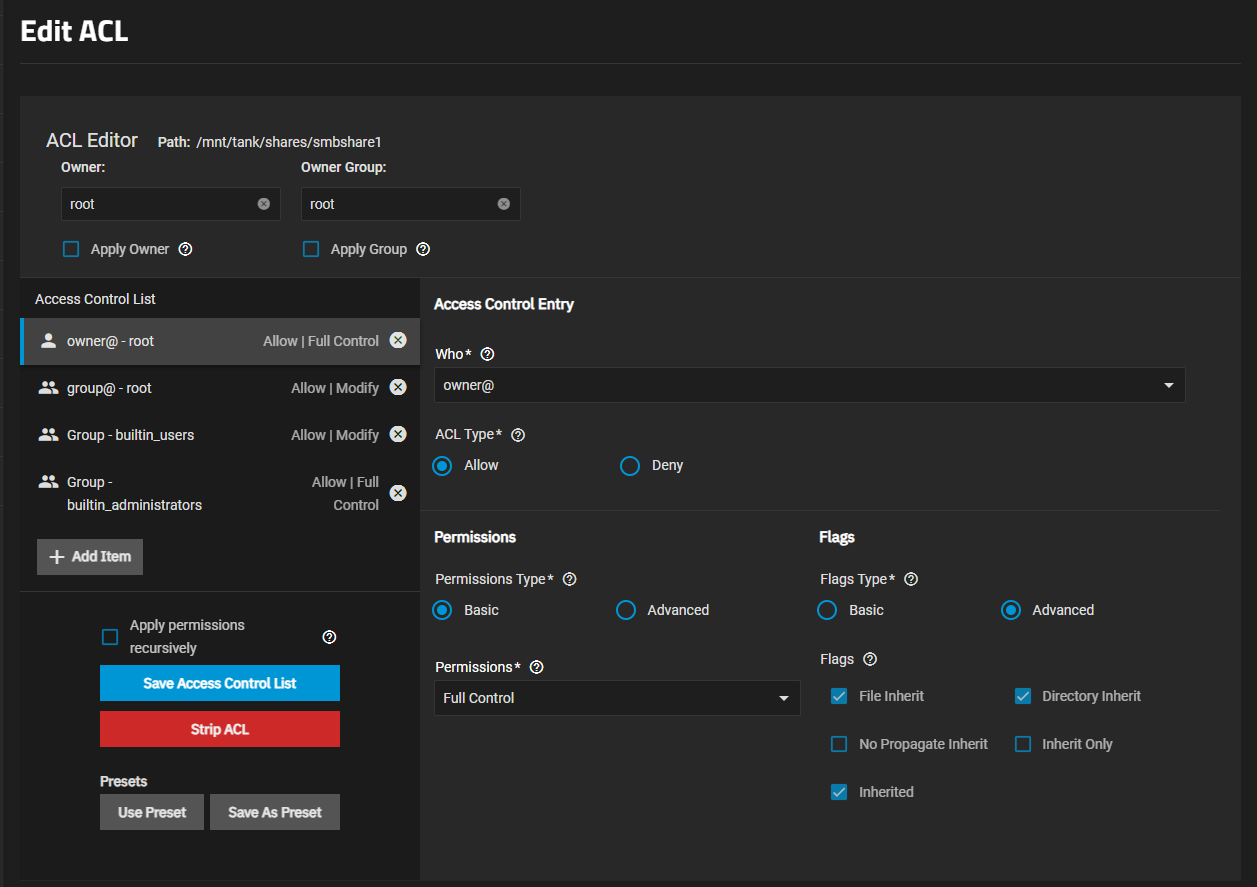
- Edit Filesystem ACL opens the Edit ACL screen.
- Delete displays the Delete dialog.
To return to the Share screen, click Shares on the main navigation panel or Sharing on the breadcrumb at the top of the screen.
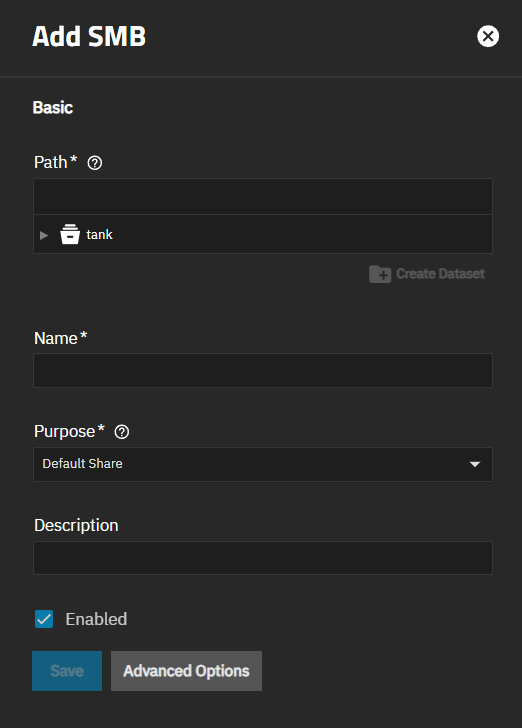
The two SMB share configuration screens, Add SMB and Edit SMB, display the same SMB share setting options. The Create Dataset option only shows on the Add SMB screen, but you can change it to another existing dataset on the system.
Save creates the share (or saves an existing one) and adds it to the Windows (SMB) Shares widget and the table on the Sharing > SMB screen.
The Basic Options settings also show on the Advanced Options screen.
| Setting | Description |
|---|---|
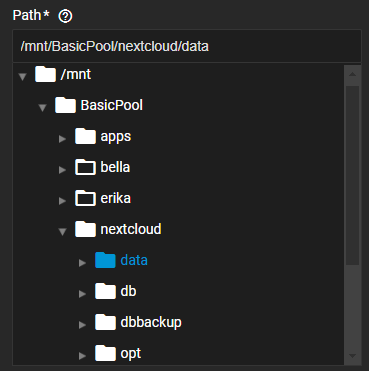
| Path | Shows the entered or selected mount path to the share dataset on the local file system that TrueNAS exports over the SMB protocol. Use the icon to the left of |
| Create Dataset | Opens the Create Dataset dialog. After navigating to the location in the dataset tree where you want to create the dataset, click to open the dialog. Enter a name for the new dataset and the SMB share. Create adds the dataset and populatesName field on the Add SMB screen. |
| Name | Enter a name for the share that is less than or equal to 80 characters. Because of how the SMB protocol uses the name, the name must not exceed 80 characters. The name cannot have invalid characters as specified in Microsoft documentation MS-FSCC section 2.1.6. Name is automatically populated with the name of the dataset when you use Create Dataset. If not supplied, the share name becomes the last component of the path. This forms part of the full share path name when SMB clients perform and SMB tree connect. If changing the name, follow the naming conventions for files and directories or share names. |
| Purpose | Select a preset option from the dropdown list. The selected option applies predetermined settings (presets) and disables changing some share setting options. |
| Description | Enter a brief description or notes on how this share is used. |
| Enabled | Selected by default to enable sharing the path when the SMB service is activated. Clear to disable this SMB share without deleting it. |
This table details the options found on the Purpose dropdown list.
| Setting | Description |
|---|---|
| No presets | Select to retain control over all Advanced Options setting. Users can manually configure the SMB settings and parameters. |
| Default share parameters | The default option when you open the Add SMB screen. Use for any basic SMB share. These settings provide a baseline configuration that ensures compatibility and functionality and allows users to set up shares with commonly implemented options and behaviors. |
| Basic time machine share | Select to set up a basic time machine share. This provides a centralized location for users to store and manage system backups. |
| Multi-User time machine | Select to set up a multi-user time machine share. This option allows multiple users to use TrueNAS as a centralized backup solution while ensuring that each backup is kept separate and secure from the others. |
| Multi-Protocol (NFSv4/SMB) shares | Select for multi-protocol (NFSv4/SMB) shares. Choosing this option allows NFS and SMB users to access TrueNAS at the same time. Multi-protocol shares in TrueNAS try to enable kernel oplocks which are enabled per share when the chosen share uses both NFS and SMB protocols, but the oplocks are incompatible with SMB2/3 lease support. This incompatibility might trigger unexpected failures depending on the order in which the SMB client negotiates the first SMB tree connect. The multi-protocol share type is mutually exclusive with AAPL extension support like time machine. These extensions require the SMB2/3 lease support which is no longer available in multi-protocol shares. Therefore, time machine cannot be enabled and a warning message shows in the UI. Selecting other Apple protocol options also displays warning messages. Multi-protocol shares can impact the performance of all SMB shares. |
| Private SMB Datasets and Shares | Select to create a share that maps to a path determined by the username of the authenticated user. TrueNAS creates a unique, private dataset matching the user name. |
| SMB WORM. Files become read-only via SMB after 5 minutes | The SMB WORM preset only impacts writes over the SMB protocol. Before deploying this option in a production environment, determine whether the feature meets your requirements. Employing this option ensures data written to the share cannot be modified or deleted, thus increasing overall data integrity and security. |
Advanced Options show settings made available or locked based on the selection in the Purpose option.
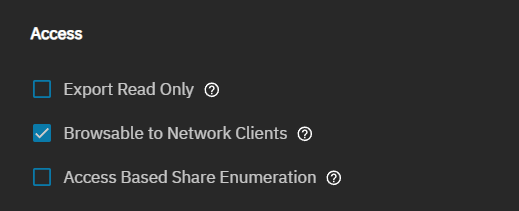
Access settings customize access to the share and files, and specify allowed or denied access for host names or IP addresses.
| Setting | Description |
|---|---|
| Enable ACL | Select to enable ACL support for the SMB share. When clearing this option, a warning shows when the SMB dataset has an ACL. You must strip the ACL from the dataset before creating the SMB share. |
| Export Read-Only | Select to prohibit writes to the share. |
| Browsable to Network Clients | Select to include this share name when browsing shares. Enabled by default. Home shares are only visible to the owner, regardless of this setting. |
| Allow Guest Access | Select to enable and allow guest accounts to access the share. Privileges are the same as the guest account. Guest access is disabled by default in Windows 10 version 1709 and Windows Server version 1903. Additional client-side configuration is required to provide guest access to these clients. MacOS clients: Attempting to connect as a user that does not exist in FreeNAS does not automatically connect as the guest account. You must select the Connect As: Guest option in macOS to log in as the guest account. See the Apple documentation for more details. |
| Access Based Share Enumeration | Select to restrict share visibility to users with read or write access to the share. Open is the default for this setting. See the smb.conf manual page. |
| Hosts Allow | Enter a list of allowed host names or IP addresses. Separate entries by pressing Enter. For a more detailed description with examples, click here. |
| Hosts Deny | Enter a list of denied host names or IP addresses. Separate entries by pressing Enter. |
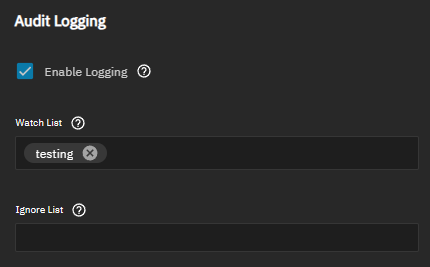
The Audit Logging settings enable the auditing function for the SMB share and allow configuring a watch and ignore list for groups administrators want to monitor.
| Setting | Description |
|---|---|
| Enabled | Select to enable audit logging for the SMB share. |
| Watch List | Select groups from the dropdown list for which you want to generate audit logging messages. Leaving this blank includes all SMB users with access to the share. If also setting a limit list, when a conflict exists, the watch list takes precedence. |
| Limit List | Select groups from the dropdown list that you want to ignore or exclude from audit logging. If a group is a member of both the watch and limit lists, the watch list takes precedence, and the group generates audit messages. |
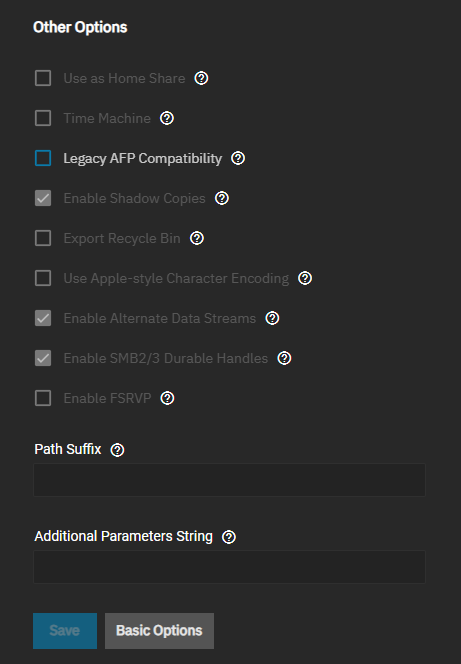
The Other Options settings include improving Apple software compatibility, ZFS snapshot features, and other advanced features.
Auxiliary parameters are an unsupported configuration. Parameters entered here are not validated and can cause undefined system behavior, including data corruption or data loss.
| Setting | Description |
|---|---|
| Use as Home Share | Select to allow the share to host user home directories. Each user has a personal home directory that they use when connecting to the share that is not accessible by other users. Home Shares allow for personal, dynamic shares. You can only use one share as the home share. See Adding an SMB Home Share for more information. |
| Time Machine | Enables Apple Time Machine backups on this share. This option requires SMB2/3 protocol extension support. You can enable this in the general SMB server configuration. |
| ** Time Machine Quota** | Visible when Time Machine is enabled. Sets a maximum limit on storage consumed by Time Machine backups. This applies to the entire share. |
| Legacy AFP Compatibility | Select to enable backend compatibility with metadata written by legacy netatalk implementations. This option configures Samba to properly read and present Apple Filing Protocol (AFP) metadata, such as resource forks to SMB clients. Only enable this option when migrating data that was previously shared via the AFP. Pure SMB shares and standard macOS SMB clients do not require this compatibility option. |
| Enable Shadow Copies | Select to export ZFS snapshots as Shadow Copies for Microsoft Volume Shadow Copy Service (VSS) clients. |
| Export Recycle Bin | Select to enable. Deleted files are renamed to a per-user subdirectory within the .recycle directory at either the root of the SMB share if the path is the same dataset as the SMB share (default is share and dataset have the same name), or at the root of the current dataset if datasets are nested. Nested datasets do not have automatic deletion based on file size. Do not rely on this function for backups or replacements of ZFS snapshots. |
| Use Apple-style Character Encoding | Select to convert NTFS illegal characters in the same manner as macOS SMB clients. By default, Samba uses a hashing algorithm for NTFS illegal characters. Apple extension options cannot be set if Purpose is set to the multi-protocol option |
| Enable Alternate Data Streams | Select to allow multiple NTFS data streams. Disabling this option causes macOS to write streams to files on the file system. |
| Enable SMB2/3 Durable Handles | Select to allow using open file handles that can withstand short disconnections. Support for POSIX byte-range locks in Samba is also disabled. This option is not recommended when configuring multi-protocol or local access to files. |
| Enable FSRVP | Select to enable support for the File Server Remote VSS Protocol (FSVRP). This protocol allows remote procedure call (RPC) clients to manage snapshots for a specific SMB share. Requires setting the share path to a dataset mount point. Snapshots have the prefix fss- followed by a snapshot creation timestamp. A snapshot must have this prefix for an RPC user to delete it. |
| Path Suffix | Appends a suffix to the share connection path. Use to provide individualized shares on a per-user, per-computer, or per-IP address basis. Suffixes can contain a macro. See the smb.conf manual page for a list of supported macros. The connection path must be preset before a client connects. |
| Additional Parameters String | Shows a string of parameters associated with the share preset selected, or if no preset, enter additional smb4.conf parameters not covered by the TrueNAS API. |
The Other Options show after selecting Advanced Options. The Purpose setting sets default options and affects which other settings (presets) are selectable. Some options are available or locked based on the choice. The expandable below provides a comparison table listing these preset options and shows whether the option is available or locked.
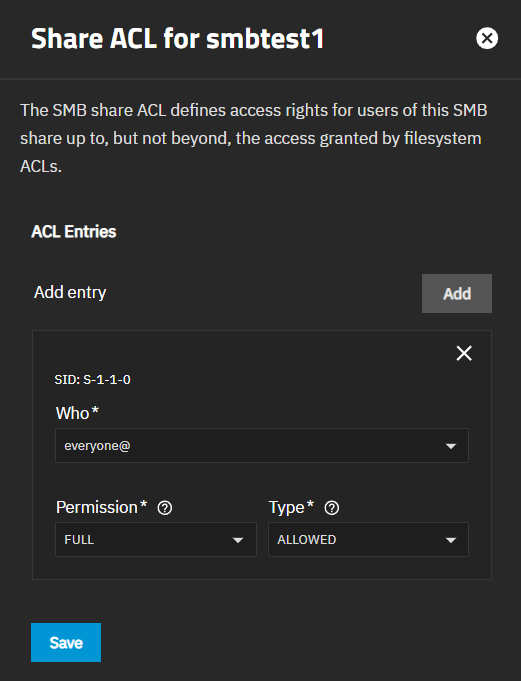
The Share ACL for sharename screen opens after clicking on the share Edit Share ACL icon on the Windows (SMB) Shares widget or the on the Sharing SMB details screen. These settings configure new ACL entries for the selected SMB share and apply them at the entire SMB share level, but not to the dataset. It is separate from file system permissions. To configure dataset permissions, use the Edit Filesystem ACL option.
ACL Entries shows a block of settings that specify who and the permissions they are granted. Add shows a block of these settings to enter who, the permissions level, and type.
| Setting | Description |
|---|---|
| SID | Shows the security identifier (SID) trustee value or to whom this ACL entry (ACE) applies. SID is a unique value of variable length that identifies the trustee. Shown as a Windows Security Identifier. Save and re-open Edit Share ACL to update. |
| Who | Select the domain for an account (who) to apply the permissions for this ACL entry. Options are: |
| Permission | Select predefined permission combinations from the dropdown list. Options are: |
| Type | Select the option from the dropdown list that specifies how TrueNAS applies permissions to the share. Options are: |
Save stores the share ACL and immediately applies it to the share.
The Edit Filesystem ACL option opens the Edit ACL screen for the dataset the share uses. See Edit ACL Screen for more information on the settings found on this screen.
Use the ACL editor screen to set file system permissions for the shared dataset. See Permissions for more information on configuring permissions.
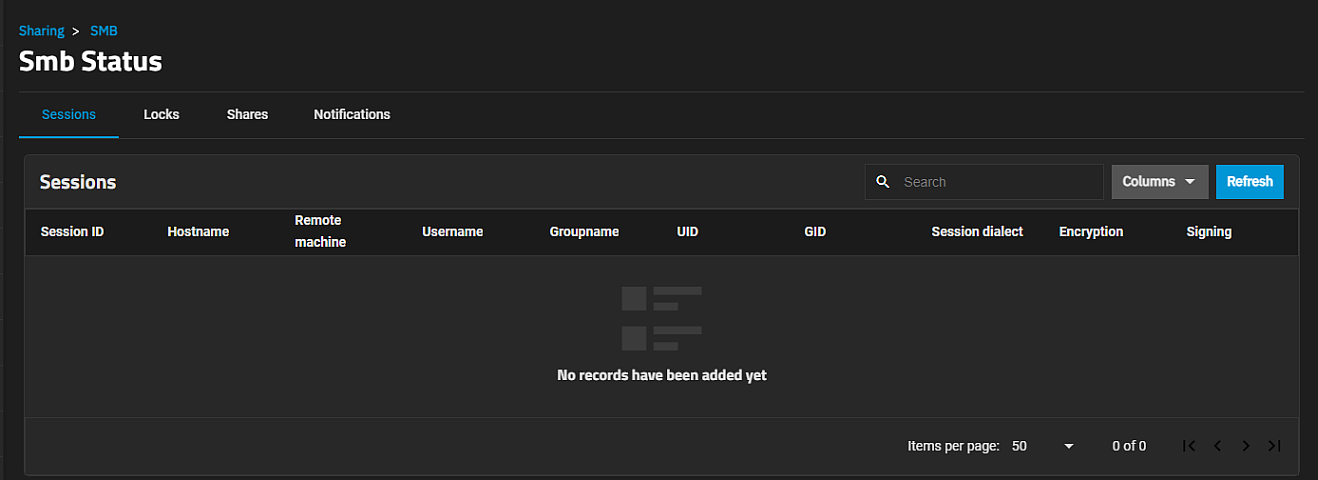
The SMB Status screen opens after clicking SMB on the list icon on the System > Services screen, and the on the Shares > Windows (SMB) Shares widget.
The SMB Status screen has four tabs with information related to SMB shares:
- Sessions shows current SMB sessions (default view).
- Locks shows locked files.
- Shares shows open files.
- Notifications shows file notification subscriptions.
Refresh updates the information displayed on the selected tab.
Column displays a dropdown list of options for the selected tab to customize the information included on the screen.
Sharing or SBM on the top breadcrumb opens or returns to the selected screen name.
The breadcrumb shows when you access the SMB Status screen from the System > Services SMB row.


