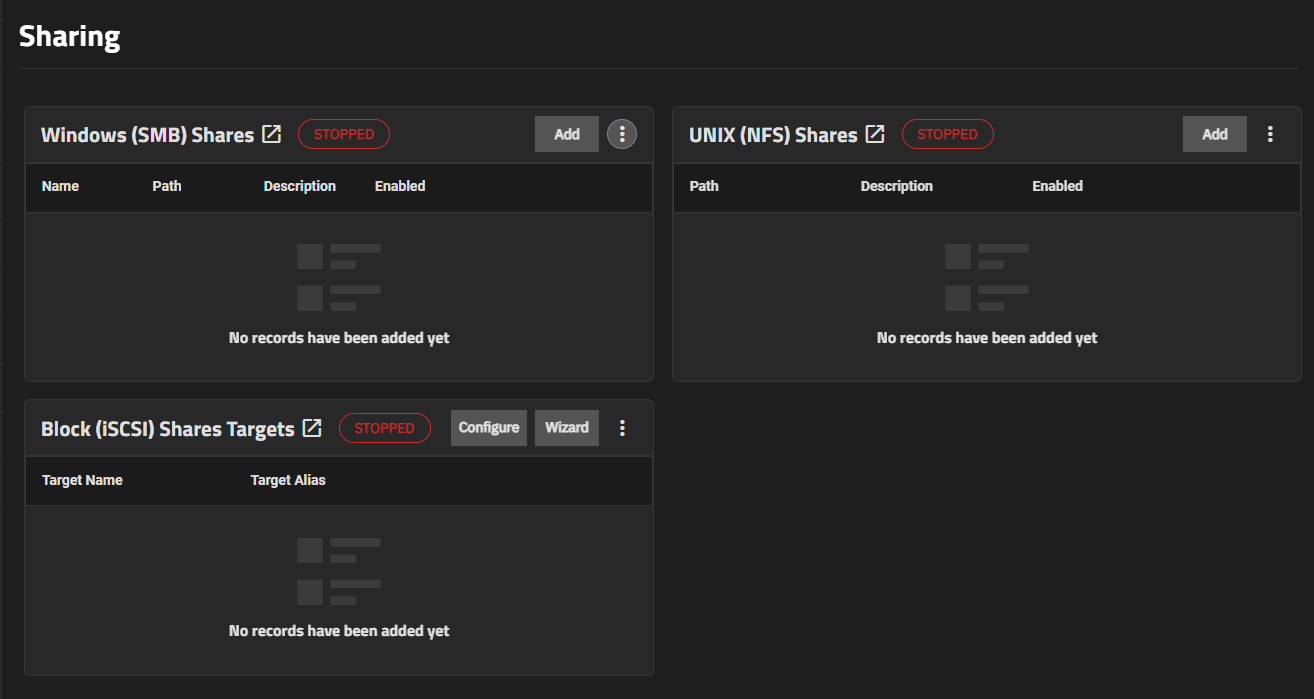
File sharing is one of the primary benefits of a NAS. TrueNAS helps foster collaboration between users through network shares. TrueNAS SCALE allows users to create and configure block (iSCSI) shares targets, Windows SMB shares, Unix (NFS) shares, and WebDAV shares.
When creating zvols for shares, avoid giving them names with capital letters or spaces since they can cause problems and failures with iSCSI and NFS shares.
Internet Small Computer Systems Interface (iSCSI) represents standards for using Internet-based protocols for linking binary data storage device aggregations.
IBM and Cisco submitted the draft standards in March 2000. Since then, iSCSI has seen widespread adoption into enterprise IT environments.
iSCSI functions through encapsulation. The Open Systems Interconnection Model (OSI) encapsulates SCSI commands and storage data within the session stack. The OSI further encapsulates the session stack within the transport stack, the transport stack within the network stack, and the network stack within the data stack.
Transmitting data this way permits block-level access to storage devices over LANs, WANs, and even the Internet itself (although performance may suffer if your data traffic is traversing the Internet).
The table below shows where iSCSI sits in the OSI network stack:
OSI Layer Number
OSI Layer Name
Activity as it relates to iSCSI
7
Application
An application tells the CPU that it needs to write data to non-volatile storage.
6
Presentation
OSI creates a SCSI command, SCSI response, or SCSI data payload to hold the application data and communicate it to non-volatile storage.
5
Session
Communication between the source and the destination devices begins. This communication establishes when the conversation starts, what it talks about, and when the conversion ends. This entire dialogue represents the session. OSI encapsulates the SCSI command, SCSI response, or SCSI data payload containing the application data within an iSCSI Protocol Data Unit (PDU).
4
Transport
OSI encapsulates the iSCSI PDU within a TCP segment.
3
Network
OSI encapsulates the TCP segment within an IP packet.
2
Data
OSI encapsulates the IP packet within the Ethernet frame.
1
Physical
The Ethernet frame transmits as bits (zeros and ones).
Unlike other sharing protocols on TrueNAS, an iSCSI share allows block sharing and file sharing.
Block sharing provides the benefit of block-level access to data on the TrueNAS.
iSCSI exports disk devices (zvols on TrueNAS) over a network that other iSCSI clients (initiators) can attach and mount.
Challenge-Handshake Authentication Protocol (CHAP): an authentication method that uses a shared secret and three-way authentication to determine if a system is authorized to access the storage device. It also periodically confirms that the session has not been hijacked by another system. In iSCSI, the client (initiator) performs the CHAP authentication.
Mutual CHAP: a CHAP type in which both ends of the communication authenticate to each other.
Internet Storage Name Service (iSNS): protocol for the automated discovery of iSCSI devices on a TCP/IP network.
Extent: the storage unit to be shared. It can either be a file or a device.
Portal: indicates which IP addresses and ports to listen on for connection requests.
Initiators and Targets: iSCSI introduces the concept of initiators and targets which act as sources and destinations respectively. iSCSI initiators and targets follow a client/server model. Below is a diagram of a typical iSCSI network. The TrueNAS storage array acts as the iSCSI target and can be accessed by many of the different iSCSI initiator types, including software and hardware-accelerated initiators.
The iSCSI protocol standards require that iSCSI initiators and targets is represented as iSCSI nodes. It also requires that each node is given a unique iSCSI name. To represent these unique nodes via their names, iSCSI requires the use of one of two naming conventions and formats, IQN or EUI. iSCSI also allows the use of iSCSI aliases which are not required to be unique and can help manage nodes.
Logical Unit Number (LUN): LUN represents a logical SCSI device. An initiator negotiates with a target to establish connectivity to a LUN. The result is an iSCSI connection that emulates a connection to a SCSI hard disk. Initiators treat iSCSI LUNs as if they were a raw SCSI or SATA hard drive. Rather than mounting remote directories, initiators format and directly manage filesystems on iSCSI LUNs. When configuring multiple iSCSI LUNs, create a new target for each LUN. Since iSCSI multiplexes a target with multiple LUNs over the same TCP connection, there can be TCP contention when more than one target accesses the same LUN. TrueNAS supports up to 1024 LUNs.
Jumbo Frames: Jumbo frames are the name given to Ethernet frames that exceed the default 1500 byte size. This parameter is typically referenced by the nomenclature as a maximum transmission unit (MTU). A MTU that exceeds the default 1500 bytes necessitates that all devices transmitting Ethernet frames between the source and destination support the specific jumbo frame MTU setting, which means that NICs, dependent hardware iSCSI, independent hardware iSCSI cards, ingress and egress Ethernet switch ports, and the NICs of the storage array must all support the same jumbo frame MTU value. So, how does one decide if they should use jumbo frames?
Administrative time is consumed configuring jumbo frames and troubleshooting if/when things go sideways. Some network switches might also have ASICs optimized for processing MTU 1500 frames while others might be optimized for larger frames. Systems administrators should also account for the impact on host CPU utilization. Although jumbo frames are designed to increase data throughput, it may measurably increase latency (as is the case with some un-optimized switch ASICs); latency is typically more important than throughput in a VMware environment. Some iSCSI applications might see a net benefit running jumbo frames despite possible increased latency. Systems administrators should test jumbo frames on their workload with lab infrastructure as much as possible before updating the MTU on their production network.
TrueNAS Enterprise Feature:
Asymmetric Logical Unit Access (ALUA): ALUA allows a client computer to discover the best path to the storage on a TrueNAS system. HA storage clusters can provide multiple paths to the same storage. For example, the disks are directly connected to the primary computer and provide high speed and bandwidth when accessed through that primary computer. The same disks are also available through the secondary computer, but speed and bandwidth are restricted. With ALUA, clients automatically ask for and use the best path to the storage. If one of the TrueNAS HA computers becomes inaccessible, the clients automatically switch to the next best alternate path to the storage. When a better path becomes available, as when the primary host becomes available again, the clients automatically switch back to that better path to the storage.
Do not enable ALUA on TrueNAS unless it is also supported by and enabled on the client computers. ALUA only works when enabled on both the client and server.
iSCSI Configuration Methods
There are a few different approaches for configuring and managing iSCSI-shared data:
TrueNAS CORE web interface: the TrueNAS web interface is fully capable of configuring iSCSI shares. This requires creating and populating zvol block devices with data, then setting up the iSCSI Share. TrueNAS Enterprise licensed customers also have additional options to configure the share with Fibre Channel.
TrueNAS SCALE web interface: TrueNAS SCALE offers a similar experience to TrueNAS CORE for managing data with iSCSI; create and populate the block storage, then configure the iSCSI share.
TrueCommand instances that have many TrueNAS systems connected can manage iSCSI Volumes from the TrueCommand web interface. TrueCommand allows creating block devices and configuring iSCSI Targets and Initiators from one central location.
TrueNAS Enterprise customers that use vCenter to manage their systems can use the TrueNAS vCenter Plugin to connect their TrueNAS systems to vCenter and create and share iSCSI datastores. This is all managed through the vCenter web interface.
To get started with iSCSI shares, make sure you have already created a zvol or a dataset with at least one file to share.
Go to Shares and click Configure in the Block (iSCSI) Shares Targets window. You can either use the creation wizard or set one up manually.
This short tutorial video demonstrates basic steps to set up an iSCSI share configuration.
First, enter a name. It can only contain lowercase alphanumeric characters plus a dot (.), dash (-), or colon (:). We recommend keeping it short or at most 63 characters. Next, choose the Extent Type.
If the Extent Type is Device, select the Zvol to share from the Device menu.
If the Extent Type is File, select the path to it and indicate the size.
Select the type of platform using the share. For example, if you use an updated Linux OS, choose Modern OS.
Now you either create a new portal or select an existing one from the dropdown list.
If you create a new portal, you need to select a Discovery Authentication Method.
If you set the Discovery Authentication Method to CHAP or MUTUAL CHAP, you also need to select a Discovery Authentication Group. If no group exists, click Create New from the dropdown list and enter a value in Group ID, User, and Secret.
When the Discovery Authentication Method is NONE, you can leave the Discovery Authentication Group empty.
Select 0.0.0.0 or :: from the IP Address dropdown list and click NEXT. 0.0.0.0 listens on all IPv4 addresses and :: listens on all IPv6 addresses.
Decide which initiators or networks can use the iSCSI share.
Leave the list empty to allow all initiators or networks, or add entries to the list to limit access to those systems.
Confirm the settings are correct and click Submit.
Manual Setup
The Target Global Configuration tab lets users configure settings that apply to all iSCSI shares.
Setting
Description
Base Name
Lowercase alphanumeric characters plus dot (.), dash (-), and colon (:) are allowed. See the “Constructing iSCSI names using the iqn.format” section of RFC3721.
ISNS Servers
Hostnames or IP addresses of the ISNS servers to register with the iSCSI targets and portals of the system. Separate entries by pressing Enter.
Pool Available Space Threshold (%)
Generates an alert when the pool has this percent space remaining. This is typically configured at the pool level when using zvols or at the extent level for both file and device-based extents.
The Portals tab lets users create new portals or edit existing ones in the list.
To add a new portal, click ADD and enter the basic and IP address information.
To edit an existing portal, click more_vert next to the portal and select Edit.
Basic Info
Setting
Description
Description
Optional description. Portals are automatically assigned a numeric group.
Authentication Method and Group
Setting
Description
Discovery Authentication Method
iSCSI supports multiple authentication methods that the target uses to discover valid devices. None allows anonymous discovery while CHAP and Mutual CHAP require authentication.
Discovery Authentication Group
Group ID created in Authorized Access. Required when the Discovery Authentication Method is CHAP or Mutual CHAP.
IP Address
Setting
Description
IP Address
Select the IP addresses the portal listens to. Click Add to add IP addresses with a different network port. 0.0.0.0 listens on all IPv4 addresses and :: listens on all IPv6 addresses.
Port
TCP port used to access the iSCSI target. Default is 3260.
ADD
Adds another IP address row.
The Initiators Groups tab lets users create new authorized access client groups or edit existing ones in the list.
To add a new initiators group, click Add and leave Allow All Initiators checked or configure your own allowed initiators and authorized networks.
To edit an existing initiators group, click more_vert next to the initiators group and select Edit.
Setting
Description
Allow All Initiators
Allows all initiators when checked.
Allowed Initiators (IQN)
Initiators allowed access to this system. Enter an iSCSI Qualified Name (IQN) and click + to add it to the list. Example: iqn.1994-09.org.freebsd:freenas.local.
Authorized Networks
Network addresses allowed to use this initiator. Each address can include an optional CIDR netmask. Click + to add the network address to the list. Example: 192.168.2.0/24.
Description
Any notes about initiators.
The Authorized Access tab lets users create new authorized access networks or edit existing ones in the list.
To add a new authorized access network, click ADD and fill out the group, user, and peer user information.
To edit an existing authorized access network, click more_vert next to it and select Edit.
Group
Setting
Description
Group ID
Allow configuring different groups with different authentication profiles. Example: all users with a group ID of 1 inherits the authentication profile associated with Group 1.
User
Setting
Description
User
User account to create for CHAP authentication with the user on the remote system. Many initiators use the initiator name as the user name.
Secret
User password. Must be at least 12 and no more than 16 characters long.
Secret (Confirm)
Confirm the user password.
Peer User
Setting
Description
Peer User
Only entered when configuring mutual CHAP. Usually the same value as User.
Peer Secret
Mutual secret password. Required when Peer User is set. Must be different than the Secret.
Peer Secret (Confirm)
Confirm the mutual secret password.
The Targets tab lets users create new TrueNAS storage resources or edit existing ones in the list.
To add a new target, click ADD and enter the basic and iSCSI group information.
To edit an existing target, click more_vert next to it and select Edit.
Basic Info
Setting
Description
Target Name
The base name is automatically prepended if the target name does not start with iqn. Lowercase alphanumeric characters plus dot (.), dash (-), and colon (:) are allowed. See the “Constructing iSCSI names using the iqn.format” section of RFC3721.
Target Alias
Optional user-friendly name.
iSCSI Group
Setting
Description
Portal Group ID
Leave empty or select an existing portal to use.
Initiator Group ID
Select the existing initiator group that has access to the target.
Authentication Method
Choices are None, Auto, CHAP, or Mutual CHAP.
Authentication Group Number
Select None or an integer. This value represents the number of existing authorized accesses.
The Extents tab lets users create new shared storage units or edit existing ones in the list.
To add a new extent, click Add and enter the information.
To edit an existing extent, click more_vert next to it and select Edit.
Basic Info
Setting
Description
Name
Name of the extent. If the Extent size is not 0, it cannot be an existing file within the pool or dataset.
Description
Notes about this extent.
Enabled
Set to enable the iSCSI extent.
Type
Setting
Description
Extent Type
Device provides virtual storage access to zvols, zvol snapshots, or physical devices. File provides virtual storage access to a single file.
Device
Only appears if Device is selected. Select the unformatted disk, controller, or zvol snapshot.
Path to the Extent
Only appears if File is selected. Browse to an existing file. Create a new file by browsing to a dataset and appending /{filename.ext} to the path. Users cannot create extents inside a jail root directory.
Filesize
Only appears if File is selected. Entering 0 uses the actual file size and requires that the file already exists. Otherwise, specify the file size for the new file.
Logical Block Size
Leave at the default of 512 unless the initiator requires a different block size.
Disable Physical Block Size Reporting
Set if the initiator does not support physical block size values over 4K (MS SQL).
Compatibility
Setting
Description
Enable TPC
Set to allow an initiator to bypass normal access control and access any scannable target. This allows xcopy operations that are otherwise blocked by access control.
Xen initiator compat mode
Set when using Xen as the iSCSI initiator.
LUN RPM
Do NOT change this setting when using Windows as the initiator. You only change it in large environments where the number of systems using a specific RPM is needed for accurate reporting statistics.
Read-only
Set to prevent the initiator from initializing this LUN.
The Associated Targets tab lets users create new associated TrueNAS storage resources or edit existing ones in the list.
To add a new associated target, click ADD and fill out the information.
To edit an existing associated target, click more_vert next to it and select Edit.
Setting
Description
Target
Select an existing target.
LUN ID
Select the value or enter a value between 0 and 1023. Some initiators expect a value below 256. Leave this field blank to automatically assign the next available ID.
Extent
Select an existing extent.
TrueNAS SCALE allows users to add iSCSI targets without having to set up another share. Go to Shares and click Add in the Block (iSCSI) Shares Targets window.
Basic Info
Setting
Description
Target Name
The base name is automatically prepended if the target name does not start with iqn. Lowercase alphanumeric characters plus dot (.), dash (-), and colon (:) are allowed. See the “Constructing iSCSI names using the iqn.format” section of RFC3721.
Target Alias
Optional user-friendly name.
iSCSI Group
Setting
Description
Portal Group ID
Leave empty or select an existing portal to use.
Initiator Group ID
Select which existing initiator group has access to the target.
Authentication Method
Choices are None, Auto, CHAP, or Mutual CHAP.
Authentication Group Number
Select None or an integer. This value represents the number of existing authorized accesses.
Starting the iSCSI Service
To turn on the iSCSI service, go to Services and toggle on iSCSI.
Set Start Automatically to start it when TrueNAS boots up.
Clicking the edit returns to the options in Shares > Block (iSCSI) Shares Targets.
Using the iSCSI Share
Connecting to and using an iSCSI share can differ between operating systems.
iSCSI Utilities and Service
First, open the command line and ensure you have installed the open-iscsi utility.
To install the utility on an Ubuntu/Debian distribution, enter sudo apt update && sudo apt install open-iscsi.
After the installation completes, ensure the iscsid service is running: sudo service iscsid start.
With the iscsid service started, run the iscsiadm command with the discovery arguments and get the necessary information to connect to the share.
Discover and Log In to the iSCSI Share
Run the command sudo iscsiadm \--mode discovery \--type sendtargets \--portal {IPADDRESS}.
The output provides the basename and target name that TrueNAS configured.
Alternatively, enter sudo iscsiadm -m discovery -t st -p {IPADDRESS} to get the same output.
Note the basename and target name given in the output. You need them to log in to the iSCSI share.
When a Portal Discovery Authentication Method is CHAP, add the three following lines to /etc/iscsi/iscsid.conf.
discovery.sendtargets.auth.authmethod = CHAP
discovery.sendtargets.auth.username = user
discovery.sendtargets.auth.password = secret
The user for discovery.sendtargets.auth.username is set in the Authorized Access used by the iSCSI share Portal. Likewise, the password to use for discovery.sendtargets.auth.password is the Authorized Access secret. Without those lines, the iscsiadm does not discover the portal with the CHAP authentication method.
Next, enter sudo iscsiadm \--mode node \--targetname {BASENAME}:{TARGETNAME} \--portal {IPADDRESS} \--login, where {BASENAME} and {TARGETNAME} is the discovery command information.
Partition iSCSI Disk
When the iSCSI share login succeeds, the device shared through iSCSI shows on the Linux system as an iSCSI Disk.
To view a list of connected disks in Linux, enter sudo fdisk -l.
Because the connected iSCSI disk is raw, you must partition it.
Identify the iSCSI device in the list and enter sudo fdisk {/PATH/TO/iSCSIDEVICE}.
Shell lists the iSCSI device path in the sudo fdisk -l output.
Use the fdisk command defaults when partitioning the disk.
Remember to type w when finished partitioning the disk.
The w command tells fdisk to save any changes before quitting.
After creating the partition on the iSCSI disk, a partition slice displays on the device name.
For example, /dev/sdb1.
Enter fdisk -l to see the new partition slice.
Make a Filesystem on the iSCSI Disk
Finally, use mkfs to make a filesystem on the new partition slice.
To create the default filesystem (ext2), enter sudo mkfs {/PATH/TO/iSCSIDEVICEPARTITIONSLICE}.
Mount the iSCSI Device
Now the iSCSI device can mount and share data.
Enter sudo mount {/PATH/TO/iSCSIDEVICEPARTITIONSLICE}.
For example, sudo mount /dev/sdb1 /mnt mounts the iSCSI device sdb1 to /mnt.
To access the data on the iSCSI share, clients need to use iSCSI Initiator software. An iSCSI Initiator client is pre-installed in Windows 7 to 10 Pro, and Windows Server 2008, 2012, and 2019. Windows Professional Edition is usually required.
First, click the Start Menu and search for the iSCSI Initiator application.
Next, go to the Configuration tab and click Change to replace the iSCSI initiator with the name created earlier. Click OK.
Next, switch to the Discovery Tab, click Discover Portal, and type in the TrueNAS IP address.
If TrueNAS changed the port number from the default 3260, enter the new port number.
If you set up CHAP when creating the iSCSI share, click Advanced…, set Enable CHAP log on, and enter the initiator name and the same target/secret set earlier in TrueNAS.
Click OK.
Go to the Targets tab, highlight the iSCSI target, and click Connect.
After Windows connects to the iSCSI target, you can partition the drive.
Search for and open the Disk Management app.
The current state of your drive should be unallocated. Right-click the drive and click New Simple Volume….
Complete the Wizard to format the drive and assign a drive letter and name.
Finally, go to This PC or My Computer in File Explorer. The new iSCSI volume should display under the list of drives. You should now be able to add, delete, and modify files and folders on your iSCSI drive.
Expanding LUNs
TrueNAS lets users expand Zvol and file-based LUNs to increase the available storage that the iSCSI shares.
To expand a Zvol LUN, go to Storage and click the more_vert next to the Zvol LUN, then select Edit Zvol.
Enter a new size in the Size for this zvol field, then click SAVE.
TrueNAS prevents data loss by not allowing users to reduce the Zvol size.
TrueNAS also does not allow users to increase the Zvol size past 80% of the pool size.
You need to know the path to the file to expand a file-based LUN. Go to Shares and click Configure in the Block (iSCSI) Shares Targets window, then select the Extents tab.
Click the more_vert next to the file-based LUN and select Edit.
Highlight and copy the path, then click Cancel.
Go to Shell and input truncate -s +[size] [path to file], then press Enter.
The [size] is how much space you want to grow the file by, and the [path to file] is the file path you copied earlier.
An example command could look like this: truncate -s +2g /mnt/Pool1/Dataset1/File LUN
Lastly, go back to the extent in Shares > Block (iSCSI) Shares Targets and make sure the Filesize is set to 0 so that the share uses the actual file size.
SMB (also known as CIFS) is the native file sharing system in Windows.
SMB shares can connect to most operating systems, including Windows, macOS, and Linux.
TrueNAS can use SMB to share files among single or multiple users or devices.
SMB supports a wide range of permissions, security settings, and advanced permissions (ACLs) on Windows and other systems, as well as Windows Alternate Streams and Extended Metadata.
SMB is suitable for managing and administering large or small pools of data.
TrueNAS uses Samba to provide SMB services.
The SMB protocol has multiple versions. An SMB client typically negotiates the highest supported SMB protocol during SMB session negotiation. Industry-wide, SMB1 protocol (sometimes referred to as NT1) usage is being deprecated for security reasons.
However, most SMB clients support SMB 2 or 3 protocols, even when they are not default.
Legacy SMB clients rely on NetBIOS name resolution to discover SMB servers on a network. TrueNAS disables the NetBIOS Name Server (nmbd) by default. Enabled in Network if you require its functionality.
MacOS clients use mDNS to discover SMB servers present on the network. TrueNAS enables the mDNS server (avahi) by default.
Windows clients use WS-Discovery to discover the presence of SMB servers, but network discovery can be disabled by default depending on the Windows client version.
Discoverability through broadcast protocols is a convenience feature and not required to access an SMB server.
First Steps
Create a Dataset
It is recommended to create a new dataset and set the Share Type to SMB for the new SMB share.
TrueNAS creates the ZFS dataset with these settings:
aclmode = restricted
case sensitivity = insensitive
TrueNAS also applies a default access control list to the dataset.
This default ACL is restrictive and only allows access to the dataset owner and group.
You can modify the ACL later according to your use case.
Create Local User Accounts
By default, all new local users are members of a built-in SMB group called builtin users.
You can use the group to grant access to all local users on the server or add more groups to fine-tune permissions to large numbers of users.
You cannot access SMB shares with user accounts built-in to TrueNAS or those without the smb flag.
Anonymous or guest access to the share is possible, but it is a security vulnerability.
Major SMB client vendors are deprecating it, partly because signing and encryption are not possible for guest sessions.
If you want LDAP server users to access the SMB share, go to Credentials > Directory Services.
Click Settings in the LDAP window, then click Advanced Options and set Samba Schema.
Local TrueNAS user accounts no longer have access to the share.
Tune the Dataset ACL
After creating a dataset and accounts, you need to investigate your access requirements and adjust the dataset ACL to match.
Go to Storage, open the options for the new dataset, and click Edit Permissions.
Many home users typically add a new entry that grants FULL_CONTROL to the builtin_users group with the flags set to INHERIT.
See the Permissions article for more details.
Creating the SMB Share
To create a Windows SMB share, go to Sharing > Windows Shares (SMB) and click Add.
The SMB share Path and Name define the absolute minimum amount of information required to create a new SMB share. The Path is the directory tree on the local filesystem that TrueNAS exports over the SMB protocol. The Name is the SMB share name, which forms part of the full share pathname when SMB clients perform an SMB tree connect. Because of how the SMB protocol uses the name, it must be less than or equal to 80 characters. It cannot have any invalid characters as specified in Microsoft documentation MS-FSCC section 2.1.6. If a name is not supplied, then the last component of the path is used as the share name.
You can set a share Purpose to apply and lock pre-determined advanced options for the share.
To retain control over all the share Advanced Options, choose No presets.
The following table shows the preset options for the different Purpose options and if those are locked. A check_box indicates the option is enabled while check_box_outline_blank means the option is disabled. [ ] indicates empty text fields, and [%U] indicates the exact option the preset created.
Setting
Default share parameters
Multi-user time machine
Multi-protocol (NFSv3/SMB) shares
Private SMB Datasets and Shares
Files become readonly of SMB after 5 minutes
Enable ACL
check_box (locked)
check_box
check_box_outline_blank (locked)
check_box_outline_blank
Export Read Only
check_box_outline_blank (locked)
check_box_outline_blank
Browsable to Network Clients
check_box (locked)
check_box
check_box
check_box
check_box
Allow Guest Access
check_box_outline_blank
Access Based Share Enumeration
check_box_outline_blank (locked)
check_box_outline_blank
Hosts Allow
check_box_outline_blank (locked)
check_box_outline_blank
Hosts Deny
check_box_outline_blank (locked)
check_box_outline_blank
Use as Home Share
check_box_outline_blank (locked)
check_box_outline_blank
Time Machine
check_box_outline_blank (locked)
check_box_outline_blank
Enable Shadow Copies
check_box (locked)
check_box
check_box
check_box
check_box
Export Recycle Bin
check_box_outline_blank (locked)
check_box_outline_blank
Use Apple-style Character Encoding
check_box_outline_blank (locked)
check_box_outline_blank
check_box
check_box
check_box
Enable Alternate Data Streams
check_box (locked)
check_box
check_box_outline_blank (locked)
check_box_outline_blank
Enable SMB2/3 Durable Handles
check_box (locked)
check_box
check_box_outline_blank (locked)
check_box_outline_blank
Enable FSRVP
check_box_outline_blank (locked)
check_box_outline_blank
Path Suffix
[ ] (locked)
[%U] (locked)
[%U]
[%U] (locked)
[ ] (locked)
Auxiliary Parameters
[ ]
[ ]
[ ]
[ ]
[ ]
You can specify an optional Description to help explain the share purpose.
Enabled allows this path to be shared when the SMB service is activated.
Unsetting Enabled disables the share without deleting the configuration.
Options are divided into Access and Other Options groups.
Access options control various settings for allowing systems or users to access or modify the shared data.
Setting
Description
Enable ACL
Enables ACL support for the SMB share.
Export Read Only
Prohibits writes to the share.
Browsable to Network Clients
Determine whether this share name is included when browsing shares. Home shares are only visible to the owner regardless of this setting.
Allow Guest Access
Privileges are the same as the guest account. Guest access is disabled by default in Windows 10 version 1709 and Windows Server version 1903. Additional client-side configuration is required to provide guest access to these clients.
MacOS clients: Attempting to connect as a user that does not exist in FreeNAS does not automatically connect as the guest account. The Connect As: Guest option must be specifically chosen in macOS to log in as the guest account. See the Apple documentation for more details.
Access Based Share Enumeration
Restrict share visibility to users with read or write access to the share. See the smb.conf manual page.
Hosts Allow
Enter a list of allowed hostnames or IP addresses. Separate entries by pressing Enter. You can find a more detailed description with examples here.
Hosts Deny
Enter a list of denied hostnames or IP addresses. Separate entries by pressing Enter.
The Hosts Allow and Hosts Deny fields work together to produce different situations:
If neither Hosts Allow or Hosts Deny contains an entry, then SMB share access is allowed for any host.
If there is a Hosts Allow list but no Hosts Deny list, then only allow hosts on the Hosts Allow list.
If there is a Hosts Deny* list but no Hosts Allow list, then allow all hosts on the Hosts Deny list.
If there is both a Hosts Allow and Hosts Deny list, then allow all hosts on the Hosts Allow list. If there is a host not on the Hosts Allow and not on the Hosts Deny list, then allow it.
The Other Options have settings for improving Apple software compatibility, ZFS snapshot features, and other advanced features.
Setting
Description
Use as Home Share
Allows the share to host user home directories. Each user is given a personal home directory when connecting to the share which is not accessible by other users. This allows for a personal, dynamic share. Only one share can be used as the home share. See the SMB Home Shares section below.
This controls how the SMB share reads and writes data. Leave unset for the share to behave like a normal SMB share and set for the share to behave like the deprecated Apple Filing Protocol (AFP). Only set this when this share originated as an AFP sharing configuration. This is not required for pure SMB shares or macOS SMB clients.
Enable Shadow Copies
Export ZFS snapshots as Shadow Copies for Microsoft Volume Shadow Copy Service (VSS) clients.
Export Recycle Bin
Files that are deleted from the same dataset are moved to the Recycle Bin and do not take any additional space. Deleting files over NFS removes the files permanently. When the files are in a different dataset or a child dataset, they are copied to the dataset where the recycle bin is located. To prevent excessive space usage, files larger than 20 MiB are deleted rather than moved. Adjust the Auxiliary Parametercrossrename:sizelimit= setting to allow larger files. For example, crossrename:sizelimit=50 allows moves of files up to 50 MiB in size. This means files can be permanently deleted or moved from the recycle bin. This is not a replacement for ZFS snapshots.
Use Apple-style Character Encoding
By default, Samba uses a hashing algorithm for NTFS illegal characters. Enabling this option converts NTFS illegal characters in the same manner as macOS SMB clients.
Enable Alternate Data Streams
Allows multiple NTFS data streams. Disabling this option causes macOS to write streams to files on the filesystem.
Enable SMB2/3 Durable Handles
Allow using open file handles that can withstand short disconnections. Support for POSIX byte-range locks in Samba is also disabled. This option is not recommended when configuring multi-protocol or local access to files.
Enable FSRVP
Enable support for the File Server Remote VSS Protocol (FSVRP). This protocol allows remote procedure call (RPC) clients to manage snapshots for a specific SMB share. The share path must be a dataset mount point. Snapshots have the prefix fss- followed by a snapshot creation timestamp. A snapshot must have this prefix for an RPC user to delete it.
Path Suffix
Appends a suffix to the share connection path. This is used to provide unique shares on a per-user, per-computer, or per-IP address basis. Suffixes can contain a macro. See the smb.conf manual page for a list of supported macros. The connectpath must be preset before a client connects.
Clicking Save creates the share and adds it to the Shares > Windows (SMB) Shares list.
You can also choose to enable the SMB service at this time.
Share Management
After creating the SMB share, additional management options are available by going to the Shares screen and clicking open_in_new in the Windows (SMB) Shares window. Click next to the share you want to manage.
Edit Share ACL: Opens a screen to configure an Access Control List (ACL) for the share. This screen is separate from filesystem permissions and applies at the entire SMB share level. Other filesharing protocol clients or other SMB shares that export the same share Path do not interpret these permissions. Open is the default. This ACL determines the browse list if Access Based Share Enumeration is enabled.
Edit Filesystem ACL: Opens a screen to configure an Access Control List (ACL) for the path defined in the share Path.
Delete: Remove the share configuration from TrueNAS. Shared data is unaffected.
Configure Share ACL
To see the share ACL options, select Edit Share ACL.
TrueNAS displays the Share Name (cannot be changed).
ACL Entries are listed as a block of settings.
Click Add to register a new entry.
Setting
Description
SID
Who this ACL entry (ACE) applies to, shown as a Windows Security Identifier. Values in either SID or Domain with Name is required for the ACL.
Domain
Domain for the user specified in Name. Required when a SID value is not entered. Local users have the SMB server NetBIOS name: truenas\smbusers.
Permission
Predefined permission combinations. Read: Read access and Execute permission on the object (RX). Change: Read access, Execute permission, Write access, and Delete object (RXWD). Full: Read access, Execute permission, Write access, Delete object, change Permissions, and take Ownership (RXWDPO).
Who this ACL entry applies to, shown as a user name. Requires adding the user Domain.
Type
How permissions are applied to the share. Allowed denies all permissions by default except those that are manually defined. Denied allows all permissions by default except those that are manually defined.
Clicking Save stores the share ACL and applies it to the share immediately.
Configure Filesystem ACL
Selecting Edit Filesystem ACL takes you to the Edit File ACL screen in Storage to edit the dataset ACL.
Since SCALE gives users the option to use either POSIX or NFSv4 share ACL types, the Edit File ACL page differs depending on which ACL type the filesystem is using.
The filesystem ACL defines the user accounts or groups that own or have specific permissions to the shared dataset.
The User and Group values show which accounts own or have full permissions to the dataset.
Change the default settings to your preferred primary account and group and set the Apply permissions recursively checkbox before saving any changes.
ACL Presets
To rewrite the current ACL with a standardized preset, click Use ACL Preset and choose an option:
NFS4_OPEN: Owner and group have full dataset control. All other accounts can modify the dataset contents. NFS4_RESTRICTED: Owner has full dataset control. Group can modify the dataset contents.
NFS4_HOME: Owner has full dataset control. Group can modify the dataset contents. All other accounts can navigate the dataset.
Adding ACL Entries (ACEs)
To define permissions for a specific user account or group, click Add Item.
Open the Who drop-down, select User or Group, and choose a specific user or group account.
Define how the settings apply to the account, then choose which permissions to apply.
For example, to only allow the newuser user permission to view dataset contents but not make changes, set the ACL Type to Allow and Permissions to Read.
The filesystem ACL defines the user accounts or groups that own or have specific permissions to the shared dataset.
The User and Group values show which accounts own, or have full permissions to the dataset.
Change the default settings to your preferred primary account and group and set the Apply permissions recursively checkbox before saving any changes.
ACL Presets
To rewrite the current ACL with a standardized preset, click Use ACL Preset and choose an option:
POSIX_OPEN: Owner and group have full dataset control. All other accounts can modify the dataset contents. POSIX_RESTRICTED: Owner has full dataset control. Group can modify the dataset contents.
POSIX_HOME: Owner has full dataset control. Group can modify the dataset contents. All other accounts can navigate the dataset.
Adding ACL Entries (ACEs)
To define permissions for a specific user account or group, click Add Item.
Open the Who drop-down, select User or Group, and choose a specific user or group account.
Define how the settings apply to the account, then choose which permissions to apply.
For example, to only allow the newuser user permission to view dataset contents but not make changes, set the ACL Type to Allow and Permissions to Read.
Activate the SMB Service
Connecting to an SMB share does not work when the related system service is not activated.
To make SMB share available on the network, go to System Settings > Services and click the toggle to running for SMB.
Set Start Automatically if you want the service to activate when TrueNAS boots.
Service Configuration
Configure the SMB service by clicking edit.
Unless you need a specific setting or are configuring a unique network environment, we recommend the default settings.
Setting
Description
NetBIOS Name
Automatically populated with the system’s original hostname. This name is limited to 15 characters and cannot be the Workgroup name.
NetBIOS Alias
Enter any aliases, separated by spaces. Each alias can be up to 15 characters long.
Workgroup
Must match the Windows workgroup name. When this is unconfigured and Active Directory or LDAP is active, TrueNAS detects and sets the correct workgroup from these services.
Description
This allows entering any notes or descriptive details about the service configuration.
Enable SMB1 support
Allow legacy SMB1 clients to connect to the server. Note that SMB1 is being deprecated and it is advised to upgrade clients to operating system versions that support modern SMB protocol versions.
NTLMv1 Auth
When set, smbd attempts to authenticate users with the insecure and vulnerable NTLMv1 encryption. This setting allows backward compatibility with older versions of Windows, but is not recommended and should not be used on untrusted networks.
Setting
Description
UNIX Charset
Character set used internally. UTF-8 is standard for most systems as it supports all characters in all languages.
Log Level
Record SMB service messages up to the specified log level. By default, error and warning level messages are logged. It is not recommended to use a log level above minimum for production servers.
Use Syslog Only
Set to log authentication failures in /var/log/messages instead of the default /var/log/samba4/log.smbd.
Local Master
Set to determine if the system participates in a browser election. Clear the setting when the network contains an AD or LDAP server, or when Vista or Windows 7 machines are present.
Enable Apple SMB2/3 Protocol Extensions
These protocol extensions can be used by macOS to improve the performance and behavioral characteristics of SMB shares. This is required for Time Machine support.
Administrators Group
Members of this group are local administrators and automatically have privileges to take ownership of any file in an SMB share, reset permissions, and administer the SMB server through the Computer Management MMC snap-in.
Guest Account
Account used for guest access. Default is nobody. The chosen account is required to have permissions to the shared pool or dataset. To adjust permissions, edit the dataset Access Control List (ACL), add a new entry for the chosen guest account, and configure the permissions in that entry. If the selected Guest Account is deleted the field resets to nobody.
File Mask
Overrides default 0666 file creation mask which creates files with read and write access for everybody.
Directory Mask
Overrides default directory creation mask of 0777 which grants directory read, write and execute access for everybody.
Bind IP Addresses
Static IP addresses which SMB listens on for connections. Leaving all unselected defaults to listening on all active interfaces.
Auxiliary Parameters
Stores additional smb.conf. Auxiliary parameters can be used to override the default SMB server configuration, but such changes may adversely affect SMB server stability or behavior.
Mounting SMB Share on another machine.
Verify that your Linux distribution has the required CIFS packages installed.
Create a mount point: sudo mkdir /mnt/smb_share.
Mount the volume. sudo mount -t cifs //computer_name/share_name /mnt/smb_share.
If your share requires user credentials, add the switch -o username= with your username after cifs and before the share address.
To mount the SMB share to a drive letter on Windows, open the command line and run the following command with the appropriate drive letter, computer name, and share name.
net use Z: \\computer_name\share_name /PERSISTENT:YES
Open Finder > Go > Connect To Server
Enter the SMB address: smb://192.168.1.111.
Input the username and password for the user assigned to that pool or guest if the share has guest access.
Create a mount point: sudo mkdir /mnt/smb_share.
Mount the volume. sudo mount_smbfs -I computer_name\share_name /mnt/smb_share.
SMB Home Shares
TrueNAS offers the Use as Home Share option for organizations or SMEs that want to use a single SMB share to provide a personal directory to every user account.
The Use as Home Share feature is available for a single TrueNAS SMB share. You can create additional SMB shares without the Use as Home Share option enabled.
Go to Storage and open the more_vert next to the root dataset in the pool you just created, then click Add Dataset.
Name the dataset and set the Share Type to SMB.
After creating the dataset, go to Storage and open more_vert next to the new dataset. Select View Permissions, then click edit.
Click the Group drop-down list and change the owning group to your Active Directory domain admins.
Click Use an ACL Preset and choose NFS4_HOME. Then, click Continue.
Create the Share
Go to Shares > Windows (SMB) Shares and click Add.
Set the Path to the prepared dataset.
The Name automatically becomes identical to the dataset. Leave this at the default.
Set the Purpose to No presets, then click Advanced Options and set Use as Home Share. Click Save.
Enable the SMB service in System Settings > Services to make the share is available on your network.
Add Users
Go to Credentials > Local Users and click Add. Create a new user name and password. By default, the user Home Directory is titled from the user account name and added as a new subdirectory of Home_Share_Dataset.
If existing users require access to the home share, go to Credentials > Local Users and edit an existing account.
Adjust the user home directory to the appropriate dataset and give it a name to create their own directory.
After adding the user accounts and configuring permissions, users can log in to the share and see a folder matching their username.
SMB Shadow Copies
Shadow Copies, also known as the Volume Shadow Copy Service (VSS) or Previous Versions, is a Microsoft service for creating volume snapshots.
You can use shadow copies to restore previous versions of files from within Windows Explorer.
By default, all ZFS snapshots for a dataset underlying an SMB share path are presented to SMB clients through the volume shadow copy service or are accessible directly with SMB when the hidden ZFS snapshot directory is within the SMB share path.
There are a few caveats about shadow copies to be aware of before activating the feature in TrueNAS:
Shadow copies might not work if the Windows system is not patched to the latest service pack. If no previous versions of files to restore are visible, use Windows Update to ensure the system is fully up-to-date.
Shadow copy support only works for ZFS pools or datasets.
Permissions on the pool or dataset SMB shares must be configured appropriately.
Shadow copy cannot be deleted by users with an SMB client. Instead, the administrator uses the TrueNAS web interface to remove snapshots. Shadow copies can be disabled for an SMB share by unsetting Enable shadow copies for the SMB share. This does not prevent access to the hidden .zfs/snapshot directory for a ZFS dataset when the directory is located within the path for an SMB share.
To enable shadow copies, go to Shares > Windows (SMB) Shares and Edit an existing share.
Open the Advanced Options and set Enable Shadow Copies.
Some users have experienced issues in the Windows 10 v2004 release where network shares can’t be accessed. The problem appears to come from a bug in gpedit.msc, the Local Group Policy Editor. Unfortunately, setting the Allow insecure guest logon flag value to Enabled in Computer Configuration > Administrative Templates > Network > Lanman Workstation appears to have no effect on the configuration.
To work around this issue, edit the Windows registry. Use Regedit and go to HKLM\SYSTEM\CurrentControlSet\Services\LanmanWorkstation\Parameters.
The DWORD AllowInsecureGuestAuth is an incorrect value: 0x00000000. Change this value to 0x00000001 (Hexadecimal 1) to allow adjusting the settings in gpedit.msc.
You can use a Group Policy Update to apply this to a fleet of Windows machines.
Creating a Network File System (NFS) share on TrueNAS makes a lot of data available for anyone with share access.
Depending on the share configuration, it can restrict users to read or write privileges.
To create a new share, make sure a dataset is available with all the data for sharing.
Use the file browser to select the dataset to be shared.
You can enter an optional text to help identify the share in Description.
Clicking Save creates the share.
At the time of creation, you can select Enable Service for the service to start and to automatically start after any reboots.
If you wish to create the share but not immediately enable it, select Cancel.
NFS Share Settings
Setting
Description
Path
Type or browse to the full path to the pool or dataset to share. Click Add to configure multiple paths.
Description
Enter any notes or reminders about the share.
Enabled
Enable this NFS share. Unset to disable this NFS share without deleting the configuration.
Add networks
Enter an allowed network in network/mask CIDR notation. Click Add to define another authorized network. Defining an authorized network restricts access to all other networks. Leave empty to allow all networks.
Add hosts
Enter a hostname or IP address to allow that system access to the NFS share. Click Add to define another allowed system. Defining authorized systems restricts access to all other systems. Leave the field empty to allow all systems access to the share.
Opening the Advanced Options allows tuning the share access permissions and defining authorized networks.
Setting
Value
Description
Read Only
checkbox
Prohibits writing to the share when set.
Maproot User
string or drop-down
Select a user to apply that user’s permissions to the root user.
Maproot Group
string or drop-down
Select a group to apply that group’s permissions to the root user.
Mapall User
string or drop-down
Permissions for the chosen user applied to all clients.
Mapall Group
string or drop-down
Permissions for the chosen group are applied to all clients.
To edit an existing NFS share, go to Shares > Unix Shares (NFS) and click the share you want to edit.
The options available are identical to the share creation options.
Configure the NFS Service
To begin sharing, go to System Settings > Services and click the NFS toggle to running.
Select Start Automatically if you want NFS to activate when TrueNAS boots.
NFS service settings can be configured by clicking edit.
Setting
Description
Bind IP Addresses
Select IP addresses to listen to for NFS requests. Leave empty for NFS to listen to all available addresses.
Enable NFSv4
Set to switch from NFSv3 to NFSv4.
NFSv3 ownership model for NFSv4
Set when NFSv4 ACL support is needed without requiring the client and the server to sync users and groups.
Require Kerberos for NFSv4
Set to force NFS shares to fail if the Kerberos ticket is unavailable.
Serve UDP NFS clients
Set if NFS clients need to use the User Datagram Protocol (UDP).
Support >16 groups
Set when a user is a member of more than 16 groups. This assumes group membership is configured correctly on the NFS server.
Enter a number to bind rpc.statd only to that port.
rpc.lockd(8) bind port
Enter a number to bind rpc.lockd only to that port.
Unless you need a specific setting, we recommend using the default NFS settings.
When TrueNAS is already connected to Active Directory, setting NFSv4 and Require Kerberos for NFSv4 also requires a Kerberos Keytab.
Connecting to the NFS Share
Although you can connect to an NFS share with various operating systems, it is recommended to use a Linux/Unix operating system.
First, download the nfs-common kernel module.
This can be done using the installed distribution package manager.
For example, on Ubuntu/Debian, enter sudo apt-get install nfs-common in the terminal.
After installing the module, connect to an NFS share by entering sudo mount -t nfs {IPaddressOfTrueNASsystem}:{path/to/nfsShare} {localMountPoint}.
In the above example, {IPaddressOfTrueNASsystem} is the remote TrueNAS system IP address that contains the NFS share, {path/to/nfsShare} is the path to the NFS share on the TrueNAS system, and {localMountPoint} is a local directory on the host system configured for the mounted NFS share.
For example, sudo mount -t nfs 10.239.15.110:/mnt/Pool1/NFS_Share /mnt mounts the NFS share NFS_Share to the local directory /mnt.
You can also use the linux nconnect function to let your NFS mount to support multiple TCP connections.
To enable nconnect, enter sudo mount -t nfs -o rw,nconnect=16 {IPaddressOfTrueNASsystem}:{path/to/nfsShare} {localMountPoint}.
Use the same {IPaddressOfTrueNASsystem}, {path/to/nfsShare}, and {localMountPoint} you used when connecting to the share.
For example, sudo mount -t nfs -o rw,nconnect=16 10.239.15.110:/mnt/Pool1/NFS_Share /mnt.
By default, anyone that connects to the NFS share only has read permission.
To change the default permissions, edit the share, open the Advanced Options, and change the Access settings.
ESXI 6.7 or later is required for read/write functionality with NFSv4 shares.
A Web-based Distributed Authoring and Versioning (WebDAV) share makes it easy to share a TrueNAS dataset and its contents over the web.
To create a new share, make sure a dataset is available with all the data for sharing.
Share Configuration
Go to Shares > WebDAV Shares and click Add.
Enter a share Name and use the file browser to select the dataset to be shared.
An optional Description helps to identify the share.
To prevent user accounts from modifying the shared data, set Read Only.
By default, Change User & Group Ownership is set.
This changes existing ownership of all files in the share to the webdav user and group accounts.
The default simplifies WebDAV share permission, but is unexpected, so the web interface shows a warning:
This warning does not show when the Change User & Group Ownership checkbox is cleared.
In that situation, you must manually set shared file ownership to the webdav or www user and group accounts.
By default, the new WebDAV share is immediately active.
To create the share but not immediately activate it, unset Enable.
Click Submit to create the share.
Service Activation
Creating a share allows users to activate the WebDAV service.
To enable or disable the WebDAV service, go to System Settings > Services and toggle WebDAV.
To automatically start the service when TrueNAS boots, set Start Automatically.
Click edit to change the service settings.
For better data security, set the Protocol to HTTPS.
If you require it, you must choose an SSL certificate (freenas_default is always available).
All Protocol options require you to define a number in the Port field.
Make sure the network is not already using the WebDAV service port.
To prevent unauthorized access to the shared data, set the HTTP Authentication to either Basic or Digest and create a new Webdav Password.
Be sure to click Save after making any changes.
Connecting to the WebDAV Share
WebDAV shared data is accessible from a web browser.
To see the shared data, open a new browser tab and enter {PROTOCOL}://{TRUENASIP}:{PORT}/{SHAREPATH}.
Replace the elements in curly brackets {} with your chosen WebDAV share and service settings.
Example: https://10.2.1.1:8081/newdataset
TrueNAS requires a username and password when setting the Authentication WebDAV service option to Basic or Digest.
Enter the user name webdav and the password defined in the WebDAV service.