TrueCloud Backup Tasks Screens
11 minute read.
The TrueCloud Backup Tasks widget on the Data Protection screen shows configured TrueCloud tasks, and provides access to configuration screens to add or schedule recurring transfers between TrueNAS and a cloud storage provider account like Storj iX.
TrueCloud backup tasks effectively back up data to remote locations, restore snapshots, and perform cloud-storage migration.
The TrueCloud Backup Tasks widget shows a list of tasks configured on the system.
The widget shows No records have been added yet until a TrueCloud task is added.
The widget header opens the TrueCloud Backup Tasks screen that lists all TrueCloud backup tasks configured on the system.
Add on the widget and the TrueCloud Backup Tasks screen opens the Add TrueCloud Backup Task Screen.
Each task on the widget includes a vertical ellipses icon that opens a dropdown menu with four options for various functions:
Edit opens the Edit TrueCloud Backup Task screen populated with with the settings for that task.
play_arrow Run Now starts and runs the backup task outside of the scheduled time.
visibility View Details opens the TrueCloud Backup Tasks screen that lists backup tasks configured on the system. Click on a task to see details for the selected task.
Delete opens a confirmation dialog before the system deletes the task.
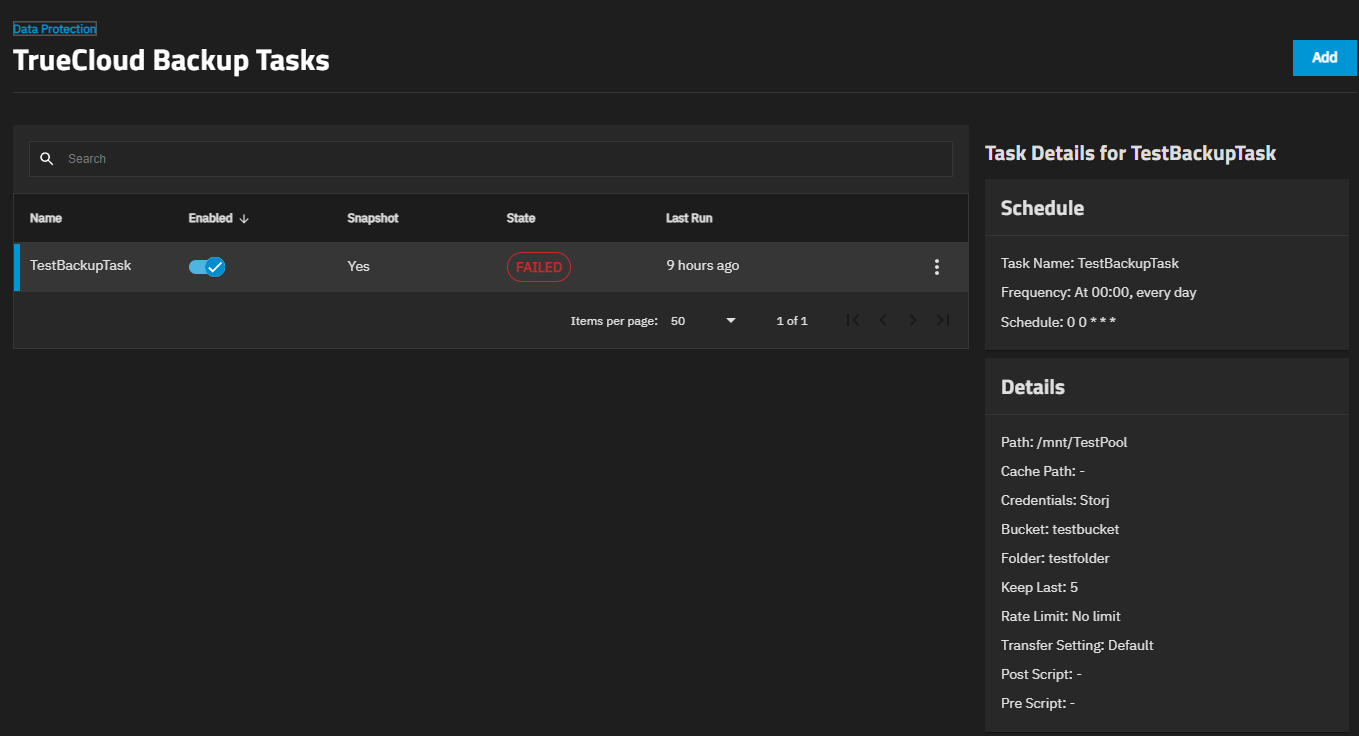
State shows the status of the previous or current task. Possible status indications are:
- SUCCESS for completed tasks.
- FAILED if the task fails to complete.
- RUNNING for tasks in progress.
- N/A for scheduled tasks before they run.
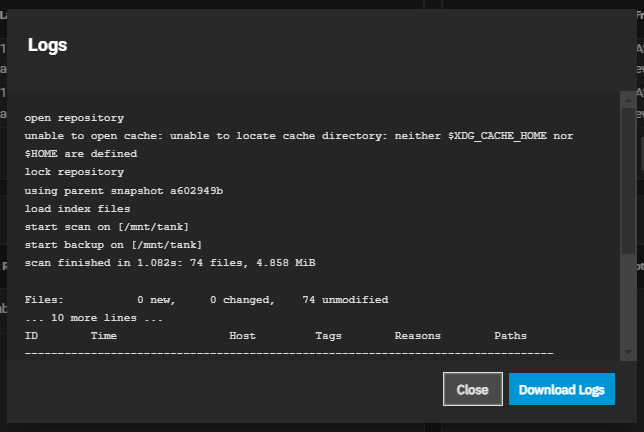
The state oval opens the Logs dialog for that task. Download Logs saves a copy of the current task logs.
The TrueCloud Backup Tasks screen lists all tasks configured on the system. The TrueCloud Backup Tasks open_in_new on the widget title or visibility View Details on a task opens the TrueCloud Backup Tasks screen.
Task options perform the same functions as the icons on the widget:
Edit opens the Edit TrueCloud Backup Task screen populated with with the settings for that task.
play_arrow Run Now starts and runs the backup task outside of the scheduled time.
Delete opens a confirmation dialog before the system deletes the task.
Select any task to see details for the configured task, such as the schedule, path to the dataset or directories, snapshots, and other task options.
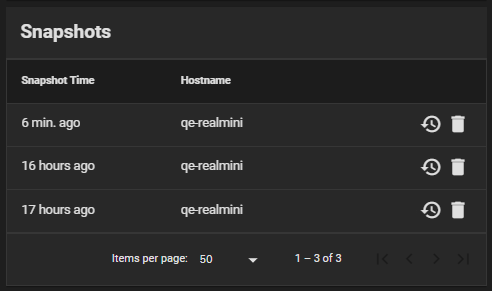
The Snapshots widget lists existing TrueCloud snapshots for the selected backup task. It contains options to restore from or delete an existing snapshot.
history Restore opens the Restore from Snapshot screen.
Delete opens a confirmation dialog before the system deletes the snapshot.
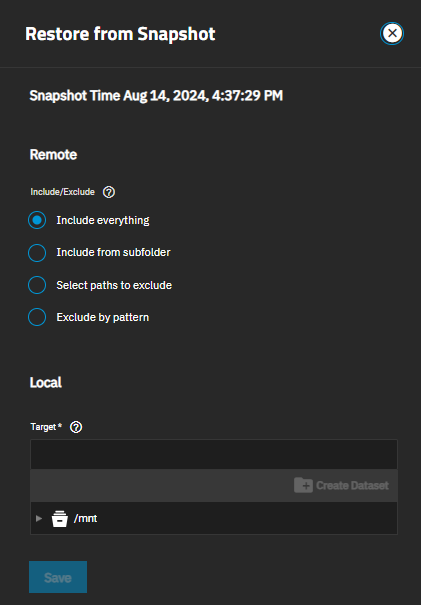
The Restore from Snapshot screen shows the date and time of the selected snapshot. It shows Remote and Local configuration options to restore the TrueCloud snapshot.
Remote Settings specify all data in the backup or exclude some data from a restoration. Additional settings show depending on the Include/Exclude selection.
| Settings | Description |
|---|---|
| Include Everything | Select to restore all backed-up data from the remote snapshot to the selected local path. |
| Include from subfolder | Select to restore data from a subfolder within the backed-up data. |
| Subfolder | Shows when Include from subfolder is selected. Enter or browse to the subfolder within the snapshot with the data to restore. |
| Included Paths | Shows when Include from subfolder is selected. Select files and directories to include from the backup. Leave empty to include everything in the selected subfolder. |
| Select paths to exclude | Select to exclude only certain paths from the data to restore. |
| Excluded Paths | Shows when Select paths to exclude is selected. Enter or select files and directories to exclude from the backup. Select as many checkboxes as desired to select multiple paths or separate multiple entries with a comma. |
| Exclude by pattern | Select to exclude files and directories matching defined glob patterns. |
| Pattern | Shows when Exclude by pattern is selected. |
Use Local settings to select the target mount point on the current (local) system where files are restored. Be cautious when setting the restore target to avoid overwriting existing files.
Target settings allow entering the path to the dataset or directory or browse to the location to populate the field with the local directory where files are restored.
create_new_folder Create Dataset opens a dialog to name and create a new dataset at the selected target.
Save starts restoring data from the snapshot.
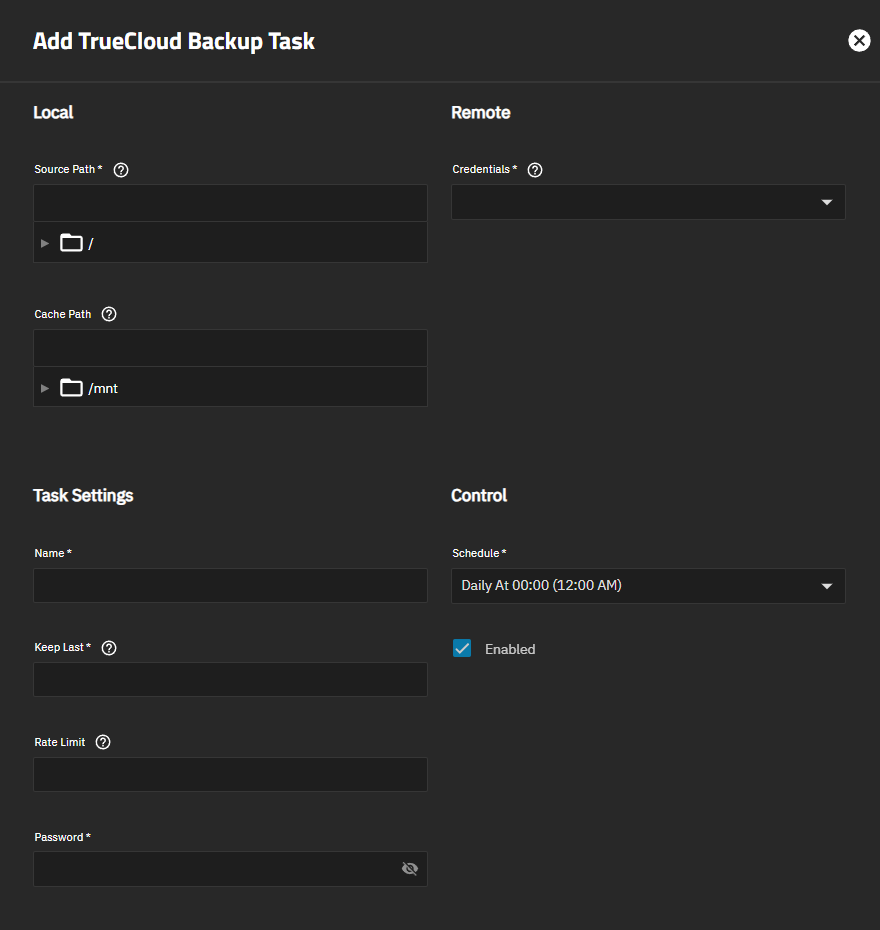
The Add TrueCloud Backup Task and Edit TrueCloud Backup Task screens contain options to configure a new backup task. The edit screen opens populated with the existing task settings. Each screen shows the Local, Remote, Task Settings, and Control settings. The Advanced and Advanced Remote Options are for advanced users.
Local settings set the dataset or directory used in the task. Selecting the dataset populates the Source Path field.
| Settings | Description |
|---|---|
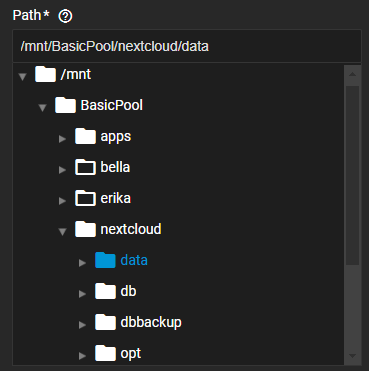
| Source Path | Enter or browse to select the dataset or directory with the data to send to the cloud backup provider set in the task. Click the arrow to the left of the /mnt folder to expand and show datasets and directories within that folder. This is the dataset or directory location with the data the TrueCloud backup task sends to the cloud storage provider. Click the arrow to the left of the /mnt folder again to collapse the directory tree. |
| Cache Path | Optional. Directory path where cache files are stored. This speeds up the backup process for users with massive datasets and large numbers of files. If not set, performance can degrade. |
The Remote settings specify the TrueCloud credential and destination storage locations.
| Settings | Description |
|---|---|
| Credential | Select an existing Storj iX credential from the dropdown list. TrueNAS automatically validates the selected credential. Select Add New to open the Cloud Credentials screen. This is the same configuration screen that opens when you click Add on the Credentials > Backup Credentials screen. |
| Bucket | Displays after selecting the Storj credential. Select a pre-configured Storj bucket. Only TrueNAS-compatible Storj buckets are selectable. Select Add New to create a new Storj bucket from the TrueNAS UI. |
| New Bucket Name | Displays when Add New is selected in the Bucket field. Enter a name for the new bucket. Only lowercase letters, numbers, and hyphens are allowed. |
| Folder | Enter or browse to select the dataset or directory to receive the backed-up data. Click the arrow to the left of the folder icon and at each dataset or directory to reach the storage location to use for this task. Enter /name, where name is a folder that does not exist, to create a new folder in the bucket. |
Task Settings specify the task name, snapshot retention policy, and password for the backup repository.
| Settings | Description |
|---|---|
| Name | Enter a name for the TrueCloud backup task. |
| Keep Last | Enter a number for the past snapshot copies to retain before removing older snapshots. |
| Rate Limit | Optional. Positive integer that sets the rate limit for the backup process in KiB/s (kibibytes per second). This is a static rate limit that applies throughout the entire backup process. Unlike Cloud Sync bandwidth limits, this setting does not support time-based scheduling. |
| Password | Enter a password for the backup repository. Record this password in a secure location. Required to recreate the task using the same bucket/folder, such as in a new TrueNAS install or system, or to restore data from the existing snapshots in another TrueNAS system. |
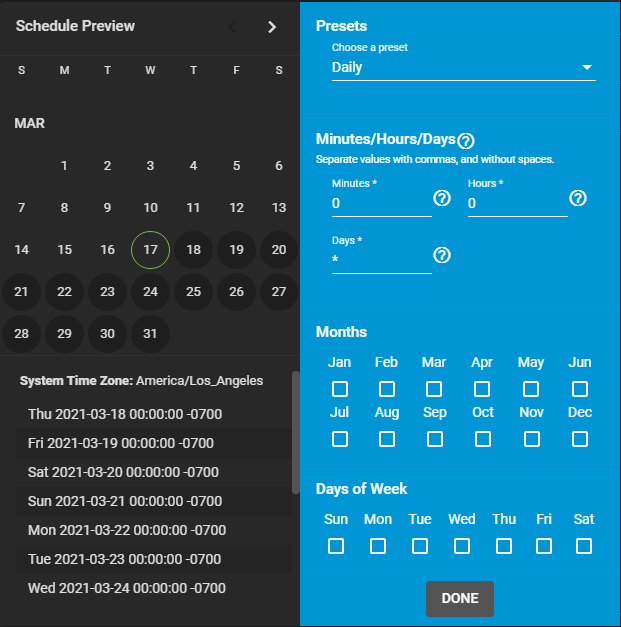
Control settings establish a schedule for when to run the backup task.
| Settings | Description |
|---|---|
| Schedule | Shows a list of schedule preset options. See Schedule Presets below for more info. |
| Enabled | Select to enable the TrueCloud task. Leave clear to disable the task without deleting it and keep the configuration available without allowing the specified schedule to run the task. The toggle in the Enable column on the TrueCloud Backup Tasks widget enables/disables the task. |
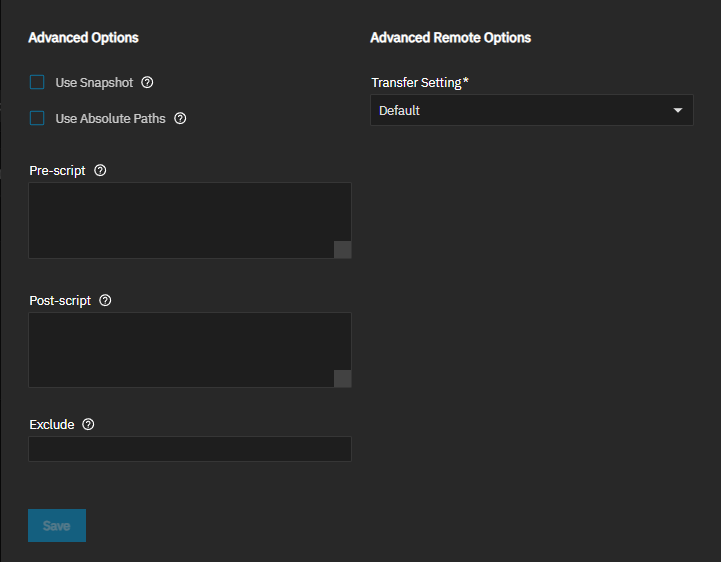
Advanced Options settings are intended for advanced users.
| Settings | Description |
|---|---|
| Use Snapshot | Select to set the TrueCloud Backup Task to use a snapshot of the dataset before a push transfer. |
| Use Absolute Paths | Select to ensure that restic backups contain absolute paths. If you do not select this option, the restic backup contains relative paths. |
| Pre-Script | (For advanced users only) Enter a script to execute before running the task. See the Managing TrueCloud Backup Tasks tutorial for more information. See Script Environment Variables below for a list of variables for scripts. |
| Post-Script | (For advanced users only) Enter a script to execute after running the task. See the Managing TrueCloud Backup Tasks tutorial for more information. See Script Environment Variables below for a list of variables for scripts. |
| Exclude | Enter a list of files and directories to exclude from the backup. Separate entries by pressing Enter. See restic exclude patterns for more information about the --exclude option and proper syntax. |
Advanced Remote Options settings are intended for advanced users.
| Settings | Description |
|---|---|
| Transfer Settings | Select the option from the dropdown list to set the number of simultaneous file transfers to allow. Options: |


