Replication Task Screens
27 minute read.
The Replication Task widget on the Data Protection screen lists replication tasks configured on the TrueNAS system. The widget shows a definition of replication tasks before adding a task when none exist on the system.


Replication tasks work with periodic snapshot tasks to complete the replication. After scheduling a replication task, the Periodic Snapshot Task widget shows a new task for the newly added replication task.
The Replication Tasks widget heading opens the Replications Tasks screen.
Add on the Replication Task widget opens the Replication Task Wizard.
The vertical ellipses to the right of each task opens a dropdown menu of options:
Edit icon opens the Edit Replication Task screen.
Run Now Run job opens a dialog.
Restore Restore to opens the Restore Replication Task window.
Delete Delete opens a delete confirmation dialog.
State shows the status of the replication task. Status shows as SUCCESS for completed tasks, FAILED if the task fails to complete the sync, and PENDING for tasks that have not run yet.
The state oval opens the Logs dialog for that task. Download Logs saves a copy of the current task logs.
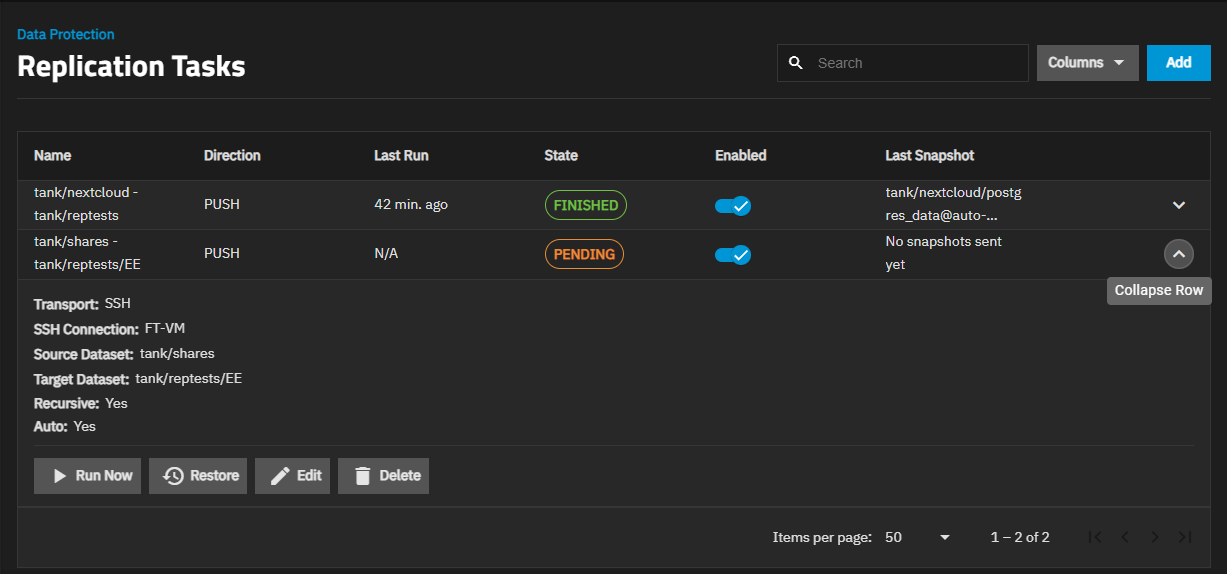
The Replications Tasks screen lists the replication tasks configured on the system.
Column headings sorts the list in ascending or descending order.
Columns shows a list of options to customize the list view to add or remove information to the table. Options are: Select All, Name, Direction, Transport, SSH Connection, Source Dataset, Target Dataset, Recursive, Auto, Last Run, State, Enabled, Last Snapshot, and Reset to Defaults.
Click anywhere on a task row to expand it and show details about that task and options to run, restore, edit, or delete that task.
The details view of each replication task shows the Transport, SSH Connection, Source Dataset, Target Dataset, Recursive, and Auto settings.
Run Now opens a Run Now dialog.
Restore opens the Restore Replication Task window.
Edit opens the Edit Replication Task screen.
Delete opens a delete confirmation dialog.
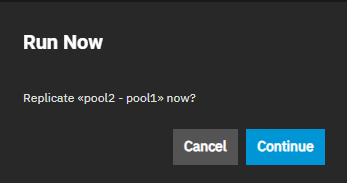
Run Now opens the Run Now dialog.
Continue starts the replication task.
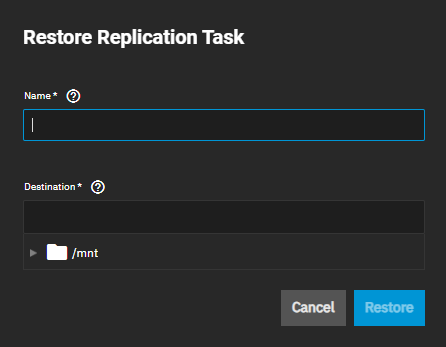
The Restore Replication Task window shows settings to configure a restore task operation. where the system creates the new file and displays the task on both the widget and list screen with the PENDING status.
Name is the name of the new file created by the restore operation.
Destination sets the mount path where TrueNAS creates the new file resulting from the restore operation.
Restore starts the restore operation.
When a replication task involves a key-encrypted source or destination, the icon shows in the task options. This downloads any encryption keys to your local system.
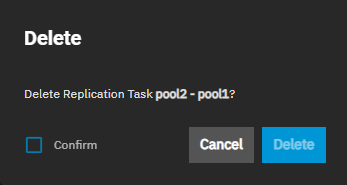
The Delete confirmation dialog shows the task name with both source and destination information.
Confirm activates Delete.
Delete removes the task from the system.
There are two ways to add a replication task: the wizard and the advanced creation screen. These two methods share many settings described in the shared settings in the sections below.
The Edit Replication Task screen shows the same settings. Shared settings are documented in these sections:
Add opens the wizard.
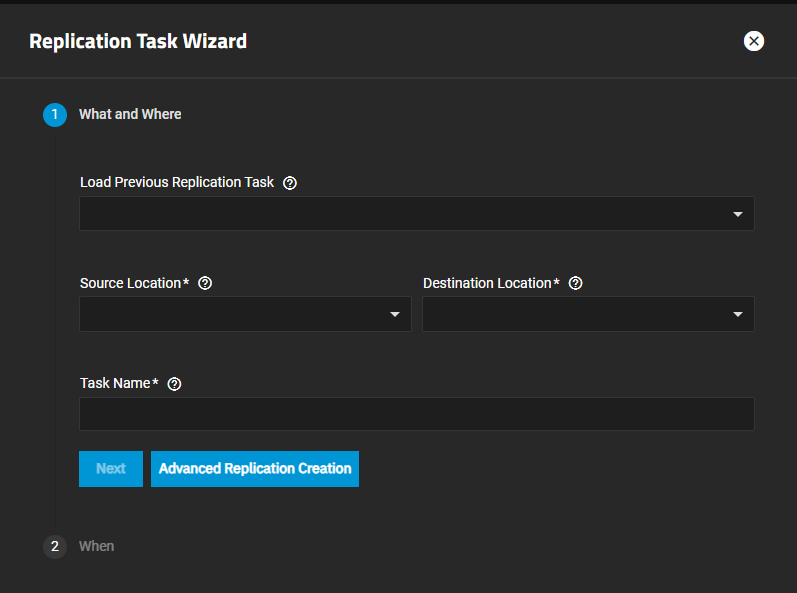
The wizard has two screens:
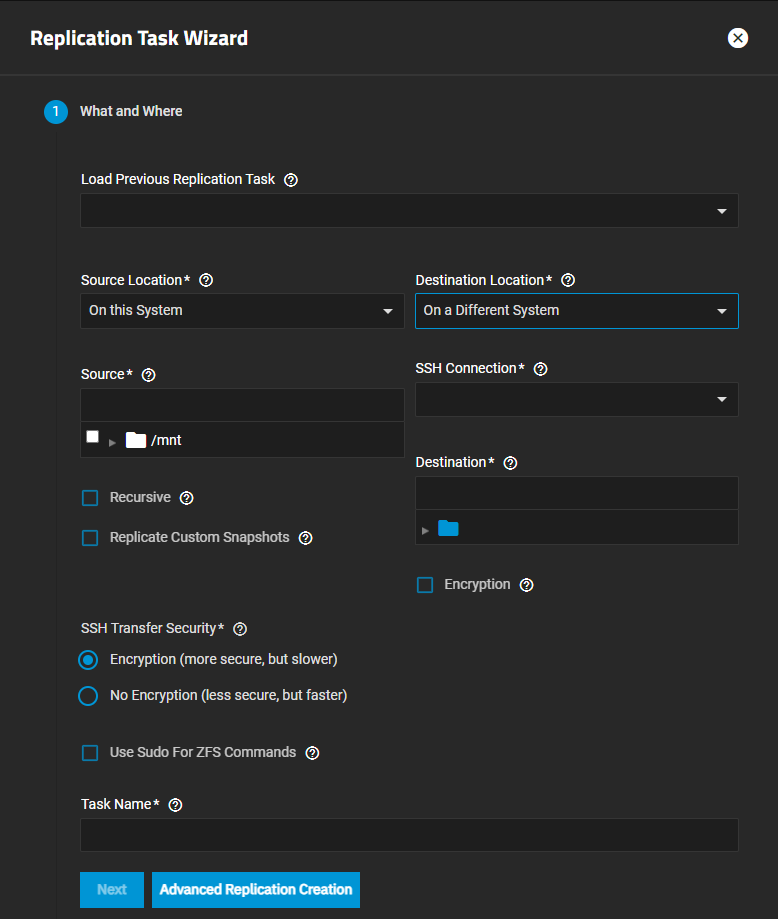
- What and Where settings specify the task name, data source, and destinations, the type of replication (local or remote), transport options (SSH connection), schema or regular expression that names the snapshot created by the task, and, when selected, sets up encryption on the data transfer.
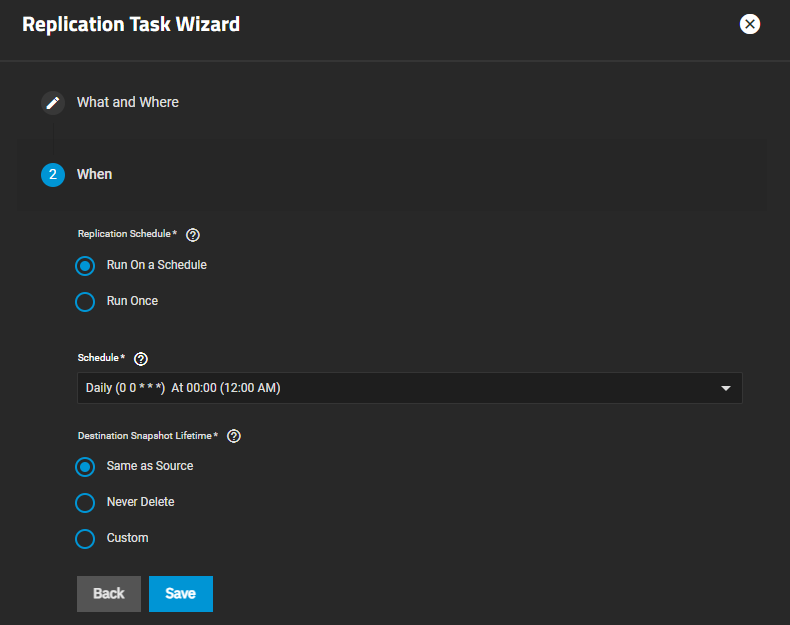
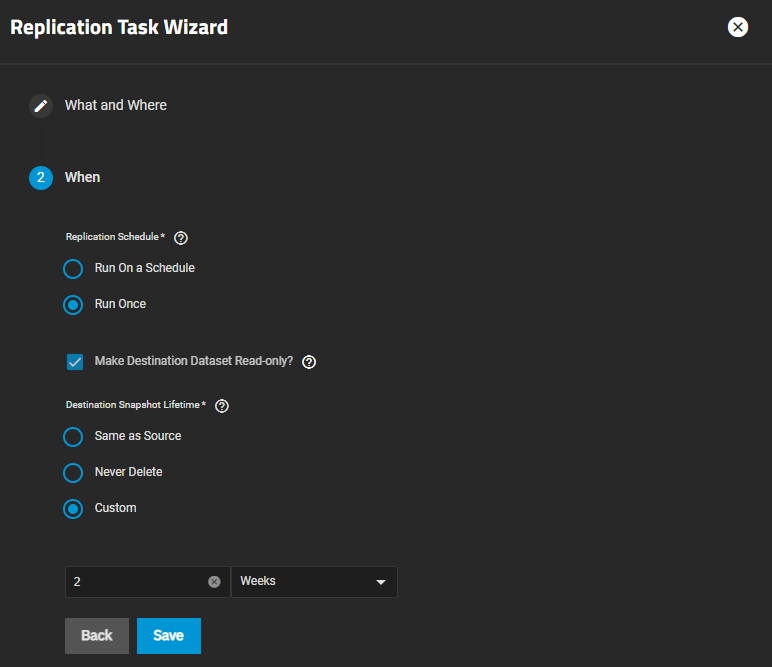
- When settings specify when to run the task and how long to retain the replicated snapshots.
Advanced Replication Creation opens the Add Replication Task screen with the same settings found in the wizard and more advanced settings. If you populate wizard settings and then click Advanced Replication Creation, TrueNAS shows you the dialog asking you to confirm you want to leave the screen. After clicking Yes the Add Replication Task screen opens but values entered in the wizard are not transfered to the Add Replication Task screen.
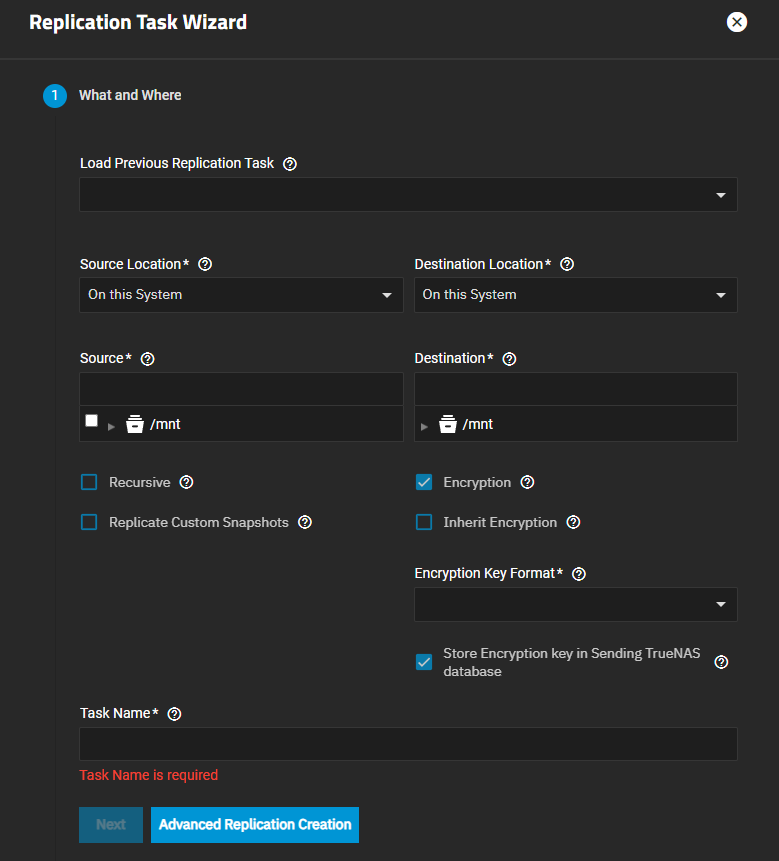
The What and Where screen shows settings for both the source and destination information (path to the dataset), the source and destination transfer direction, encryption settings for the data transfer, remote replication SSH connections, naming schema to apply to the snapshot taken through the replication task, and the name for the task.
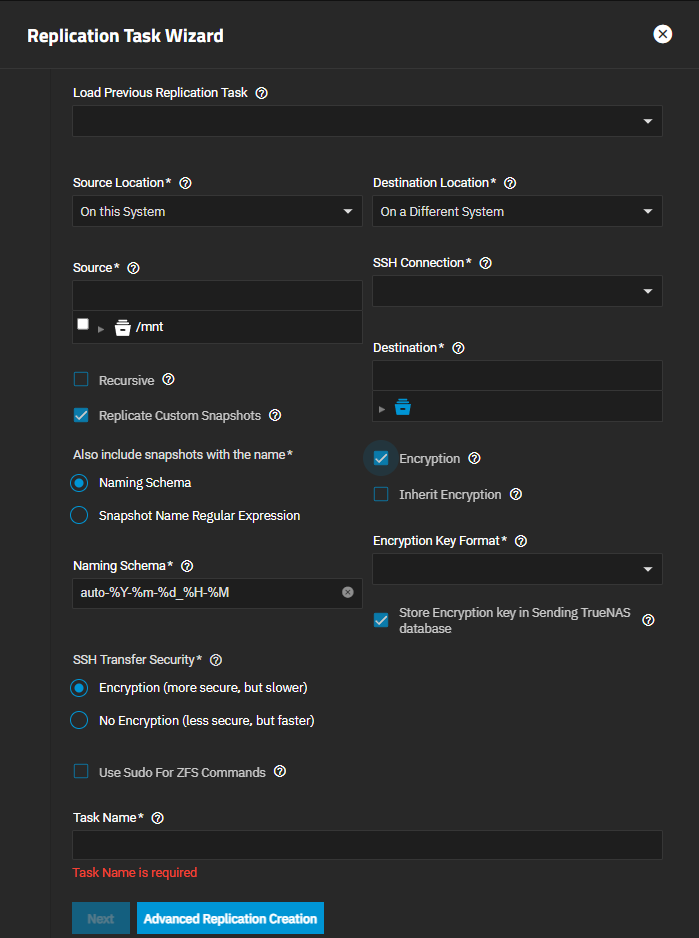
The Encryption and SSH Connection options show when the source or destination is set to On a Different System. Encryption applies another layer of protection to the data transfer; it is not the encryption of the data stored or the dataset. You can use an existing SSH connection created using the Credentials > Backup Credentials > SSH Connection screen or create a new connection through the replication task wizard or screens. SeeConfigure SSH for more information on adding a Backup Credential SSH credentials.
Settings on the wizard screen change based on the Source Location and Destination Location options selected. On this System (local replication) and On a Different System (remote replication) show settings that apply to or are needed to set up that type of replication.
Also include snapshots with the name options show different snapshot settings based on the naming option selected.
Setting Source Location to On This System and Destination Location to On a Different System and making naming schema choices changes the wizard screen to show all available settings.
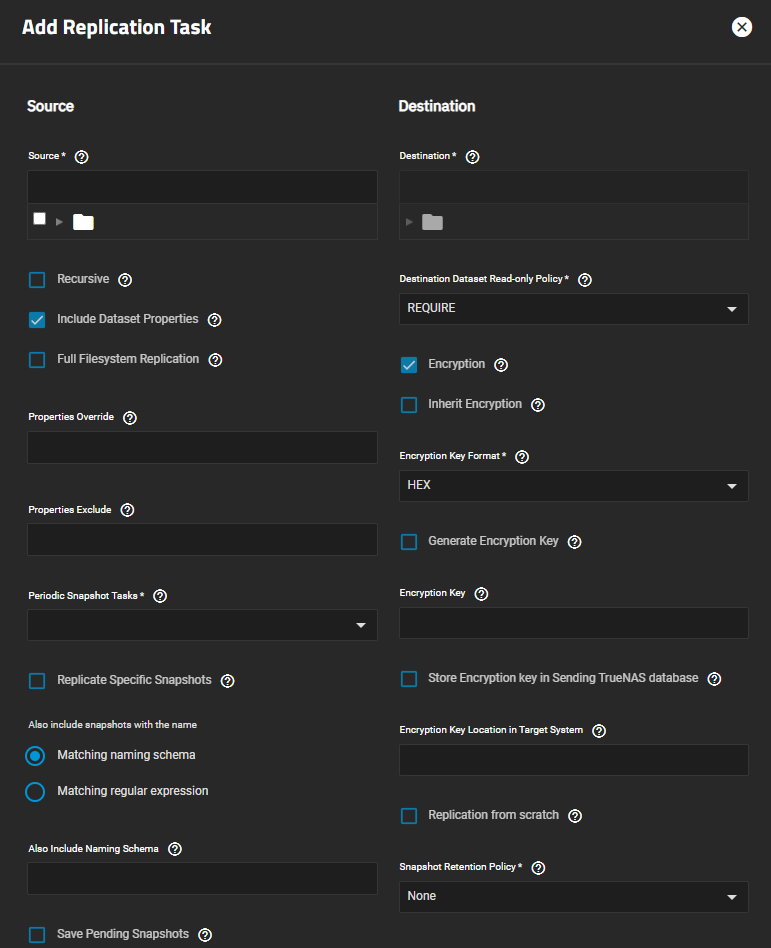
The Encryption option shows additional settings on the Add Replication Task screen and the What and Where wizard screen below the Destination settings.
The New SSH Connection window opens after selecting Create New in the SSH Connection field. It allows you to set up a new SSH connection for the remote system.
The When wizard screen sets the schedule for running the task and the retention period for keeping the replicated snapshots. Replication Schedule and Destination Snapshot Lifetime options change the setting displayed on the screen.
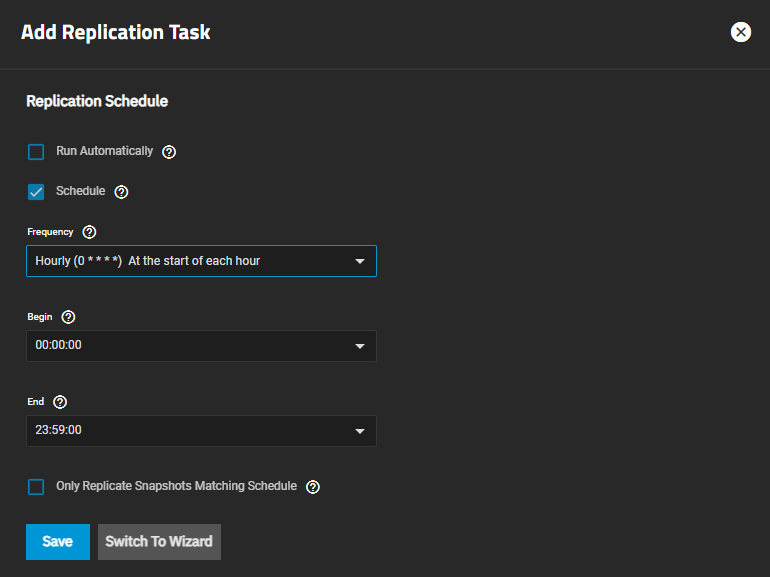
The Replication Schedule options set when to run the task based on the schedule defined in Schedule or to run it one time.
The Destination Snapshot Lifetime setting determines how long the replicated snapshot is retained on the destination server.
TrueNAS always preserves the latest snapshot so replication can resume later. If you delete a dataset or zvol on the source, you must manually delete the replicated dataset or zvol and the most recent snapshot on the destination.
Advanced Replication Creation opens the Add Replication Task screen.
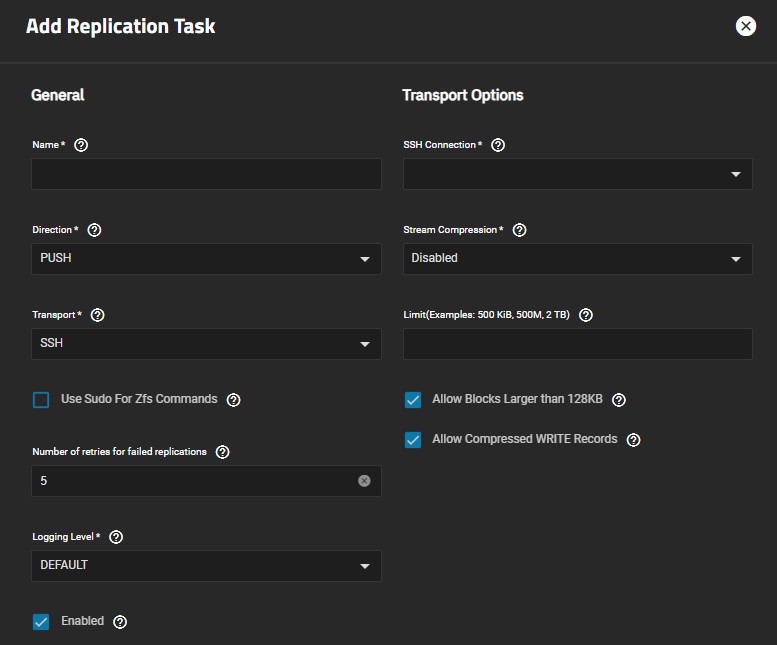
The Edit icon button opens the Edit Replication Task screen. The Add Replication Task and Edit Replication Task screens show the same setting options.
The Add Replication Task screen shows the Switch to Wizard button at the bottom of the screen.
Switch to Wizard, like Advanced Replication Creation shows the dialog asking you to confirm you want to leave the screen. After clicking Yes the wizard or Add Replication Task screen opens. Settings entered on either screen do not carry over when switching from one screen to the other.
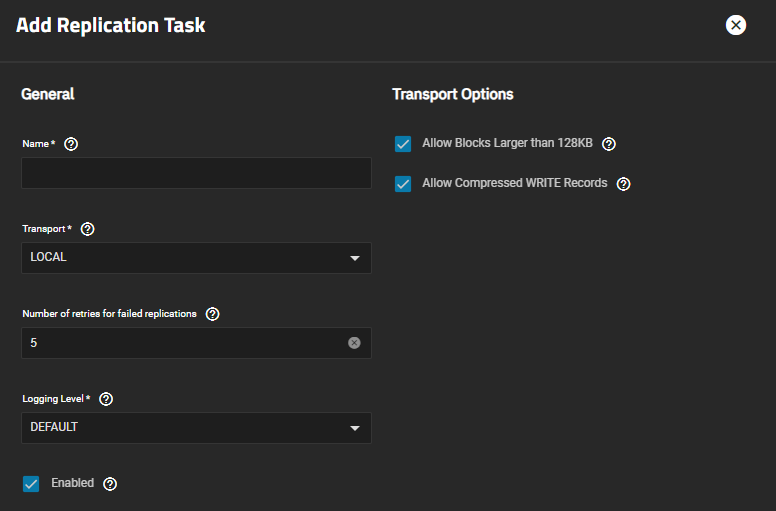
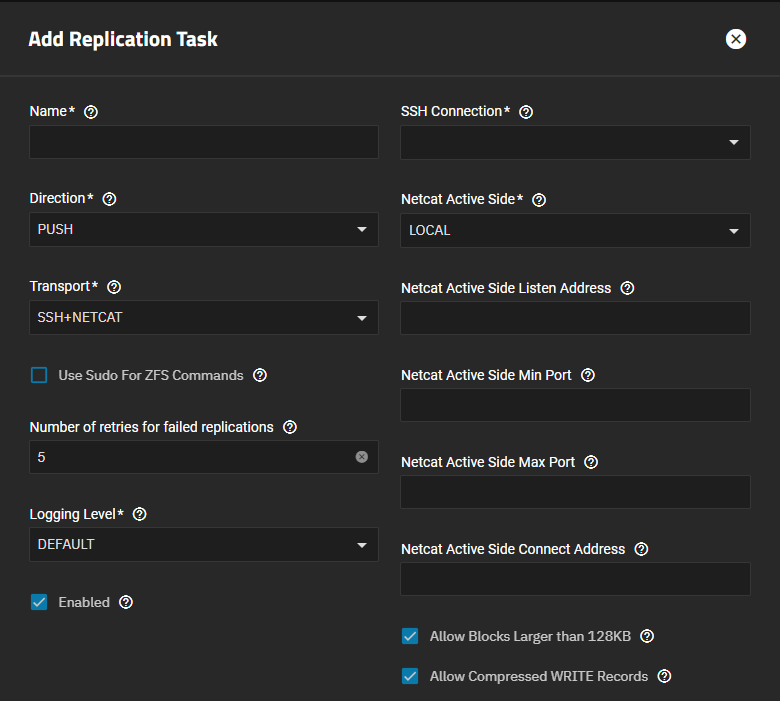
The settings in General and Transport Options specify the name of the task, the direction of the data transfer, the transport connection type, and method settings for each type. The Transport setting changes options displayed in the Transport Options area (SSH is the default setting). All three Transport field options share the two settings displayed for Local, and the SSH Connection field displays for both the SSH and SSH+NETCAT transport selections.
These settings display for all three Transport options.
When Transport is set to SSH, the settings listed below show in addition to the setting options the Allow Blocks Larger than 128KB and Allow Compressed WRITE Records options shown when Transport is set to Local.
When Transport is set to SSH+NETCAT, the settings listed below show in addition to the setting options the Allow Blocks Larger than 128KB and Allow Compressed WRITE Records options shown when Transport is set to Local.
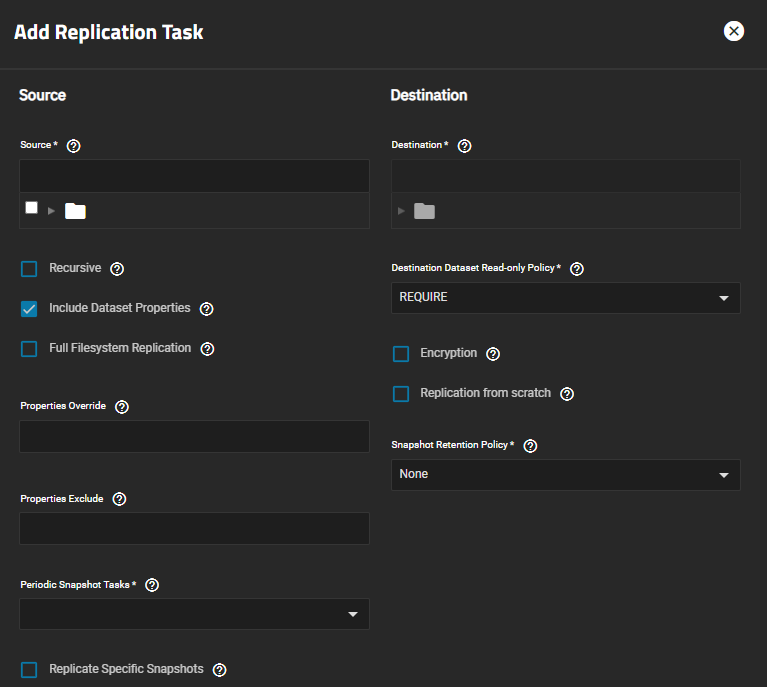
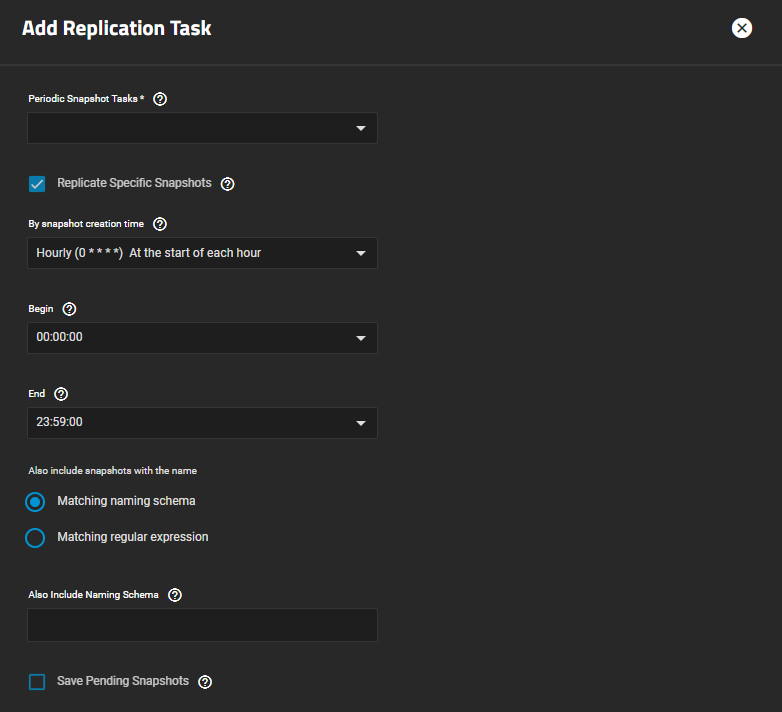
Source settings specify the location of files you push or pull in the replication task, and the properties applied to the replicated data. Selections made in Recursive and Replicate Specific Snapshots change the Source setting options, and each option shows additional setting options.
The settings in Destination specify the location of files you push or pull in the replication task, and the properties applied to the replicated data. Selections made in Encryption and Snapshot Retention Policy change the destination setting options, and each show additional setting options.
The snapshot settings below change options displayed based on selections made.
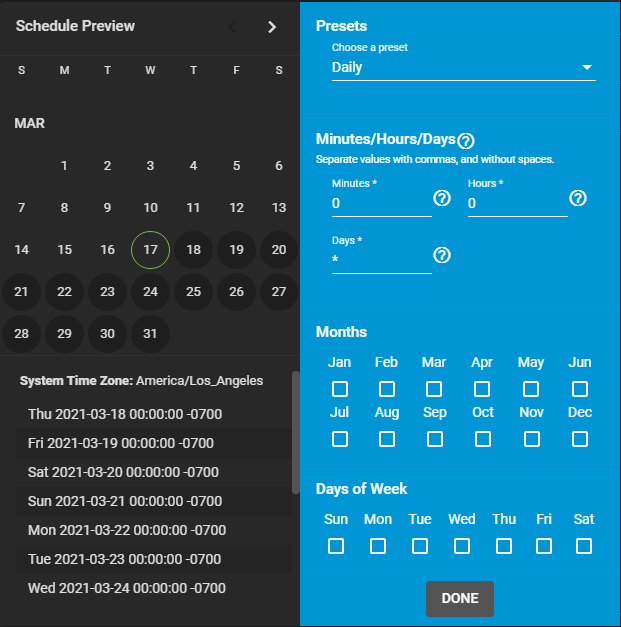
These schedule setting options are common to both the Replication Task Wizard and Add Replication Task screens.


