Boot Pool Management
7 minute read.
The Boot Environment screen has options that monitor and manage the ZFS boot pool and devices that store the TrueNAS operating system.
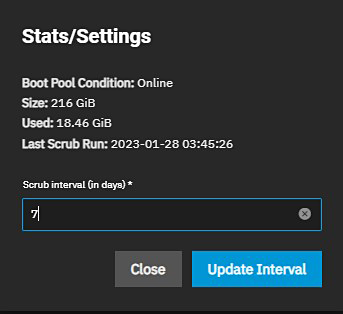
The Stats/Settings option shows current system statistics. It also allows you to change the scrub interval or how often the system runs a data integrity check on the operating system device.
Go to the System > Boot Environment screen and click Stats/Settings. The Stats/Settings window shows statistics for the operating system device: Boot Pool Condition as Online or Offline, Size in GiB, the consumed space in Used, and Last Scrub Run with the date and time of the most recent scrub task. By default, the operating system device is scrubbed every seven days.
To change the default scrub interval, input a different number in Scrub interval (in days) and click Update Interval.
From the Boot Environment screen, click Boot Pool Status to open the Boot Pool Status screen. This screen shows the boot-pool. Expand it to show the devices allocated to that pool. Read, write, or checksum errors show for the pool.
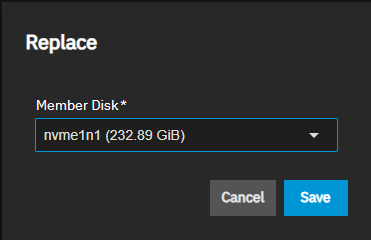
Click the to open the Actions options. Click Replace, select the device from the Member Disk dropdown, and then click Save.
Click the to open the Actions options for a device.
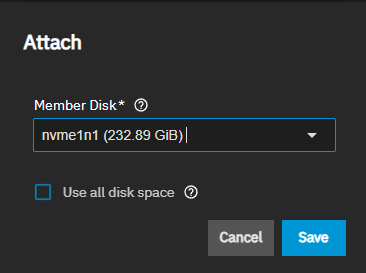
Click Attach, then select a device from the Member Disk dropdown.
Select Use all disk space to use the entire capacity of the new device.
Click Save.
You can initiate a manual data integrity check (scrub) of the operating system device at any time.
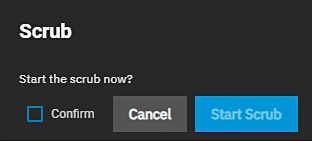
On the System > Boot screen, click Scrub Boot Pool to open the Scrub dialog.
Click Confirm and then Start Scrub.
TrueNAS supports a ZFS feature known as boot environments. These are snapshot clones of the TrueNAS boot-pool install location that TrueNAS boots into. Only one boot environment is used for booting at a time.
A boot environment allows restarting the system to a specific point in time and greatly simplifies recovering from system misconfigurations or other potential system failures. With multiple boot environments, updating the operating system becomes a low-risk operation.
For example, the TrueNAS update process automatically creates a snapshot of the current boot environment and adds it to the boot menu before applying the update. If anything goes wrong during the update, the system administrator can activate the snapshot of the pre-update environment and restart TrueNAS to restore system functionality.
Boot environments do not preserve or restore the state of any attached storage pools or apps, only the system boot-pool. Storage backups must be handled through the ZFS snapshot feature or other backup options. TrueNAS applications also use separate upgrade and container image management methods to provide app update and rollback features.
To view the list of boot environments on the system, go to System > Boot. Each boot environment entry contains this information:
- Name: the name of the boot entry as it appears in the boot menu.
- Active: indicates which entry boots by default if a boot environment is not active.
- Date Created: indicates the boot environment creation date and time.
- Space: shows boot environment size.
- Keep: indicates whether or not TrueNAS deletes this boot environment when a system update does not have enough space to proceed.
Use the icons row to take different actions for a boot environment.
Boot environments do not share all system information. TrueNAS carries over central database and configuration elements into a new environment during an update, but other state changes made in one environment do not appear in another.
Changes in a new boot environment do not exist in older environments. Similarly, changes made while booted into an old environment do not propagate forward into new boot environments.
The isolation among different boot environments means that frequent switching between environments can lead configuration divergence and missing audit information. Because of this, it is only recommended to revert a boot pool upgrade if the new version introduces a problem or to recover from a broken configuration if the system console or IPMI is unavailable.
The option to activate a boot environment only displays for boot entries not set to Active
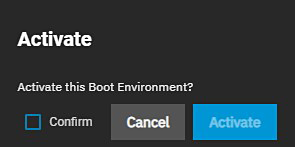
Activating an environment means the system boots into the point of time saved in that environment the next time it is started. Click the Activate (Activate) icon for an inactive boot environment to open the Activate dialog.
Click Confirm, and then click Activate.
The System Boot screen status changes to Reboot and the current Active entry changes from Now/Reboot to Now, indicating that it is the current boot environment but it is not used on the next system restart (boot operation).
Activating and booting into an older environment restores only that environment state. Any changes made there do not carry forward into newer environments.
Cloning copies the selected boot environment into a new inactive boot environment that preserves the boot-pool state at the clone-creation time.
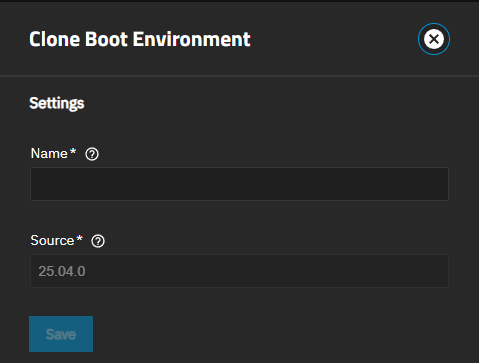
Click the Clone (Clone) icon to open the Clone Boot Environment window.
Enter a new name using only alphanumeric characters, and/or the allowed dashes (-), underscores (_), and periods (.) characters.
The Source field displays the boot environment you are cloning. If the displayed name is incorrect, close the window and select the correct boot environment to clone.
Click Save.
Deleting a boot environment removes it from the ** Boot Environment** screen and the boot menu.
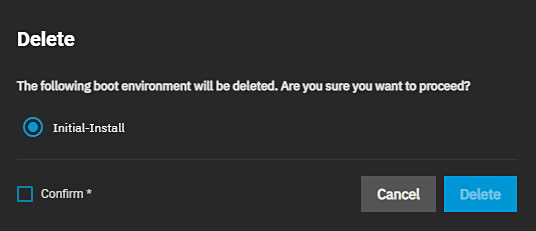
Click on the Delete (Delete) icon for a boot environment to open the Delete dialog. Select Confirm and then click Delete.
You cannot delete the default or any active entries. Because you cannot delete an activated boot entry, this option does not show for activated boot environments. To delete the active boot environment, first, activate another entry and then delete the environment you want to remove.
By default, TrueNAS prunes boot environments when the boot pool runs out of remaining storage space.
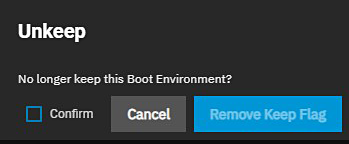
Keep toggles with the Unkeep option, and they determine whether the TrueNAS updater can automatically delete this boot environment if there is not enough space to proceed with an update.
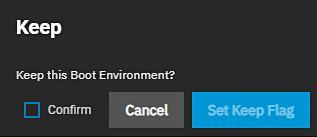
Click the Keep (Keep) icon for a boot environment to open the Keep dialog. Select Confirm and then click Keep Flag.
The boot environment action list removes the Keep option and adds Unkeep.
This makes the boot environment subject to automatic deletion if the TrueNAS updater needs space for an update.
When the TrueNAS boot pool fails and cannot be repaired, reinstall TrueNAS and restore your system configuration. This process involves a complete system rebuild while preserving your data pools and configuration settings.
Replace the failed boot drive - Install a new drive to serve as the boot device.
Perform a clean TrueNAS installation - Follow the standard installation procedure to install TrueNAS on the new boot drive.
Upload your configuration file - Use your previously saved configuration backup to restore system settings:
- Go to System > General > Manage Configuration
- Click Upload Config and select your configuration backup file
- Follow the prompts to restore your settings
Import existing data pools - Your data pools should be automatically detected and imported after the configuration restore. If not:
- Go to Storage > Import Pool
- Select your existing pools and import them
By default, TrueNAS creates a new boot environment when you update or reinstall the system, and changes made in a previous boot environment do not automatically appear in a new environment after updates or reinstallation. Because of this, the recovery process depends entirely on having a current configuration backup saved externally. Boot pool failures result in a complete loss of system configuration if no backup exists.
- Keep external backups - Always maintain current configuration backups stored outside the TrueNAS system
- Regular backup schedule - Export configuration files regularly, especially after making system changes
- Data pools preserved - This process only affects the boot pool - your data pools and their contents remain intact
- Boot environments lost - All boot environments are lost and must be recreated after recovery
After completing the recovery:
- Verify all pools are imported and healthy
- Check that sharing services are working correctly
- Recreate any custom boot environments as needed
- Update your configuration backup to reflect the new system state


