Managing Pools
15 minute read.
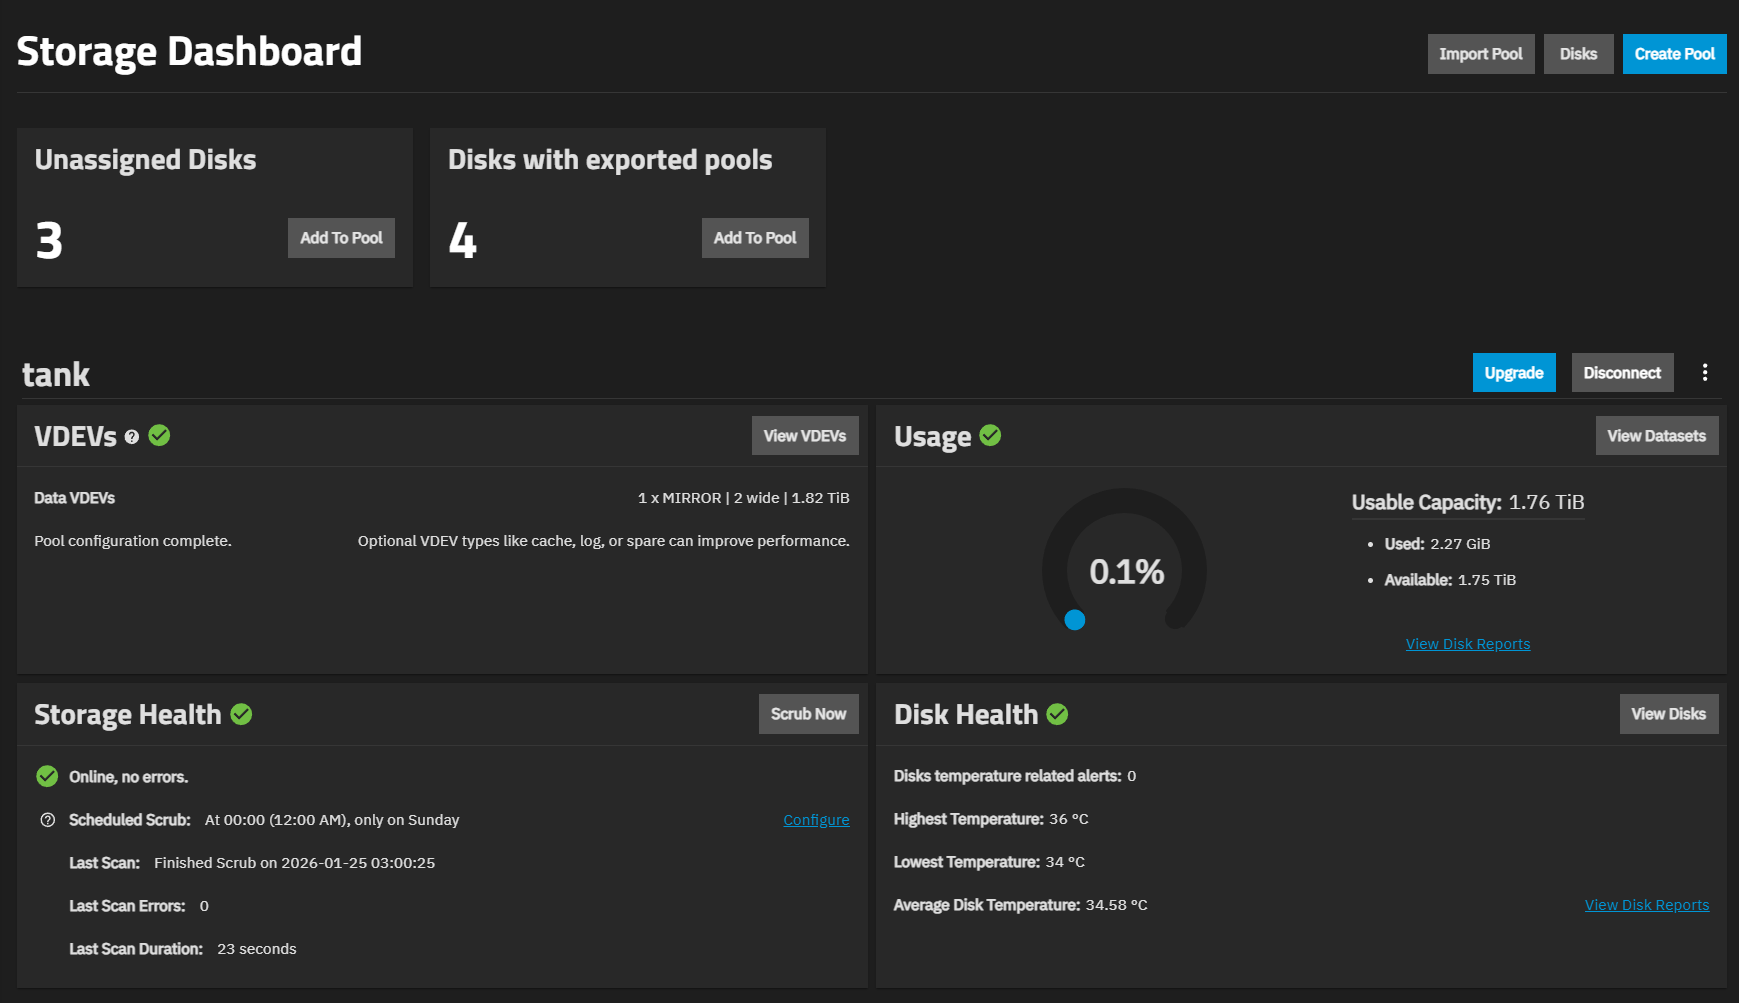
The Storage Dashboard widgets provide enhanced storage provisioning capabilities and access to pool management options to keep the pool and disks healthy, upgrade pools and VDEVs, open datasets, snapshots, and data protection screens. This article provides instructions on pool management functions available in the TrueNAS UI.
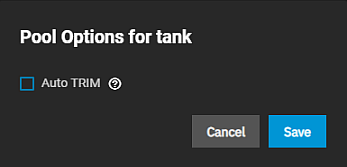
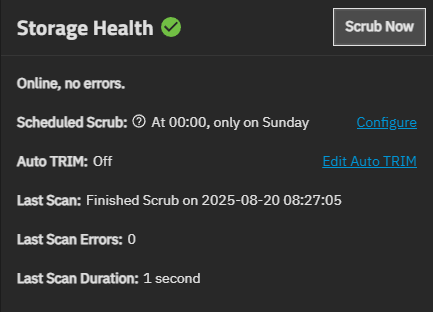
Select Storage on the main navigation panel to open the Storage Dashboard. Locate the Storage Health widget for the pool, then click the Edit Auto TRIM. The Pool Options for poolname dialog opens.
Select Auto TRIM.
Click Save.
With Auto TRIM selected and active, TrueNAS periodically checks the pool disks for storage blocks it can reclaim. Auto TRIM can impact pool performance, so the default setting is disabled.
For more details about TRIM in ZFS, see the autotrim property description in zpool.8.
Use the Export/Disconnect button to disconnect a pool and transfer drives to a new system where you can import the pool. It also lets you completely delete the pool and any data stored on it.
Click on Export/Disconnect on the Storage Dashboard.
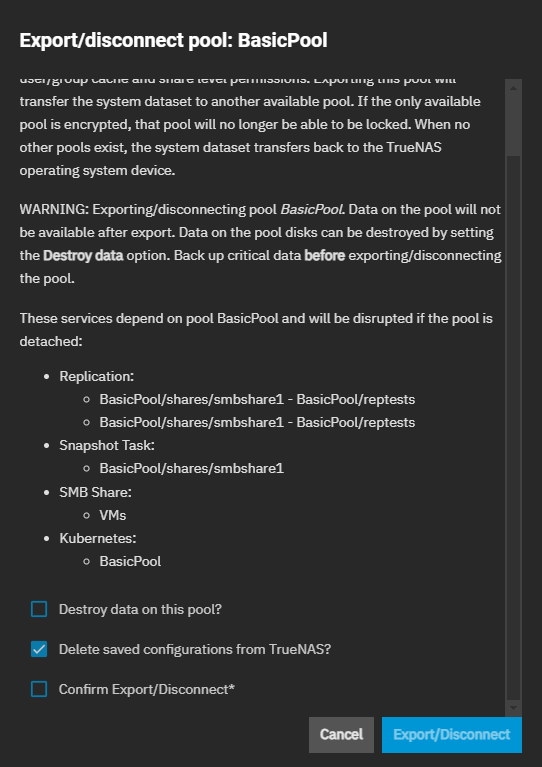
A dialog displays showing any system services affected by exporting the pool, and options based on services configured on the system.
To delete the pool and erase all the data on the pool, select Destroy data on this pool. The pool name field displays at the bottom of the window. Type the pool name into this field. To export the pool, do not select this option.
Select Delete saved configurations from TrueNAS? to delete shares and saved configurations on this pool.
Select Confirm Export/Disconnect
Click Export/Disconnect. A confirmation dialog displays when the export/disconnect completes.
Upgrading a storage pool is typically not required unless the new OpenZFS feature flags are deemed necessary for required or improved system operation.
Do not do a pool-wide ZFS upgrade until you are ready to commit to this TrueNAS major version! You can not undo a pool upgrade, and you lose the ability to roll back to an earlier major version!
The Upgrade button displays on the Storage Dashboard for existing pools after an upgrade to a new TrueNAS major version that includes new OpenZFS feature flags. Newly created pools are always up to date with the OpenZFS feature flags available in the installed TrueNAS version.
Upgrading pools only takes a few seconds and is non-disruptive. However, the best practice is to upgrade a pool while it is not in heavy use. The upgrade process suspends I/O for a short period but is nearly instantaneous on a quiet pool.
It is not necessary to stop sharing services to upgrade the pool.
Use Scrub Now on the Storage Health pool widget to start a pool data integrity check.
Click Scrub Now to open the Scrub Pool dialog, then click Start Scrub to begin the process.
If TrueNAS detects problems during the scrub operation, it either corrects them or generates an alert in the web interface.
A scrub is a data integrity check of your pool. Scrubs identify data integrity problems, detect silent data corruptions caused by transient hardware issues, and provide early disk failure alerts.
TrueNAS automatically creates a scheduled scrub for each pool that runs every Sunday at 12:00 AM.
The Storage Health widget shows the scheduled scrub status:
- Scheduled Scrub: None Set with a Schedule link if no scrub task exists
- Scheduled Scrub: [when] with a Configure link if a scrub task is configured and enabled
Click Schedule to create a new scrub schedule or Configure to modify an existing schedule. This opens the Configure Scheduled Scrub screen, where you can set the schedule, number of threshold days, and enable or disable the scheduled scrub.
Threshold Days sets the days before a completed scrub can run again. This controls the task schedule. For example, scheduling a scrub to run daily and setting threshold days to 7 means the scrub attempts to run daily. When the scrub is successful, TrueNAS continues to check daily but does not run again until seven days have elapsed. Using a multiple of seven ensures the scrub always occurs on the same weekday.
Starting in TrueNAS 25.10, resilver priority settings are now located in System Settings > Advanced Settings on the Storage widget.
The Disks button on the Storage Dashboard screen and the View Disks button on the Disk Health widget open the Disks screen.
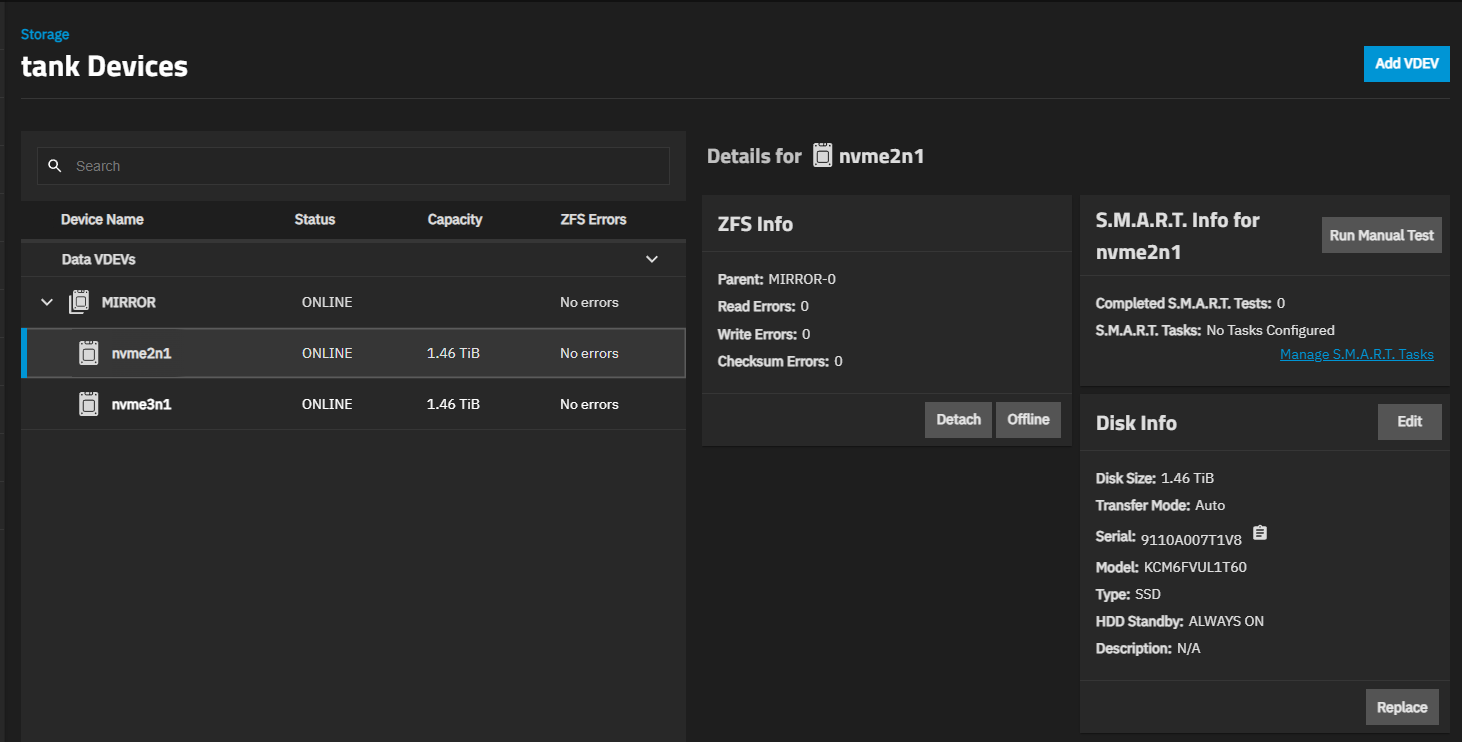
View VDEVs on the VDEVs widget opens the Poolname VDEVs screen. To manage disks in a pool, click on the VDEV to expand it and show the disks in that VDEV. Click on a disk to see the widgets for that disk. You can take a disk offline, detach it, replace it, manage the SED encryption password, and perform other disk management tasks from this screen.
See Replacing Disks for more information on the Offline, Replace and Online options.
There are a few ways to increase the size of an existing pool:
- Add one or more drives to an existing RAIDZ VDEV.
- Add a new VDEV of the same type.
- Add a new VDEV of a different type.
- Replace all existing disks in the VDEV with larger disks.
Adding a new special VDEV increases usable space in combination with a special_small_files VDEV, but it is not encouraged.
A VDEV limits all disks to the usable capacity of the smallest attached device.
When you use one of the above methods, TrueNAS does not automatically expand the pool to fit newly available space.
To expand an existing pool:
- Navigate to Storage and click Expand Pool above the Usage widget.
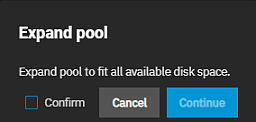
- Select Confirm in the Expand Pool pop-up screen.
- Click Continue to initiate the pool expansion process.
TrueNAS expands the pool to use the additional available capacity.
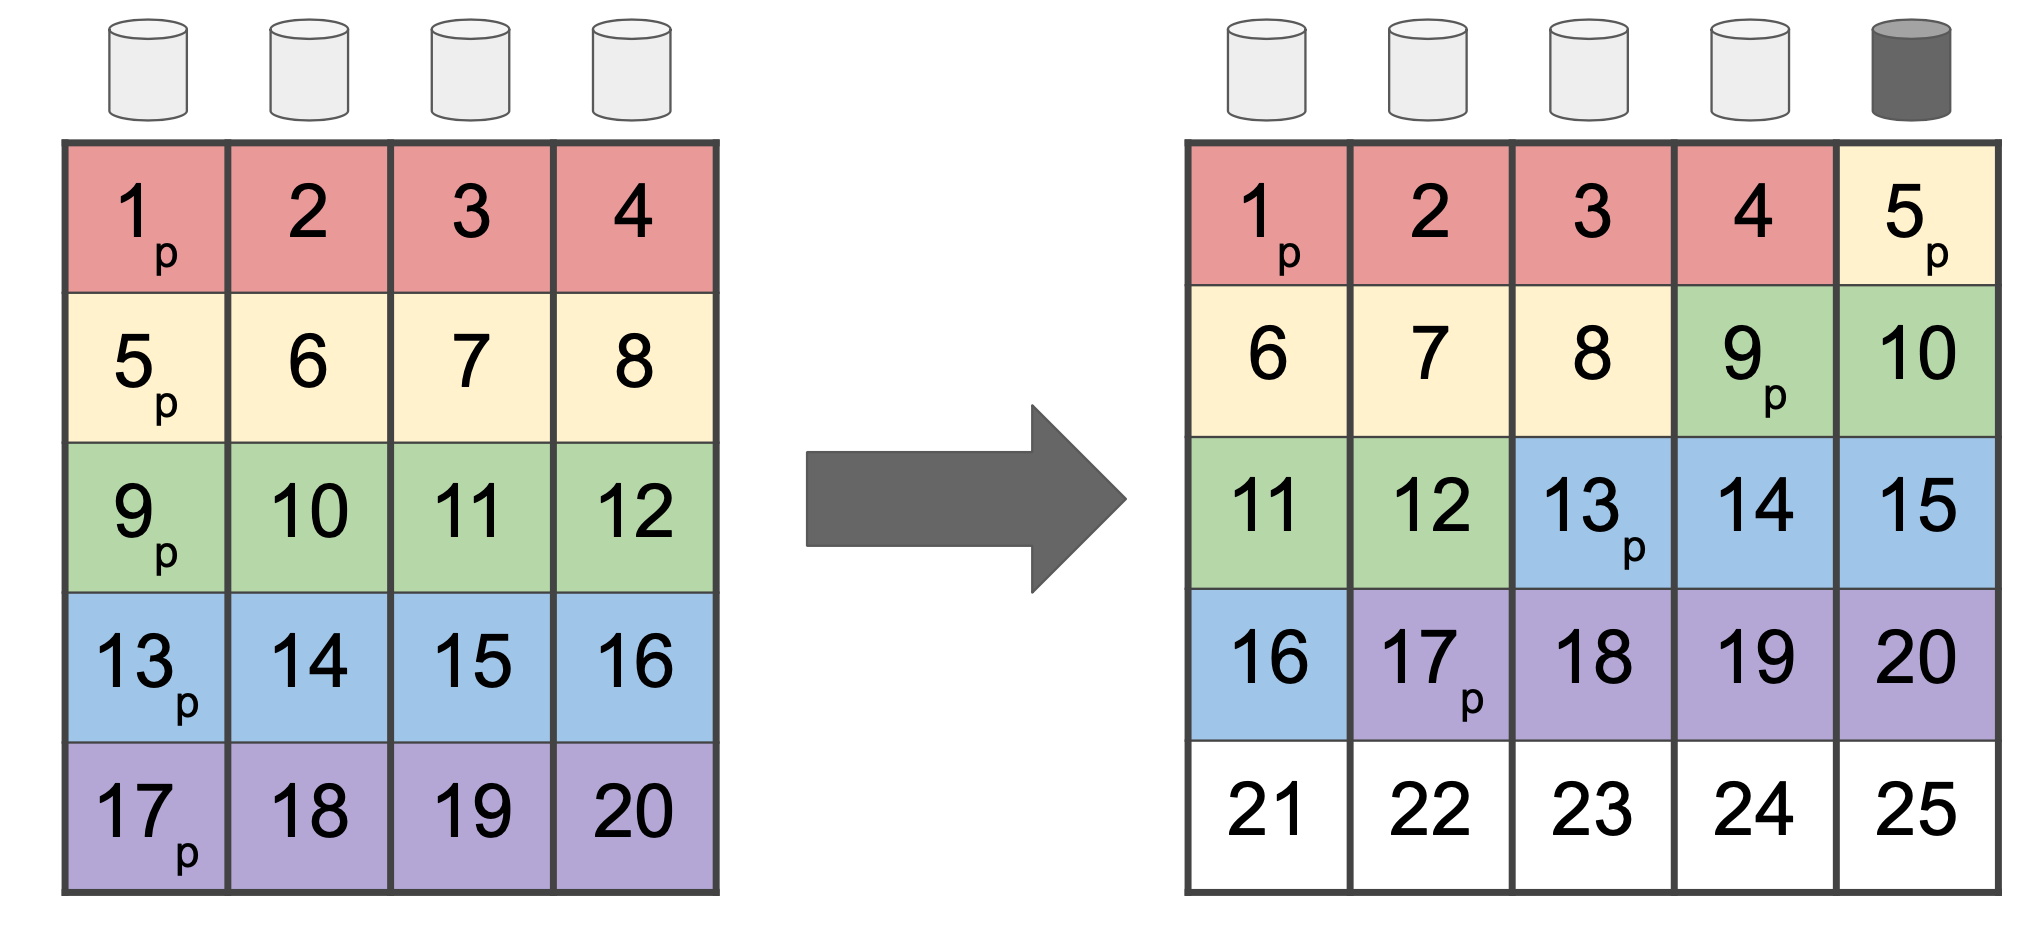
Extend a RAIDZ VDEV to add additional disks one at a time, expanding capacity incrementally. This is useful for small pools (typically with only one RAID-Z VDEV), where there is not enough hardware capacity to add a second VDEV, doubling the number of disks.
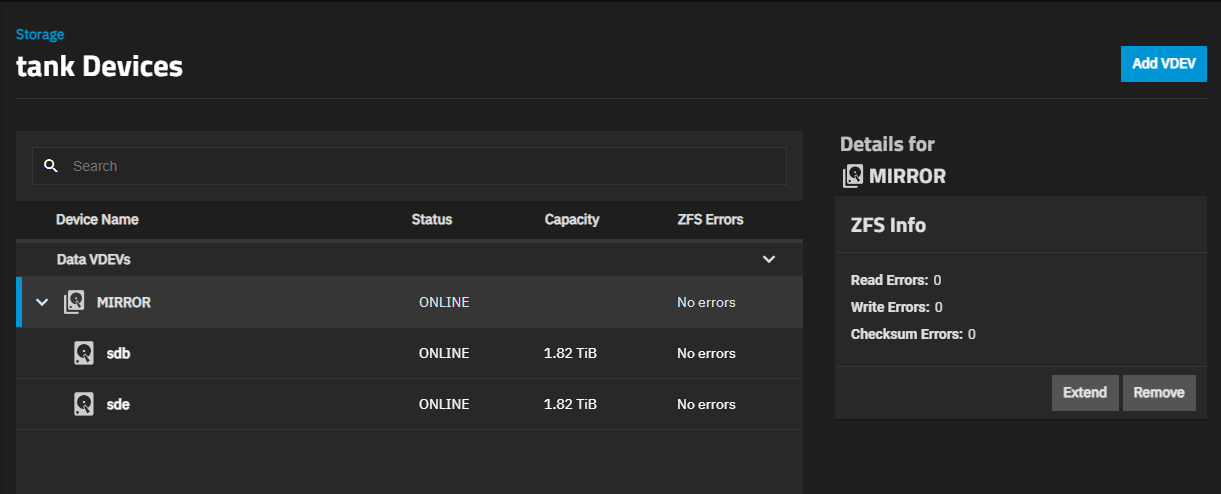
To extend a RAIDZ VDEV, go to Storage. Locate the pool and click View VDEVs on the VDEVs widget to open the Poolname VDEVs screen.
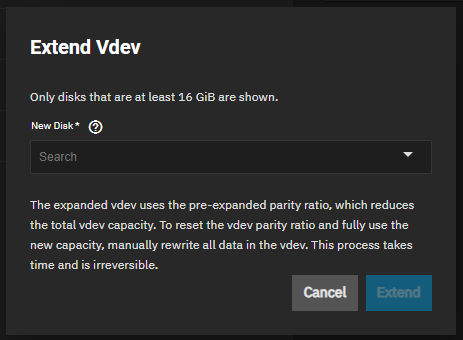
Select the target VDEV and click Extend to open the Extend Vdev window.
Select an available disk from the New Disk dropdown menu. Click Extend.
A job progress window opens. TrueNAS returns to the Poolname VDEVs screen when complete.
ZFS supports adding VDEVs to an existing ZFS pool to increase the capacity or performance of the pool. To extend a pool by mirroring, you must add a data VDEV of the same type as existing VDEVs.
You cannot change the original encryption or data VDEV configuration.
To add a VDEV to an existing pool, you can:
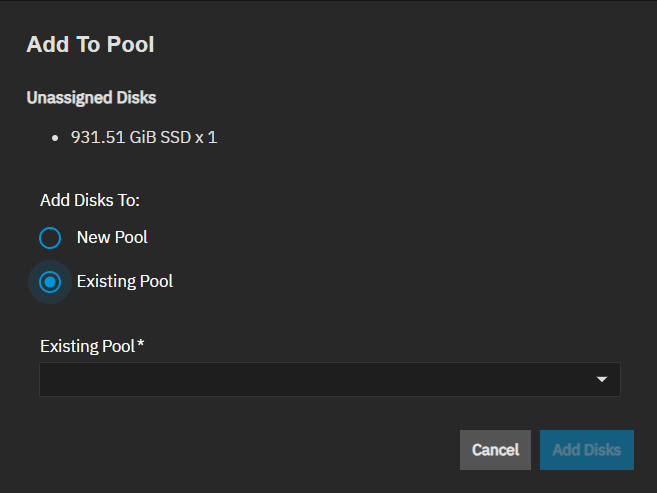
Click Add To Pool to open the Add To Pool window, and select Existing Pool. Select the pool on the Existing Pool dropdown.
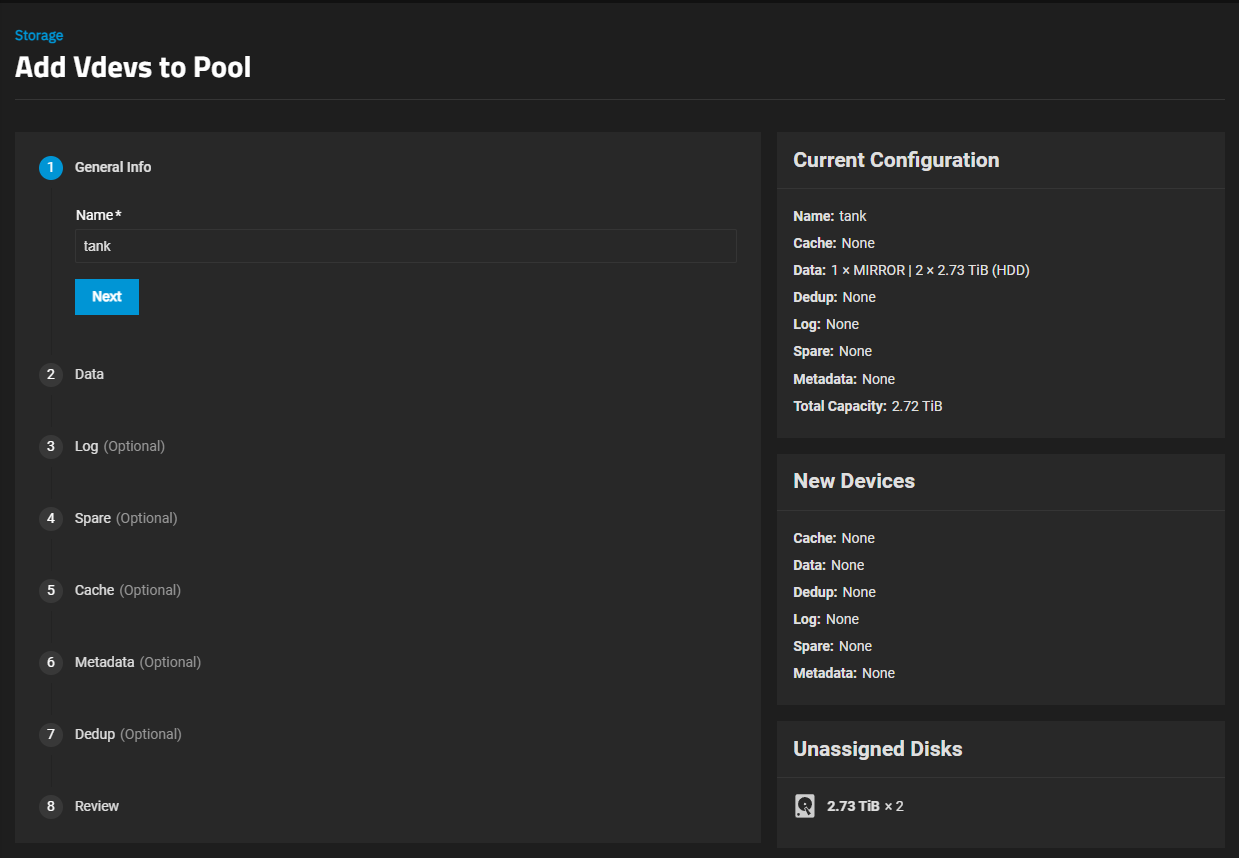
Click View VDEVs on the VDEVs widget to open the Poolname VDEVs screen, then click Add VDEV to open the Add Vdevs to Pool wizard.
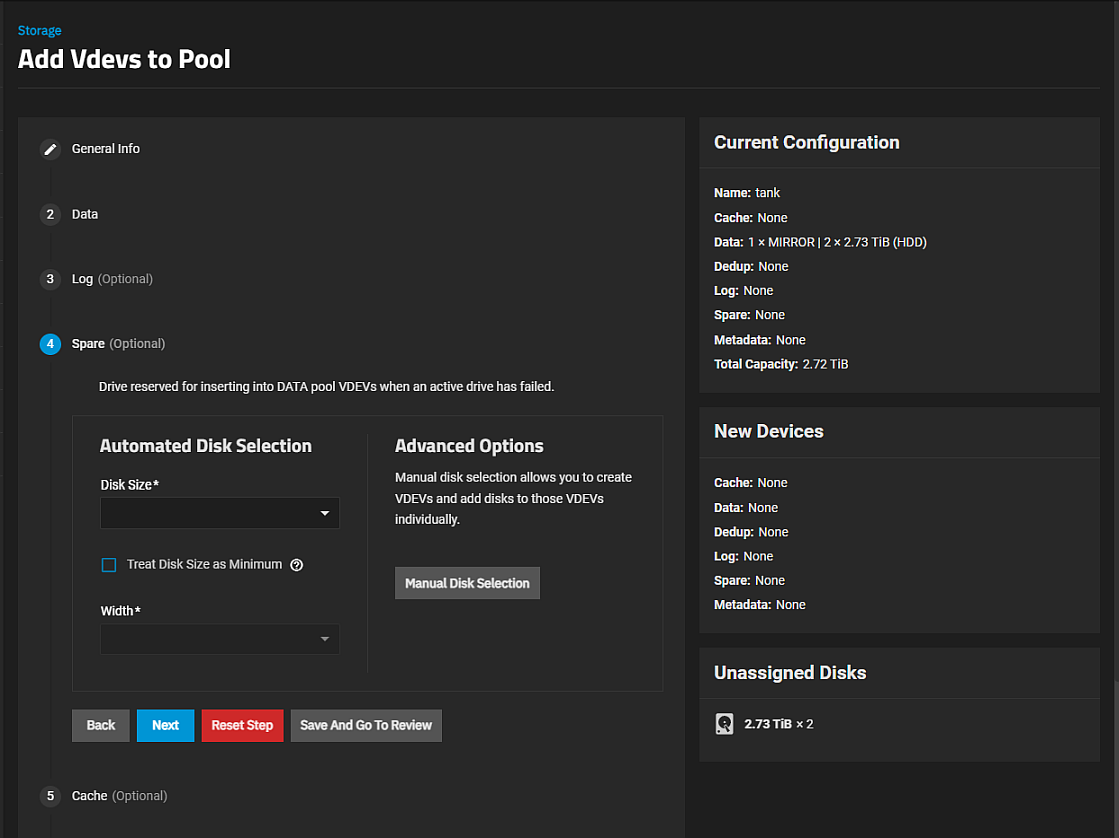
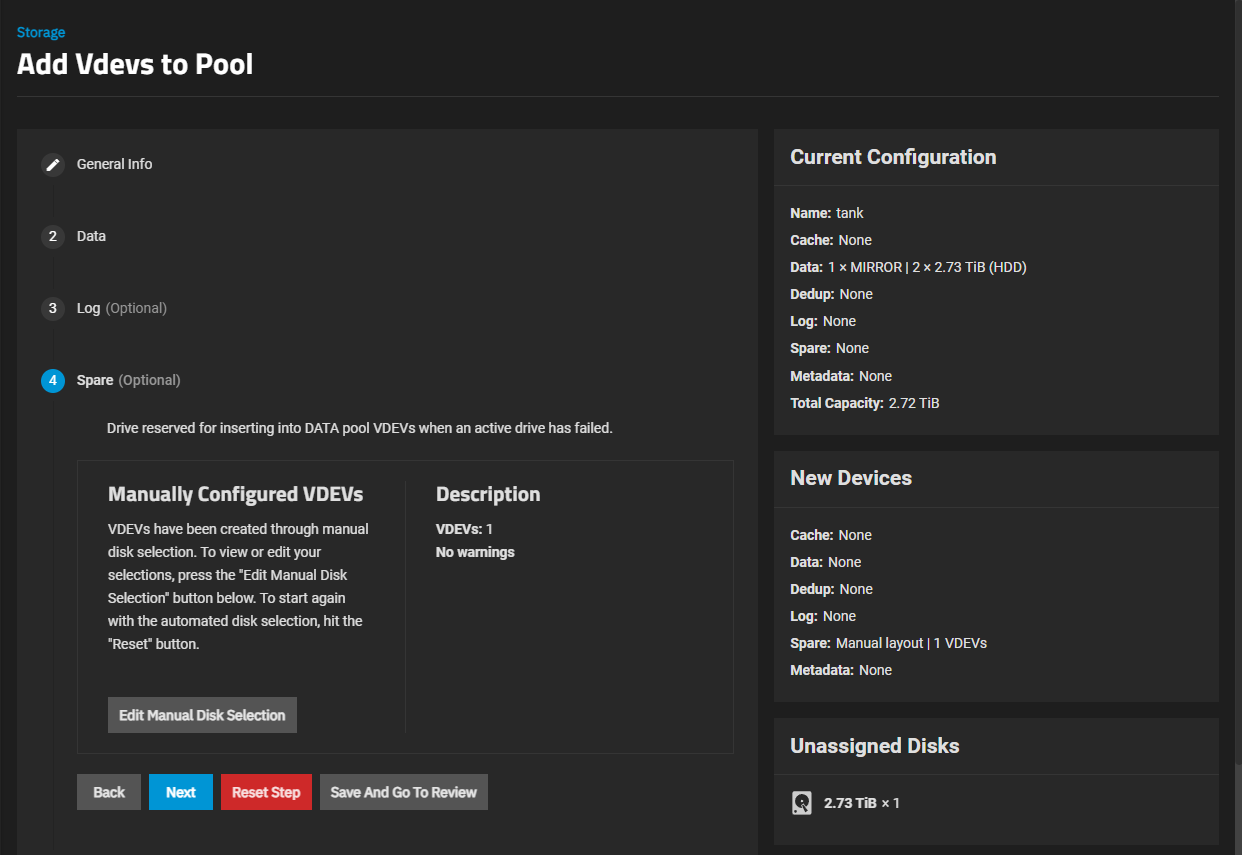
Adding a vdev to an existing pool follows the same process as documented in Create Pool. Click on the type of vdev you want to add. For example, to add a spare, click on Spare to show the vdev spare options.
Select the layout, mirror, or stripe.
Select the disk size to use the Automated Disk Selection option. The Width and Number of VDEVs fields populate with default values based on the layout and disk size selected. To change this, select new values from the dropdown lists.
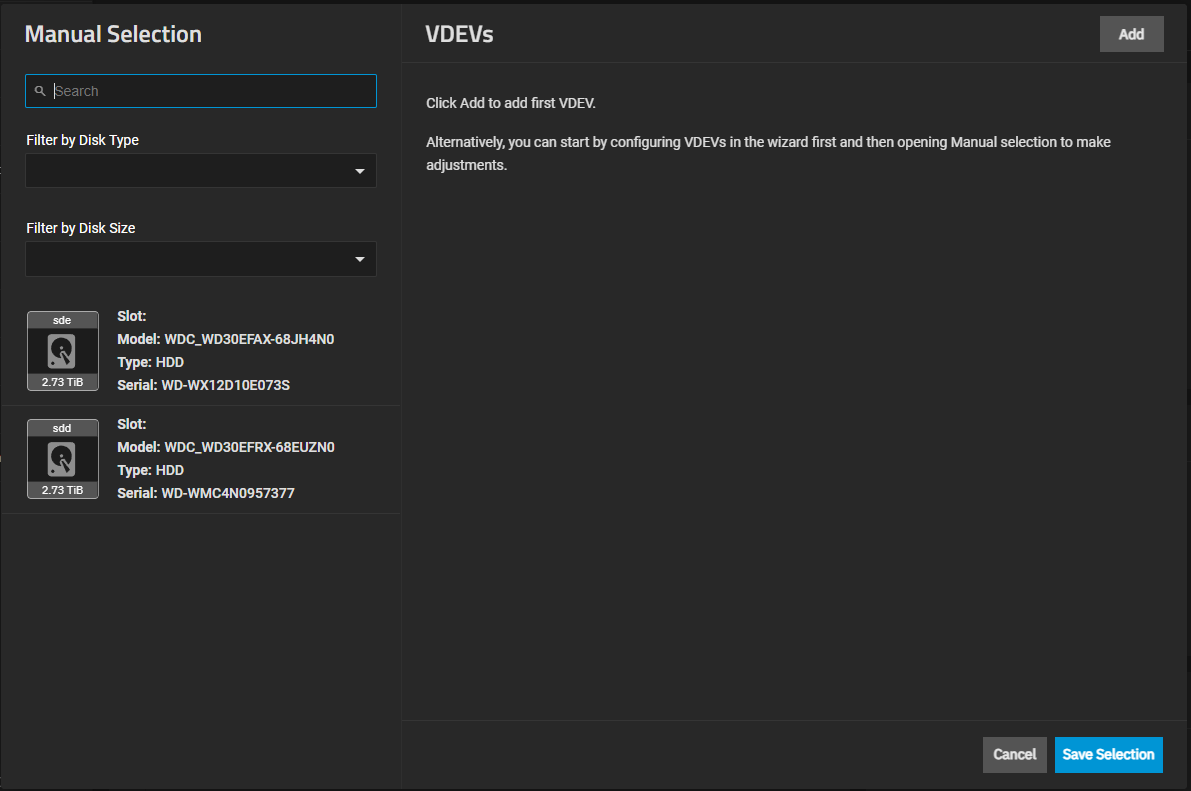
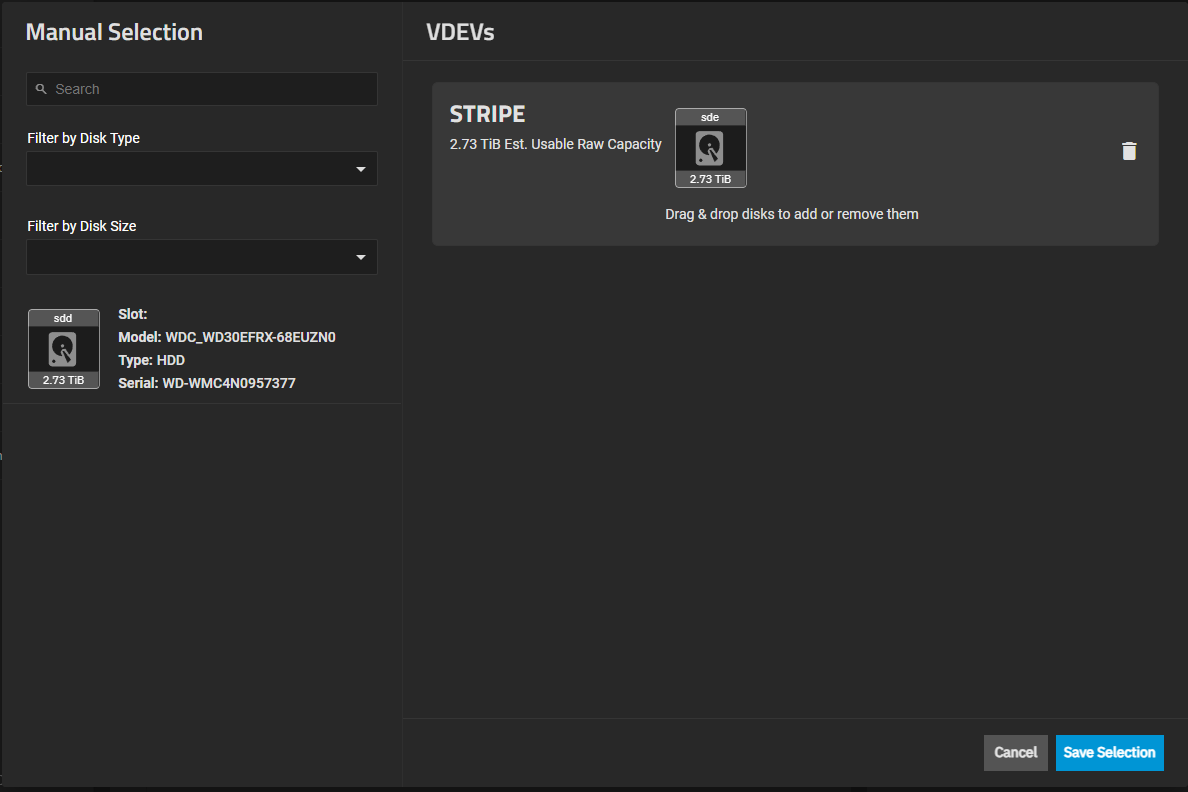
You can accept the change or click Edit Manual Disk Selection to change the disk added to the strip vdev for the spare, or click Reset Step to clear the strip vdev from the spare completely. Click either Next or a numbered item to add another type of vdev to this pool.
Repeat the same process above for each type of vdev to add.
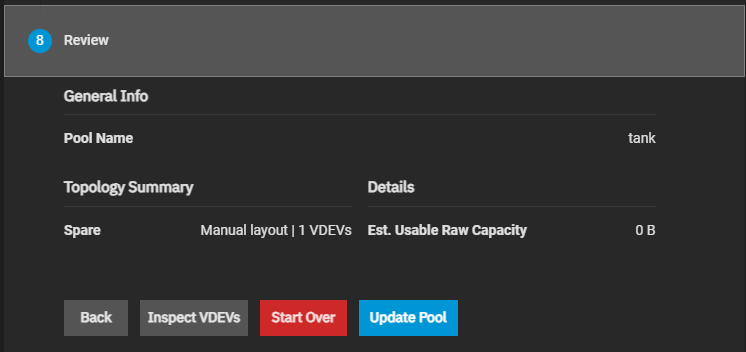
Click Save and Go to Review to show the Review screen when ready to save your changes.
To make changes, click either Back or the vdev option (i.e., Log, Cache, etc.) to return to the settings for that vdev. To clear all changes, click Start Over. Select Confirm, then click Start Over to clear all changes.
Click Update Pool to save changes.
You can add a deduplication VDEV to an existing pool, but files in the pool might or might not have deduplication applied to them. When adding a deduplication VDEV to an existing pool, any existing entries in the deduplication table remain on the data VDEVs until the data they reference is rewritten.
After adding a deduplication VDEV to a pool, and when adding duplicated files to the pool, the Storage Health widget on the Storage Dashboard shows two links, Prune and Set Quota. These links do not show if duplicated files do not exist in the pool.
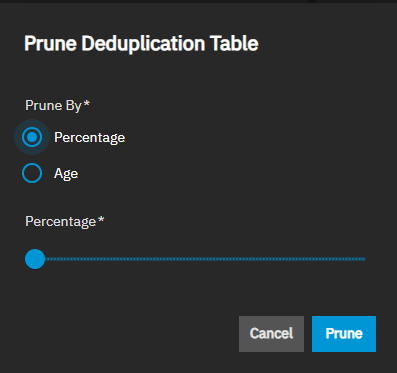
Use Prune to set the parameters used to prune the deduplication table (DDT). When pruning the size, select the percentage or age measurement to use.
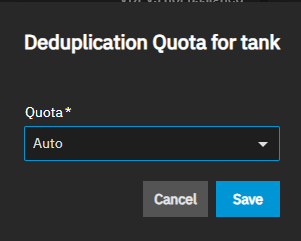
Use Set Quota to set the DDT quota. This determines the maximum table size allowed. The default setting, Auto, allows the system to determine the quota based on the size of a dedicated dedup vdev when setting the quota limit. This property works for both legacy and fast dedup tables.
Change to Custom to set the quota to your preference.
Click Save to save and close the dialogs.
To expand a pool by replacing disks with a higher-capacity disk, follow the same procedure as in Replacing Disks.
Insert a new disk into an empty enclosure slot. Remove the old disk only after completing the replacement operation. If an empty slot is unavailable, you can off-line the existing disk and replace it in the same slot, but this reduces redundancy during the process.
Go to the Storage Dashboard and click View VDEVs on the VDEVs widget opens the Poolname VDEVs screen.
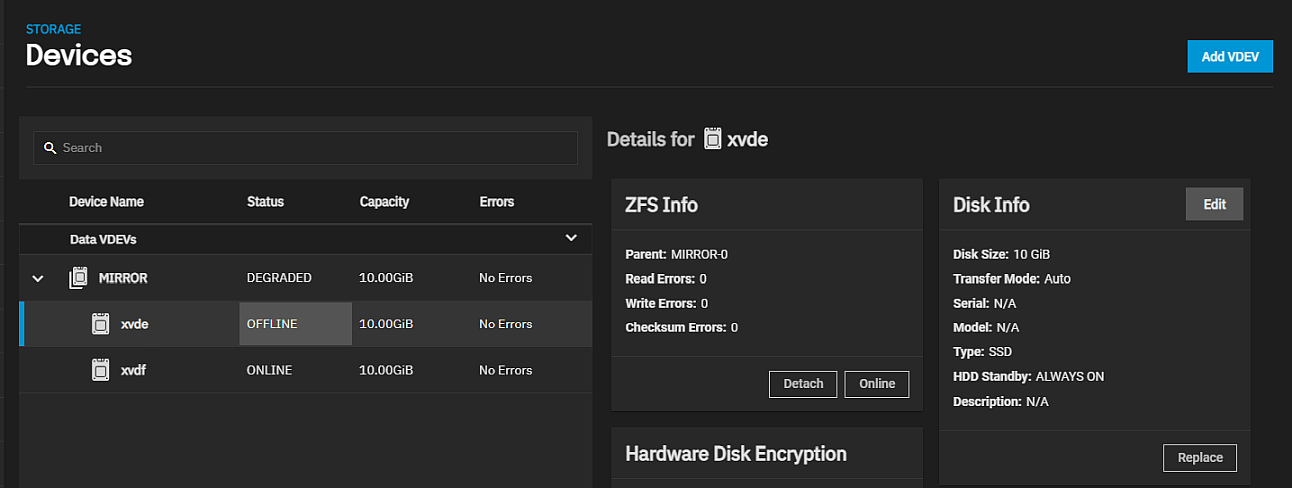
Click anywhere on the VDEV to expand it and select one of the existing disks.
(Optional) If replacing disks in the same slot, take one existing disk offline.
Click Offline on the ZFS Info widget to take the disk offline. The button toggles to Online.
Remove the disk from the system.
Insert a larger capacity disk into an open enclosure slot (or if no empty slots, the slot of the offline disk being replaced).
a. Click Replace on the Disk Info widget on the Poolname Devices screen for the disk you off-lined.
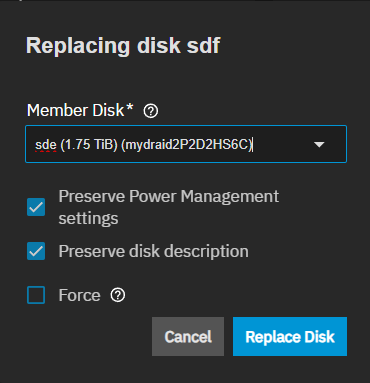
b. Select the new drive from the Member Disk dropdown list on the Replacing disk diskname dialog.
Add the new disk to the existing VDEV. Click Replace Disk to add the new disk to the VDEV and bring it online.
Disk replacement fails when the selected disk has partitions or data present. To destroy any data on the replacement disk and allow the replacement to continue, select the Force option.
After the disk wipe completes, TrueNAS starts replacing the failed disk. TrueNAS resilvers the pool during the replacement process. This can take a long time for pools with large amounts of data. When the resilver process completes, the pool status returns to Online status on the Poolname Devices screen.
Wait for the resilver to complete before replacing the next disk. Repeat steps 1-4 for all attached disks.
After replacing the last attached disk, click Expand on the Storage Dashboard to increase the pool size to fit all available disk space.
You can always remove the L2ARC (cache) and SLOG (log) VDEVs from an existing pool, regardless of topology or VDEV type. Removing these devices does not impact data integrity but can significantly impact read and write performance.
In addition, you can remove a data VDEV from an existing pool under specific circumstances. This process preserves data integrity but has multiple requirements:
- The pool must be upgraded to a ZFS version with the
device_removalfeature flag. The system shows the Upgrade button after upgrading TrueNAS when new ZFS feature flags are available. - All top-level VDEVs in the pool must be only mirrors or stripes.
- Special VDEVs cannot be removed when RAIDZ data VDEVs are present.
- All top-level VDEVs in the pool must use the same basic allocation unit size (
ashift). - The remaining data VDEVs must contain sufficient free space to hold all data from the removed VDEV.
It is generally not possible to remove a device when a RAIDZ data VDEV is present.
To remove a VDEV from a pool:
- Click *View VDEVs on the VDEVs widget opens the Poolname VDEVs screen.
- Click the device or drive to remove, then click the Remove button in the ZFS Info widget. If the Remove button is not visible, check that all conditions for VDEV removal listed above are correct.
- Confirm the removal operation and click the Remove button.
The VDEV removal process status shows in the Jobs screen (or alternately with the zpool status command).
Avoid physically removing or attempting to wipe the disks until the removal operation completes.


