Adding NFS Shares
10 minute read.
When creating a share, do not attempt to set up the root or pool-level dataset for the share. Instead, create a new dataset under the pool-level dataset for the share. Setting up a share using the root dataset leads to storage configuration issues.
Creating a Network File System (NFS) share on TrueNAS makes a lot of data available for anyone with share access. Depending on the share configuration, you can restrict users to read or write privileges.
NFS treats each dataset as its own file system. When creating the NFS share on the server, the specified dataset is the location that the client accesses. If you choose a parent dataset as the NFS file share location, the client cannot access any nested or child datasets beneath the parent.
If you need to create shares that include child datasets, SMB sharing is an option. Note that Windows NFS Client versions currently support only NFSv2 and NFSv3.
The UDP protocol is deprecated and not supported with NFS. It is disabled by default in the Linux kernel. Using UDP over NFS on modern networks (1Gb+) can lead to data corruption caused by fragmentation during high loads.
TrueNAS has implemented administrator roles to align with FIPS-compliant encryption and security hardening standards. The Sharing Admin role allows the user to create new shares and datasets, modify the dataset ACL permissions, and start/restart the sharing service, but does not permit the user to modify users or grant the sharing administrator role to new or existing users.
Full Admin users retain full access control over shares and creating/modifying user accounts.
It is best practice to use a dataset instead of a full pool for SMB and/or NFS shares. Sharing an entire pool makes it more difficult to later restrict access if needed.
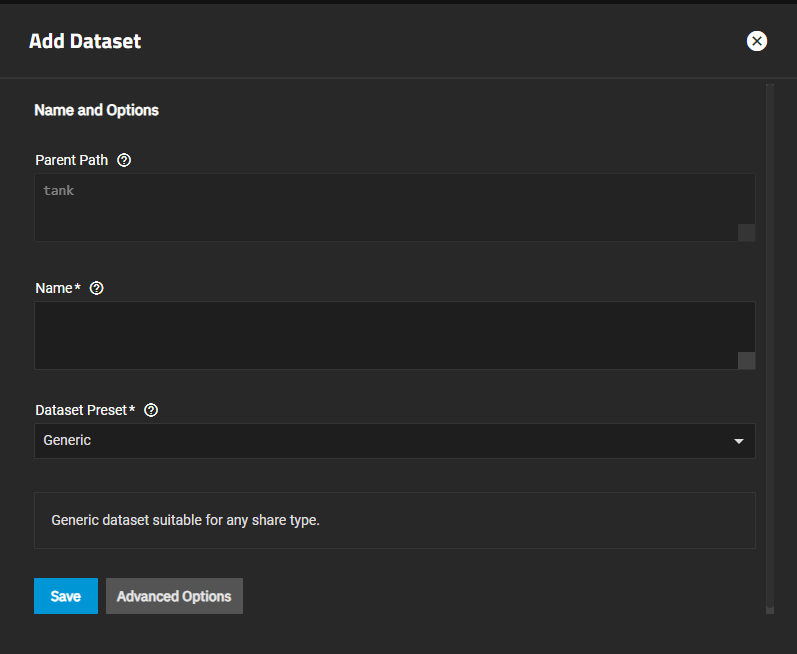
If creating a dataset and share from the Add Dataset screen, we recommend creating a new dataset with the Dataset Preset set to Generic for the new NFS share. Or you can set it to Multiprotocol and only select the NFS share type.
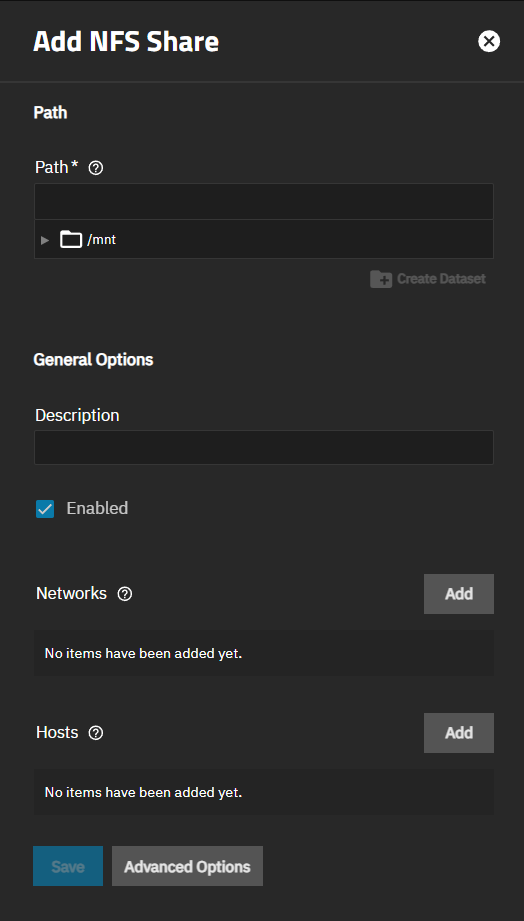
To create the share and dataset from the Add NFS Share screen:
Go to Shares > Unix (NFS) Shares and click Add to open the Add NFS Share configuration screen.
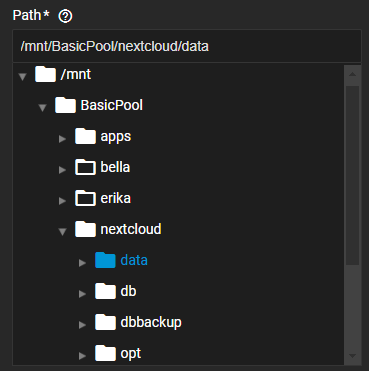
Enter the path or use the icon to the left of
Click Create Dataset, enter a name for the dataset, and click Create. The system creates the dataset optimized for an NFS share, populates the share Name, and updates the Path with the dataset name. The dataset name is the share name.
Enter text to help identify the share in Description.
Click Add to the right of Allowed Hosts if you want to enter allowed networks and hosts.
If needed, adjust access permissions.
Click Save to create the share.
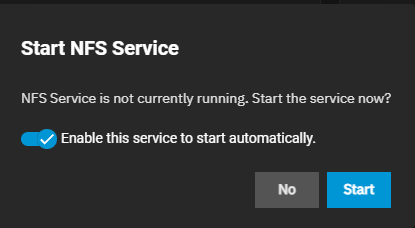
After adding the first NFS share, the system opens an enable service dialog.
Enable Service turns the NFS service on and changes the toolbar status to Running. If you wish to create the share without immediately enabling it, select Cancel.
If you want to enter allowed networks, click Add to the right of Networks. Enter an IP address in Network and select the mask CIDR notation. Click Add for each network address and CIDR you want to define as an authorized network. Defining an authorized network restricts access to all other networks. Leave empty to allow all networks.
Click Add to the right of Hosts if you want to enter allowed systems. Enter a host name or IP address to allow that system access to the NFS share. Click Add for each allowed system you want to define. Defining authorized systems restricts access to all other systems. Press the X to delete the field and allow all systems access to the share.
To tune the NFS share access permissions or define authorized networks, click Advanced Options.
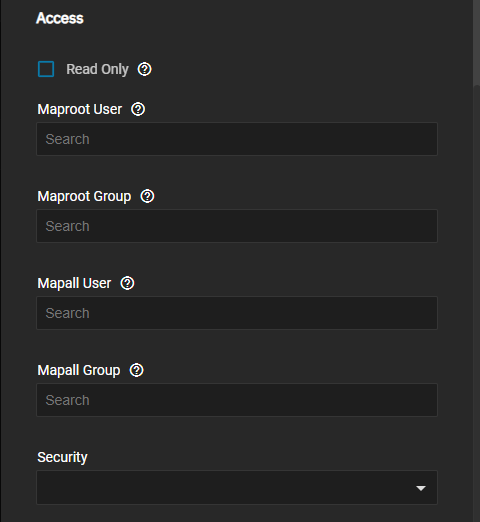
Select Read-Only to prohibit writing to the share.
To map user permissions to the root user, enter a string or select the user from the Maproot User dropdown list. To map the user permissions to all clients, enter a string or select the user from the Mapall User dropdown list.
To map group permissions to the root user, enter a string or select the group from the Maproot Group dropdown list. To map the group permissions to all clients, enter a string or select the group from the Mapall Group dropdown list.
Select an option from the Security dropdown. If you select KRB5 security, you can use a Kerberos ticket. Otherwise, everything is based on IDs.
To edit an existing NFS share, go to Shares > Unix (NFS) Shares and click the share you want to edit. The Edit NFS screen settings are identical to the share creation options, but you cannot create a new dataset.
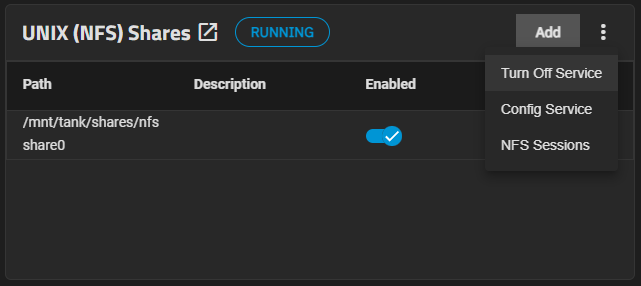
To begin sharing, click the on the toolbar and select Turn On Service. Turn Off Service displays if NFS is on. Turn On Service displays if NFS is off.
Or you can go to System > Services, locate NFS, and click the Start Service button to start the service. Toggle Start Automatically on if you want NFS to activate when TrueNAS boots.
The NFS service does not automatically start on boot if all NFS shares are encrypted and locked.
You can configure the NFS service from either the System > Services screen or the Shares > Unix (NFS) Shares widget.
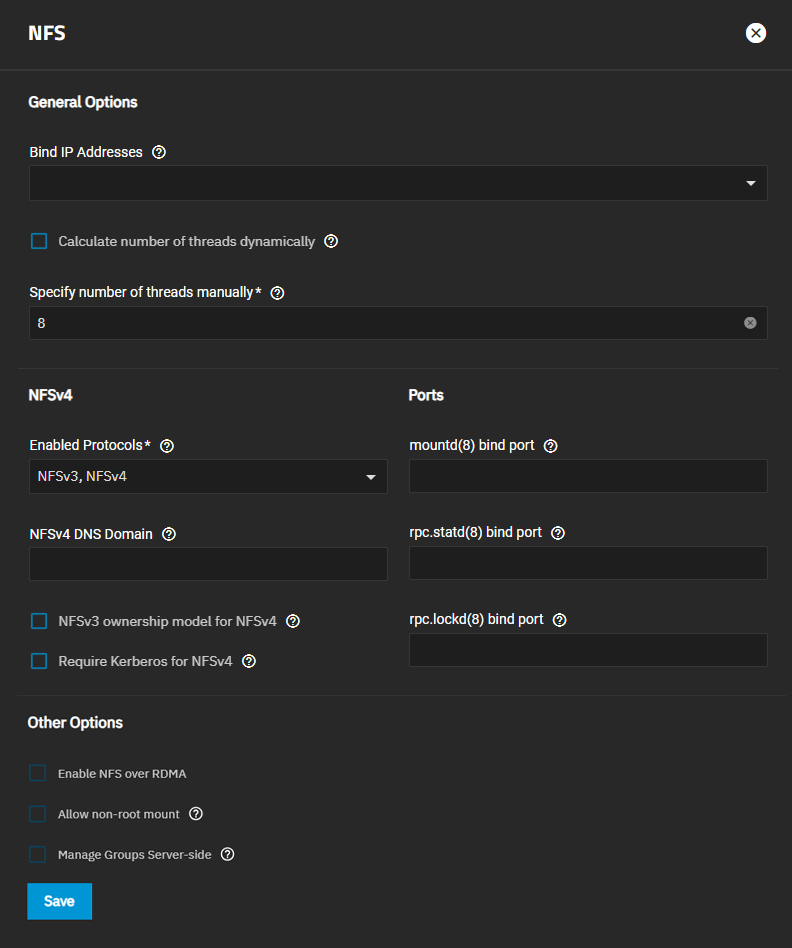
To configure NFS service settings from the Services screen, click edit on the System > Services screen to open the NFS service screen.
To configure NFS service settings from the Shares > Unix (NFS) Shares widget, click the Config Service from the dropdown menu on the widget header to open the NFS service screen.
Unless you need specific settings, we recommend using the default NFS settings.
When TrueNAS is already connected to Active Directory, setting NFSv4 and Require Kerberos for NFSv4 also requires a Kerberos Keytab.
TrueNAS Enterprise
NFS over RDMA
TrueNAS Enterprise customers utilizing NFS shares with compatible hardware can enable NFS over RDMA to improve NFS performance and efficiency. Remote Direct Memory Access (RDMA) lets a client system transfer data directly from server memory to its own, improving speed, reducing latency, and lowering CPU usage.
NFS over RDMA support requires an active Enterprise license and RDMA-capable network interface cards (NICs) in the TrueNAS host and client systems. Interested customers should contact Enterprise Support for assistance.
Although you can connect to an NFS share with various operating systems, we recommend using a Linux/Unix OS.
First, download the nfs-common kernel module.
You can do this using the installed distribution package manager.
For example, on Ubuntu/Debian, entering the command sudo apt-get install nfs-common in the terminal.
After installing the module, connect to an NFS share by entering sudo mount -t nfs {IPaddressOfTrueNASsystem}:{path/to/nfsShare} {localMountPoint}.
Where {IPaddressOfTrueNASsystem} is the remote TrueNAS system IP address that contains the NFS share, {path/to/nfsShare} is the path to the NFS share on the TrueNAS system, and {localMountPoint} is a local directory on the host system configured for the mounted NFS share.
For example, sudo mount -t nfs 10.239.15.110:/mnt/Pool1/NFS_Share /mnt mounts the NFS share NFS_Share to the local directory /mnt.
You can also use the Linux nconnect function to let your NFS mount support multiple TCP connections.
To enable Linux nconnect, enter sudo mount -t nfs -o rw,nconnect=16 {IPaddressOfTrueNASsystem}:{path/to/nfsShare} {localMountPoint}.
Where {IPaddressOfTrueNASsystem}, {path/to/nfsShare}, and {localMountPoint} are the same ones you used when connecting to the share.
For example, sudo mount -t nfs -o rw,nconnect=16 10.239.15.110:/mnt/Pool1/NFS_Share /mnt.
By default, anyone who connects to the NFS share only has read permission. To change the default permissions, edit the share, open the Advanced Options, and change the Access settings.
Changes to local groups or directory service groups take up to 10 minutes to take effect for NFS shares. For immediate effect, reload or restart the NFS service.
You must have ESXI 6.7 or later for read/write functionality with NFSv4 shares.


