Managing Network Configurations
3 minute read.
Use the Network Configuration Settings widget shows existing general network settings like the default gateway and DNS servers, set services allowed to externally communicate, enter an HTTP proxy, or host name database.
You can lose your TrueNAS connection if you change the network interface that the web interface uses! You might need command line knowledge or physical access to the TrueNAS system to fix misconfigured network settings.
Do not configure network settings to depend on any client container or application hosted on the TrueNAS system, such as DNS services, proxy networks, firewalls, and routers. This is an unsupported configuration because TrueNAS cannot access the necessary networks during boot if the client container has not started.
Use the Network Configuration widget to add general network settings like the default gateway and DNS name servers to allow external communication.
To add new or change existing network interfaces, see Interface Configurations.
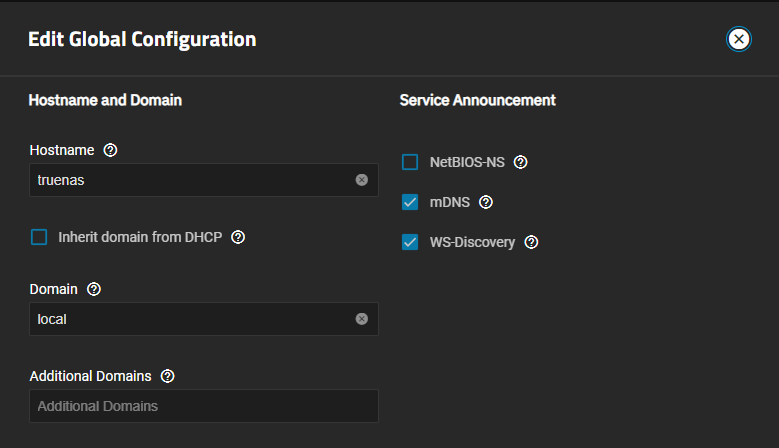
Go to System > Network, and click Settings on the Network Configuration widget to open the Edit Global Configuration screen.
Enter the host name for your TrueNAS in Hostname. For example, replace the default value truenas with something like localnas.
If you plan to use Active Directory or SMB services, the hostname is also used as the NetBIOS name and must comply with NetBIOS naming restrictions: maximum 15 characters, cannot contain\ / : * ? " < > |, and cannot use Microsoft or RFC 852 reserved words (ANONYMOUS, AUTHENTICATED USER, BATCH, BUILTIN, DIALUP, DOMAIN, ENTERPRISE, INTERACTIVE, INTERNET, LOCAL, NETWORK, NULL, PROXY, RESTRICTED, SELF, SERVER, USERS, WORLD, GATEWAY, GW, TAC). TrueNAS 25.04 and later enforce these restrictions through validation.Enter the system domain name in Domain. For example, replace the default local with example.com.
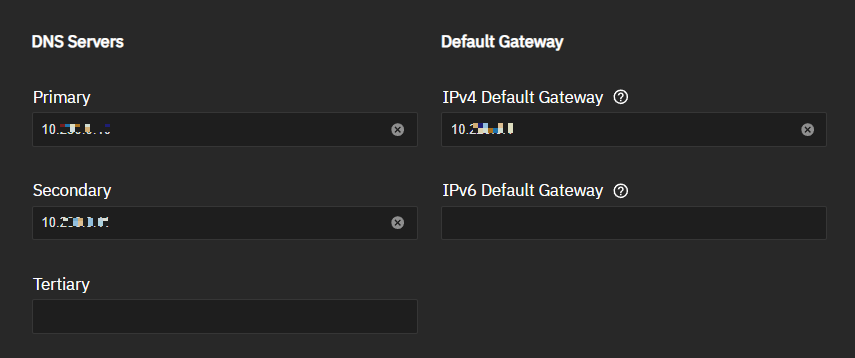
Enter the IP addresses for your DNS name servers in Primary, Secondary, and/or Tertiary. For home users, enter 8.8.8.8 in the Primary field so your TrueNAS can communicate externally with the Internet.
Enter the IP address for your default gateway into the IPv4 Default Gateway if you are using IPv4 IP addresses. Enter the IPv6 address in the IPv6 Default Gateway if you are using IPv6 addresses.
Select the desired Outbound Network option.
Selecting Allow All permits all services to communicate externally.
Selecting Deny All prevents services from communicating externally.
Selecting Allow Specific shows a dropdown list of services that you can choose to allow to communicate externally. Services not selected cannot communicate externally.
Selecting Allow All Except shows the same dropdown list of services that you can choose to deny the ability to communicate externally. Services not selected for this option are allowed external communication
Select as many services as desired.
- Click Save. The Network Configuration widget on the Network screen shows the new settings.


