Setting Up a Network Bridge
6 minute read.
In general, a bridge refers to various methods of combining (aggregating) multiple network connections into a single aggregate network.
TrueNAS uses bridge(4) as the kernel bridge driver. Bridge(8) is a command for configuring the bridge in Linux. While the examples focus on the deprecated brctl(8) from the bridge-utilities package, we use ip(8) and bridge(8) from iproute2 instead. Refer to the FAQ section that covers bridging topics more generally.
Network bridging does not inherently aggregate bandwidth like link aggregation (LAGG). Bridging is often used for scenarios that require extending a network segment or combining different types of network traffic.
You can use bridging to integrate different types of networks (e.g., wireless and wired networks) or to segment traffic within the same network. You can also use a bridge to allow a VM, container, or app configured on TrueNAS to communicate with the host system. See Accessing NAS from Containers for more information.
You can lose your TrueNAS connection if you change the network interface that the web interface uses!
If your network changes result in lost communication with the network and you need to return to the DHCP configuration, you can refer to the information below to restore communication with your server. Lost communication might require an IPMI or physical connection to the system, and reconfiguring your network settings using the Console Setup menu.
To prepare before making changes:
Have the DNS name server addresses, the default gateway for the new IP address, and any static IP addresses on hand before making network changes. You only have 60 seconds to change and test new network settings before they revert to the current settings. For example, back to DHCP assigned if moving from DHCP to a static IP.
Back up your system to preserve your data and system settings. Save the system configuration file and a system debug.
Grab a screenshot of your current settings in the Global Configuration widget as a precautionary step.
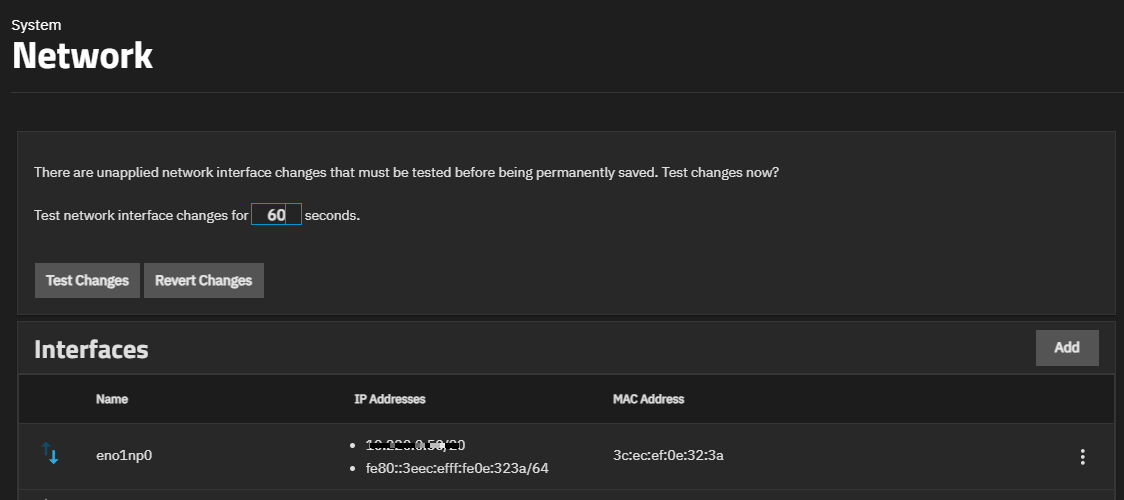
TrueNAS protects your connection to the interface by displaying the Test Changes option on the Network screen after you make and save changes to the network interface.
TrueNAS shows the unapplied changes widget above the Interfaces widget after saving network changes.
Click the Test Changes button to test access to the UI after making a change and before making it a permanent change. This safeguard is intended to prevent changes that can break access to the UI.
Revert Changes discards any changes made to the interface within the same 60-second period.
The test timer starts after you click Save on the Add Interface or Edit Interface screens. After clicking Test Changes, wait a few moments to give the interface time to initialize, and then refresh the browser until you see the Save Changes button or follow the steps below to test in a new browser tab. Click Save Changes to make the changes permanent.
To test the change in a different browser tab:
Click Test Changes.
(Optional) Click on 60 and enter a new number to change the time allotted to test the network change before changes automatically revert.
Immediately open a new browser window. Do not close the existing login session tab.
Enter the new IP address in the browser URL field of the new browser window, and press Enter. The TrueNAS login screen displays.
Enter your administrator login credentials to access the system.
Go to Network and click Save Changes to make the changes permanent.
If the timer expires before you save the changes, TrueNAS reverts to the settings before you made the change. Return to the original browser session, to re-enter your interface changes, click Save, then repeat the steps above.
If you cannot access the UI, return to the original browser session and click Revert Changes on the Network screen.
To set up a bridge interface:
Go to Apps and the Containers screens to verify all apps and containers are stopped. If still running, stop all apps and containers listed on the Applications and the Containers screens.
Go to Virtual Machines, expand each VM, and click Power Off to stop each VM. Powering off the VM disconnects any NIC device used by the VM, where stopping the VM might not.
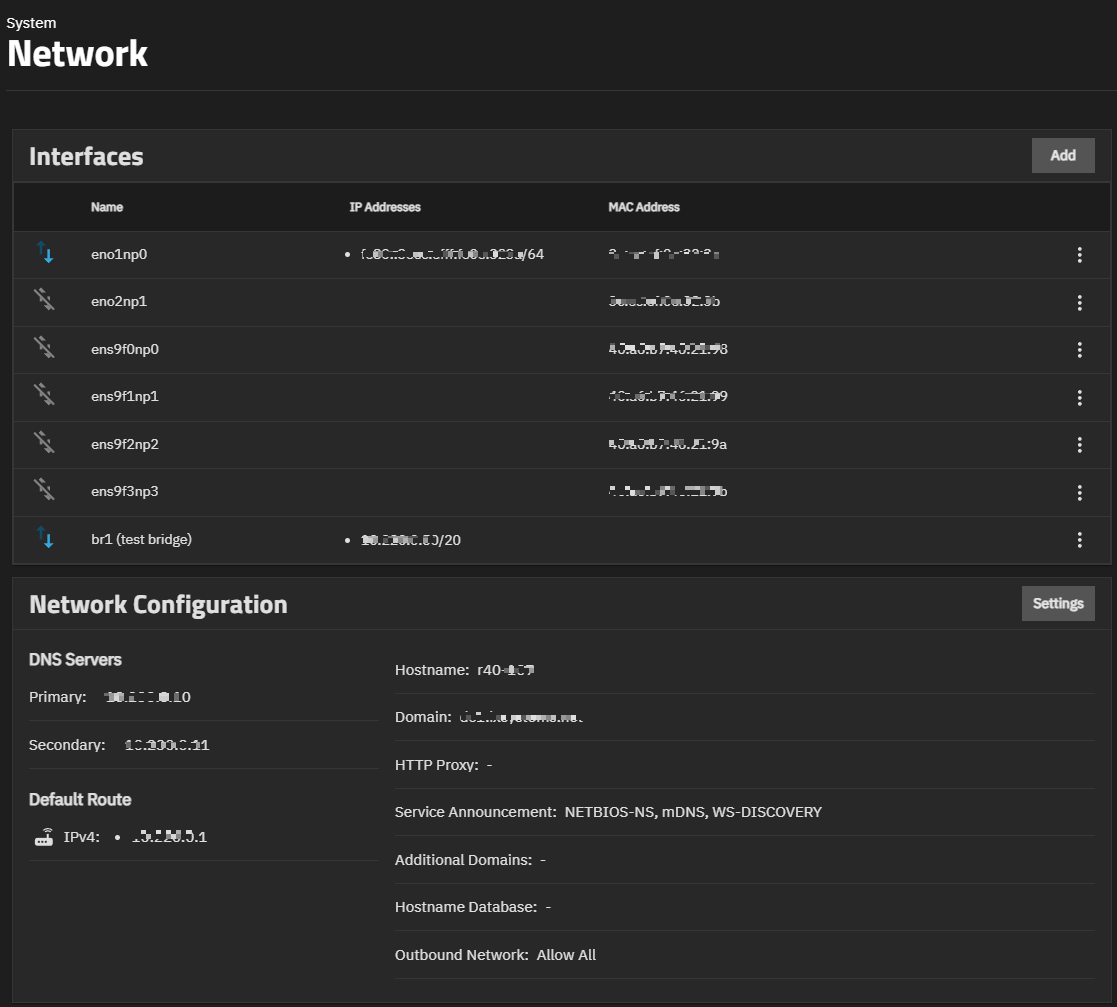
Go to System > Network and take a screenshot showing your Interfaces and the Global Configuration widgets.
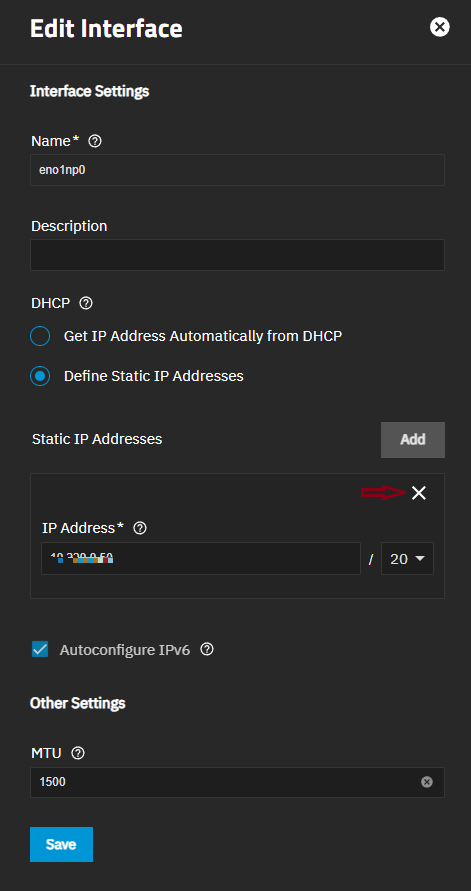
Click the icon for the interface, to open the Edit Interface screen. Click the x to the right of Static IP Addresses to remove the current static IP address assignment, and then click Save.
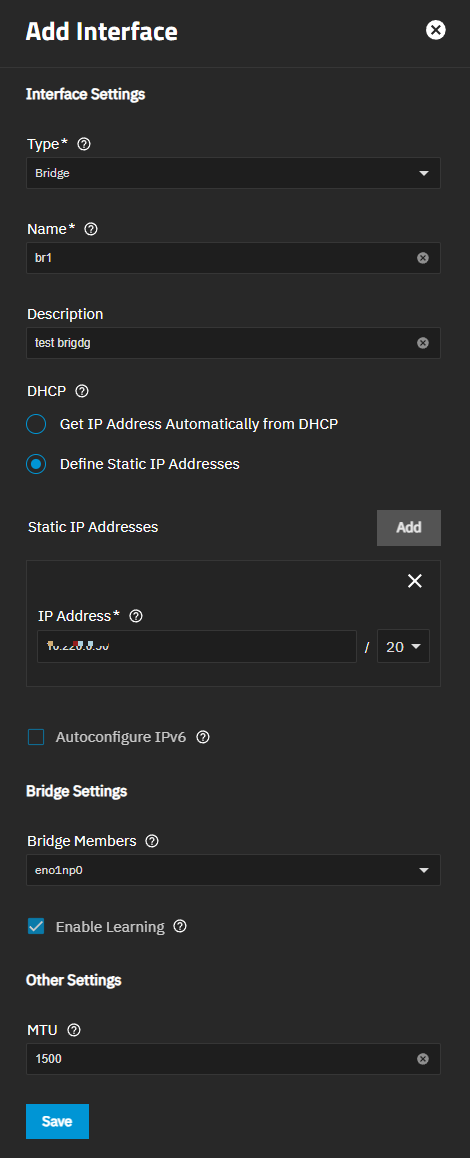
Click Add to open the Add Interface screen. Configure the interface:
a. Set Type to Bridge. Name automatically populates with the correct name. You cannot change the Type field value or the name after clicking Save!
b. (Optional) Enter a short description for the bridge. This is optional but recommended if configuring multiple bridges on your system to help identify their use or location.
c. Select Define Static IP Addresses, then click Add to the right of Static IP Addresses. Enter the IP address and select the netmask for the interface edited in step 4 above. Refer to the screenshot if you do not remember the IP address and netmask.
d. Select the interface name in Bridge Members. You only need to add the interface name edited in step 4 above. Leave Enable Learning selected unless you want to defer interface learning until runtime. Disabling learning prevents premature state transitions and potential issues during system startup.
e. Click Save.
TrueNAS shows the bridge on the Interfaces widget.
Click Test Changes. See Testing Network Changes above for details on testing and saving network changes.
TrueNAS shows the bridge as working.


