Creating VMWare Snapshots
8 minute read.
Use this procedure to create ZFS snapshots when using TrueNAS as a VMWare datastore.
You must have a paid edition of VMWare ESXi to use the TrueNAS VMWare Snapshots feature. ESXi free has a locked (read-only) API that prevents using TrueNAS VMWare Snapshots.
This tutorial uses ESXi version 8.
When creating a ZFS snapshot of the connected dataset, VMWare automatically takes a snapshot of any running virtual machines on the associated datastore. VMware snapshots can integrate VMware Tools, making it possible to quiesce VM snapshots, sync filesystems, take shadow copy snapshots, and more. Quiescing snapshots is the process of bringing VM data into a consistent state, suitable for creating automatic backups. Quiesced snapshots can be file-system consistent, where all pending data or file-system changes complete, or application consistent, where applications complete all tasks and flush buffers, prior to creating the snapshot.See Manage Snapshots from VMWare for more information.
VM snapshots are included as part of the connected Virtual Machine File System (VMFS) datastore and stored as a point-in-time within the scheduled or manual TrueNAS ZFS snapshot of the data or zvol backing that VMWare datastore. The temporary VMware snapshots are automatically deleted on the VMWare side, but still exist in the ZFS snapshot and are available as stable restore points.
TrueNAS Enterprise
TrueNAS Enterprise customers with TrueNAS 12.0 and newer and TrueNAS 22.12.4 (Bluefin) and newer deployed can access the iXsystems TrueNAS vCenter plugin. This activates management options for TrueNAS hardware attached to vCenter Server and enables limited management of TrueNAS systems from a single interface.
Please contact TrueNAS Enterprise Support to learn more and schedule a time to deploy or upgrade the plugin.
Before using TrueNAS to create VMWare snapshots, configure TrueNAS to present a VMFS datastore or NFS export to your ESXi host(s) (this tutorial uses iSCSI) and then create and start your VM(s) in ESXi. Virtual machines must be running for TrueNAS to include them in VMWare snapshots, because powered-off virtual machines are already in a consistent state
Go to Datasets and click Add Zvol to create a dedicated zvol for VMWare.
This tutorial uses virtual/vmware/zvol-01.Create an iSCSI share. Go to Shares and click Wizard on the Block (iSCSI) Shares Targets widget.
a. Enter a name for the share. For example, vmware.
Select Device for Extent Type and select the zvol from the Device dropdown. Leave Sharing Platform set to VMware and Target set to Create New, then click Next.b. Set Portal to Create New. You can leave Discovery Authentication Method set to NONE, or select CHAP or Mutual CHAP and enter a Discovery Authentication Group ID. Click Add next to IP Address and select either 0.0.0.0 for IPv4 or :: for IPv6 to listen on all ports.
c. Leave Initiators blank and click Save.
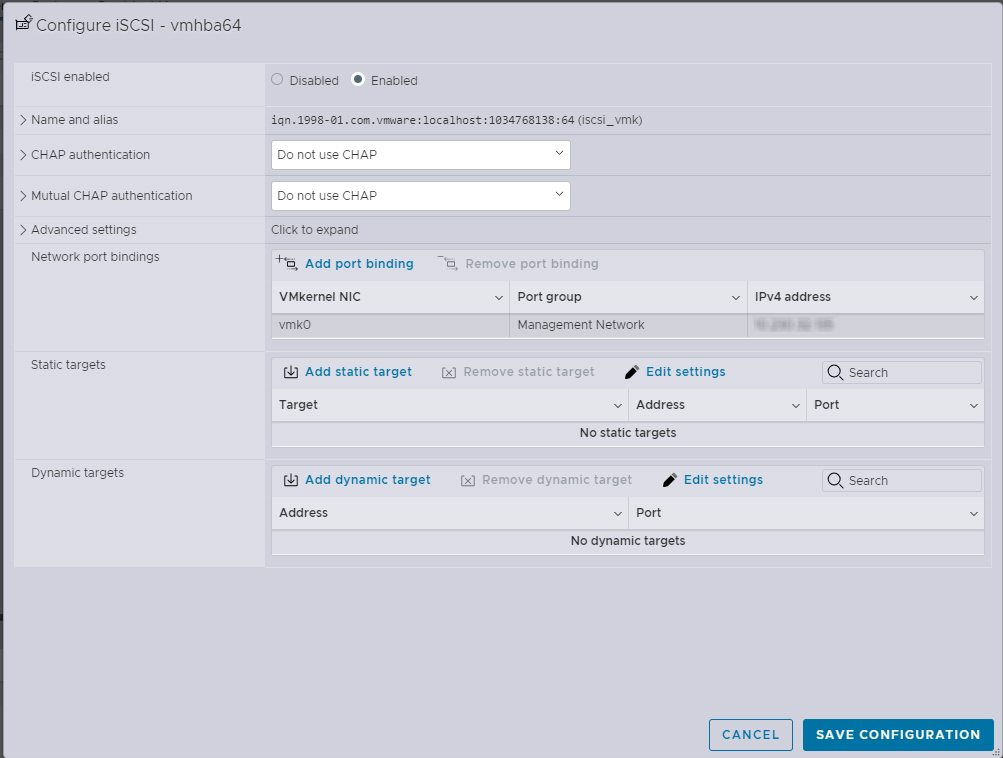
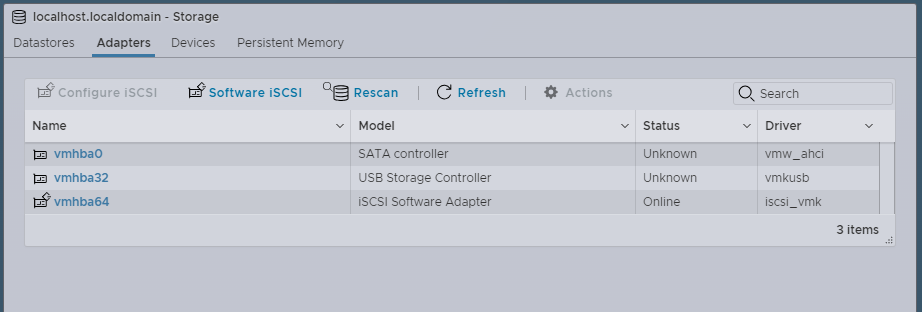
In the VMWare ESXi Host Client, go to Storage, select Adapters, and then click Software iSCSI to configure the iSCSI connection.
a. Configure CHAP authentication if needed or leave set to Do not use CHAP.
b. Click Add dynamic target, enter the IP address for the TrueNAS system, and click Save Configuration to return to the Adapters screen.
c. Click Rescan to discover the iSCSI initiator. ESXi automatically adds static targets for discovered initiators. Click Software iSCSI again to confirm.
d. Go to Devices and click Rescan to discover the shared storage. ESXi adds the TrueNAS iSCSI disk to the list of devices.
Go to Datastores and click New Datastore to create a new VMFS datastore using the TrueNAS device. Then go to Virtual Machines and create your new virtual machine(s), using the new datastore for storage.
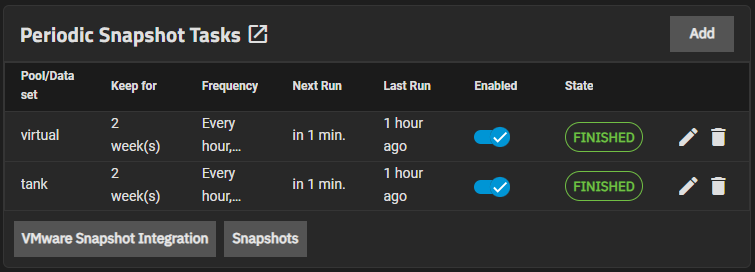
To configure TrueNAS to create VMWare snapshots, go to Data Protection and click the VMware Snapshot Integration button in the Periodic Snapshot Tasks widget to open the VMWare Snapshots screen.
Note that you can organize information in the columns of the table(s) below by clicking on each column title. This allows you to toggle the information between a descending an ascending order.
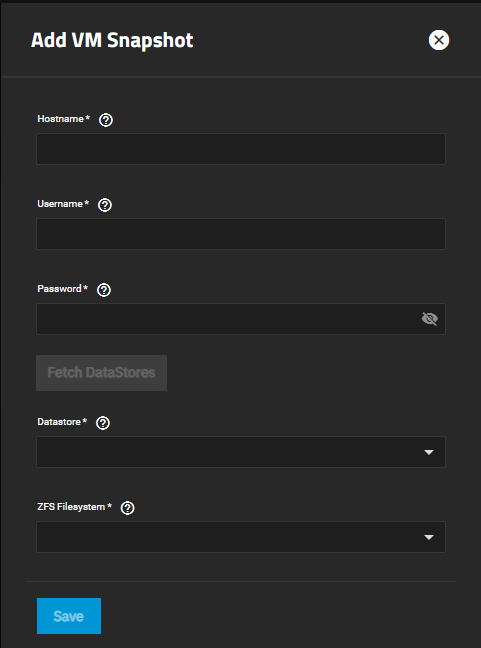
Click the Add button to configure the VMWare Snapshot Task.
You must follow the exact sequence to add the VMware snapshot or the ZFS Filesystem and Datastore fields do not populate with options available on your system. If you click in ZFS Filestore* or Datastores before you click Fetch Datastores the creation process fails, the two fields do not populate with the information from the VMWare host, and you must exit the add form or click Cancel and start again.
Enter the IP address or host name for your VMWare system in Hostname.
Enter the user credentials on the VMware host with ‘Create Snapshot’ and ‘Remove Snapshot’ permissions in VMware. See Virtual Machine Snapshot Management Privileges from VMware for more information.
Click Fetch Datastores. This connects TrueNAS to the VMWare host and populates the ZFS Filesystem and Datastore dropdown fields. Make sure the correct TrueNAS ZFS dataset or zvol matching the VMware datastore is populated.
Select the TrueNAS dataset from the ZFS Filesystem dropdown list of options.
Select the VMFS datastore from the Datastore dropdown list of options.
Click Save. The saved snapshot configuration appears on the VMware Snapshots screen.
State indicates the current status of the VMware connection as PENDING, SUCCESS, or ERROR.
Create a new periodic snapshot task for the zvol or a parent dataset. If there is an existing snapshot task for the zvol or a parent dataset, VMWare snapshots are automatically integrated with any snapshots created after the VMWare snapshot is configured.
Expand the configured task on the Periodic Snapshot Tasks screen and ensure that VMware Sync is true.
To revert a VM using a ZFS snapshot, first clone the snapshot as a new dataset in TrueNAS, present the cloned dataset to ESXi as a new LUN, resignature the snapshot to create a new datastore, then stop the old VM and re-register the existing machine from the new datastore.
Clone the snapshot to a new dataset.
a. Go to Data Protection and click Snapshots on the Periodic Snapshot Tasks widget and locate the snapshot you want to recover and click on that row to expand details.
b. Click Clone to New Dataset. Enter a name for the new dataset or accept the one provided then click Clone.
The cloned zvol appears on the Datasets screen.
Share the cloned zvol to VMWare using NFS or iSCSI (this tutorial uses iSCSI).
a. Go to Shares and click Block (iSCSI) Shares Targets to access the iSCSI screen.
b. Click Extents and then click Add to open the Add Extent screen.
c. Enter a name for the new extent, select Device from the Extent Type dropdown, and select the cloned zvol from the Device dropdown. Edit other settings according to your use case and then click Save.
d. Click Associated Targets and then click Add to open the Add Associated Target screen.
e. Select the existing VMWare target from the Target dropdown. Enter a new LUN ID number or leave it blank to automatically assign the next available number. Select the new extent from the Extent dropdown and then click Save.
Go to Storage > Adapters and click Rescan to discover the new LUN. Then go to the Devices tab and click Rescan again to discover VMFS filesystems on the LUN. At this point, ESXi discovers the cloned device snapshot, but is unable to mount it because the original device is still online.
Resignature the snapshot so that it can be mounted.
a. Access the ESXi host shell using SSH or a local console connection to resignature the snapshot
b. Go back to Storage > Devices in the ESXi Host Client UI and click Refresh. The mounted snapshot appears in the list of devices.
c. Go to the Datastores tab. You might need to click Refresh again. A new datastore for the mounted snapshot appears in the list of datastores.
Stop the old virtual machine(s) you want to revert and use the snapshot datastore to register an existing VM from the snapshot.
a. Go to Virtual Machines in ESXi, select the existing VM(s) to revert, and click Power Off.
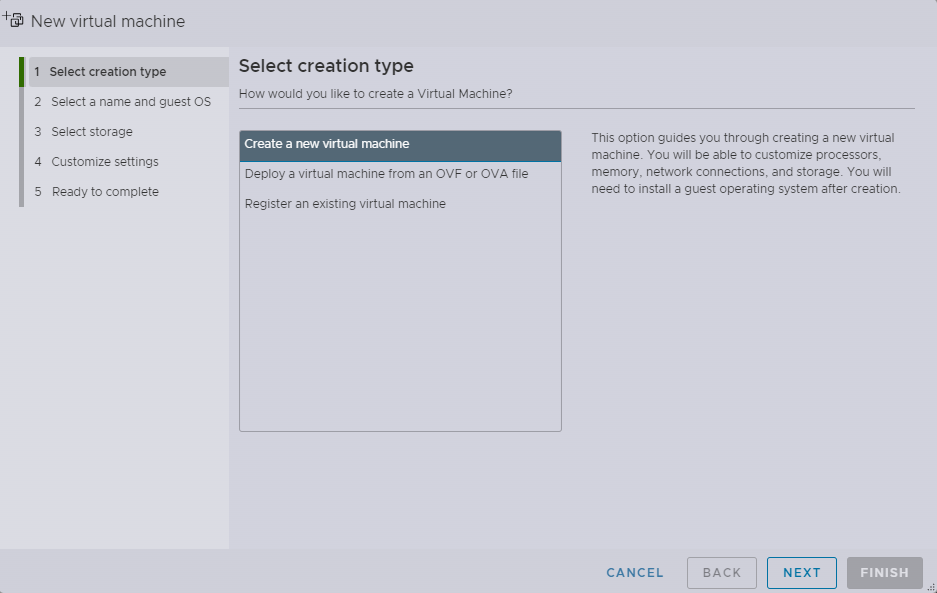
b. Click Create / Register VM to open the New virtual machine screen.
c. Select Register an existing virtual machine and then click next.
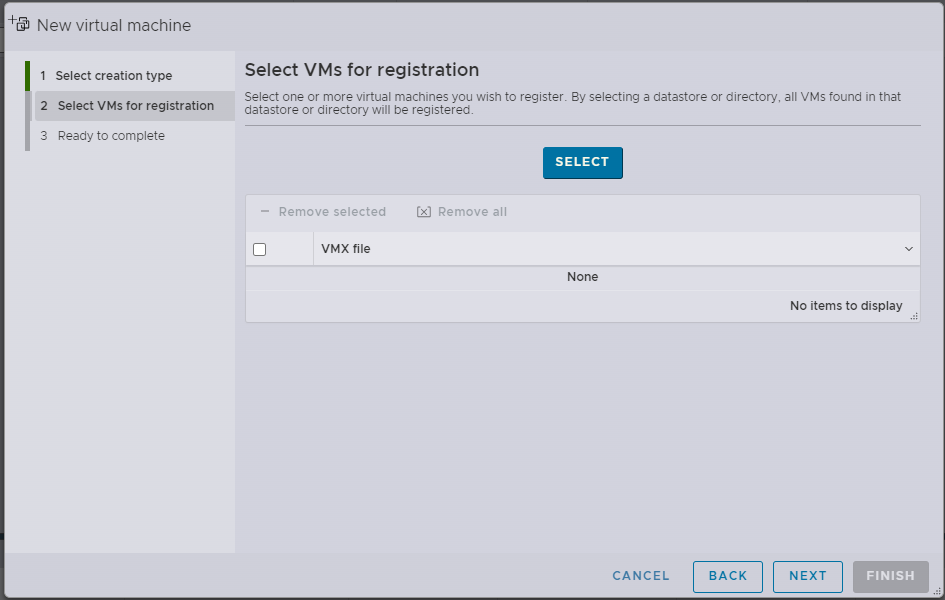
d. Click Select and use the Datastore Browser to select the snapshot datastore.
Select the VM(s) you want to revert and click Next.
e. Review selections on the Ready to complete screen/ If correct, click Finish.
Start the new VM(s) and verify functionality, then delete or archive the previous VM(s). Copy or migrate the VMware virtual machine to the original, non-snapshot datastore.


