Adding a Google Photos Cloud Sync Task
12 minute read.
On March 31, 2025, Google changed the Google Photos API to allow external applications to access and manage only the media and albums they create. Cloud sync tasks continue to upload photos to albums created by the TrueNAS sync client, but reading from your full photo library or from shared albums does not work as expected. Some operations return permission errors.
Tokens issued before March 31, 2025 do not provide full-library access under the new API rules. Generate new credentials if you need to continue uploading into albums created by the sync client.
See the Google API update notice for more details.
Review existing Google Photos cloud sync tasks and configure them to use albums created by the TrueNAS source. A complete backup of a Google Photos library through the API is not possible.
Google Photos cloud sync tasks in TrueNAS use the rclone backend for the Google Photos API to authenticate credentials and transfer data.
Configuring a Google Photos cloud sync task is a multi-part procedure where you:
- Plan your deployment and select a local dataset.
- Generate Google API credentials on the Google Cloud API dashboard.
- Install rclone and generate a token on your remote client OS.
- Add Google Photos cloud credentials on TrueNAS.
- Configure the cloud sync task on TrueNAS.
Review your storage and data protection requirements before setting up a Google Photos cloud sync task. See the rclone Google Photos backend documentation for details on standard options and API limitations that can help you plan your deployment.
Decide how you want to manage media files in Google Photos and your local dataset. Choose the cloud sync direction and transfer mode, target folder, and local dataset (new or existing) that best fit your needs.
A Google Photos cloud sync task can either push local files to Google Photos or (limited) pull files from Google Photos to a local TrueNAS dataset. Select the direction that fits how you want to manage your media files.
Pull is restricted by the Google Photos API and only accesses albums created by the TrueNAS sync client. Pulling your full library or from shared albums is not possible.
Push uploads local files into albums created by the TrueNAS sync client. Use push to manage media in your local dataset and back it up to Google Photos.
Next, select the data transfer mode that fits how you want to manage file retention between the source and destination. There are three options:
- SYNC - Matches files on the destination to the source. Deletes files from the destination if they do not exist on the source. Only affects albums created by the sync client.
- COPY - Duplicates each source file into the destination. Overwrites files with the same name. Only affects albums created by the sync client.
- MOVE - Transfers files from the source to the destination and deletes them from the source. Overwrites files with the same name. Only affects albums created by the sync client.
After choosing the direction and mode for your cloud sync task, select the remote Google Photos folder that rclone targets.
Each folder option has specific file management and structure requirements due to API restrictions.
Cloud sync tasks cannot target the root folder (
| Folder | Recommended | Direction | Description |
|---|---|---|---|
| Yes | Push or Pull | Use this folder for push tasks or to organize media into albums. Only albums created by the TrueNAS cloud sync client are accessible. Pull returns only items in these albums; push uploads work as expected. All local files must be in child directories (albums) under the dataset. | |
| No | Pull | API restrictions prevent reading your full Google Photos library. Only items in app-created albums are accessible. Do not use this option for full-library sync. | |
| No | Push | Temporary upload location. Files pushed here are not sorted into albums, metadata can be lost, and repeated sync tasks can produce duplicates or unstable filenames. Use only for temporary transfers. |
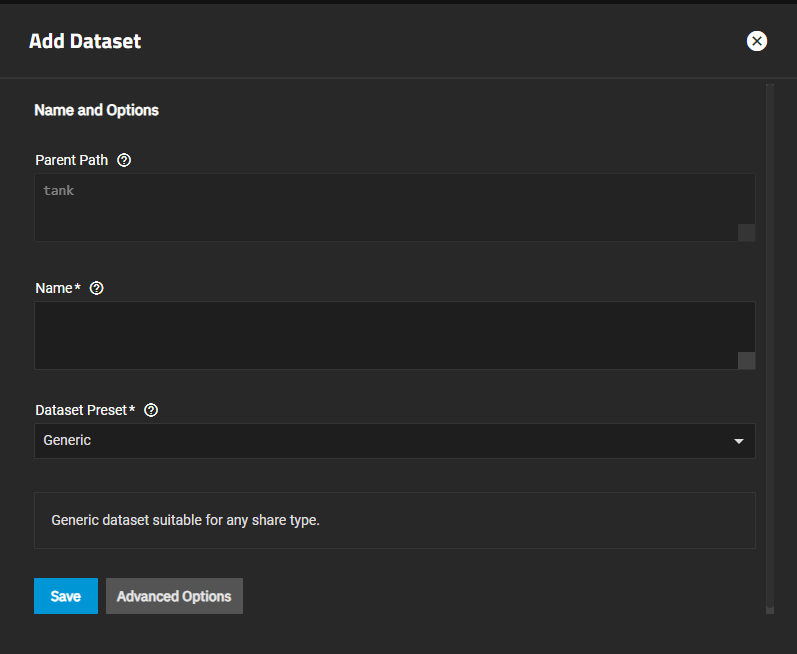
Select a TrueNAS local dataset or create a new one to use as the source or destination.
For push tasks, organize files in the local dataset so they map to albums created by the TrueNAS cloud sync client.
For pull tasks, the Google Photos API only provides access to items in albums created by the sync client.
Full-library pulls or shared albums are not accessible.
Configure your dataset accordingly based on your chosen direction, mode, and target folder.
Tokens generated before March 31, 2025 do not provide full access to your Google Photos library under the new API rules.
When creating credentials, ensure that your OAuth client and token are intended for use with albums created by the TrueNAS cloud sync client. Only these app-created albums can be accessed for push or pull tasks.
On the Google API dashboard, click the dropdown menu to the right of the Google Cloud logo and select your project.
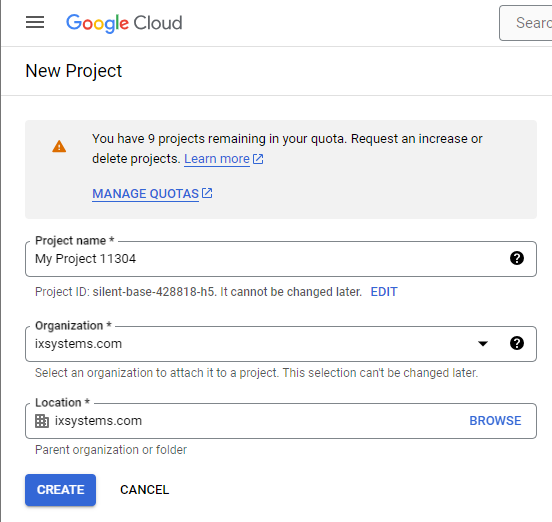
If you do not have a project, click NEW PROJECT and enter a value in Project name, Organization, and Location. Click Create.
After you select your project, click Enabled APIs & Services on the left menu, then click + ENABLE APIS AND SERVICES.
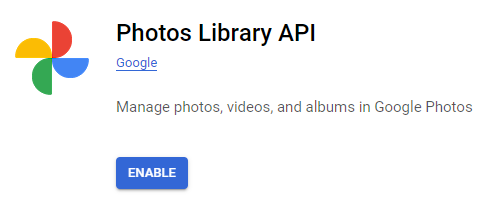
Enter photos library api in the search bar, then select Photos Library API and click ENABLE. This enables the API for your project Access remains limited to albums created by the TrueNAS cloud sync client.
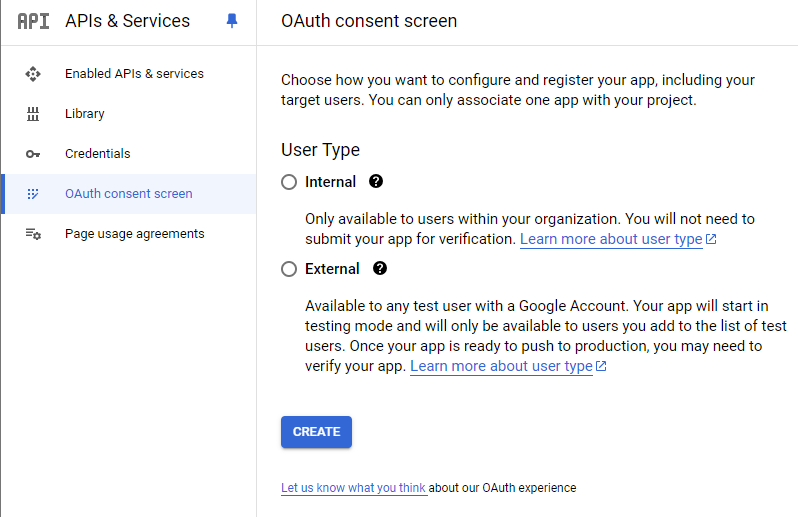
Click OAuth consent screen on the left menu, select EXTERNAL, then click CREATE.
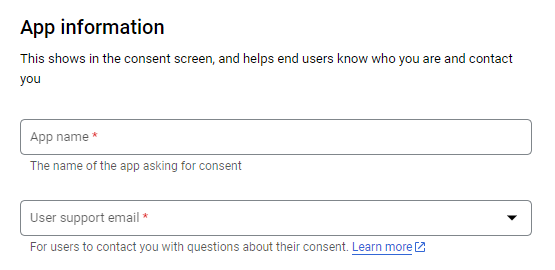
Enter a value in App name and User support email.
Enter an email address in Developer contact information, then click SAVE AND CONTINUE.
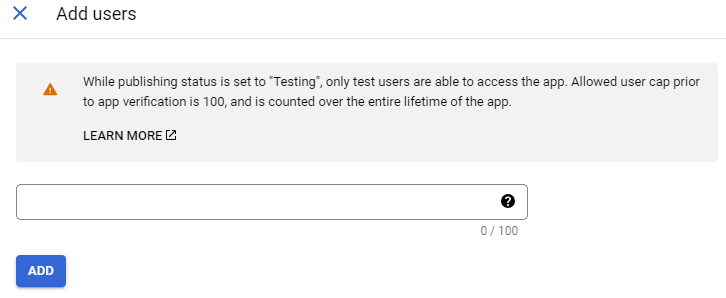
Continue to the Test users section and click + ADD USERS, enter the email addresses of users who run cloud sync tasks, then click ADD.
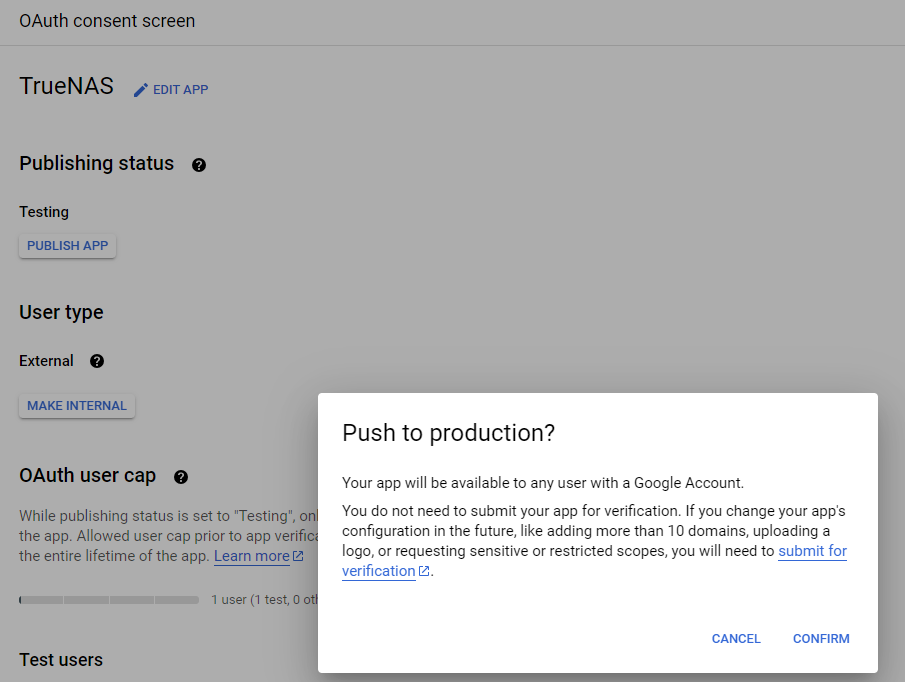
On the OAuth consent screen, click PUBLISH APP under Testing and push the app to production.
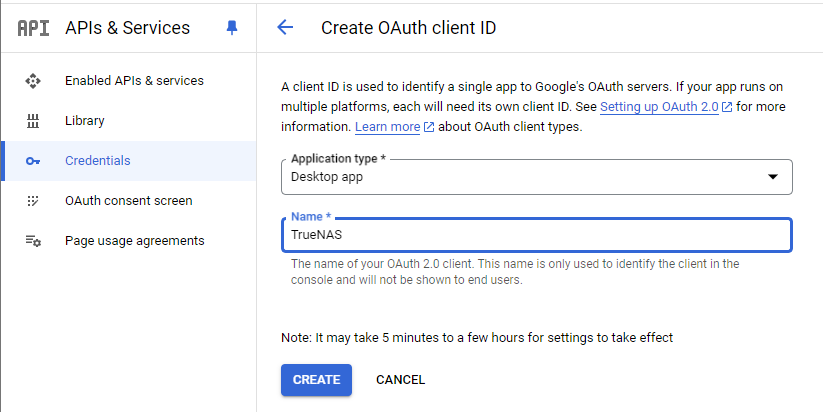
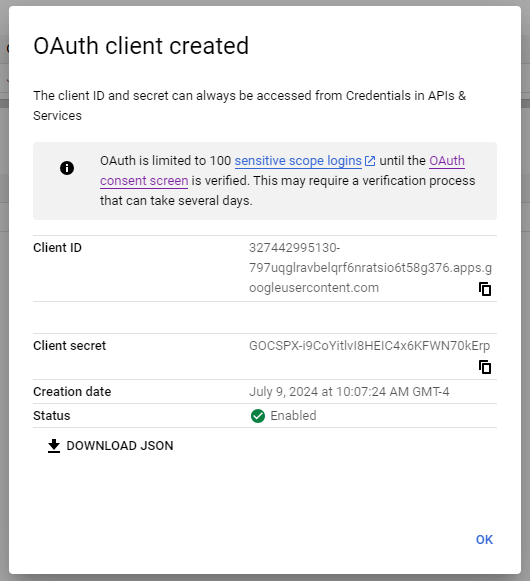
Click Credentials on the left menu, then click + CREATE CREDENTIALS and select OAuth client ID.
Select Desktop app in the Application type dropdown, then enter a name for the client ID and click CREATE.
Copy and save your client ID and secret, or download the JSON file.
Download rclone for your client OS and open it in a command line utility following the rclone installation instructions. The example photos in this article use Powershell in Windows OS.
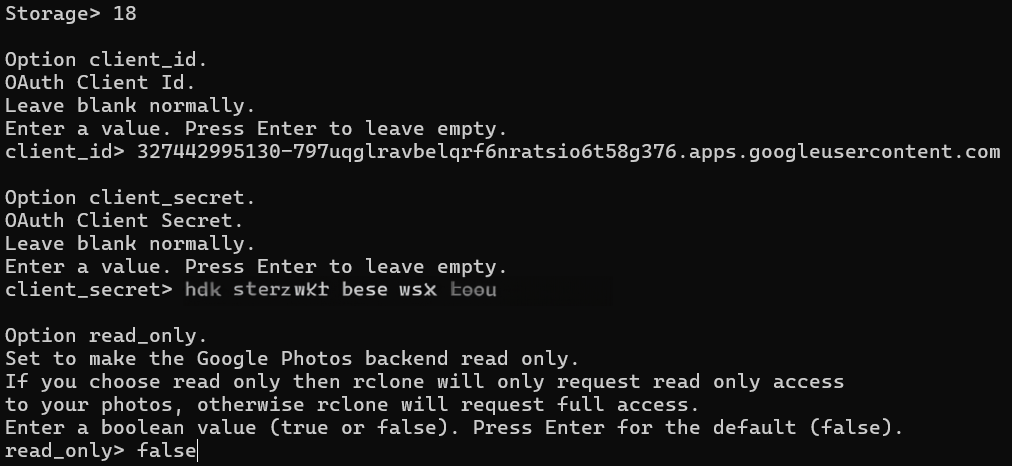
Enter rclone config, then enter n to create a new remote.
Enter a name for the new remote, then enter the number from the list corresponding to Google Photos.
Enter the client id and secret you saved when you created the Google Photos API credentials, then enter false or press Enter to allow the Google Photos backend to request full access.
Note: After March 31, 2025, full-library access is no longer possible under the Google Photos API. Even if rclone requests full access, it only sees albums created by the TrueNAS cloud sync client.
Do not edit the advanced config.
Enter y to authenticate rclone using the web browser.
A browser window opens to authorize rclone access.
Click Allow.
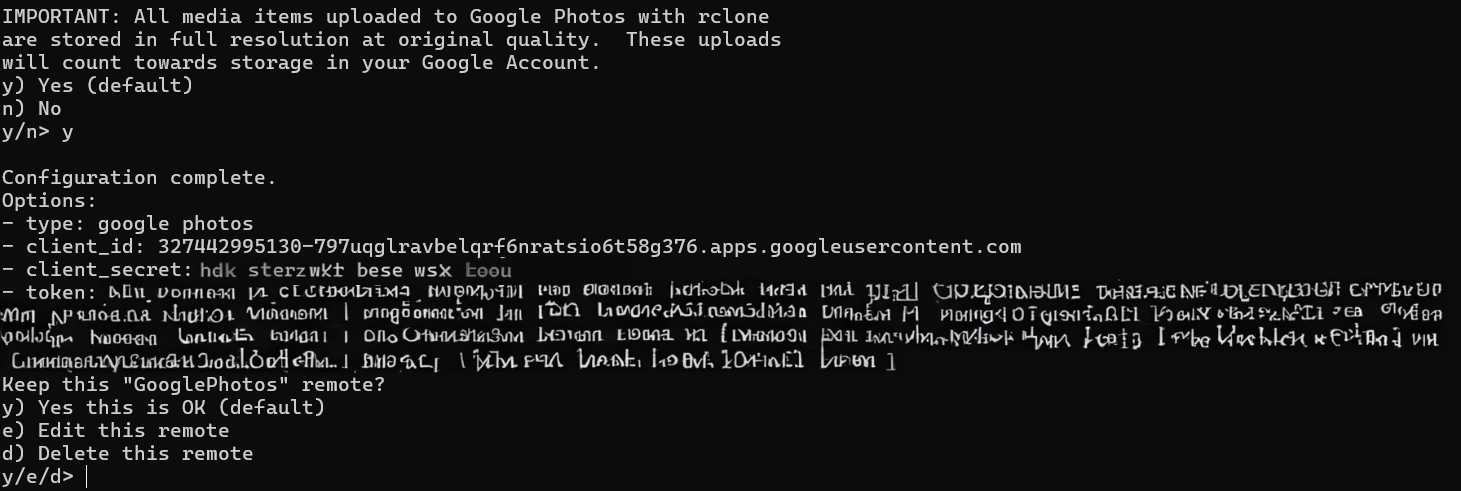
In the command line, enter y to confirm rclone uploads media items with full resolution and complete the configuration.
Only albums created by the TrueNAS cloud sync client are accessible.
Copy and save the type, client_id, client_secret, and token, then enter y to save the new remote.
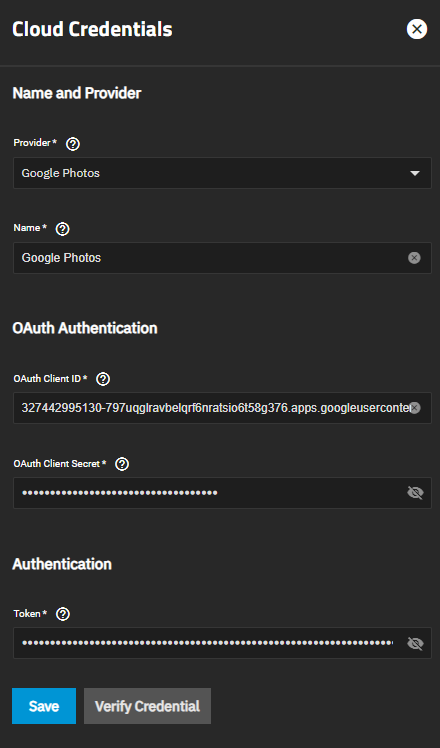
In the TrueNAS Web UI, go to Credentials > Backup Credentials and click Add in the Cloud Credentials widget.
Select Google Photos as the Provider and enter a name.
Paste the Google Photos API client ID and client secret in the OAuth Client ID and OAuth Client Secret fields.
Paste your rclone token into the Token field.
Note: Due to API restrictions, these credentials only provide access to albums created by the TrueNAS cloud sync client Full-library or shared-album access is not possible.
Click Verify Credential to ensure the credentials are valid, then click Save.
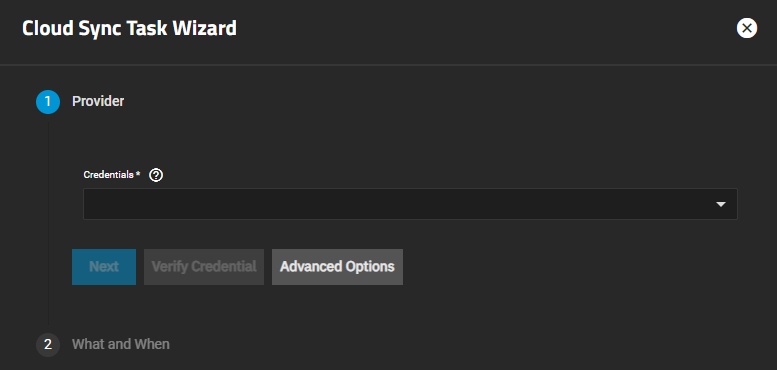
Go to Data Protection > Cloud Sync Tasks and click Add. The Cloud Sync Task Wizard opens.
Select the Google Photos backup credentials from the Credentials dropdown list.
Click Verify Credential to ensure the credentials are valid then click Next.
Select the Direction as PUSH or PULL and select the Transfer Mode as SYNC, COPY, or MOVE. Select the Google Photos location to back up data to or from in Folder. Browse to and select the album folder or enter /album.
Note: Pull tasks only access albums created by the TrueNAS cloud sync client. Full-library pulls or shared albums are not accessible.
Select the local dataset in Directory/Files. This is the dataset sent to Google Photos for push tasks or the write destination for pull tasks.
Push tasks containing media files saved to the local dataset root level fail with the error: Failed to sync: can’t upload files here.
Save files to child directories, not to the root level of the TrueNAS dataset. Directories under the local dataset correspond to albums created by the TrueNAS cloud sync client in Google Photos.
Enter a Description for the cloud sync task.
Select the time to run the task from the Schedule options.
Click Save to add the task.
TrueNAS adds the task to the Cloud Sync Task widget with the status Pending, until the task runs on schedule.
Click Dry Run to test the task by connecting to Google Photos and simulating transferring a file. During a dry run, TrueNAS sends or receives no data. A dry run can report successful even for a task that fails to transfer data due to misconfiguration
Click the vertical ellipses on the task and select Run Job to start the cloud sync task immediately.
If a Google Photos cloud sync task fails, go to Data Protection and click the FAILED status in State on the Cloud Sync Tasks widget. Review the logged error messages. Common error messages for failed Google Photos tasks include:
If a pull task runs but some or all files never appear in the local dataset, those files are not in albums created by the TrueNAS cloud sync client and the API does not expose them to the sync client. To get originals from Google Photos you can:
- Export your account via Google Takeout (download the archive and import the files into TrueNAS).
- Download desired photos directly from Google Photos and copy them into your TrueNAS dataset.
If you want the sync client to manage media going forward, create and sync albums via TrueNAS. Those albums then remain accessible to the TrueNAS cloud sync client.


