Configuring FreeIPA
3 minute read.
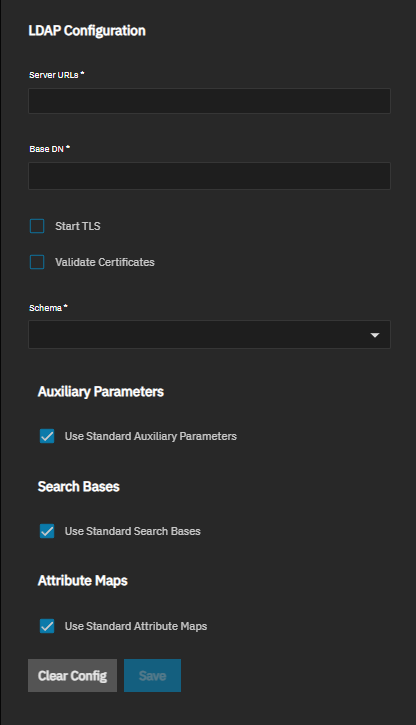
TrueNAS provides the option to configure a FreeIPA directory service client using the LDAP configuration screen under Credentials > Directory Services.
You can have either Active Directory or LDAP configured on TrueNAS, but not both.
You must do the following things listed in this section. See the procedure below for detailed steps.
Your IPA server must have DNS properly configured and have access through the firewall. Having functional DNS for the IPA domain is an absolute requirement. If improperly configured, the IPA server cannot resolve Kerberos SRV records and the configuration in TrueNAS fails with network errors. Running the IPA server as the LDAP client automatically joins the realm with the ldap creds.
Change the global network settings default Hostname setting from truenas to any other name. Leaving it set to the default breaks the configuration.
Change Nameserver 1 to the IP address for the IPA server and remove any other IP addresses configured as Nameserver 2 and Nameserver 3. Having extra non-IPA DNS nameserver addresses configured in TrueNAS breaks DNS.
You must set the LDAP screen Hostname to the Fully Qualified Domain Name (FQDN) for for the IPA server. Setting it to the IPA server IP address breaks the configuration.
Check the LDAP screen Base DN setting for extraneous spaces between dn records and remove them.
The LDAP service goes into a degraded state for systems with misconfigured FreeIPA.
To use Kerberos for NFS/SMB authentication, do not point a random windows client at the server or SMB does not work.
To configure TrueNAS for a FreeIPA server:
Go to Network and click Configure on the Global Network Settings widget to open the network settings screen.
a. Change the Hostname to something other than the default truenas value. This can be any name of your choosing.
b. Change the IP address in Nameserver 1 to the IP address assigned to the IPA server.
c. Delete any other IP addresses in both Nameserver 2 and Nameserver 3.
d. Click Save
Go to Credentials > Directory Services and click Configure LDAP.
a. Enter the FQDN for the IPA server in the Hostname field. Do not enter the IP address for the IPA server!
b. Enter the base DN for the IPA server. For example, if the FQDN name is myIPAserver.mydept.mycompany.net, enter dc=mycompany,dc=mydept,dc=net if this represents the top of the top level of the LDAP directory tree to use when searching for resources. Make sure there are no spaces between entries, and separate each dn entry with a comma.
c. Enter the bind DN. Include the uid=admin,cn=users,cn=accounts,dc=mydept,dc=mycompany,dc=net in the entry.
d. Enter the bind password, which is the password for the administrator account.
Select Enable to activate the server.
Click Save.
TrueNAS creates the Kerberos key and realm, and populates these fields on the LDAP Advanced Options screen. See the LDAP UI Reference article for details about advanced settings.
To disable IPA server but not remove the configuration, clear the Enable checkbox. The main Directory Services screen returns to the default view showing the options to configure Active Directory or LDAP. To enable again, click Configure LDAP to open the LDAP screen with your saved configuration. Select Enable again to reactivate your IPA directory server configuration.
To remove the LDAP configuration, click Settings to open the LDAP screen. Clear all settings and click Save.


