TrueNAS SCALE Nightly Development Documentation
This content follows experimental early release software. Use the Product and Version selectors above to view content specific to a stable software release.
Installing MinIO Enterprise MNMD
10 minute read.
Last Modified 2024-06-28 15:06 EDTTrueNAS Enterprise
The instructions in this article apply to the TrueNAS MinIO Enterprise application installed in a Multi-Node Multi-Disk (MNMD) multi-mode configuration.
For more information on MinIO multi-mode configurations see MinIO Single-Node Multi-Drive (SNMD) or Multi-Node Multi-Drive (MNMD). MinIO recommends using MNMD (distributed) for enterprise-grade performance and scalability.
Community members can add and use the MinIO Enterprise app or the default community version.
To add the Enterprise MinIO application to the list of available applications, go to Apps and click on Discover Apps.
Click on Manage Catalogs at the top of the Discover screen to open the Catalog screen.
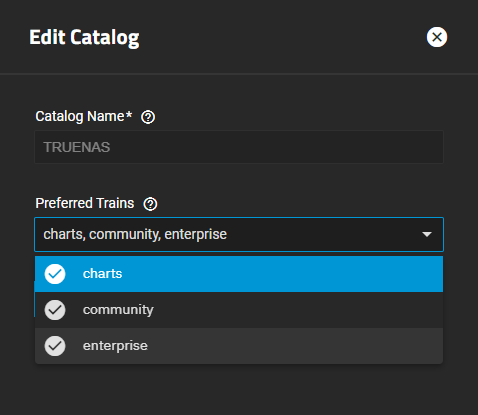
Click on the TRUENAS catalog to expand it, then click Edit to open the Edit Catalog screen.
Click in the Preferred Trains field, click on enterprise to add it to the list of trains, and then click Save.
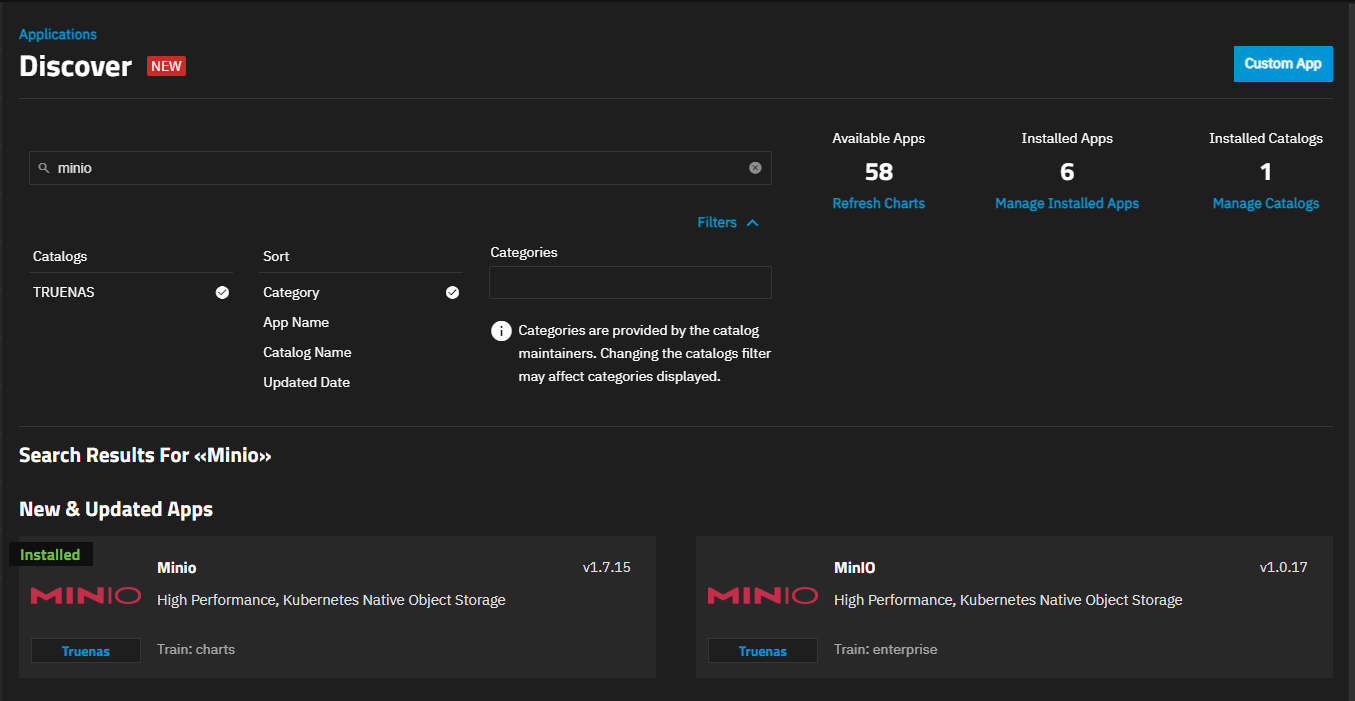
Both the charts and enterprise train versions of the MinIO app widget display on the Discover application screen.
Complete these steps for every system (node) in the cluster.
Assign four sequential IP addresses or host names such as minio1.mycompany.com through minio4.mycompany.com to the TrueNAS SCALE system. If you assign IP address numbers such as *#.#.#.*100 - 103 or *#.#.#.134 - .137, you can use these in the command string in the Multi Mode field. If not using sequential IP addresses, use sequentially numbered host names. Add network settings using either the Network screen. Enter host names on the Global Configuration screen.
When creating the certificate, enter the system IP addresses for each system in Subject Alternate Names. If configuring MinIO in an MNMD cluster, enter the system IP addresses for each system in the cluster.
If the system has active sharing configurations (SMB, NFS, iSCSI), disable these sharing services in System Settings > Services before adding and configuring the MinIO application. Start any sharing services after MinIO completes the install and starts.
Multi mode configurations require a self-signed certificate. If creating a cluster each system requires a self-signed certificate.
Add a self-signed certificate for the MinIO application to use.Create four datasets named, data1, data2, data3, and data4. Do not nest these datasets under each other. Select the parent dataset, for example apps, before you click Create Dataset. Set the Share Type to apps for each dataset. MinIO assigns the correct properties during the installation process so you do not need to configure the ACL or permissions.
This procedure covers the required Enterprise MinIO App settings.
Repeat this procedure for every system (node) in the MNND cluster.
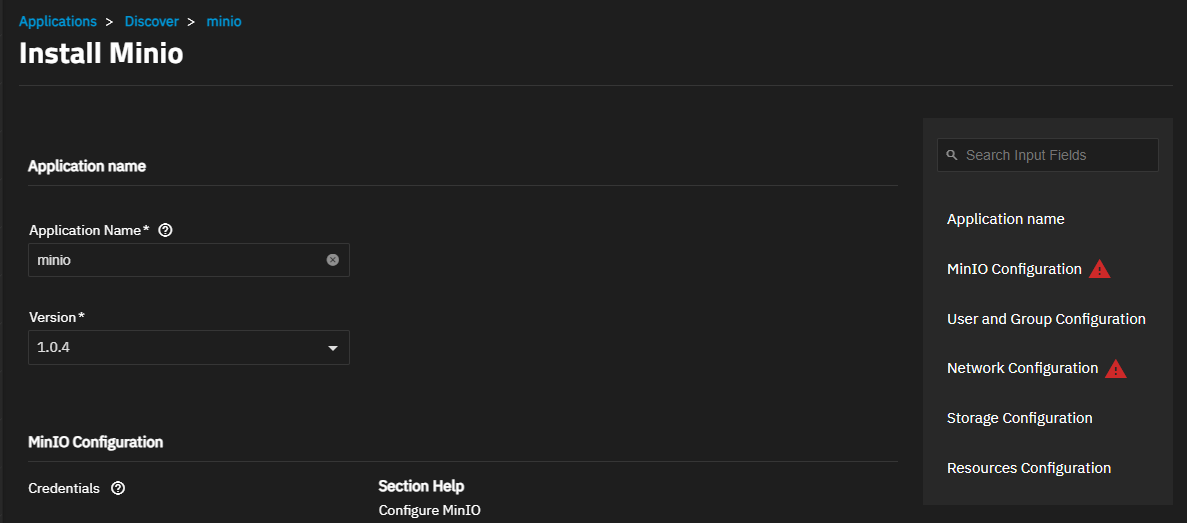
To install the Minio Enterprise app, go to Apps, click on Discover Apps, then scroll down to locate the enterprise version of the Minio widget.
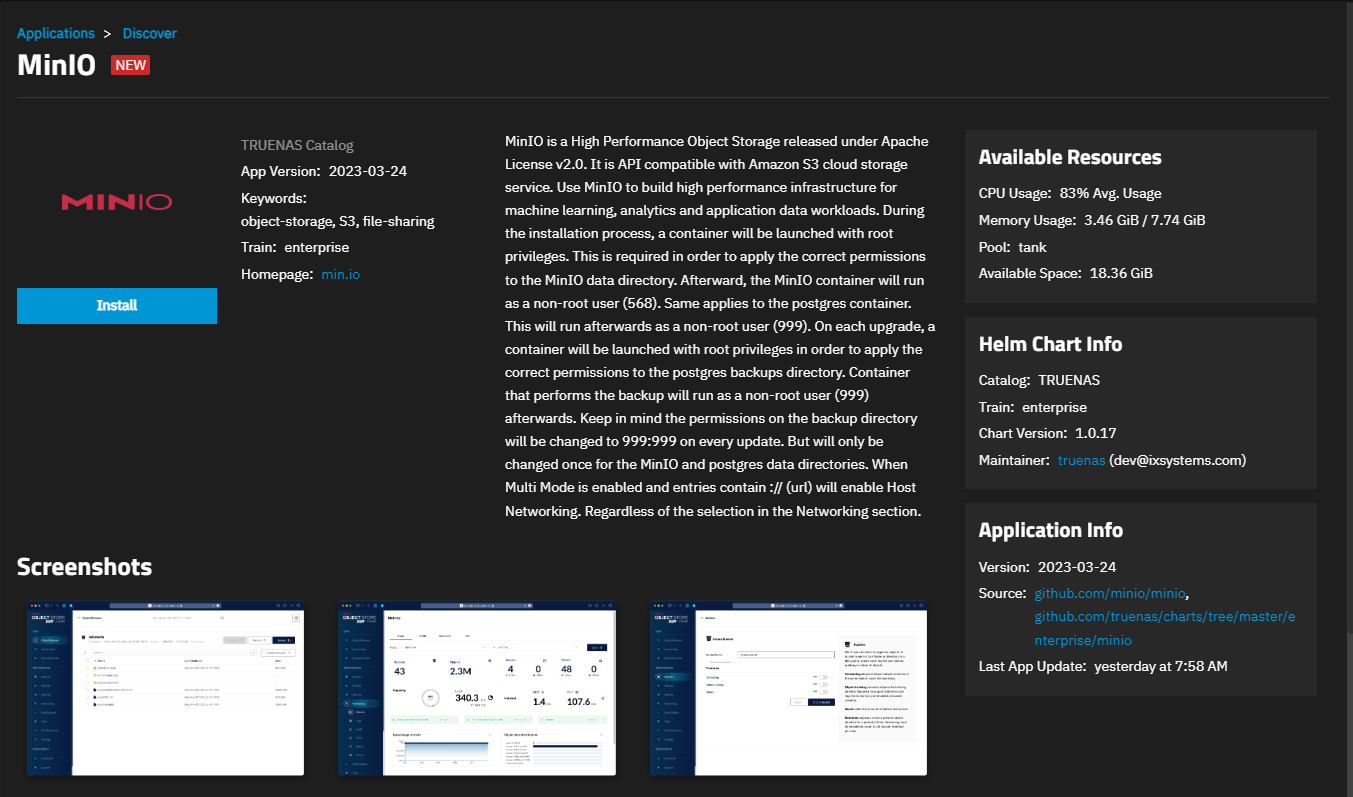
Click on the MinIO Official Enterprise widget to open the MinIO information screen.
Click Install to open the Install MinIO configuration screen.
Accept the defaults in Application Name or enter a name for your MinIO application deployment.
Accept the default in Version, which populates with the current MinIO version. SCALE displays update information on the Installed application screen when an update becomes available.
Enter credentials to use as the MinIO administration user. If you have existing MinIO credentials, enter these or create new login credentials for the first time you log into MinIO. The Root User is the equivalent of the MinIO access key. The Root Password is the login password for that user or the MinIO secret key.
Accept the User and Group Configuration settings default values for MinIO Enterprise. If you configured SCALE with a new administration user for MinIO, enter the UID and GID.
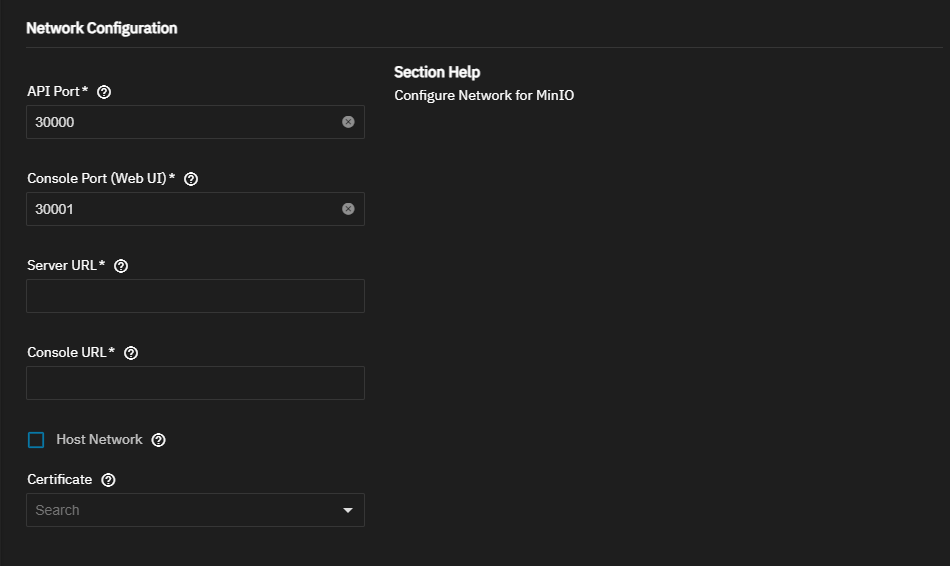
Scroll down to or click Network Configuration on the list of sections at the right of the screen.
Do not select Host Network.
Select the certificate you created for MinIO from the Certificates dropdown list.
Enter the TrueNAS server IP address and the API port number 30000 as a URL in MinIO Server URL (API). For example, https://ipaddress:30000. Enter the TrueNAS server IP address and the web UI browser redirect port number 30001 as a URL in MinIO Browser Redirect URL. For example, https://ipaddress:30001.
MNMD MinIO installations require HTTPS for both MinIO Server URL and MinIO Browser Redirect URL to verify the integrity of each node. Standard or SNMD MinIO installations do not require HTTPS.
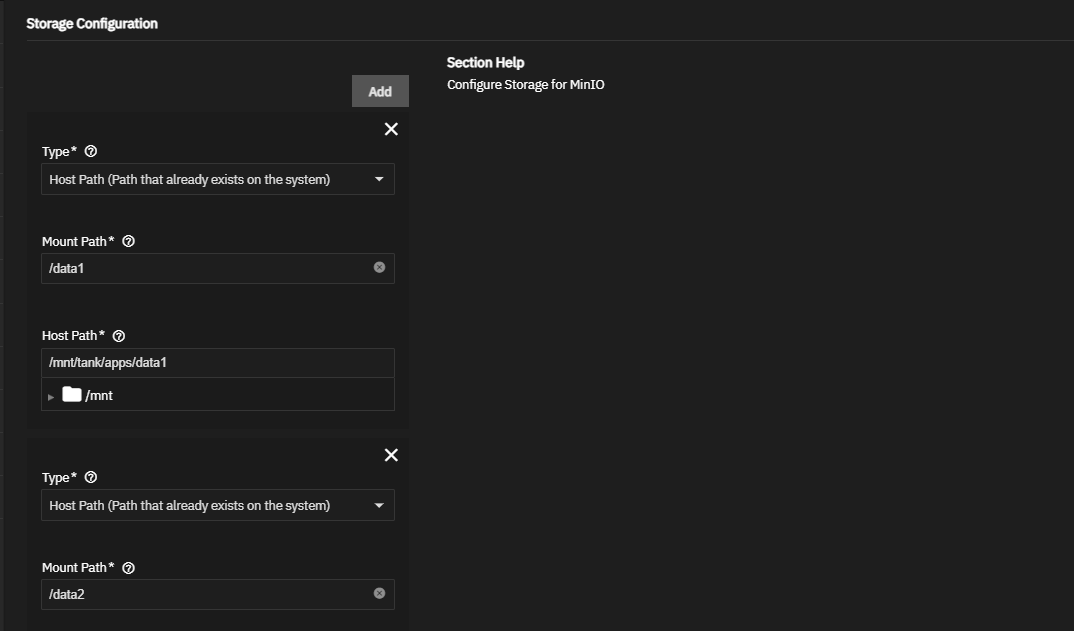
Scroll down to or click on Storage Configuration on the list of sections at the right of the screen. Click Add three times in the Storage Configuration section to add three more sets of storage volume settings. In the first set of storage volume settings, select Host Path (Path that already exists on the system) and accept the default /data1 in Mount Path. Enter or browse to the data1 dataset to populate Host Path with the mount path. For example, /mnt/tank/apps/data1.
Scroll down to the next set of storage volume settings and select Host Path (Path that already exists on the system). Change the Mount Path to /data2, and enter or browse to the location of the data2 dataset to populate the Host Path.
Scroll down to the next set of storage volume settings and select Host Path (Path that already exists on the system). Change the Mount Path to /data3, and enter or browse to the location of the data3 dataset to populate the Host Path.
Scroll down to the last set of storage volume settings and select Host Path (Path that already exists on the system). Change the Mount Path to /data4, and enter or browse to the location of the data4 dataset to populate the Host Path.
Select Enable Multi Mode (SNMD or MNMD), then click Add. If the systems in the cluster have sequentially assigned IP addresses, use the IP addresses in the command string you enter in the Multi Mode (SNMD or MNMD) field. For example, https://10.123.12.10{0…3}:30000/data{1…4} where the last number in the last octet of the IP address number is the first number in the {0…3} string. Separate the numbers in the curly brackets with three dots. If your sequential IP addresses are not using 100 - 103, for example 10.123.12.125 through 128, then enter them as https://10.123.12.12{5…8}:30000/data{1…4}. Enter the same string in the Multi Mode (SNMD or MNMD) field in all four systems in the cluster.
If you do not have sequentially numbered IP addresses assigned to the four systems, assign sequentially numbered host names. For example, minio1.mycompany.com through minio4.mycompany.com. Enter https://minio{1…4}.mycompany.com:30000/data{1…4} in the Multi Mode (SNMD or MNMD) field.
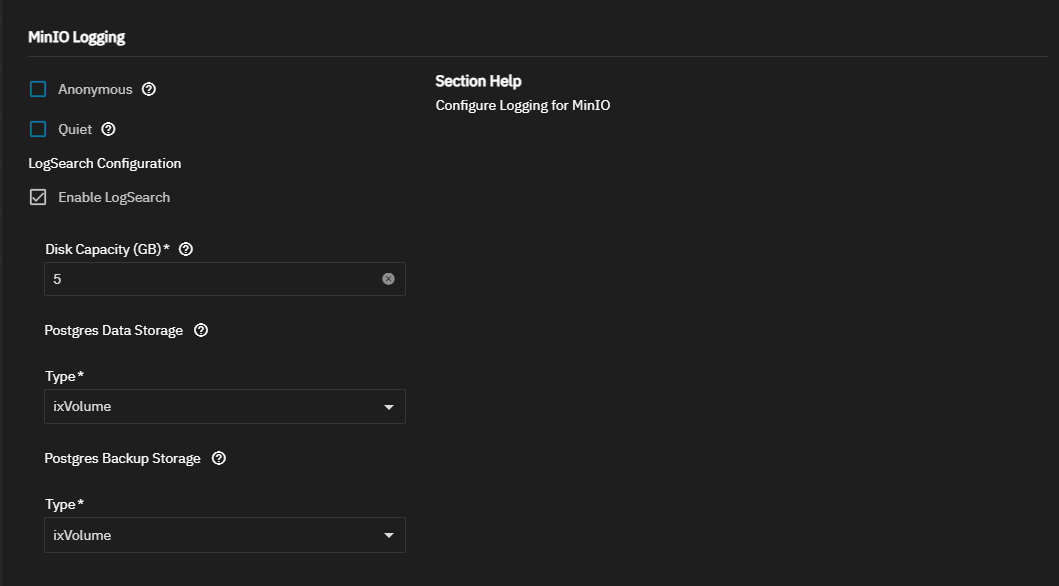
If you want to set up logging, select Anonymous to hide sensitive information from logging, or Quiet to disable startup information.
Select the optional Enable Log Search API to enable LogSearch API and configure MinIO to use this function and deploy a postgres database to store the logs.
Specify the storage in gigabytes that the logs are allowed to occupy in Disk Capacity in GB. Accept the default ixVolume in Postgres Data Storage and Postgres Backup Storage to let the system create the datasets, or select Host Path to select an existing dataset on the system to use for these storage volumes.
Accept the default values in Resources Configuration or to customize the CPU and memory allocated to the container (pod) the Minio app uses, enter new values in the CPU Resource Limit and Memory Limit fields. Tune these limits as needed to prevent the application from overconsuming system resources and introducing performance issues.
By default, this application is limited to use no more than 4 CPU cores and 8 Gigabytes available memory. The application might use considerably less system resources.
Click Install to complete the installation.
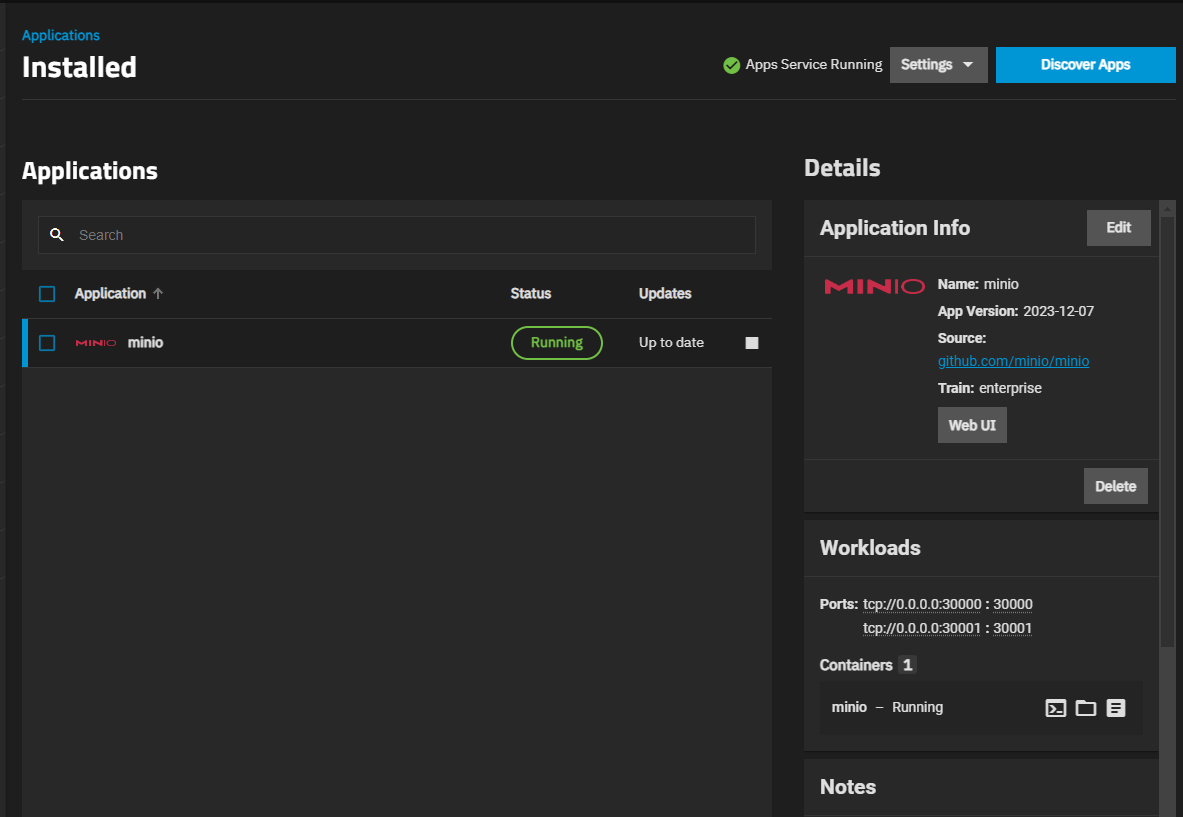
The Installed applications screen opens showing the MinIO application in the Deploying state. It changes to Running when the application is ready to use.
Click Web Portal to open the MinIO sign-in screen.
After installing and getting the MinIO Enterprise application running in SCALE, log into the MinIO web portal and complete the MinIO setup.
Go to Monitoring > Metrics to verify the servers match the total number of systems (nodes) you configured. Verify the number of drives matches the number you configured on each system, four systems each with four drives (4 systems x 4 drives each = 16 drives).
Refer to MinIO documentation for more information.


