TrueNAS SCALE Nightly Development Documentation
This content follows experimental early release software. Use the Product and Version selectors above to view content specific to a stable software release.
Apps
12 minute read.
Last Modified 2024-07-12 10:10 EDTTrueNAS applications allow for quick and easy integration of third-party software and TrueNAS SCALE. Applications are available from official, Enterprise, and community maintained trains.
Application maintenance is independent from TrueNAS SCALE version release cycles. App versions, features, fields, and install behavior at the time of access might vary from those in documented tutorials, especially for legacy version documentation that no longer receives active updates.
We welcome community contributions to keep this documentation current! Click Edit Page in the top right corner to propose changes to this article. See Updating Content for more information.
The first time you go to Apps, the Installed applications screen displays an Apps Service Not Configured status on the screen header.
After setting the pool apps uses, this changes to Apps Service Running.
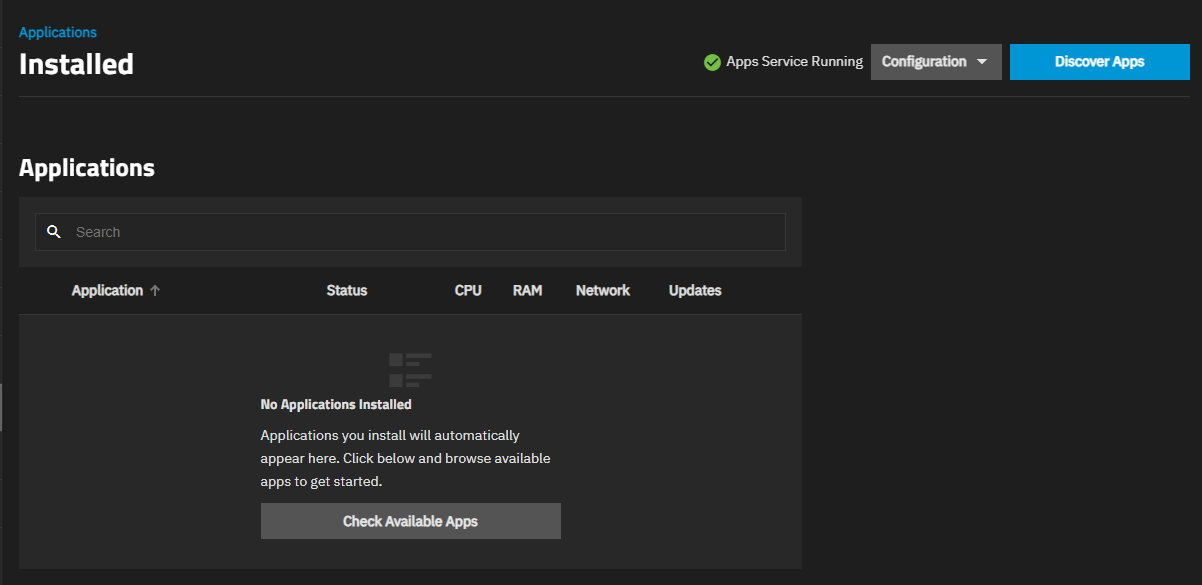
The Installed applications screen displays Check Available Apps before you install the first application.
Click Check Available Apps or Discover Apps to open the Discover screen to see application widgets available in the TRUENAS catalog.
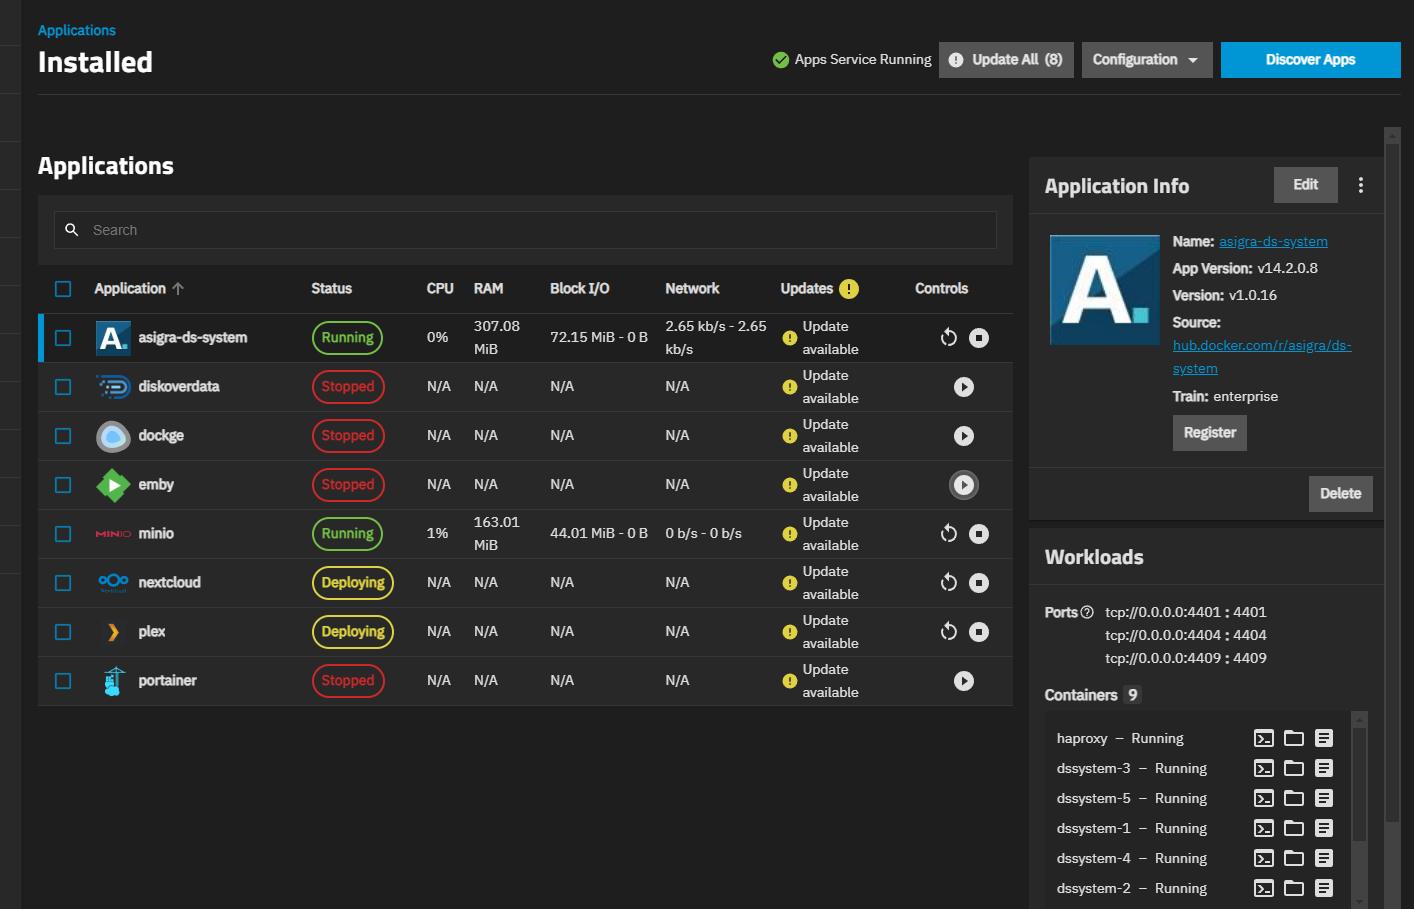
After installing an application, the Installed screen populates the Applications area with a table listing installed applications. Select an application to view the information widgets for applications, with options to edit the application settings, open container pod shell or logs, and access the Web Portal for the application, if applicable.
Application widgets vary by app, but all include the Application Info and Workloads widgets. Some include the History and Notes widgets.
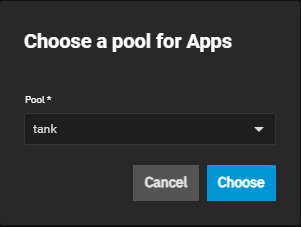
You must choose the pool apps use before you can add applications. The first time you go to the Applications screen, click Settings > Choose Pool to choose a storage pool for Apps.
We recommend keeping the application use case in mind when choosing a pool. Select a pool with enough space for all the applications you intend to use. For stability, we also recommend using SSD storage for the applications pool.
TrueNAS creates an ix-applications dataset on the chosen pool and uses it to store all container-related data. The dataset is for internal use only. Set up a new dataset before installing your applications if you want to store your application data in a location separate from other storage on your system. For example, create the datasets for the Nextcloud application, and, if installing Plex, create the dataset(s) for Plex data storage needs.
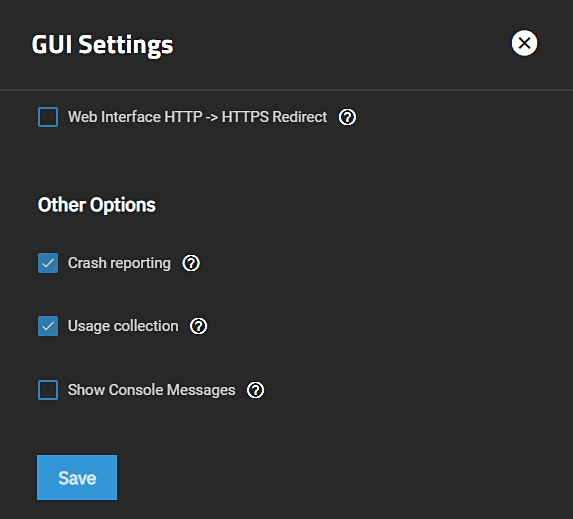
Special consideration should be given when TrueNAS is installed in a VM, as VMs are not configured to use HTTPS. Enabling HTTPS redirect can interfere with the accessibility of some apps. To determine if HTTPS redirect is active, go to System Settings > General > GUI > Settings and locate the Web Interface HTTP -> HTTPS Redirect checkbox. To disable HTTPS redirects, clear this option and click Save, then clear the browser cache before attempting to connect to the app again.
After an apps storage pool is configured, the status changes to Apps Service Running.
To select a different pool for apps to use, click Settings > Unset Pool. This turns off the Apps service until you choose another pool for apps to use.
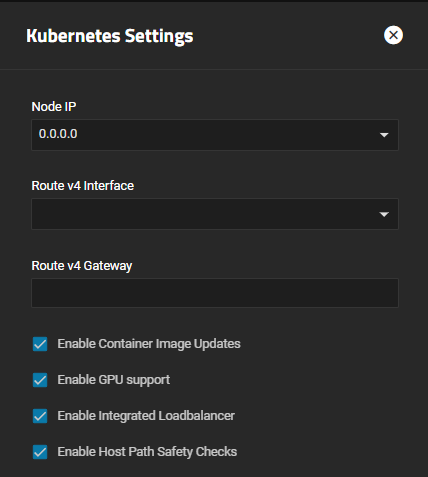
Official applications use the default system-level Kubernetes node IP settings.
You can change the Kubernetes node IP to assign an external interface to your apps, separate from the web UI interface, in Apps > Settings > Advanced Settings.
We recommend using the default Kubernetes node IP (0.0.0.0) to ensure apps function correctly.
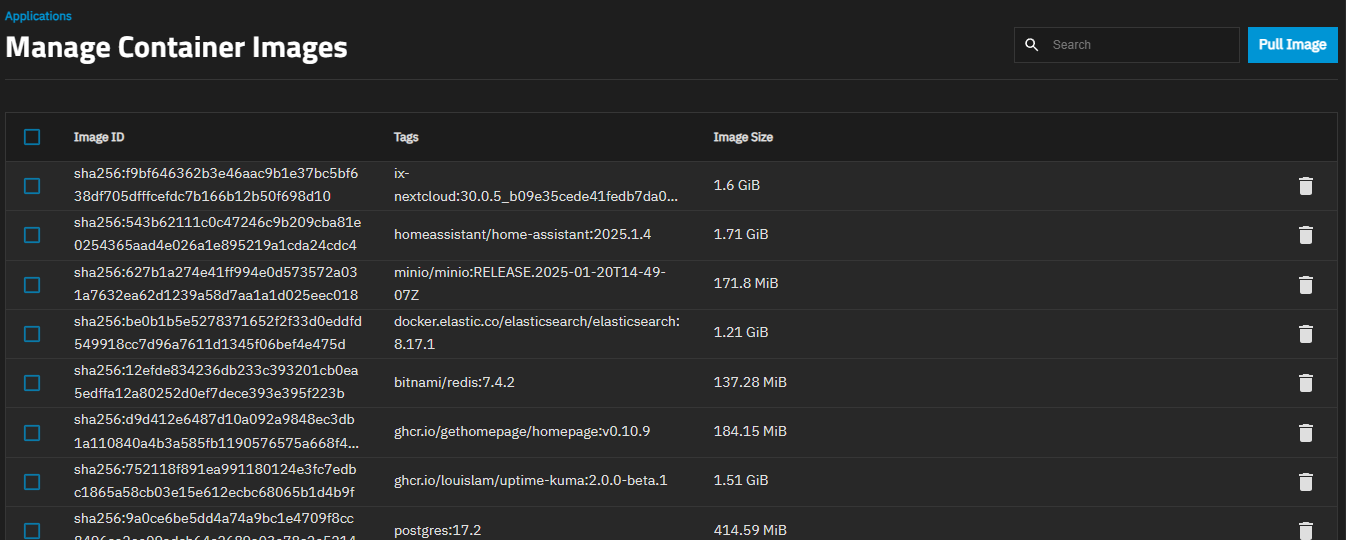
The Settings dropdown includes an option Click Settings > Manage Container Images to open the Manage Container Images screen.
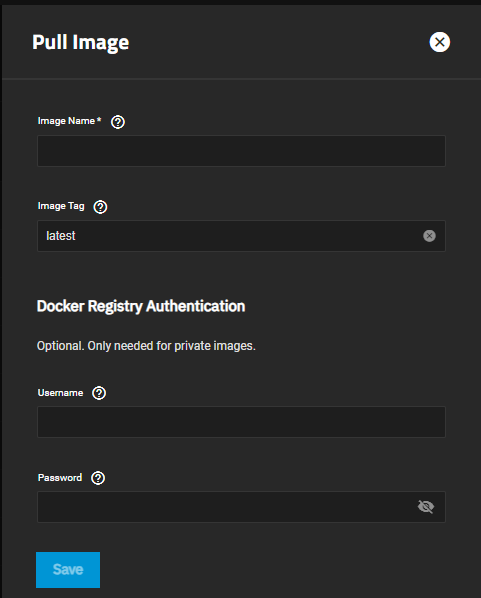
Update or delete images from this screen, or click Pull Image to download a specific custom image to TrueNAS.
To download a specific image, click the button and enter a valid path and tag to the image. Enter the path using the format registry/repository/image to identify the specific image. The default latest tag downloads the most recent image version.
When downloading a private image, enter user account credentials that allow access to the private registry.
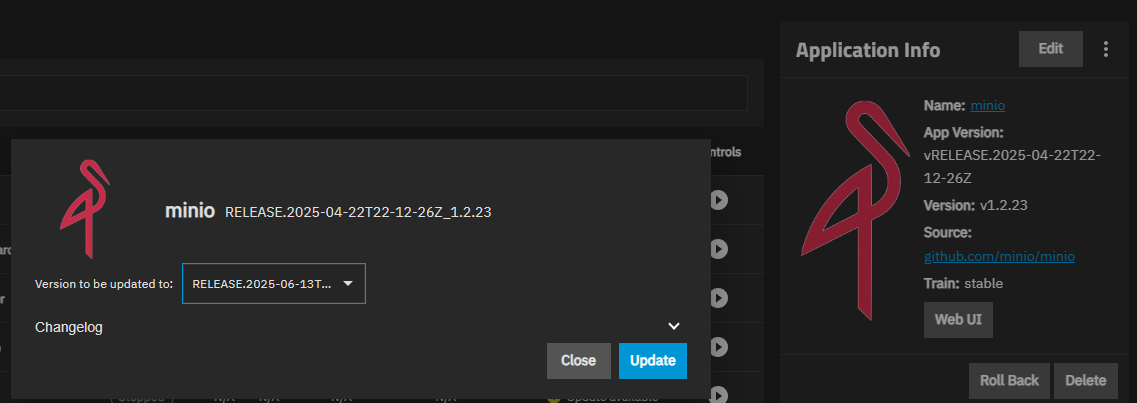
Apps display a yellow circle with an exclamation point that indicates an upgrade is available, and the Installed application screen banner displays an Update or Update All button when upgrades are available. To upgrade an app to the latest version, click Update on the Application Info widget or to upgrade multiple apps, click the Update All button on the Installed applications banner. Both buttons only display if TrueNAS SCALE detects an available update for installed applications.
Update opens an upgrade window that includes two selectable options, Images (to be updated) and Changelog. Click on the down arrow to see the options available for each.
Click Upgrade to begin the process. A counter dialog opens showing the upgrade progress. When complete, the update badge and buttons disappear and the application Update state on the Installed screen changes from Update Available to Up to date.
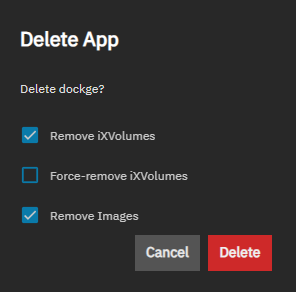
To delete an application, click Stop on the application row. After the app status changes to stopped, click Delete on the Application Info widget for the selected application to open the Delete dialog.
Click Confirm then Continue to delete the application.
The Settings dropdown list at the top of the Installed applications screen provides these options:
- Choose Pool where you set the pool apps uses and create the ix-applications dataset.
- Advanced Setting where you can make changes to the Kubernetes node IP setting.
- Unset Pool where you can unset the apps pool, and if desired, then choose a different pool for apps to use.
- Manage Container Images where you can manage every container image downloaded to TrueNAS.
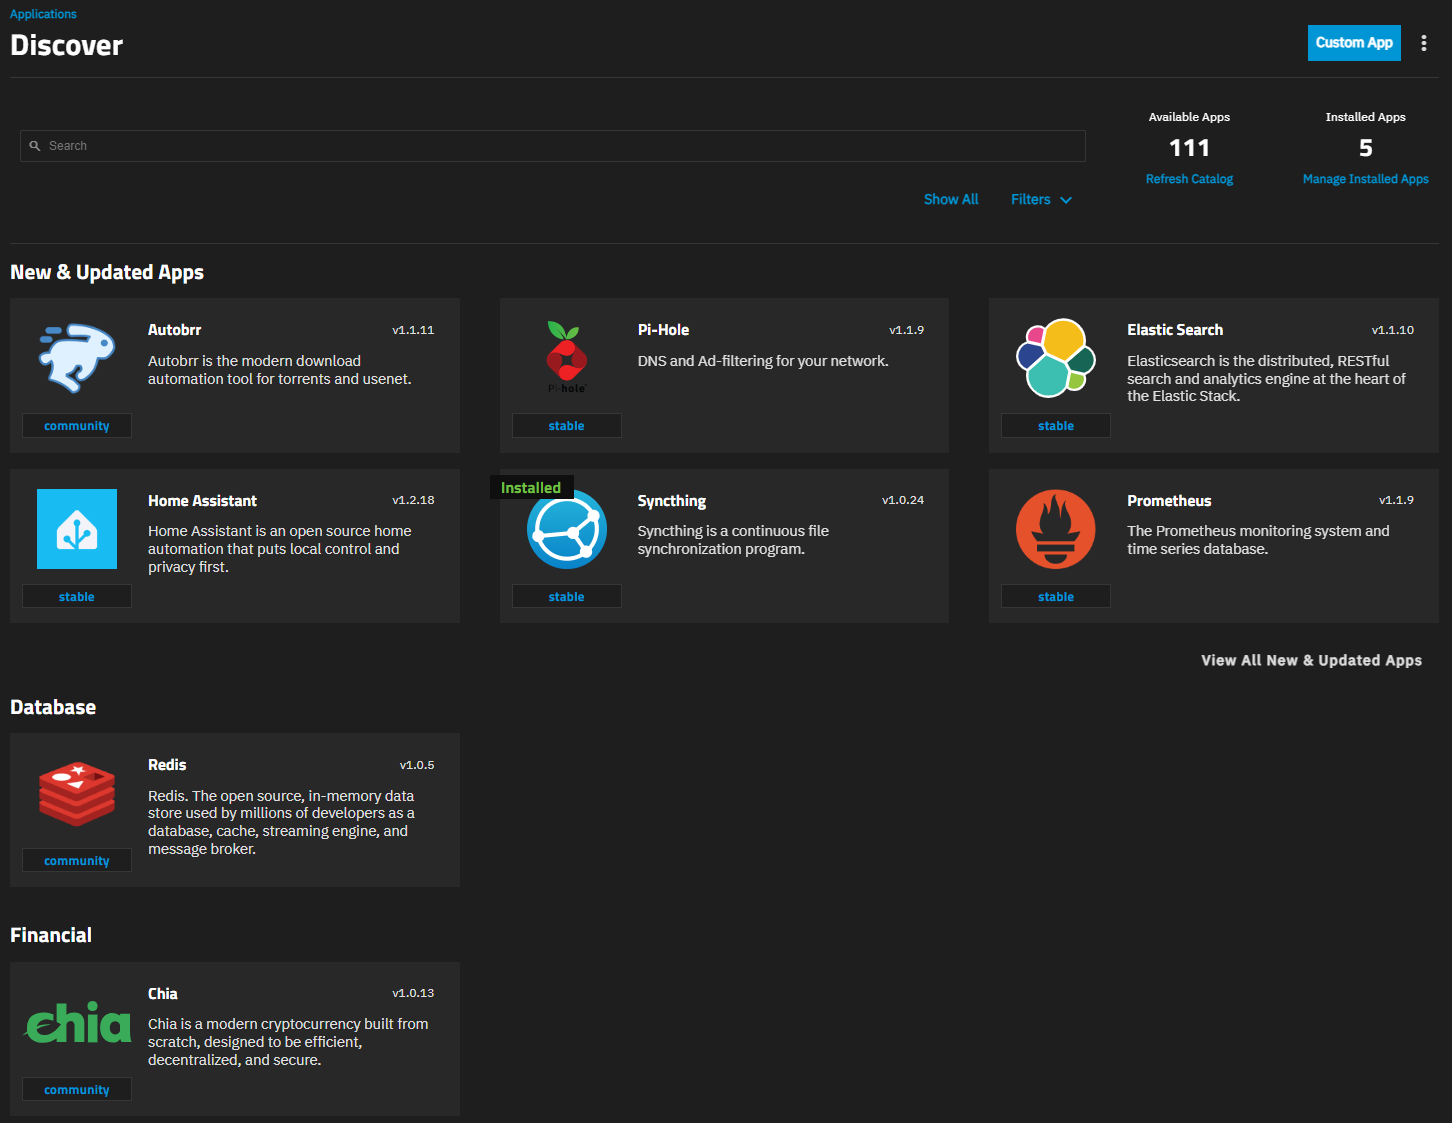
The Discover screen displays New & Updated Apps application widgets for the official TRUENAS catalog Chart, Community, and Enterprise trains. Non-Enterprise systems show the Chart catalog of apps by default. The Chart catalog train has official applications that are pre-configured and only require a name during deployment.
Enterprise applications display automatically for Enterprise=licensed systems, but community users can add these apps using the Manage Catalogs screen. App trains display based on the Trains settings on the Edit Catalog screen.
See Using SCALE Catalogs for more information on managing catalogs.
The Discover screen includes three links:
- Refresh Charts
- Manage Installed Apps opens the Installed application screen.
- Manage Catalogs
The Custom App button opens a wizard where you can install unofficial apps or an app not included in a catalog.
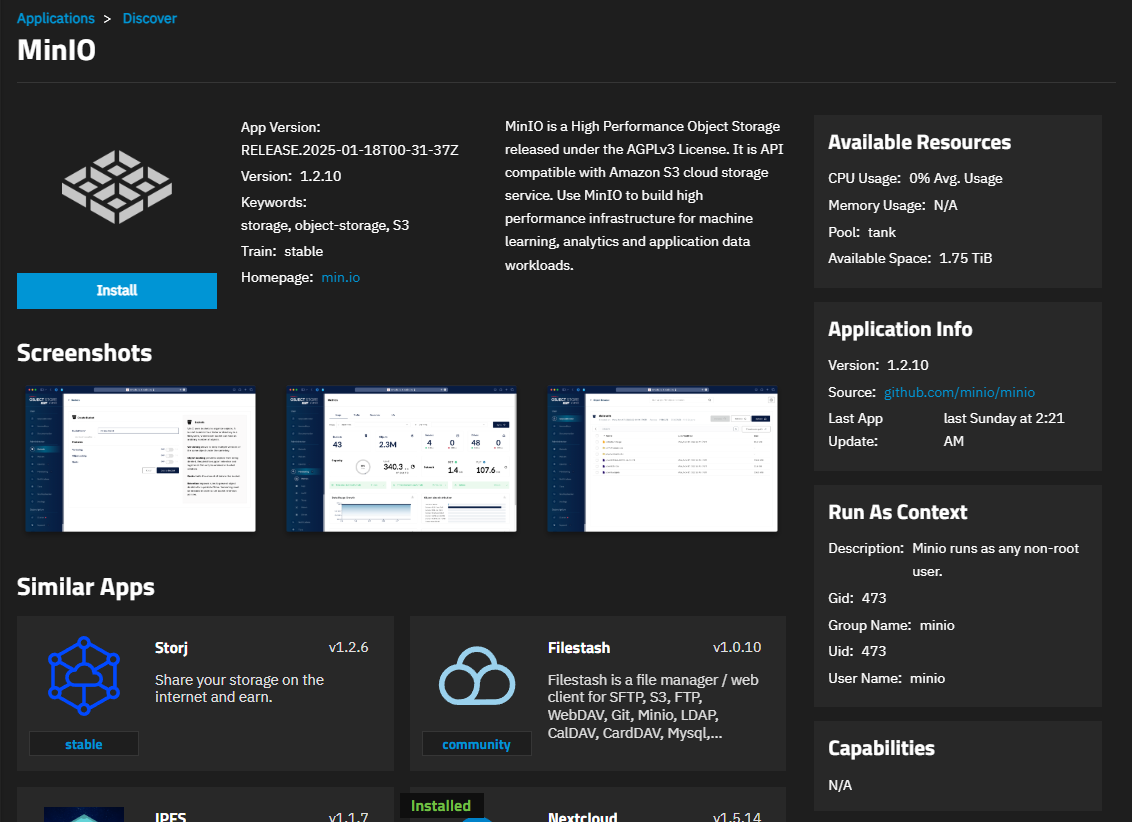
Browse the widgets or use the search field to find an available application. Click on an application widget to go to the application information screen.
You can refresh the charts catalog by clicking Refresh Charts on the Discover screen. You can also refresh all catalogs from the Catalogs screen. Click Manage Catalogs, then click Refresh All. Refresh the catalog after adding or editing the catalogs on your system.
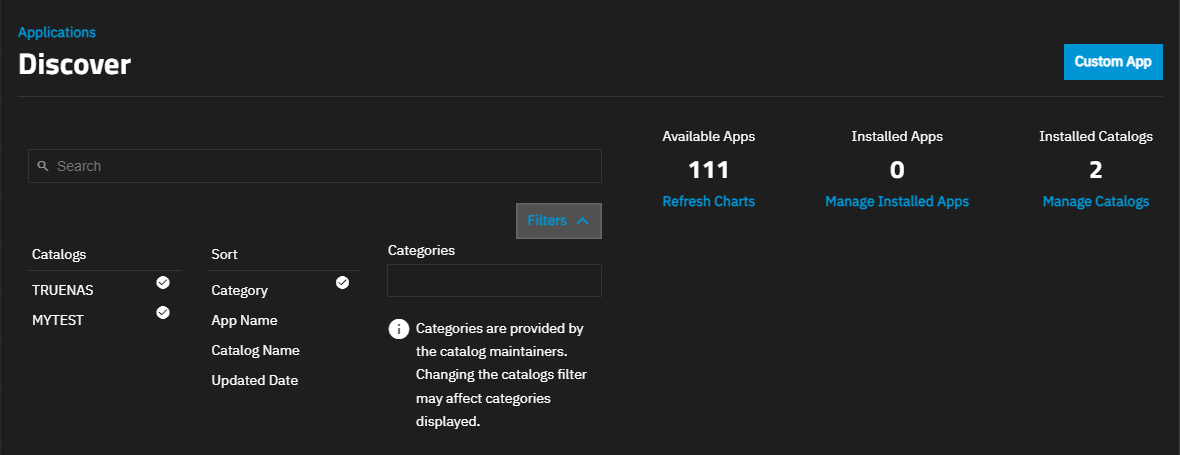
To filter the app widgets shown, click the down arrow to the right of Filters.
You can filter by catalog, app category, name, catalog name, and date last updated. Click on the option then begin typing the name of the app into the search field to narrow the widgets to fit the filter criteria. Click in Categories to select apps based on the selection you make. Click in the field again to add another category from the dropdown list to select multiple categories.
From the application information screen, click Install to open the installation wizard for the application.
After installing an application, the Installed applications screen shows the application in the Deploying state. It changes to Running when the application is ready to use.
The installation wizard configuration sections vary by application, with some including more configuration areas than others. Click Install to review settings ahead of time to check for required settings. Click Discover on the breadcrumb at the top of the installation wizard to exiting the screen without saving and until you are ready return and configure the app settings.
All applications include these basic setting sections:
Application Name shows the default name for the application.
If deploying more than one instance of the application, you must change the default name. Also includes the version number for the application. Do not change the version number for official apps or those included in a SCALE catalog. When a new version becomes available, the Installed application screen banner and application row displays an update alert, and the Application Info widget displays an update button> Updating the app changes the version shown on the edit wizard for the application.
Application Configuration shows settings that app requires to deploy. This section can be named anything. For example, the MinIO app uses MinIO Configuration.
Typical settings include user credentials, environment variables, additional argument settings, name of the node, or even sizing parameters.
If not using the default user and group provided, add the new user (and group) to manage the application before using the installation wizard.
Network Configuration shows network settings the app needs to communicate with SCALE and the Internet. Settings include the default port assignment, host name, IP addresses, and other network settings.
If changing the port number to something other than the default setting, refer to Default Ports for a list of used and available port numbers.
Some network configuration settings include the option to add a certificate. Create the certificate authority and certificate before using the installation wizard if using a certificate is required for the application.
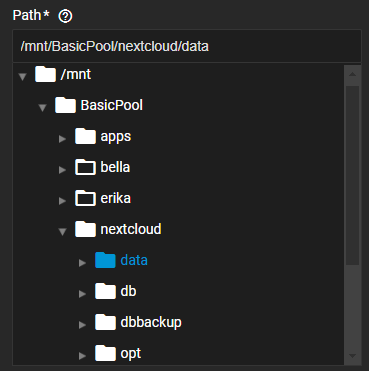
Storage Configuration shows options to configure storage for the application. Storage options include using the default ixVolume setting that adds a storage volume under the ix-applications dataset, host path where you select existing dataset(s) to use, or in some cases the SMB share option where you configure a share for the application to use. The Add button allows you to configure additional storage volumes for the application to use in addition to the main storage volume (dataset).
If the application requires specific datasets, configure these before using the installation wizard.
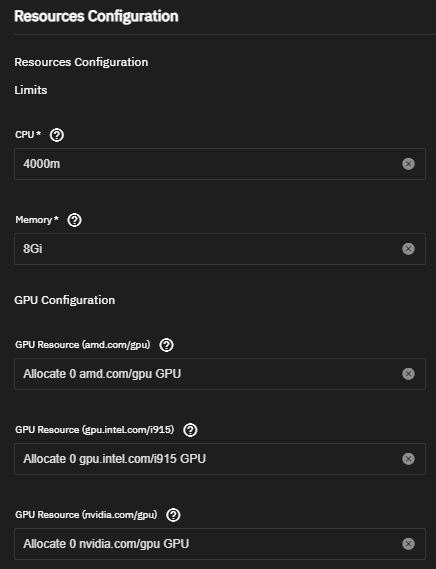
Resources Configuration shows CPU and memory settings for the container pod. This section can also be named Resource Limits. In most cases, you can accept the default settings, or you can change these settings to limit the system resources available to the application.
After installing an app, you can modify most settings by selecting the app on the Installed applications screen and then clicking the Edit button on the Application Info widget for that app.
Refer to individual tutorials in the Community or Enterprise sections of the Documentation Hub for more details on application settings. Installation and editing wizards include tooltips to help users configure application settings.
Users with compatible hardware can allocate one or more GPU devices to an application for use in hardware acceleration. This is an advanced process that could require significant troubleshooting depending on installed GPU device(s) and application-specific criteria.
GPU devices can be available for the host operating system (OS) and applications or can be isolated for use in a Virtual Machine (VM). A single GPU cannot be shared between the OS/applications and a VM.
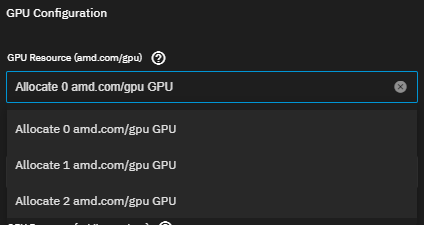
Allocate GPU from the Resources Configuration section of the application installation wizard screen or the Edit screen for a deployed application.
Click the GPU Resource allocation row for the type of GPU (AMD, Intel, or Nvidia) and select the number of GPU devices the application is allowed access to. It is not possible at this time to specify which available GPU device is allocated to the application and assigned devices can change on reboot.
To deploy a custom application, go to Discover and click Custom App to open the Install Custom App screen. See Using Install Custom App for more information.
Custom applications use the system-level Kubernetes Node IP settings by default.
You can assign an external interface to custom apps using one of the Networking section settings found on the Install Custom App screen.
Unless you need to run an application separately from the Web UI, we recommend using the default Kubernetes Node IP (0.0.0.0) to ensure apps function correctly.


