



TrueNAS Development Documentation
This content follows experimental development changes in TrueNAS 28, a future version of TrueNAS.
Use the Product and Version selectors above to view content specific to a stable software release.
Accessing NAS from VMs and Containers
6 minute read.
If you want to access your TrueNAS directories from within a virtual machine or container hosted on the system, you have multiple options:
Allow TrueNAS to create an automatic bridge (default).
Manually create a bridge interface if you have only one physical interface.
Assign a NIC other than the primary one your TrueNAS server uses if you have more than one physical interface. This method makes communication more flexible but does not offer the potential speed benefits of a bridge.
Containers allow you to configure a MACVLAN NIC, which creates a virtual interface based on an existing physical one. The assigned unique MAC address allows the container to appear as a separate device on the network.
A MACVLAN NIC on the same physical interface as the TrueNAS host cannot directly communicate with the host. MACVLAN sends traffic directly to the external network without passing through the host network stack. The host does not recognize MACVLAN packets as local, so any traffic between them must be routed through an external switch, use a separate NIC, or use a network bridge.
If your system only has a single physical interface, and you prefer to manually configure a network bridge, complete these steps.
Before making network interface changes:
- Stop running apps.
- Power off running virtual machines (VMs) and containers.
- Remove active NIC devices for VMs and containers.
Changing IP address(s) assigned to the primary interface can cause issues with access, so it is best to make changes outside normal working hours.
To set up a bridge interface:
Go to Apps and the Containers screens to verify all apps and containers are stopped. If still running, stop all apps and containers listed on the Applications and the Containers screens.
Go to Virtual Machines, expand each VM, and click Power Off to stop each VM. Powering off the VM disconnects any NIC device used by the VM, where stopping the VM might not.
Go to System > Network and take a screenshot showing your Interfaces and the Global Configuration widgets.
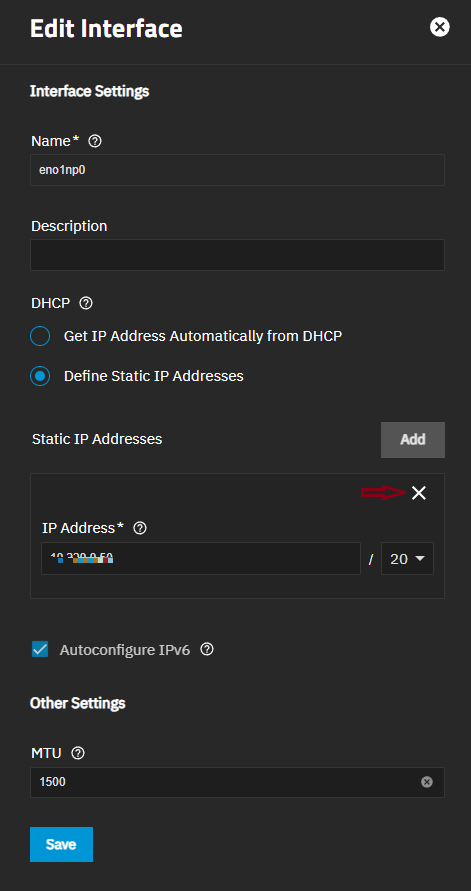
Click the icon for the interface, to open the Edit Interface screen. Click the x to the right of Static IP Addresses to remove the current static IP address assignment, and then click Save.
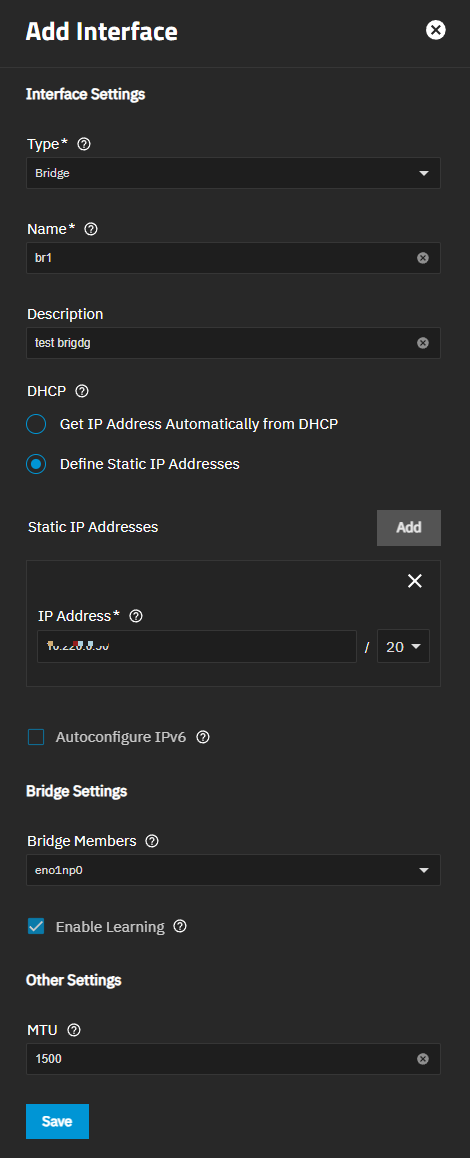
Click Add to open the Add Interface screen. Configure the interface:
a. Set Type to Bridge. Name automatically populates with the correct name. You cannot change the Type field value or the name after clicking Save!
b. (Optional) Enter a short description for the bridge. This is optional but recommended if configuring multiple bridges on your system to help identify their use or location.
c. Select Define Static IP Addresses, then click Add to the right of Static IP Addresses. Enter the IP address and select the netmask for the interface edited in step 4 above. Refer to the screenshot if you do not remember the IP address and netmask.
d. Select the interface name in Bridge Members. You only need to add the interface name edited in step 4 above. Leave Enable Learning selected for normal use. With learning enabled, the bridge learns which MAC addresses are reachable through each member and sends traffic only to the relevant member. Without learning, the bridge floods all traffic to every member instead. Disable this option only when a bridge member might not be available at startup, to prevent the bridge from learning incorrect addresses before all members are up. See Bridge Settings for details on both settings.
e. Click Save.
TrueNAS shows the bridge on the Interfaces widget.
Click Test Changes. See Testing Network Changes above for details on testing and saving network changes.
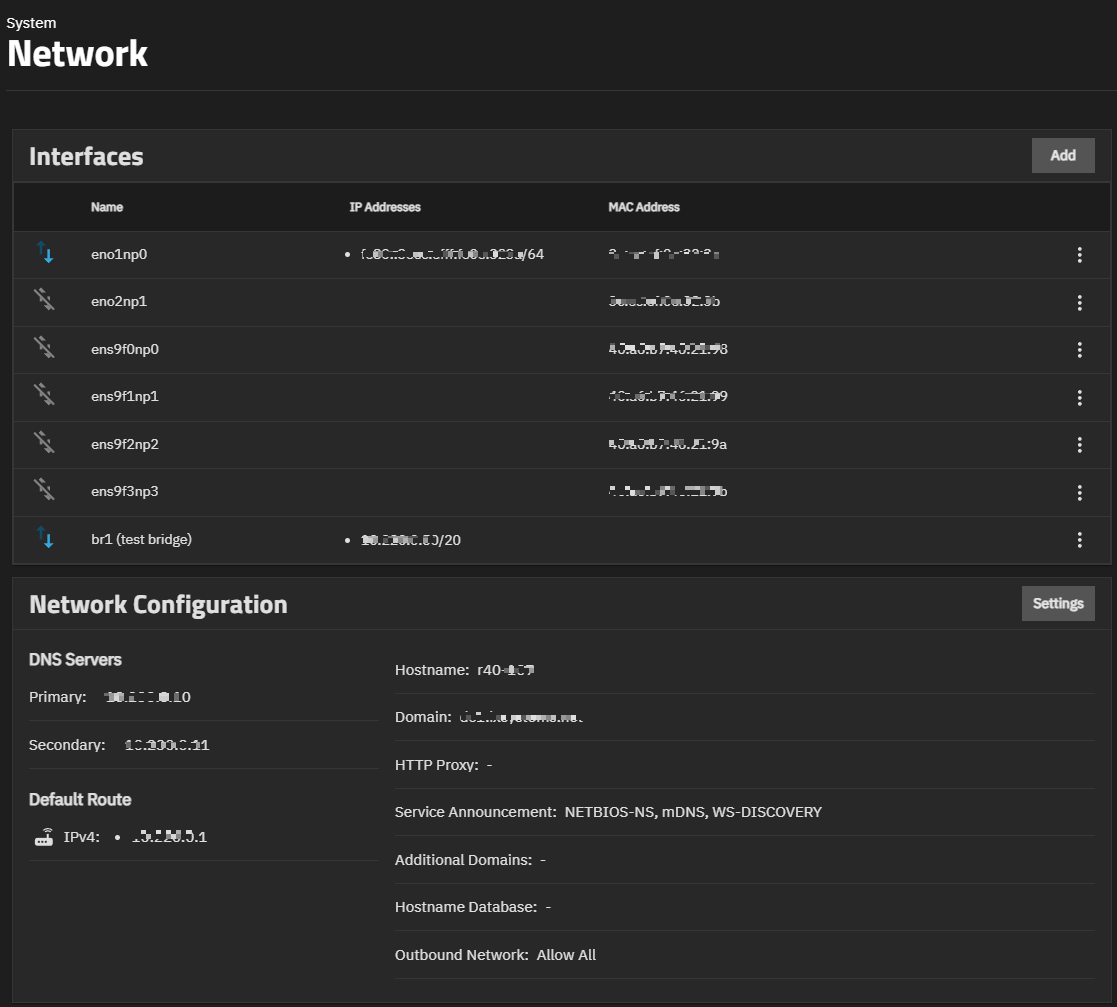
TrueNAS shows the bridge as working.
After adding the bridge, attach it to a VM or container using the steps in Attaching a Bridge or Secondary NIC below.
The steps to attach a bridge or a secondary physical NIC differ depending on whether you want to use it for a virtual machine or a container.
To attach a bridge or a physical NIC to a VM:
- Go to Virtual Machines, click on the VM to expand it, then click device_hub Devices to open the Devices screen for that VM.
- Click Add, select NIC from the Device Type dropdown list, then select the bridge or physical interface from the NIC To Attach dropdown list.
- Click Save.
See Adding a NIC Device Type for the full procedure, including MAC address and Trust Guest Filters options.
Containers can use a bridge or secondary NIC in two ways: as the default network for all new containers, or as a NIC attached to one specific container.
To set a bridge as the default network for all new containers, configure it in Default Network settings. See Configuring the Default Network for the full procedure.
To attach a bridge or secondary NIC to one existing container:
- Go to Containers, select the container, then locate the NIC Devices card.
- Click Add, select the bridge or physical interface from the list, then set NIC Type to match your network setup, such as macvlan for a secondary physical interface.
- Click Add to attach the NIC to the container.
See Managing NICs for the full procedure, including MAC address options.
You can now access your TrueNAS storage from the VM or container. You might have to set up shares or users with home directories to access certain files.
Linux Example
Linux VMs and containers can access TrueNAS storage using FTP, SMB, and NFS.
In the example below, the Linux VM uses FTP to access a home directory for a user on TrueNAS.