Setting Up Storage
12 minute read.
Now that you are logged in to the web interface, it is time to set up TrueNAS storage. These instructions describe a simple mirrored pool setup, where half the selected disks are used for storage and the other half for data protection. However, there are many configuration possibilities for your storage environment!
You can read more about these options in Creating Storage Pools. You can also use the ZFS Capacity Calculator and ZFS Capacity Graph to compare configuration options.
At minimum, the system needs at least two disks of identical size to create a mirrored storage pool. While a single-disk pool is technically allowed, it is not recommended. The disk used for the TrueNAS installation does not count toward this minimum.
You can configure data backups in several ways and have different requirements. Backing data up in the cloud requires a 3rd party cloud storage provider account. Backing up with replication requires you to have additional storage on the TrueNAS system or (ideally) another TrueNAS system in a different location. This approach leverages persistent storage for overall data protection.
Your system must have at least one storage pool configured.
After installing TrueNAS, enter the IP address assigned by DHCP (displayed in the Console Setup Menu) into a browser window to access the TrueNAS sign-in splash screen. Log in to TrueNAS.
Begin by configuring your first storage pool.
See Creating Storage Pools for more information on how to plan for and create pools in TrueNAS. If you want to create additional pools with other disks not assigned to a pool, you can do that now or as you have a need for them.
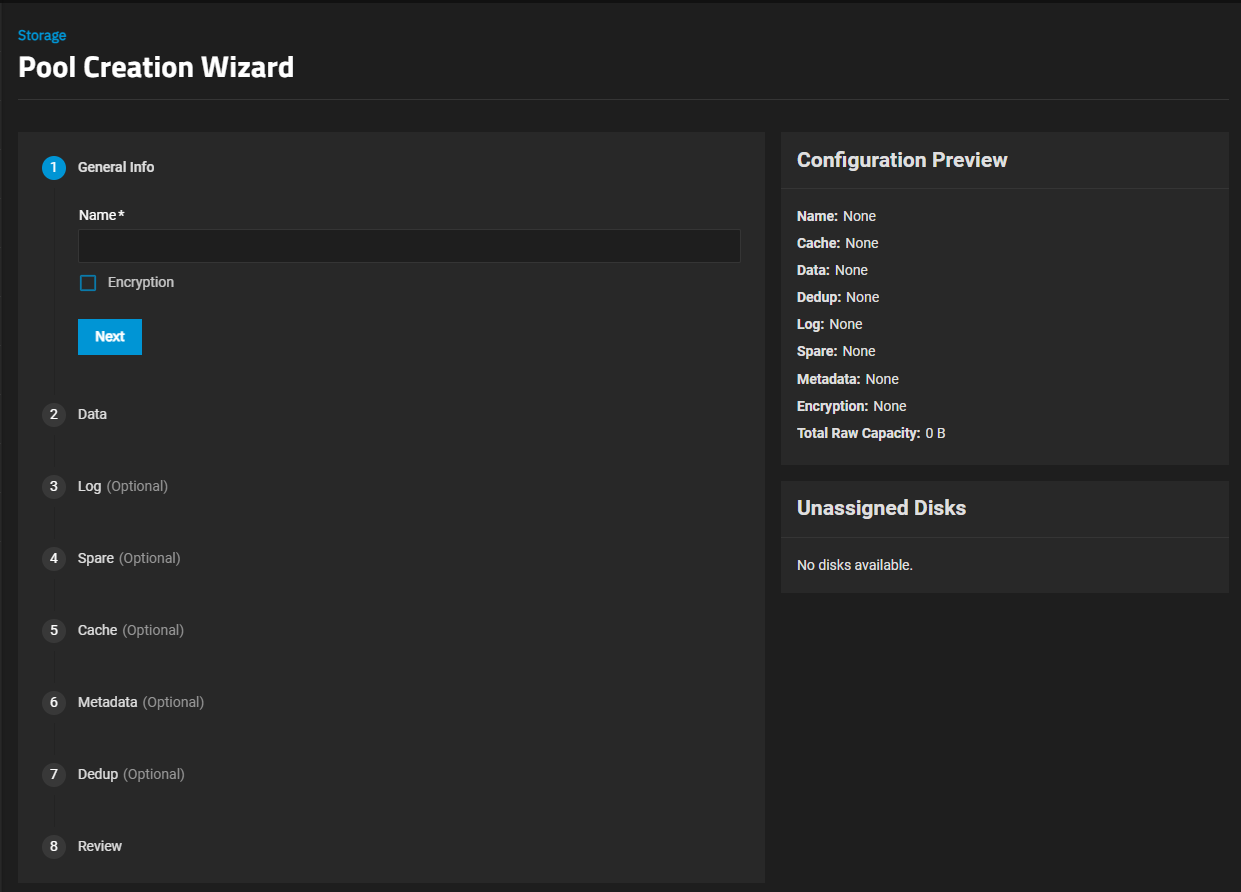
Click Create Pool to open the Pool Creation Wizard.
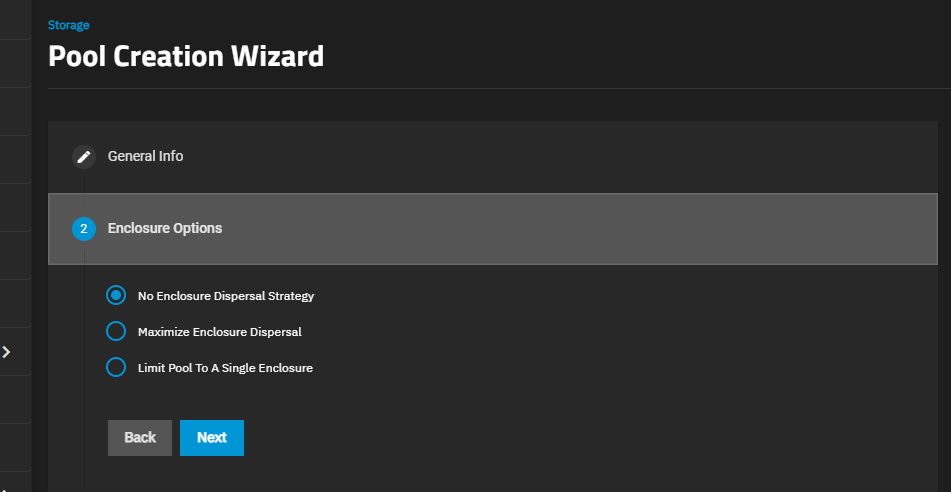
Enclosure Option only shows for TrueNAS Enterprise systems with connected expansion shelves.
You can rename your enclosure on the Enclosure screen to include the rack and U number in the name, which helps identify the physical location while in the pool creation screen.
Enter a name of up to 50 lowercase alpha-numeric characters. Use only the permitted special characters that conform to ZFS naming conventions. The pool name contributes to the maximum character length for datasets, so it is limited to 50 characters.
You cannot change the pool name after creation.(Enterprise systems only) Select the Enclosure Option to apply the dispersal strategy of your choice. This option only shows for TrueNAS Enterprise systems with connected expansion shelves. The dispersal strategy sets how the system adds disks by size and type to the pool VDEVs created using the Automated Disk Selection option. Enclosures mentioned in the options below refer to the disk enclosures in the expansion shelves and main system chassis.
No Enclosure Dispersal Strategy does not apply a dispersal strategy, and does not show additional options. Disks added to the pool VDEVs are assigned in sequence based on disk availability and are not balanced across all enclosures.
Maximum Dispersal Strategy applies a maximum dispersal strategy. This option balances disk selection across all enclosures and available disks and does not show additional options. Disks added to the pool VDEVs are spread across all available enclosure disks.
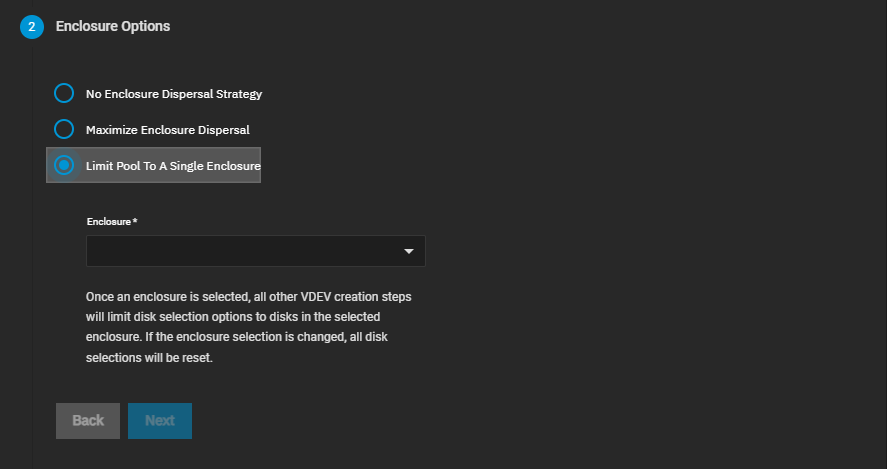
Limit Pool To A Single Enclosure applies a minimum dispersal strategy. Select the expansion shelf option on the Enclosure dropdown. Disks added to the pool VDEVs are spread across the enclosure disks that align with the selection in Enclosure.
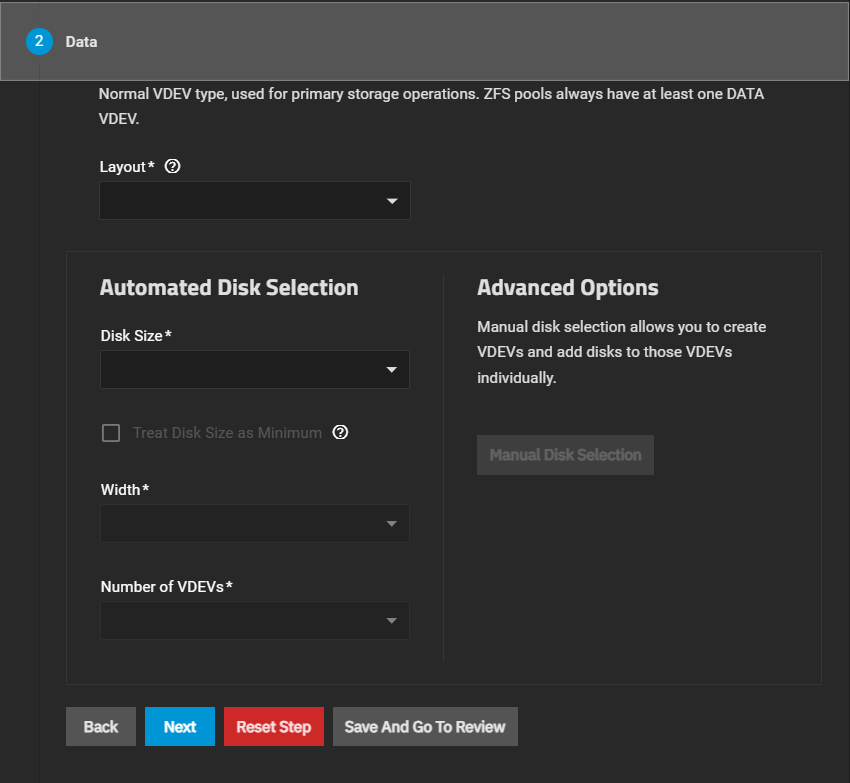
Create the required data VDEV.
Select the layout from the Layout dropdown list, then use the Automated Disk Selection fields to select and add the disks, or click Manual Disk Selection to add specific disks to the chosen Layout.
dRAID layouts do not show the Manual Disk Selection button but do show additional Automated Disk Selection fields. When configuring a dRAID data VDEV, first, choose a Disk Size then select a Data Devices number. The remaining fields update based on the Data Devices and dRAID layout selections.
ZFS allows groups to span multiple rows, which means it does not require each row to contain a whole number of redundancy groups. This layout has several advantages over requiring whole groups in each row:
- Group count - Group count is not a relevant parameter when defining a dRAID layout. ZFS only needs the group width and all groups will have the desired size.
- Group widths - ZFS can support all possible group widths (greater than or equal to the physical disk count).
ZFS determines the number of groups by the least common multiple (LCM) of the group width (D+P) and the number of physical drives minus spares (C-S). The logic within dRAID is simplified when the group width is the same for all groups, although some aspects, such as computing permutation numbers and drive offsets, are more complex. This flexible layout ensures even distribution of data and parity while maintaining high performance and resilvering efficiency.
See vdev_draid.c for more information.
Click Save And Go To Review if not adding other VDEV types to the pool or click Next to move forward to the next wizard screen.
Add optional VDEVs to suit your storage redundancy and performance requirements.
Click Create Pool on the Review wizard screen to add the pool.
The root dataset of the first pool you create automatically becomes the system dataset.
After adding your first pool, you can move on to creating datasets for data sharing, applications you plan to deploy, or other use cases.
New pools have a root dataset that allows further division into new non-root parent and child datasets or into storage volumes (zvols). A dataset is a file system that stores data and has specific permissions.
A zvol is a virtual block device (like a virtual disk drive) that has a predefined storage size. Zvols are generally used with the iSCSI sharing protocol and also virtual machines (VMs) for their data storage needs.
To create a dataset or zvol, you can click Datasets on the main navigation panel or go to Storage and click Manage Datasets on the Usage widget for a specific pool to open the Datasets screen.
To create a basic dataset, go to Datasets. Default settings include those inherited from the parent dataset.
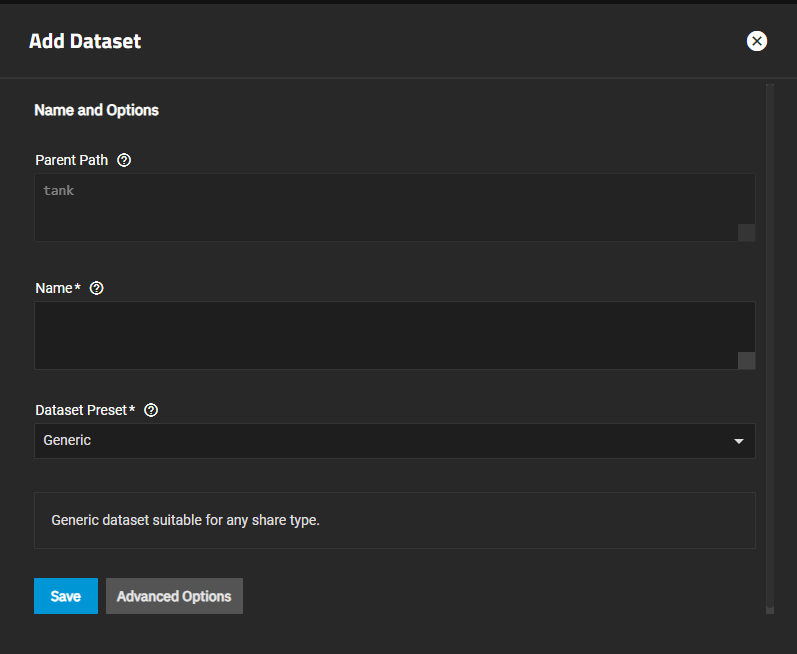
Select a dataset (root, parent, or child), then click Add Dataset.
Enter a value in Name.
Select the Dataset Preset option you want to use. Options are:
- Generic for non-SMB share datasets such as iSCSI and NFS share datasets. Also use for datasets for containers, virtual machines, and other datasets not associated with application storage.
- Multiprotocol for datasets optimized for SMB and NFS multi-mode shares or to create a dataset for NFS shares.
- SMB for datasets optimized for SMB shares.
- Apps for datasets optimized for application storage.
Generic sets ACL permissions equivalent to Unix permissions 755, granting the owner full control and the group and other users read and execute privileges.
SMB, Apps, and Multiprotocol inherit ACL permissions based on the parent dataset. When no ACL exists to inherit, TrueNAS calculates one that grants full control to the owner@, group@, members of the builtin_administrators group, and domain administrators. TrueNAS grants modify control to other members of the builtin_users group and directory services domain users.
Apps includes an additional entry granting modify control to group 568 (Apps).
If creating an SMB or multi-protocol (SMB and NFS) share, the dataset name value auto-populates the share name field with the dataset name.
If configuring a pool to deploy applications, the system automatically creates the ix-apps dataset for Docker storage, but we recommend creating separate datasets for application data storage.
If you want to store data by application, create the dataset(s) first, then deploy your application. When creating a dataset for an application, select Apps as the Dataset Preset. This optimizes the dataset for use by an application.
If you want to configure advanced setting options, click Advanced Options. For the Sync option, we recommend production systems with critical data use the default Standard choice or increase to Always. Choosing Disabled is only suitable in situations where data loss from system crashes or power loss is acceptable.
Select either Sensitive or Insensitive from the Case Sensitivity dropdown. The Case Sensitivity setting in Advanced Options is not editable after you save the dataset.
Click Save.
Review the Dataset Preset and Case Sensitivity under Advanced Options on the Add Dataset screen before clicking Save. You cannot change these or the Name setting after clicking Save.
Organize the pool with as many datasets or zvols you need according to your access and data sharing requirements before moving data into the pool.
See Adding or Managing Datasets for more information on configuring datasets, or Adding or Managing Zvols for more information on zvols.
TrueNAS provides the option to create the dataset and share at the same time. The Add Dataset screen allows you to create the new dataset and use a preset to configure an SMB, NFS, or multi-mode share. The Shares screen also provides options to add an SMB or NFS share and create the dataset at the same time.
Do not set up sharing on the root dataset! Creating a share that uses the root dataset causes all types of problems with permissions, and is not a best practice. Rather, create or select a dataset that is a child of the root dataset and that is specifically created to share.
To create a dataset and share from the Add Dataset screen:
First click on the parent dataset row, then click Add Dataset.
Enter the name for the dataset.
Select the Dataset Preset option to use. Based on the option selected, for example, selecting SMB, the screen populates the Share Name field with the name give to the dataset.
Click Save. TrueNAS creates the dataset and the share.
Configure permissions for the share. If you have created the share user, set up the share ACL permissions when prompted. If you are not ready to configure the share permissions, exit to the main Datasets screen. You can modify share dataset permissions later after adding the share user(s) by either selecting the dataset row, then clicking Edit on the Permissions widget. See Editing Permissions for more information.
You can also set permissions for the share from the Shares screen by selecting the share, then selecting the option to Edit Filesystem ACL for SMB, or set up NFS share permissions from the Add NFS share screen.
To create a dataset while adding the share, see Setting Up Sharing which covers the process of setting up the share and creating the dataset at the same time from the Shares screen. See Manage SMB Shares or Manage NFS Shares for more information on adding and managing SMB or NFS shares.
After you finish creating your initial pool and the datasets or zvols, you can continue building and organizing your TrueNAS pools and datasets or move on to configuring how the system shares data.
If you do not plan to set up data sharing, you can set up backup solutions for your system and stored data.


