Setting Up Data Sharing
8 minute read.
After setting up storage on your TrueNAS, it is time to begin sharing data! There are several sharing solutions available in TrueNAS, but in this article we discuss the options to create the share and dataset from the Shares screens.
When creating a share, do not attempt to set up the root or pool-level dataset for the share. Instead, create a new dataset under the pool-level dataset for the share. Setting up a share using the root dataset leads to storage configuration issues.
TrueNAS provides three types of sharing methods:
- SMB for Windows shares
- NFS for Unix-like shares
- ISCSi block shares
For more information on TrueNAS shares, see the Shares tutorials.
Regardless of what type of share you create, you need to create the user and dataset for the share.
Share users have permissions to access the share. You can create the user before or after you create the share.
Administrators can provision share users using a directory server such as Active Directory or LDAP. The administration user can create a limited administration user with only the ability to manage shares. See Using Administration Logins for more information on administration roles.
To add non-SMB share users or edit users, go to Credentials > Users to add or edit the user(s). Click Add to create a new or as many new user accounts as you need.
Enter the values in each required field, verify SMB User is selected for SMB share users, then click Save. For more information on the fields and adding users, see Creating User Accounts.
By default, all new users are members of a built-in group called builtin_users. You can use a group to grant access to all users on the server or add more groups to fine-tune permissions for large numbers of users. This approach is particularly useful for high availability (HA) configurations and efficient data sharing across multiple users.
After creating the share user account(s), next create the share and dataset. For iSCSI shares, create the dataset then the share. You can create an SMB or NFS share while creating the dataset or create the dataset while creating the share.
This article provides instructions on creating the share and adding the dataset from Shares screens.
For more detailed information on adding SMB shares, see Adding SMB Shares.
TrueNAS must be joined to Active Directory or have at least one local SMB user before creating an SMB share. When creating an SMB user, ensure that Samba Authentication is enabled. You cannot access SMB shares using the root user, TrueNAS built-in user accounts, or those without Samba Authentication selected.
To set up a basic SMB share from the Add SMB screen:
Create the share and dataset.
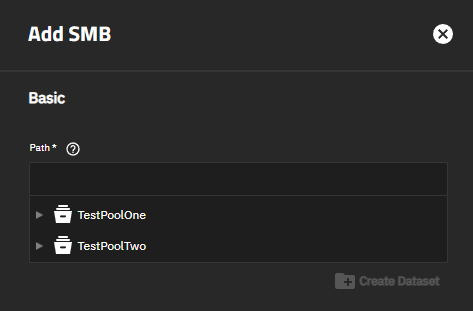
a. Go to Shares, then click Add on the Windows (SMB) Shares widget to open the Add SMB configuration screen.
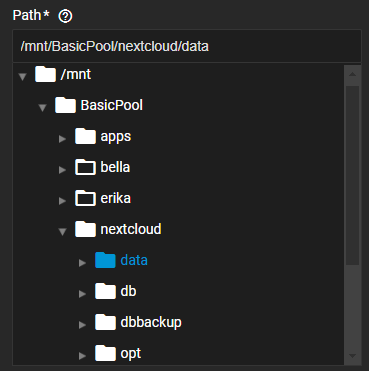
b. Populate the Path screen by either selecting the path to an existing dataset mount path, or entering the path to the dataset location. You can use an existing dataset or create a new dataset. To browse to the location, click on the to the left of mnt, and then at the pool to expand the options. Continue expanding until reaching the storage location of the existing dataset or where you want to create a new dataset for the share. Click on the exiting dataset to populate the field with the full path, or click Create Dataset to enter a name for a new dataset and the share.
Clicking Create Dataset opens the Create Dataset dialog. Enter a name and then click Create. The system creates the share and dataset, and populates both the Path and share Name fields with the name given the dataset. The dataset name becomes the share name.
c. (Optional) Customize the share properties. You can make changes to any share using the Advanced Options option. For example, to turn on auditing, click Enable to set up audit logging.
d. Click Save. TrueNAS creates the share and the dataset.
e. Start the SMB service when prompted, or select the option to start the service if not prompted.
Edit the SMB share permissions to set the share owner and/or group. You can edit access permissions at the share or dataset level.
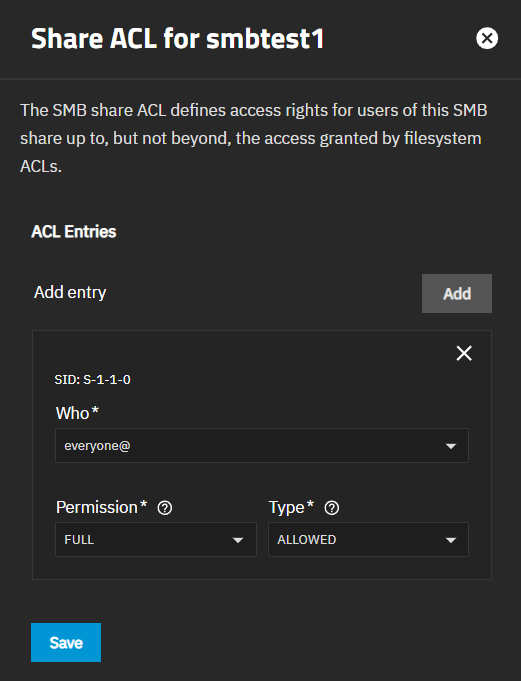
a. Click on Edit Share ACL icon to open the Edit Share ACL screen.
b. Select either User in Who, then the user name in User, and then set the permission level using Permissions and Type.
c. (Optional) Click Add then select Group, then the group name, and set the group permissions.
d. Click Save.
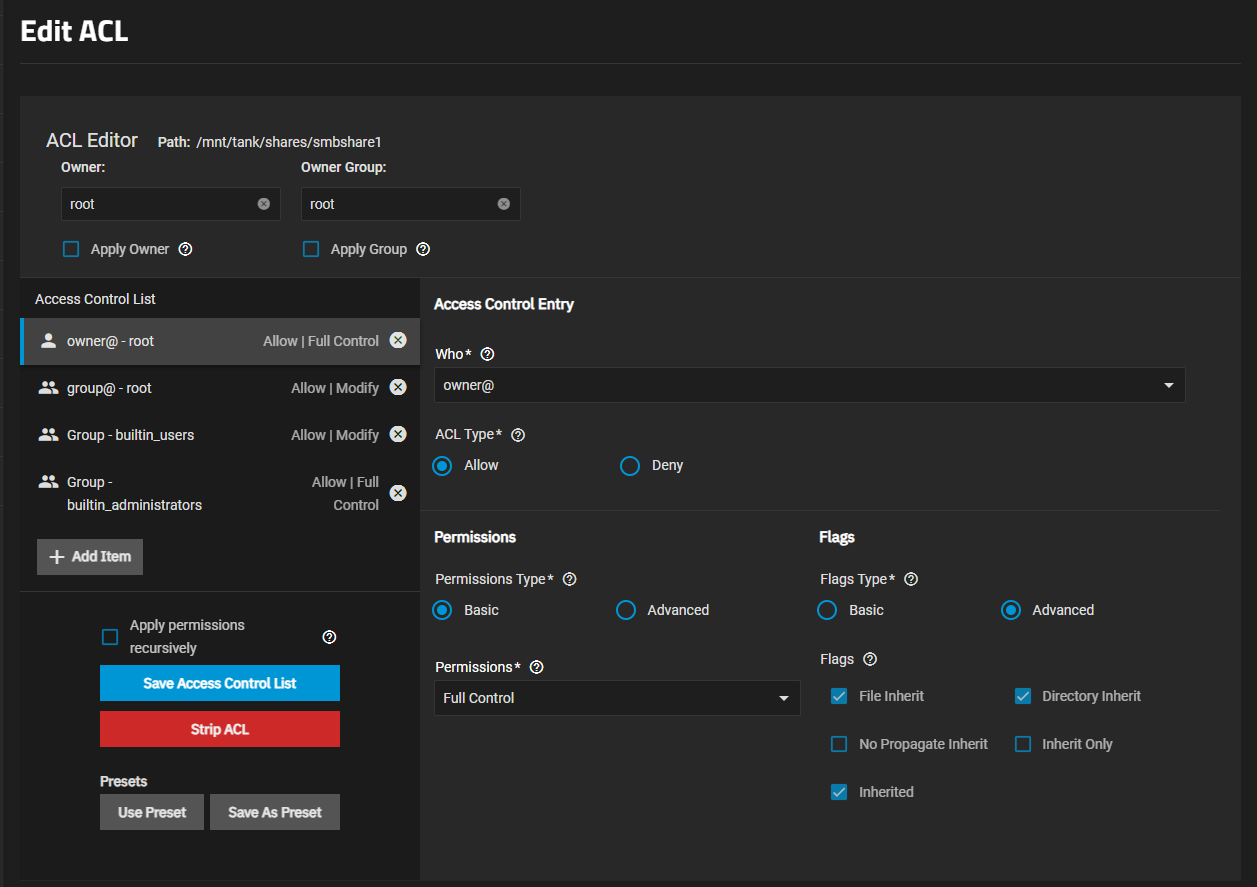
Edit the dataset for the SMB share permissions to set the share owner and/or group. You can edit share dataset permissions from either the Shares or Datasets screen. This step covers editing permissions from the Shares screen.
a. Click on Edit Filesystem ACL icon to open the Edit ACL screen for the dataset.
b. Select the Owner and Group and click Apply Owner and Apply Group. With Who set to Owner, set the permission level using Permissions and Type.
c. Click Save. TrueNAS creates the share and the dataset.
As of TrueNAS 22.12 (Bluefin) and later, TrueNAS does not support SMB client operating systems that are labeled by their vendor as End of Life or End of Support. This means MS-DOS (including Windows 98) clients, among others, cannot connect to TrueNAS SMB servers.
The upstream Samba project that TrueNAS uses for SMB features notes in the 4.11 release that the SMB1 protocol is deprecated and warns portions of the protocol might be further removed in future releases. Administrators should work to phase out any clients using the SMB1 protocol from their environments.
d. Start the share service when prompted.
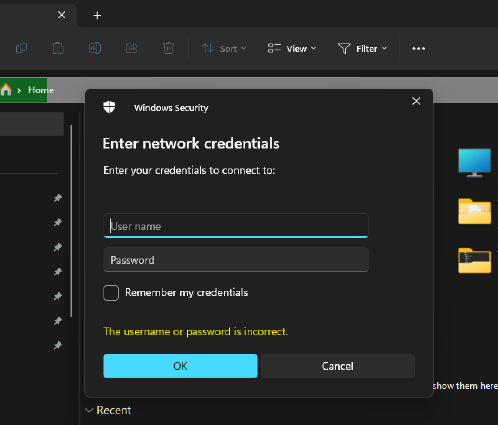
Connect to the share. On a Windows 10 or later system, open the File Browsers and then:
a. Enter
\\followed by the TrueNAS system name or IP address in the navigation bar. A login credentials dialog displays.b. Enter the TrueNAS user account credentials created on the TrueNAS system.
c. Begin browsing the dataset.
For more information on creating NFS shares, see Adding NFS Shares.
You can create an NFS share from either the Add Dataset screen while creating the dataset, or from the Add NFS share screen. Both options allow creating the dataset and the share at the same time.
To set up NFS sharing from the Add NFS screen:
Add additional packages like
nfs-commonto any client systems that require them.Create the NFS share and dataset.
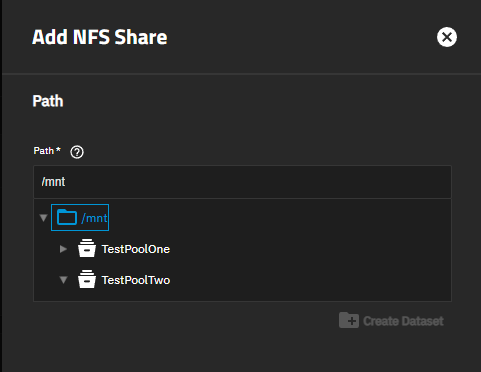
a. Go to Shares, then click Add on the UNIX (NFS) Share Targets to open the Add NFS configuration screen.
b. Populate the Path screen by either selecting the path to an existing dataset mount path, or entering the path to the dataset location. You can use an existing dataset or create a new dataset. To browse to the location, click on the to the left of mnt, and then at the pool to expand the options. Continue expanding until reaching the storage location of the existing dataset or where you want to create a new dataset for the share. Click on the exiting dataset to populate the field with the full path, or click Create Dataset to enter a name for a new dataset and the share.
Clicking Create Dataset opens the Create Dataset dialog. Enter a name and then click Create. The system creates the share and dataset, and populates both the Path and share Name fields with the name given the dataset. The dataset name becomes the share name.
c. (Optional) Customize the share properties. You can make changes to any share using the Advanced Options option. For example, mapping users or groups, click Enable to set up audit logging.
d. Click Save. TrueNAS creates the share and the dataset.
e. Start the NFS service when prompted, or select the option to start the service if not prompted.
Access the dataset. On a Unix-like system, open a command line and enter command
showmount -e {IPADDRESS}where {IPADDRESS} is your TrueNAS system IP address.tmoore@ChimaeraPrime:~$ showmount -e 10.238.15.194 Export list for 10.238.15.194: /mnt/pool1/testds (everyone)Make a local directory for the NFS mount. Enter command
sudo mkdir nfstemp/.tmoore@ChimaeraPrime:~$ sudo mkdir nfstemp/Mount the shared directory. Enter command
sudo mount -t nfs {IPADDRESS:dataset path}where {IPADDRESS} is your system IP address and {:dataset path} is the full path displayed in step 3.b. above.tmoore@ChimaeraPrime:~$ sudo mount -t nfs 10.238.15.194:/mnt/pool1/testds nfstemp/From here,
cdinto the local directory and view or modify the files as needed.
Setting up block sharing is a complicated scenario that requires detailed configuration steps and knowledge of your network environment. A simple configuration is beyond the scope of this getting started guide, but detailed articles are available in the Tutorials section.
With simple sharing now set up, you can back up your configuration and set up data backup.


