




TrueNAS Development Documentation
This content follows experimental development changes in TrueNAS 28, a future version of TrueNAS.
Use the Product and Version selectors above to view content specific to a stable software release.
Creating and Managing Containers
19 minute read.
Linux containers, powered by LXC, offer a lightweight, isolated environment that shares the host system kernel while maintaining its own file system, processes, and network settings. Containers start quickly, use fewer system resources than virtual machines (VMs), and scale efficiently, making them ideal for deploying and managing scalable applications with minimal overhead.
When you first access the Containers screen, it displays a message indicating no containers are configured.
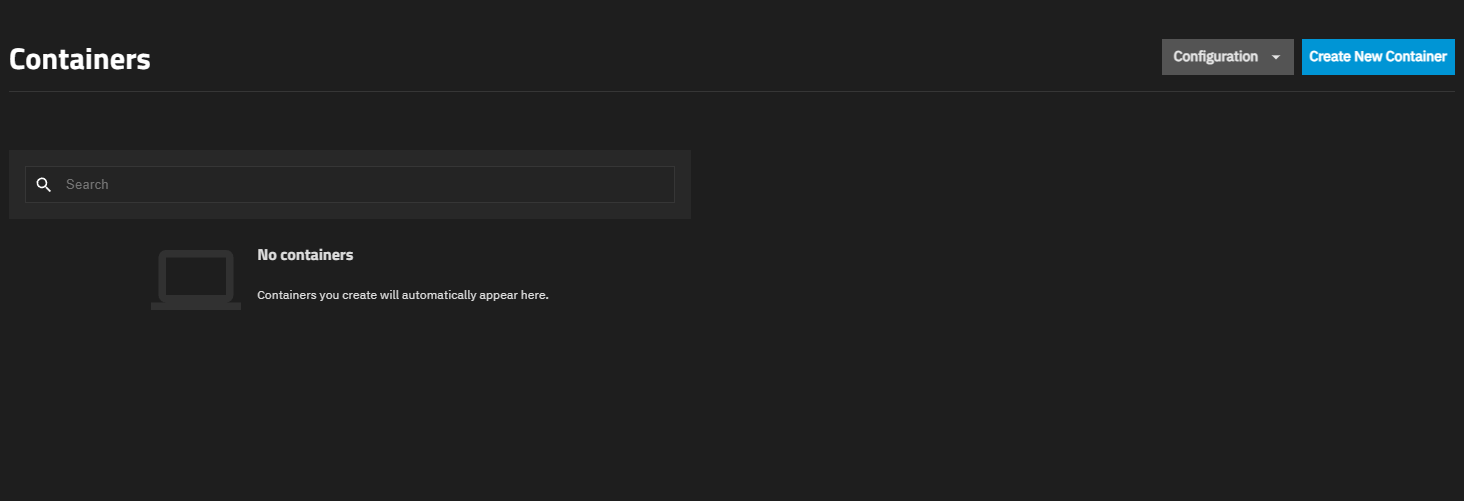
You can create containers immediately using the Create New Container button, or configure global settings first using the Configuration menu.
For more information on screens and screen functions, refer to the UI Reference article on Containers Screens.
Use the Configuration menu to access Settings where you can configure an optional preferred storage pool for containers and default network settings. The Configuration menu also provides access to Map User/Group IDs for configuring UID and GID mappings.
Click Configuration on the Containers screen header and select Settings to open the Settings screen. The screen displays global options that apply to all containers. Use these options to configure an optional preferred storage pool for containers and default network settings.
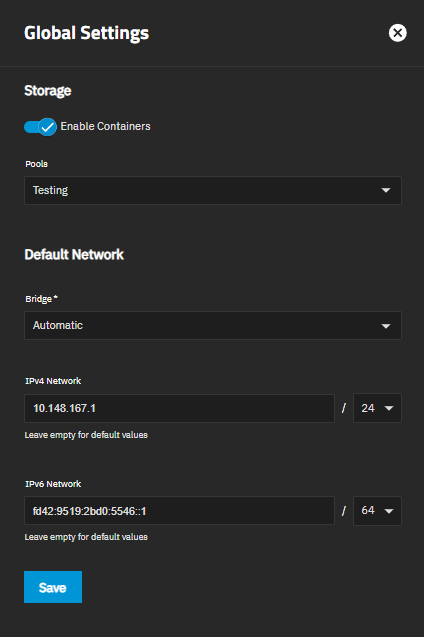
The Preferred Pool setting allows you to specify a default storage pool for container data. This setting is optional. If you do not specify a preferred pool, TrueNAS prompts you to select a pool when creating each container.
To set a preferred pool:
Click Configuration on the Containers screen header and select Settings.
Select a pool from the Preferred Pool dropdown list. The dropdown displays all available pools on your system.
Click Save.
We recommend keeping the container use case in mind when choosing a preferred pool. Select a pool with enough storage space for all the containers you intend to host.
For stability and performance, we recommend using SSD/NVMe storage for the containers pool due to faster speed and resilience for repeated read/writes.
You can change the preferred pool at any time by opening Configuration > Settings and selecting a different pool from the Preferred Pool dropdown.
TrueNAS stores container data in a hidden
Use the Default Network settings in the Settings screen to define how containers connect to the network. These settings apply to all new containers unless you configure different network settings for individual containers.
To configure default network settings:
Click Configuration on the Containers screen header and select Settings.
Select a bridge from the Bridge dropdown list:
- Automatic to allow TrueNAS to create and manage a dedicated virtual bridge (
truenasbr0) on the TrueNAS host using DHCP, and to route outbound traffic through the host via NAT. Change the defaults using the IPv4 Network and IPv6 Network fields if they conflict with your network. The default ranges are 172.200.0.0/24 and fd42:4c58:43ae::/64. - Select an existing bridge interface to use that bridge for container networking.
See Accessing NAS from VMs and Containers for information on creating bridge interfaces.
TrueNAS EnterpriseCustom bridge selection is not available on High Availability systems. HA deployments always use Automatic to prevent issues that could interfere with controller failover.- Automatic to allow TrueNAS to create and manage a dedicated virtual bridge (
(Optional) When Bridge is set to Automatic, configure IP address ranges:
a. Enter an IPv4 address and subnet in IPv4 Network (for example, 192.168.1.0/24) to assign a specific IPv4 network for containers. Leave empty to allow TrueNAS to assign the default IPv4 address.
b. Enter an IPv6 address and subnet in IPv6 Network (for example, fd42:96dd:aef2:483c::1/64) to assign a specific IPv6 network for containers. Leave empty to allow TrueNAS to assign the default IPv6 address.
Click Save.
Adjust these settings as needed to match your network environment and ensure proper connectivity for containers.
High Availability (HA) functionality is available in TrueNAS Enterprise systems.
TrueNAS 27 adds support for containers in High Availability (HA) configurations. Containers can run on HA systems and automatically restart after a controller failover. However, HA environments require specific network configuration to ensure containers remain accessible after failover events.
USB and GPU devices are not supported in HA systems, and custom bridges are not available.
Configure a static IP address in the container operating system. For a NIC on the automatic bridge, the address must be within the container network (the IPv4 Network or IPv6 Network on the Settings screen). Do not use the first address in the network (for example, 172.200.0.1), which TrueNAS uses as the gateway. TrueNAS assigns the other IPv4 addresses to containers automatically without checking whether one is already in use, so a static address can end up shared with another container. Without a static IP, the container might receive a different address after a controller failover.
Refer to your container operating system documentation for instructions on setting a static IP address.
When you configure containers for HA environments:
- Configure a static IP address inside each container OS before deploying containers in an HA system. This ensures the container retains its IP address across reboots and failover events.
- Mount container data to datasets that persist across failovers. This ensures container data remains available after a controller switchover.
- Select the Autostart option in container configuration to automatically start containers after a failover. See Editing Containers for details.
- Perform test failovers to verify containers restart properly and remain accessible with their static IP addresses.
When a controller failover occurs in an HA system:
- Containers on the previously active controller are stopped during failover. If a stop takes too long, or there is a controller failure, containers can end abruptly.
- After failover completes, containers configured with Autostart automatically start on the new active controller.
- Containers with static IP addresses keep the assigned IP address.
- Container data persists if stored on datasets that remain available after failover.
An abrupt stop during failover can result in data loss for applications that do not handle it gracefully.
For production containers in HA environments:
- Use applications designed to handle unexpected shutdowns.
- Configure regular backups or snapshots.
- Store critical data on persistent datasets.
- Test your containers’ behavior during simulated failovers.
When a container reads or writes to a host dataset mounted via a file system device, TrueNAS checks whether the user identity inside the container has permission to access that path on the host. User accounts inside containers are independent from host user accounts, so a user named appuser with UID 1000 inside a container is not the same identity as UID 1000 on the TrueNAS host, even though they share the same number.
To bridge this gap, TrueNAS uses UID/GID mapping: a translation layer that tells the host which host user corresponds to each container user. For most containers, you do not need to configure this manually — the default behavior set by the ID Map Type for the container at creation time handles it automatically. The Map User/Group IDs screen is for cases where you need finer control, such as granting a specific host user access to data a container reads or writes.
By default (when ID Map Type is set to Default), TrueNAS shifts all container UIDs and GIDs into a private range on the host starting at 2147000001. This means container UID 0 (root) maps to host UID 2147000001, container UID 1 maps to 2147000002, and so on. No container process appears as a real user on the host, which prevents a compromised container from having any meaningful access to host resources.
The special host user truenas_container_unpriv_root (UID 2147000001) represents the container root on the host when using default ID mapping. To give a container running as root access to a host dataset, assign dataset permissions to truenas_container_unpriv_root — no mapping configuration is required.
You need to configure a custom mapping when:
- An application inside the container runs as a specific non-root UID (for example, UID 1000) and needs access to a TrueNAS dataset.
- You want a specific TrueNAS user account to own files the container creates on a shared dataset.
- You are sharing a dataset between a container and other services (like an SMB share) and need consistent ownership.
In these cases, you create a mapping that tells TrueNAS: when the container acts as UID X, treat it as host user Y.
Click Configuration on the Containers screen header and select Map User/Group IDs to open the Map User and Group IDs screen.
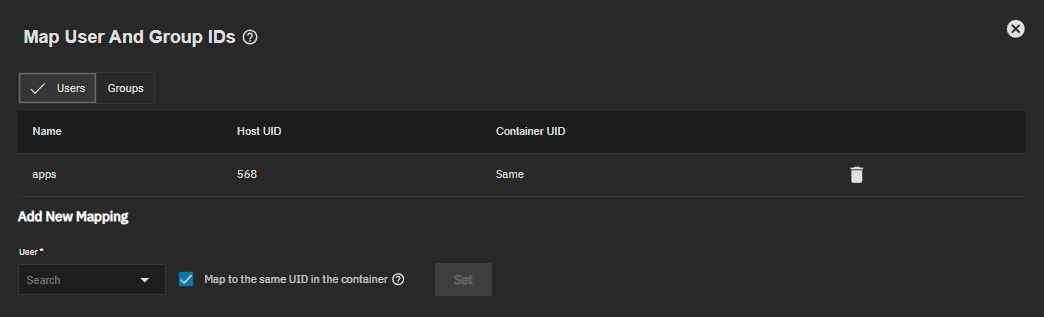
Select the Users or Groups tab to view and manage mappings for user or group accounts, respectively.
Existing mappings appear in a table listing the user or group name, host ID, and container ID. Click delete Delete on a row to remove a mapping.
To add a new mapping:
Type an account name to search or select it from the dropdown.
Choose how to map the ID:
- Select Map to the same UID/GID in the container to use the identical ID number inside the container (for example, host UID 1000 → container UID 1000).
- Disable it to assign a different container ID. Enter the UID or GID the container uses for this account — for example, 1000.
Click Set to save the mapping.
Changes apply immediately, though restarting the container might be required for them to take effect.
Only local TrueNAS users and groups are supported. Active Directory and other directory service accounts cannot be used for container ID mapping.
For example, if your container runs a service as UID 1000 and you want it to read and write to a TrueNAS dataset owned by the local user mediauser (host UID 3000):
- Create a mapping for the host user mediauser to the container UID 1000.
- Assign the dataset permissions to mediauser on the host.
- The container service running as UID 1000 can now access that dataset.
Incorrect or missing mappings cause permission denied errors when containers access mounted host paths.
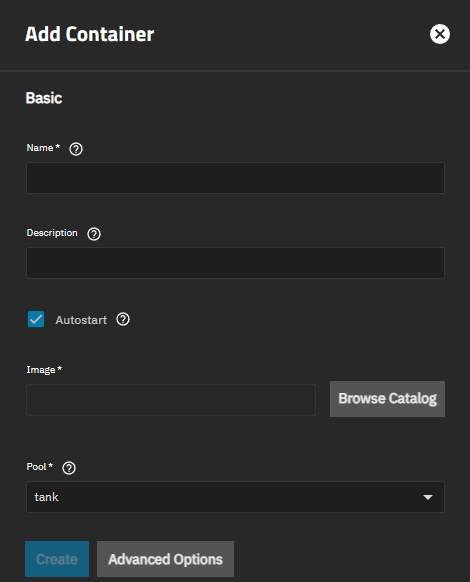
Click Create New Container to open the Add Container configuration wizard.
The Add Container screen displays basic configuration fields and an Advanced Options button for additional settings.
TrueNAS (27 and later) stores containers in a hidden
Images are stored in
The dataset is created per pool. The pool used is set by the Preferred Pool setting or chosen when you create the container.
TrueNAS 25.10 stored containers in.ix-virt . See Migrating Containers from TrueNAS 25.10 in the TrueNAS 27 documentation for information on how TrueNAS migrates them.
To create a new container:
Enter a Name for the container.
Enter an optional description for the container in Description.
Select Autostart to automatically start the container when the system boots. This is not required but is recommended if the container needs to start automatically, like for HA systems or when deploying always-on apps.
When you enable autostart, TrueNAS automatically starts the container during system boot after the containers service initializes, ensuring services are available immediately after system startup. During system shutdown, TrueNAS sends a graceful shutdown signal to the container, allowing applications to close properly and save data.
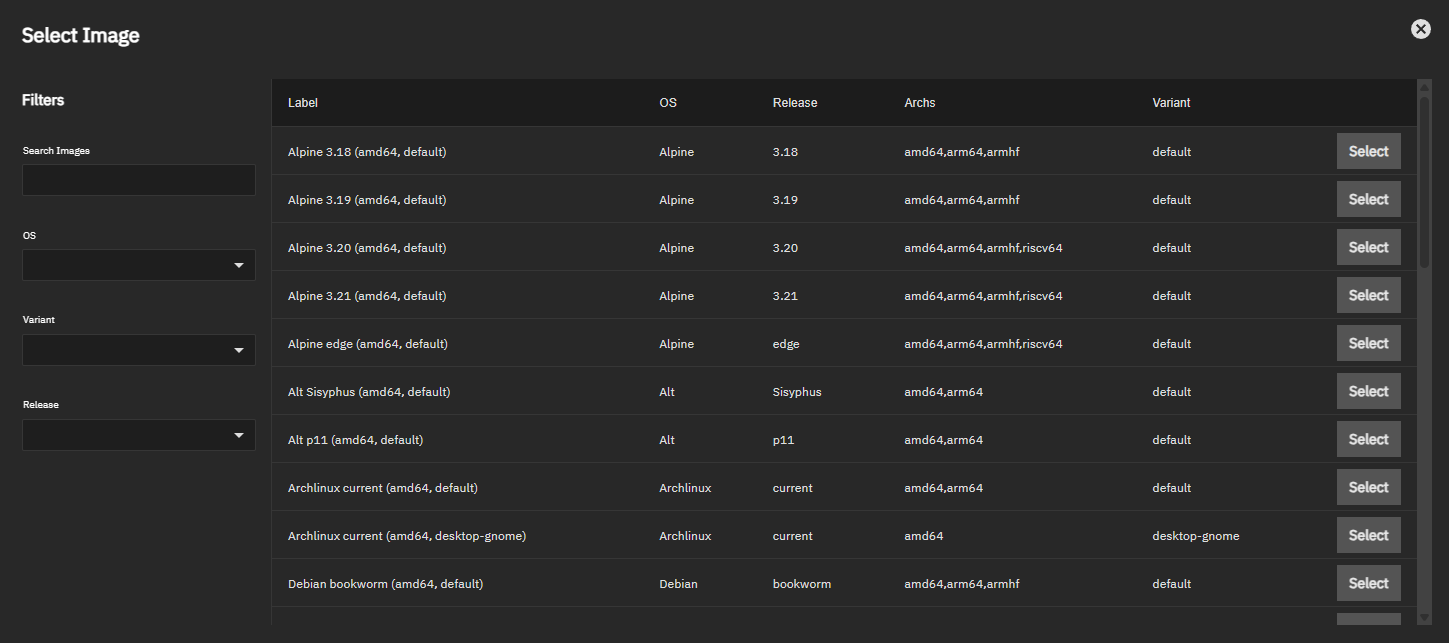
Select the image the container uses. Click Browse Catalog to open the Select Image screen.
Search or browse to choose a Linux image. Click Select in the row for your desired image.
Select a Pool for the container if the preferred pool is not already set. This field appears when no preferred pool is configured in global container settings.
Click Advanced Options to configure optional additional settings:
Use CPU Configuration to bind the container to specific CPU cores (useful for performance-sensitive workloads or isolating container resources).
Use Time Configuration to set the container time zone (Local or UTC) and shutdown timeout (how long to wait for graceful shutdown before forcing termination).
Use Init Process to configure the init command, working directory, and user/group for the PID 1 process for the container. The default init command is
/sbin/init. Note: The init command cannot be changed after creation, but working directory, user, and group remain editable.Use USB Devices to attach the device shown to the container. TrueNAS attaches the USB based on port number and not by the device name. Note: TrueNAS detects USB devices that are not USB hubs and provide the required information (device number, vendor ID, and product ID). This section does not show if there are no USB devices detected by TrueNAS.
Use ID Mapping to control how container UIDs and GIDs map to host UIDs and GIDs. This setting cannot be changed after the container is created. Options include:
- Default (recommended): Container root maps to the unprivileged host user truenas_container_unpriv_root. Provides security isolation for most workloads.
- Isolated: Assigns a unique UID/GID range to this container to prevent overlap with other containers. Use when multiple containers share access to the same host datasets.
- Privileged: Removes UID isolation — container UIDs map directly to host UIDs, including root. Required for nested container runtimes. See Running Nested Containers.
Use Environment Variables to define environment variables that are available inside the container.
Use Capabilities to control Linux capabilities (special permissions). Use DEFAULT for most containers (secure and functional) or ALLOW to grant all capabilities when containers need broad system access (reduces isolation). ALLOW is required for nested container runtimes. See Running Nested Containers.
Click Create to deploy the container.
Configuring network interfaces, USB or GPU devices, and file system mounts is performed after creating the container using the detail cards on the Containers screen.
Initial USB configuration occurs on the Add Container advanced settings screen if TrueNAS detects USB devices, but you can also add a device after adding the container using the Add button on the USB Devices card. The USB devices must show the required information before TrueNAS shows them as USB options you can add to the container.
See the following sections for device configuration procedures:
- Managing NICs for network interface configuration
- Managing USB Devices for USB device passthrough
- Managing GPU Devices for GPU hardware acceleration
- Configuring File System Devices for additional file system mounts
A nested container is a container that runs its own container runtime — for example, a TrueNAS container with Docker installed and running inside it. Nested container runtimes require direct UID mapping and full Linux capabilities, which means the container must be configured as privileged.
Privileged containers remove UID isolation between the container and the TrueNAS host. Container processes running as root have direct host root access.
Only use privileged containers for workloads that specifically require nested container support, and ensure the container image and its contents are trusted.
To create a container that supports a nested container runtime such as Docker:
Begin creating a container as described in Creating a Container.
Click Advanced Options.
Under ID Mapping, set ID Map Type to Privileged.
Under Capabilities, set Capabilities Policy to ALLOW.
Complete the remaining settings and click Create.
After the container starts, open a shell session from the Tools card and install the container runtime of your choice.
Created containers appear in a table on the Containers screen. The table lists each configured container, displaying its name, current status, autostart setting, and live resource metrics: CPU %, Memory MiB, and Disk I/O % Full Pressure. Metrics display N/A for stopped containers. Stopped containers show the option to start the container.
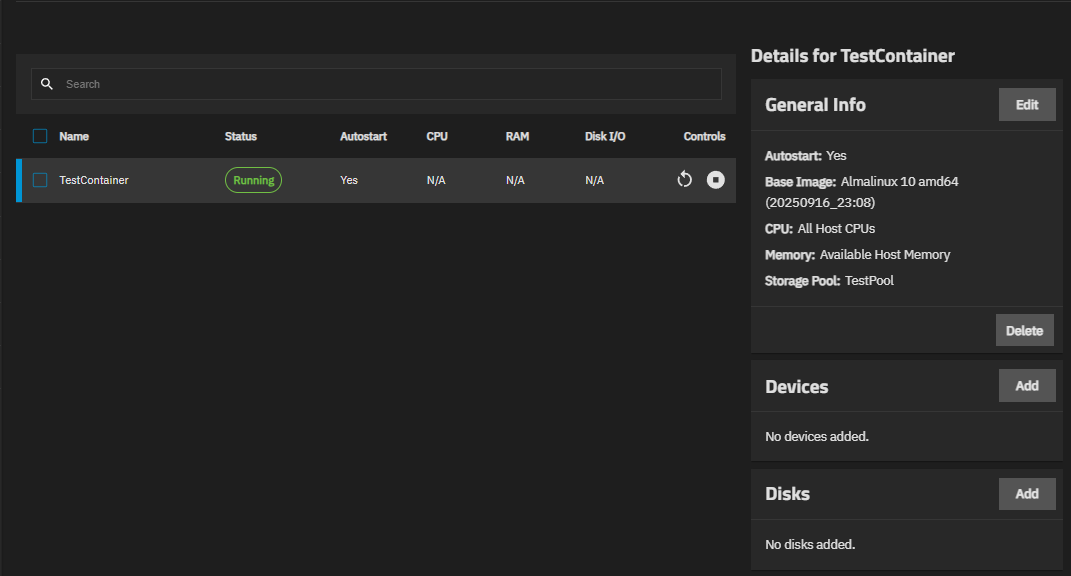
Select the checkbox to the left of Name (select all) or select one or more container rows to access the Bulk Actions dropdown.
Enter the name of a container in the Search field above the Containers table to locate a configured container.
Click restart_alt to restart or stop_circle to stop a running container. Choosing to stop a container shows a choice to stop immediately or after a small delay.
Click play_circle to start a stopped container.
Select a container row in the table to populate the Details for Container cards with information and management options for the selected container.
Apply actions to one or more selected containers on your system using Bulk Actions.
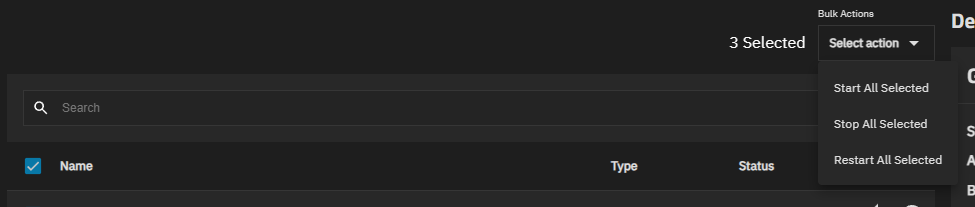
Use the dropdown to select Start All Selected, Stop All Selected, or Restart All Selected.
After selecting the container row in the table to populate the Details for Container cards, locate the General Info card.
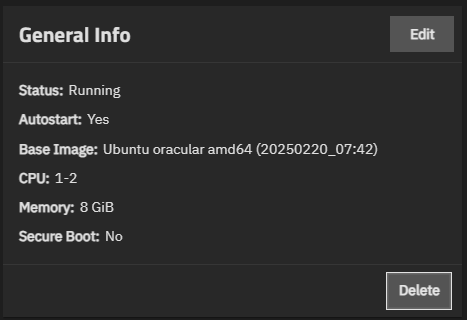
Click Edit to open the Edit Container: Container screen.
The edit screen allows you to modify container settings after creation. You can change Name, Description, Autostart, and some of the Advanced Options settings.
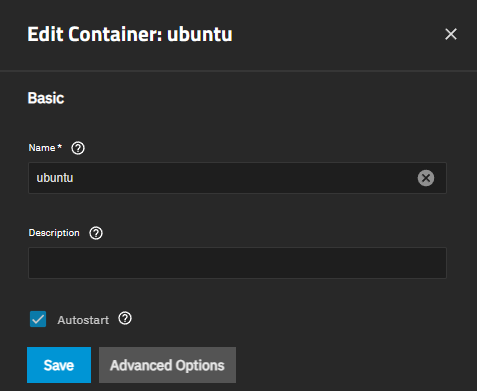
Settings you cannot change after creation:
- Pool - The storage pool cannot be changed after deployment.
- ID Map Type - The UID/GID mapping mode is fixed at creation.
- Init Process command - The init command is fixed, but Init Working Directory, Init User, and Init Group remain editable.
For detailed information about each setting, see the Add Container Screen section in the UI Reference.
After selecting the container row in the table to populate the Details for Container cards, locate the General Info card.
Click Delete to open the Delete Container dialog.
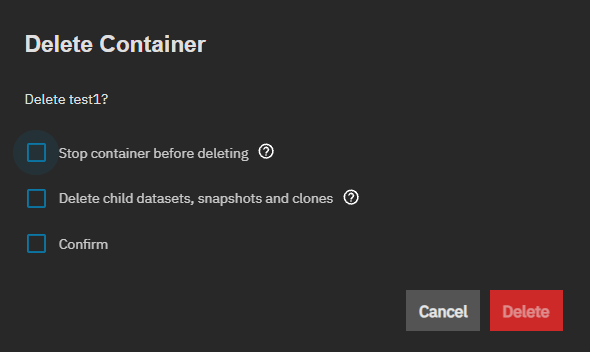
Select the options you want to enable. Stop container before deleting force-stops the container (no graceful shutdown) before deleting it. Required, and selected automatically, when the container is running or suspended. Delete child datasets, snapshots and clones also destroys the child datasets and snapshots of the container dataset, any clones of those snapshots anywhere in the pool, and any snapshot holds, which can break a replication task. Required when the container dataset has child datasets or snapshots. This cannot be undone.
Select Confirm to activate the Delete button. Click Delete to delete the container.
Use the USB Devices card to view and manage USB devices attached to the container. The container must be stopped before the Add button activates.
USB device passthrough allows containers to access USB peripherals as if they are physically connected.
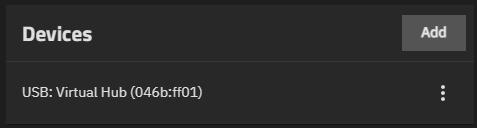
Click Add to see a list of available USB devices. TrueNAS can attach a device by port or by ID. Attaching by port stays tied to the physical port. Attaching by ID matches the device on any port.
USB devices appear in the list only if they are physically connected to the TrueNAS system, are not USB hubs, and provide the required information to TrueNAS (bus, device number, vendor ID, and product ID).
Use the GPU Devices card to attach GPU hardware to containers for graphics acceleration or computation tasks.
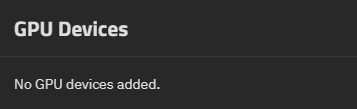
TrueNAS supports GPU passthrough for containers with the following GPU vendors:
- NVIDIA (Turing architecture and later) - Requires driver installation
- Intel - Native support (no drivers needed)
- AMD - Native support (no drivers needed)
For NVIDIA GPUs, you must install drivers before attaching the GPU to a container. Go to System > Advanced Settings to install NVIDIA drivers. See Advanced Settings Screen for detailed instructions.
Click Add to open a list of available GPU devices. Select a GPU from the list to attach it to the container.
GPU devices appear in the list only if:
- The physical GPU hardware is installed and detected by TrueNAS.
- The NVIDIA GPU drivers are installed via System > Advanced Settings.
TrueNAS does not allow using the same GPU device for a VM and a container, but if the TrueNAS system has multiple GPU devices, one can be allocated to a VM and the other(s) to containers.
Use the Filesystem Devices card to mount additional host directories or datasets into the container. File system devices provide containers with access to TrueNAS storage for reading and writing data.
Use cases for file system devices:
- Mounting TrueNAS datasets for persistent container data storage
- Providing containers with access to shared media libraries
- Mounting configuration directories from the host
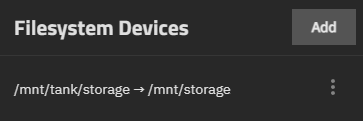
To add a file system device:
Click Add in the Filesystem Devices card.
Enter or browse to select the Host Directory Source. This is the directory or dataset path on the TrueNAS host that you want to mount into the container.
Enter the Container Mount Path. This is the mount point inside the container where the file system appears (for example, /mnt/data or /var/lib/appdata).
Click Save to create the file system device mount.
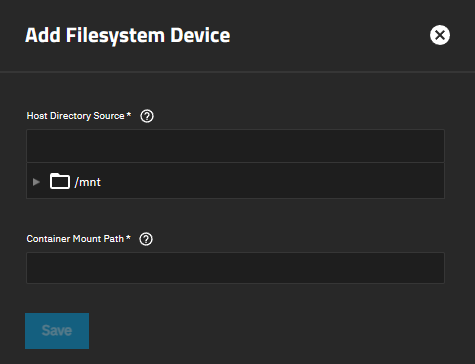
To edit or delete an existing file system device, click the icon and select Edit or Delete.
Use the NIC Devices card to view and manage network interfaces (NICs) attached to the container.
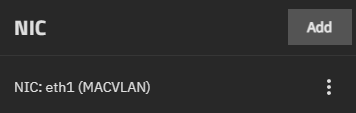
Each NIC displays the network interface name and MAC address (for example, br0 (aa:bb:cc:dd:ee:ff) or br0 (Default Mac Address)).
NIC modifications are restricted when there are pending network interface changes on the TrueNAS system. If you see a warning about pending changes, apply or revert those changes before modifying container NICs.
To add a NIC:
Click Add to open a dropdown with available network interfaces.
Select a NIC from the list to open the configuration dialog.
Configure the NIC settings:
- Set NIC Type to VirtIO or Intel e82585 (e1000).
- (Create only) Select Use Default Mac Address to automatically assign a MAC address.
- Enter a custom MAC address in Mac Address, or leave empty to use the default.
- (VirtIO only) Select Trust Guest RX Filters to trust the guest OS receive filter settings for better performance. Applies only to a VirtIO NIC added from MACVLAN NICS. For a NIC from BRIDGED NICS, TrueNAS rejects or ignores it.
Click Add to attach the NIC to the container.
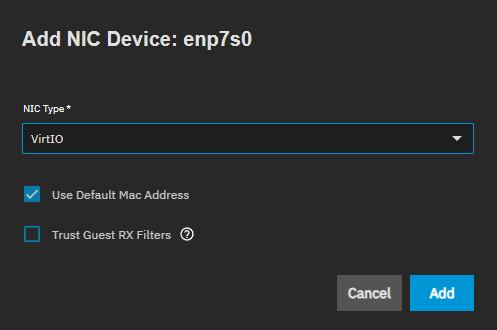
To edit or delete an existing NIC:
Stop the container if it is running. Click stop_circle to stop the container.
Click the icon next to the NIC.
Select Edit to modify the NIC settings, or Delete to remove the NIC.
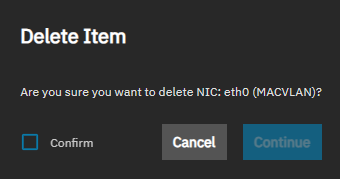
Click Confirm to activate the Continue button. Click Continue to start the delete operation.
After selecting the container row in the table to populate the Details for Container cards, locate the Tools card. You can open a shell session directly from this card.
Click Shell to open a Container Shell session for command-line interaction with the container.