



TrueNAS Early Release Documentation
This content follows TrueNAS 27 releases.
Use the Product and Version selectors above to view content specific to a stable software release.
Creating and Managing Virtual Machines
19 minute read.
TrueNAS has built-in virtualization capabilities that allow running multiple operating systems on a single system, maximizing hardware utilization, and consolidating workloads.
A virtual machine (VM) is a software-based computer that runs inside your TrueNAS system, and appears as a separate physical machine to the operating system installed within it. VMs use virtualized hardware components, including, network interfaces, storage volumes, graphics adapters, and other devices, providing complete isolation between different operating systems and applications.
VMs offer stronger isolation than containers but require more system resources, making them ideal for running full operating systems, legacy applications, or services that need dedicated environments.
Before creating a VM:
- Obtain an installer
.iso or image file for the OS you intend to install - Create a zvol on a storage pool that is available for both the virtual disk and the OS install file.
If the VM needs to access local NAS storage, you must create a network bridge to allow communication. See Accessing TrueNAS Storage from a VM below for more information.
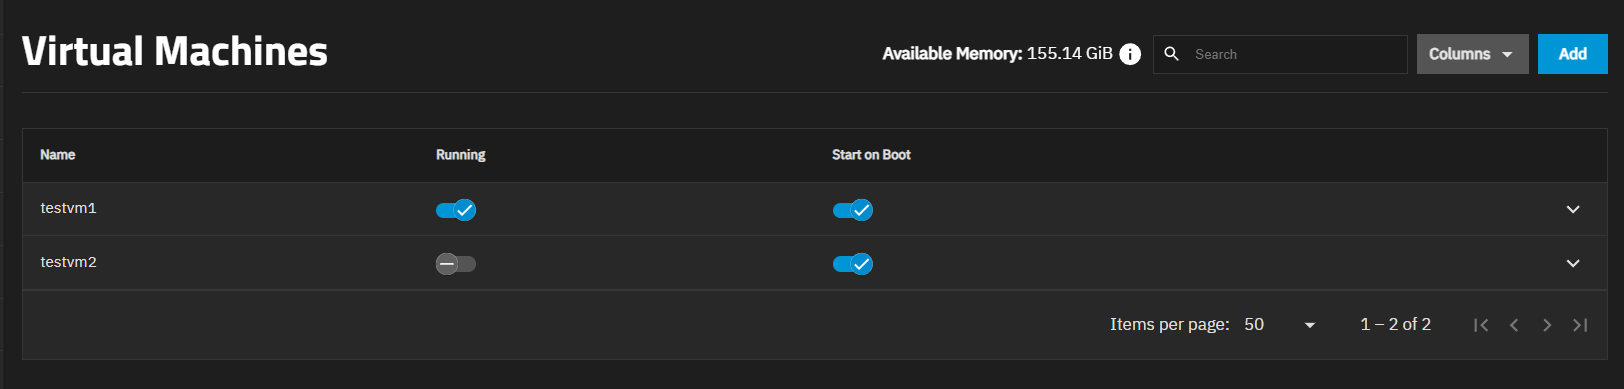
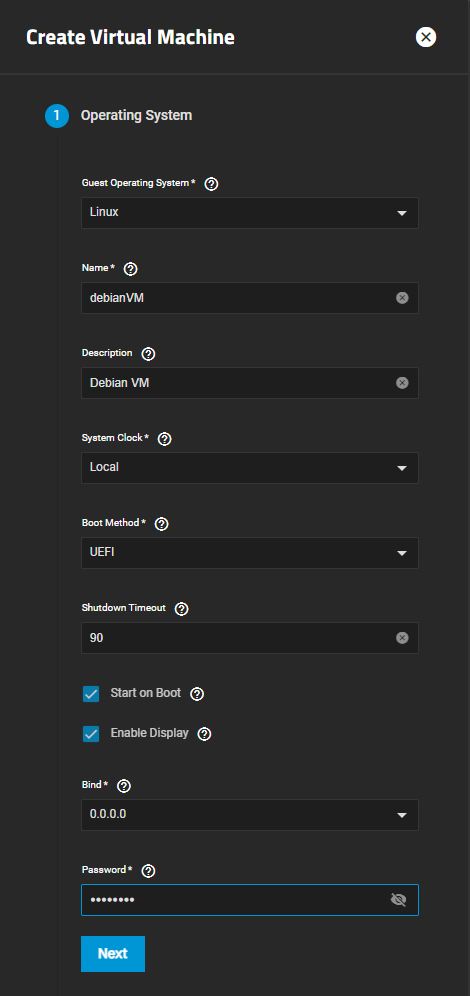
To create a new VM, go to Virtual Machines and click Add to open the Create Virtual Machine wizard. If you have not yet added a virtual machine to your system, clicking Add Virtual Machines opens the same wizard.
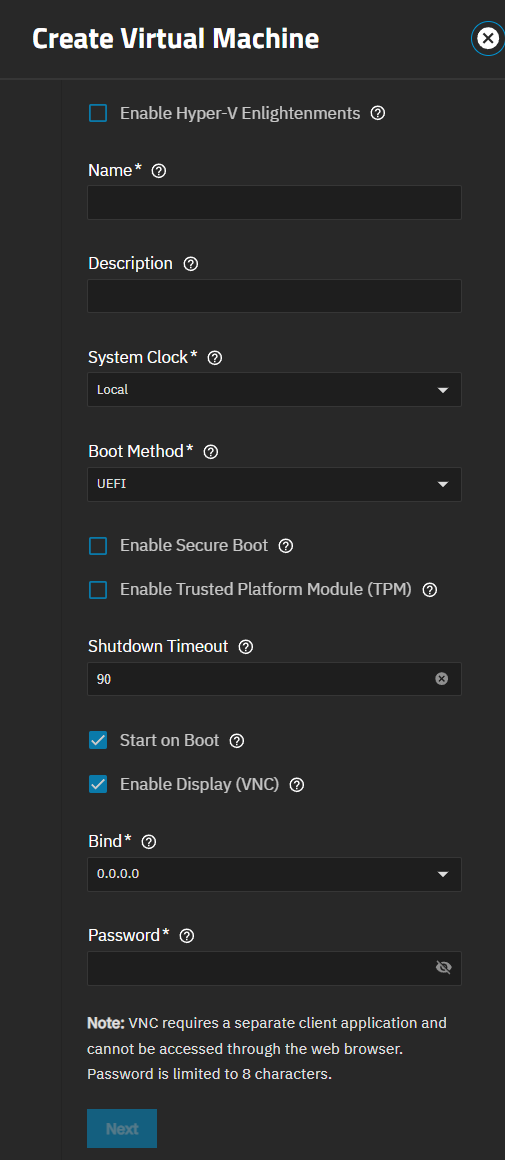
Configure the Operating System settings.
a. Select the operating system for the VM from the Guest Operating System dropdown list.
Compare the recommended specifications for the guest operating system with your available host system resources when allocating virtual CPUs, cores, threads, and memory size.
b. Enter a name for the VM.
c. (Optional) Enter a description for the VM. This can be any short text string describing how the VM is used or which operating system is configured.
d. (Optional) Change the default settings in System Clock and Boot Method to suit your use case. Select UTC as the VM system time from the System Clock dropdown if you do not want to use the default Local setting. Select UEFI from the Boot Method dropdown, unless using an older OS that requires Legacy BIOS.
e. (Optional) Select Enable Secure Boot to enable cryptographic verification of boot loaders, operating system kernels, and drivers during VM startup. This security feature prevents unauthorized or malicious code from running during the boot process by checking digital signatures against trusted certificates. Secure Boot is required for Windows 11 and some Linux distributions, and can be optional or unsupported for older operating systems. Secure boot is only available from the VM creation wizard.
f. (Optional) Select Enable Trusted Platform Module (TPM) to provide a virtual TPM 2.0 device for the VM. TPM provides hardware-based security functions, including secure key storage, cryptographic operations, and platform attestation. This is required for Windows 11 and enhances security for other operating systems that support TPM.
g. (Optional) Select Start on Boot to start the VM after the system is restarted or boots up.
h. (Optional) Select Enable Display (VNC) to enable a Virtual Network Computing (VNC) remote connection for the VM. Enable Display (VNC) shows the Bind and Password fields.
i. Select the IP address or option to use in Bind. Shows if you select Enable Display. The Bind and Password fields display. If it is selected, to change the default IP address to use a specific address as the display network interface; otherwise, leave it set to 0.0.0.0. The Bind list populates with any existing logical interfaces, such as static routes, configured on the system. You cannot edit the Bind setting after saving the VM settings.
j. Enter a password to secure access to the virtual display in Password. The Password field shows if you select Enable Display. The login screen for the display shows a credential entry field for this password.
Click Next.
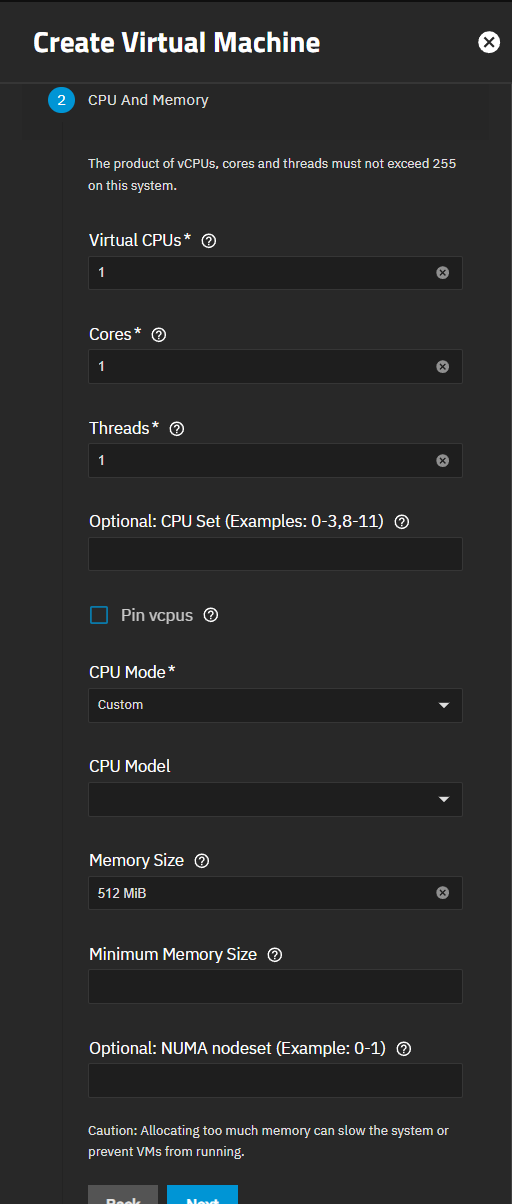
Enter the CPU and Memory settings for your VM.
When the Guest Operating System is set to Windows, Virtual CPUs shows the default value of 2. The VM operating system might have operational or licensing restrictions on the number of CPUs.
Do not allocate too much memory to a VM. Activating a VM with all available memory allocated to it can slow the host system or prevent other VMs from starting.
CPU Mode defaults to Custom, which keeps VM behavior predictable no matter what hardware it runs on. This includes a future hardware upgrade or a restore to a different system. Switch to Host Model or Host Passthrough only if this VM has CPU-intensive requirements that justify trading that portability for performance closer to the host CPU.
Use Memory Size and Minimum Memory Size to specify how much RAM to dedicate to this VM. To dedicate a fixed amount of RAM, enter a value (minimum 256 MiB) in the Memory Size field and leave Minimum Memory Size empty.
To allow for memory usage flexibility (sometimes called ballooning), define a specific value in the Minimum Memory Size field and a larger value in Memory Size. The VM uses the Minimum Memory Size for normal operations but can dynamically allocate up to the defined Memory Size value in situations where the VM requires additional memory. Reviewing available memory from within the VM typically shows the Minimum Memory Size.
Click Next.
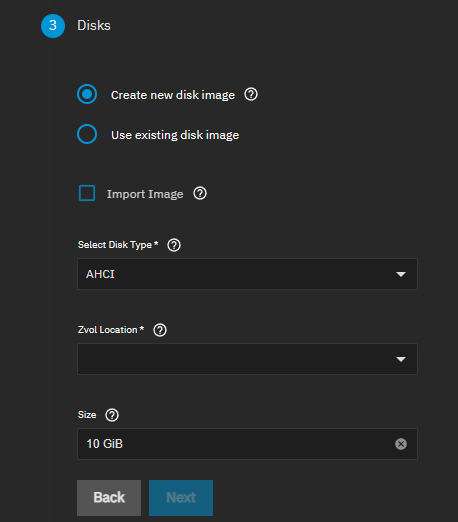
Configure Disks settings.
Select Create new disk image to create a new zvol on an existing dataset.
Select Use existing disk image to use an existing zvol for the VM.
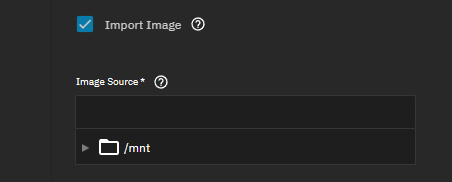
(Optional) Select Import Image to import an existing disk image file and convert it to a zvol for use by the VM.
When you select Import Image, browse to and select the source disk image file in Image Source. The system automatically detects the image format (QCOW2, QED, RAW, VDI, VHDX, or VMDK). Select the destination dataset in Zvol Location where the system creates the converted zvol.
Select either AHCI or VirtIO from the Select Disk Type dropdown list. We recommend using AHCI for Windows VMs.
When creating a new disk image, select the location for the new zvol from the Zvol Location dropdown list and enter a value in Size (Examples: 500KiB, 500M, and 2TB) to indicate the amount of space to allocate for the new zvol.
Click Next.
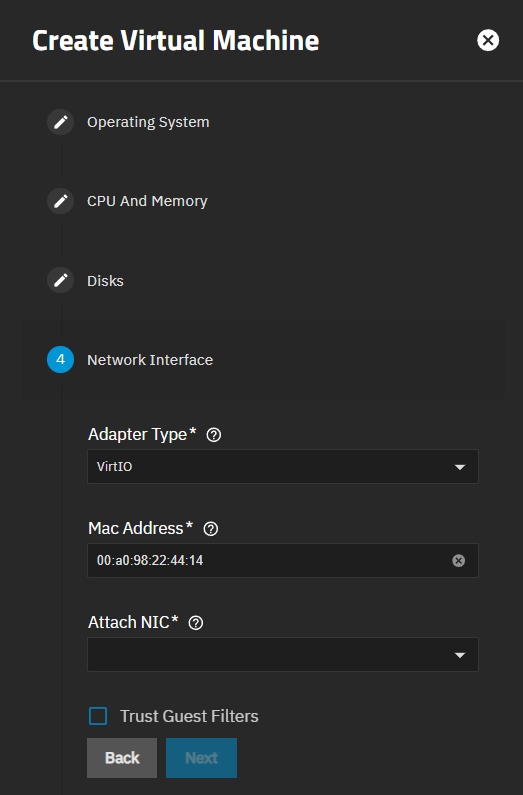
Configure Network Interface settings.
Select the network interface type from the Adapter Type dropdown list. Select Intel e82585 (e1000) as it offers a higher level of compatibility with most operating systems.
Select VirtIO if the guest operating system supports para-virtualized network drivers. The VirtIO network interface requires a guest OS that supports VirtIO para-virtualized network drivers.
Select the network interface card to use from the Attach NIC dropdown list. If the VM needs to access local NAS storage, attach a network bridge interface.
Click Next.
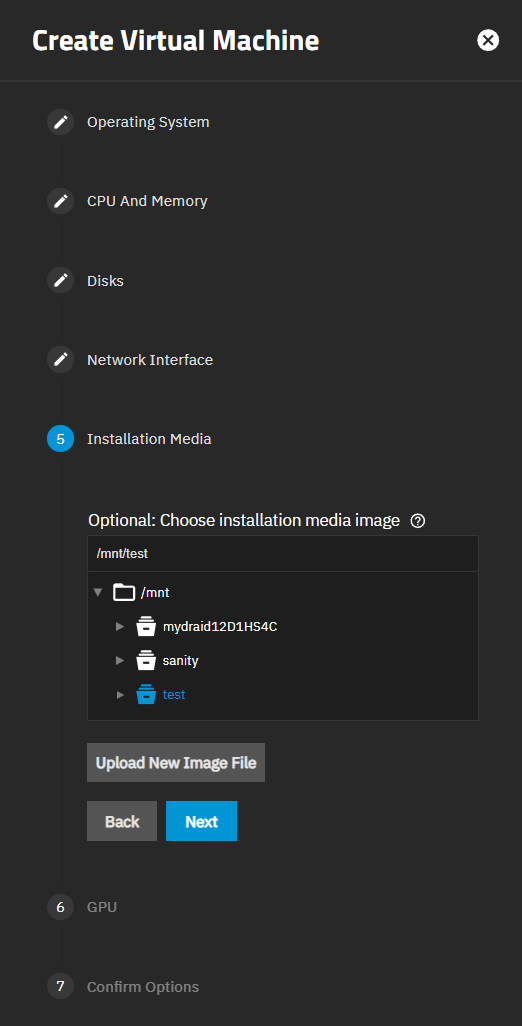
Configure Installation Media settings to upload the operating system you selected in step 1.
You can create the VM without an OS installed, then edit the VM to add it later. To add the installation media, type the path or browse to select the location of the image file, and then select it.
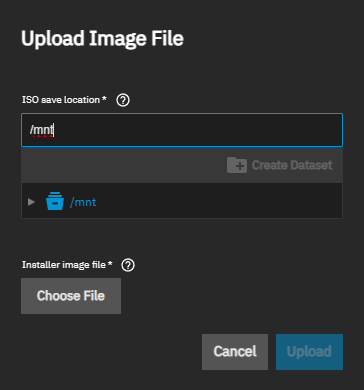
To upload an
iso , click Upload New Image File. Enter the path or browse to select the location of the file.Click Upload to begin the upload process. After the upload finishes, click Next.
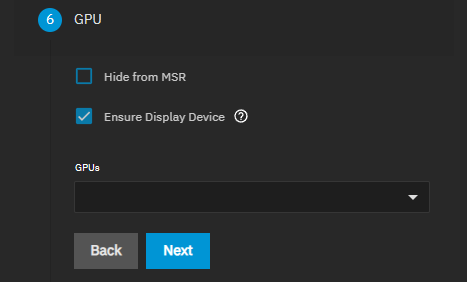
Specify GPU settings. When available, use a GPU previously isolated for VM use.
TrueNAS does not have a list of approved GPUs at this time, but TrueNAS does support various NVIDIA, Intel, and AMD GPUs.Confirm your VM settings, then click Save.
Using the Create Virtual Machine wizard configures at least one disk and NIC, and optionally a CD-ROM and display as part of the process, but you can add more devices to suit your use case. Go to Virtual Machines, then click anywhere on a VM entry to expand it and show the options for the VM.
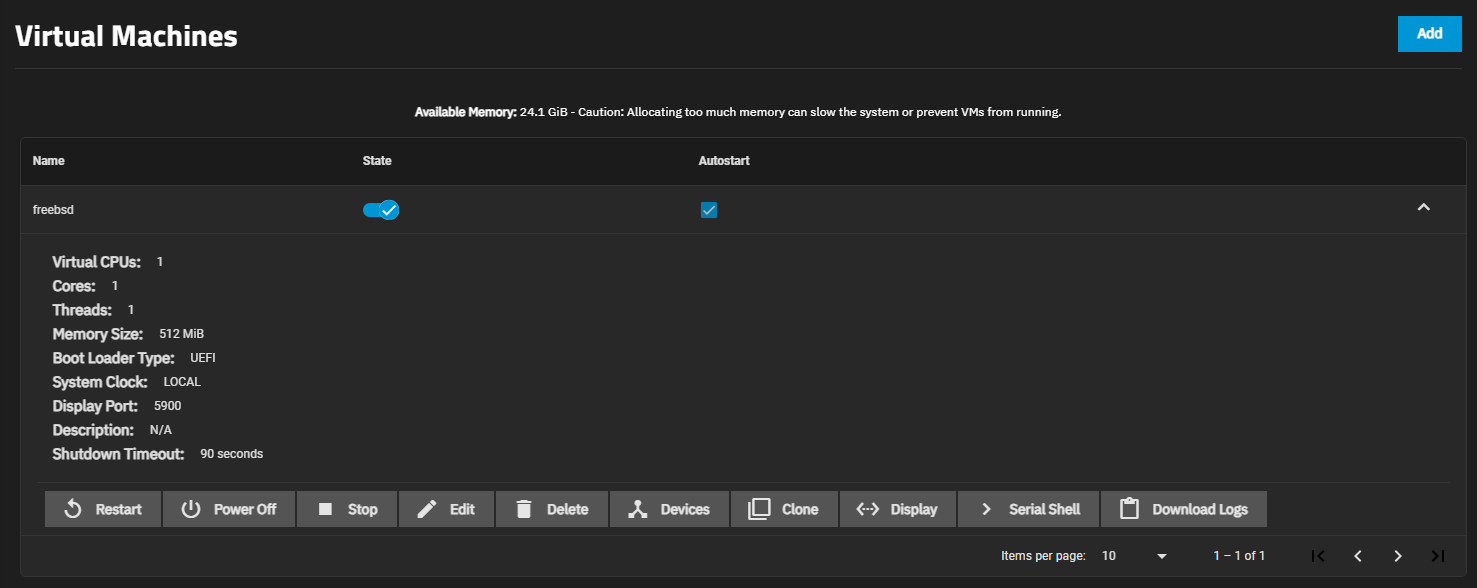
The VM options change when the VM is running.
Click device_hub Devices to open the Devices screen for that VM. Click the icon at the right of each listed device to see device options.
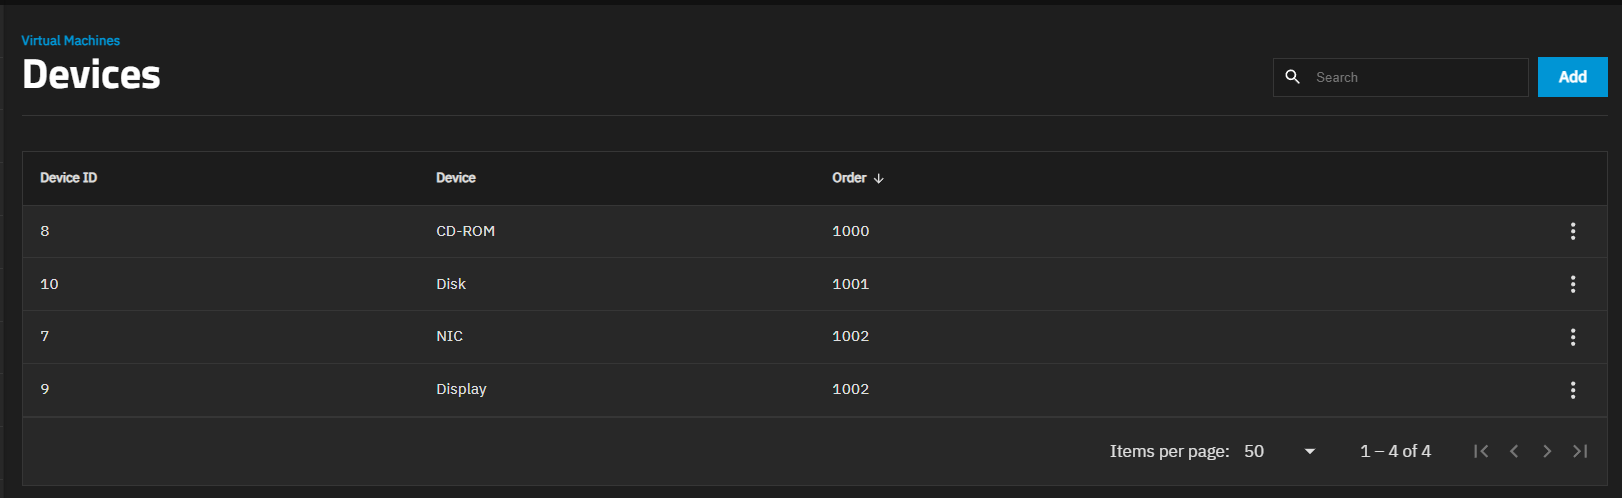
The devices for the VM display as a list.
Device notes:
- A virtual machine attempts to boot from devices according to the Device Order, starting with 1000, then ascending.
- A CD-ROM device allows booting a VM from a CD-ROM image like an installation CD. The CD image must be available in the system storage.
- A Display device provides remote clients with a way to connect to VM display sessions.
See Adding and Managing VM Devices for more information.
After creating the VM and configuring devices for it, click on the VM to expand it and show the options to manage the VM.
An active VM displays options for settings_ethernet Display and keyboard_arrow_right Serial Shell connections.
When a display device is configured, remote clients can connect to VM display sessions.
If the display connection screen appears distorted, try adjusting the display device resolution.
Use the Running toggle or click stop Stop to follow a standard procedure to do a clean shutdown of the running VM. Click power_settings_new Power Off to halt and deactivate the VM, which is similar to unplugging a computer.
If the VM does not have a guest OS installed, the VM Running toggle and stop Stop button might not function as expected. The Running toggle and stop Stop buttons send an ACPI power down command to the VM operating system, but since an OS is not installed, these commands time out. Use the Power Off button instead.
To delete a VM, first stop it if it is running, then click delete Delete on the expanded VM details screen.
The Delete Virtual Machine dialog opens with options to control what data is removed.
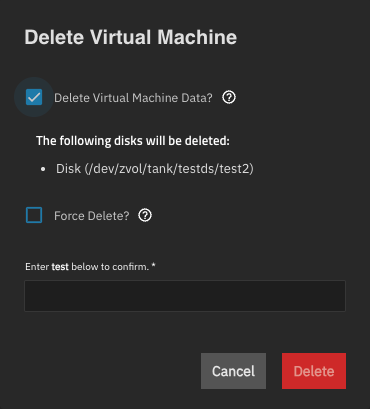
Delete Virtual Machine Data removes the zvols and data associated with the VM. When selected, the dialog displays a list of disk and raw file devices to delete.
Deleting a VM with Delete Virtual Machine Data selected results in permanent data loss if the data is not backed up. Do not select this option if you want to keep the VM zvols intact for use with another VM or for data recovery.
Force Delete ignores the VM status during the delete operation. Only select this if the VM is in an undefined state and cannot be stopped normally.
Enter the VM name in the confirmation field to enable the Delete button, then click Delete to remove the VM.
After configuring the VM in TrueNAS and an OS
Some operating systems can require specific settings to function properly in a virtual machine. For example, plain Debian can require advanced partitioning when installing the OS. Refer to the documentation for your chosen operating system for tips and configuration instructions.
Upload the Debian Click Virtual Machines, then ADD to use the VM wizard.
Configure settings as needed. After creating the VM, start it. Click on the VM to expand it, then use the **Running** toggle to start it. Click Display to open a SPICE interface and see the Debian Graphical Installation screens. Press Enter to start the Debian Graphical Install. a. Enter your localization settings for Language, Location, and Keymap. b. Debian automatically configures networking and assigns an IP address with DHCP. c. Enter a name in Hostname. d. Enter a Domain name. e. Enter the root password and re-enter the root password. f. Enter a name in New User. g. Select the username for your account or accept the generated name. h. Enter and re-enter the password for the user account. j. Choose the time zone, Eastern in this case. Detect and partition disks. a. Select Guided - use entire disk to partition. b. Select the available disk. c. Select All files in one partition (recommended for new users). d. Select Finish partitioning and write changes to disk. e. Select Yes to Write the changes to disks?. Install the base system: a. Select No to the question Scan extra installation media. b. Select Yes when asked Continue without a network mirror. Install software packages: a. Select No when asked Participate in the package usage survey. b. Select Standard system utilities. c. Click Continue when the installation finishes. After the Debian installation finishes, close the display window. Remove the device or edit the device order.
In the expanded section for the VM, click Power Off to stop the new VM. a. Click Devices. b. Remove the CD-ROM device containing the install media or edit the device order to boot from the Disk device. To remove the CD-ROM from the devices, click the and select Delete.
Click Delete Device. To edit the device boot order, click the and select Edit.
Change the CD-ROM Device Order to a value greater than that of the existing Disk device, such as 1005.
Click Save. Return to the Virtual Machines screen and expand the new VM again. Click Start, then click Display.Installing Debian OS Example
Configure VM network settings during or after installation of the guest OS. To communicate with a VM from other parts of your local network, use the IP address configured or assigned by DHCP within the VM.
To confirm network connectivity, send a ping to and from the VM and other nodes on your local network.
By default, VMs are unable to communicate directly with the host NAS. If you want to access your TrueNAS directories from a VM, for example, to connect to a TrueNAS data share, you have multiple options.
If your system has more than one physical interface, you can assign your VMs to a NIC other than the primary one your TrueNAS server uses. This method makes communication more flexible but does not offer the potential speed of a bridge.
If your system has only one physical interface, create a bridge interface for the VM to use. Stop all existing apps, VMs, and services using the current interface, edit the interface and VMs, create the bridge, and add the bridge to the VM device. See Accessing NAS from VM for more information.
Legacy VMs created using the Instances screen in 25.04.0 and 25.04.1 remained on the Containers screen through 25.10. TrueNAS 26 removes them from the Containers screen entirely. No migration tool, wizard, or notification exists for them. Containers migrate automatically during the upgrade. These legacy VMs do not.
TrueNAS does not delete a legacy VM disk during the upgrade. The disk remains on the pool, but TrueNAS does not preserve the VM configuration, UEFI variables, or Trusted Platform Module (TPM) state. You re-create the VM configuration by hand and reattach the disk to it. A guest operating system whose disk is unlocked by a TPM-bound key does not start after migration, because the original TPM state does not carry over.
Complete the preparation steps before you upgrade, while the system still runs TrueNAS 25.10. None of the preparation steps are available after upgrading to TrueNAS 26. See Preparing to Upgrade to TrueNAS 26 in the TrueNAS 25.10 documentation.
Complete this procedure after upgrading to TrueNAS 26, using the VM settings and zvol information you recorded while running TrueNAS 25.10.
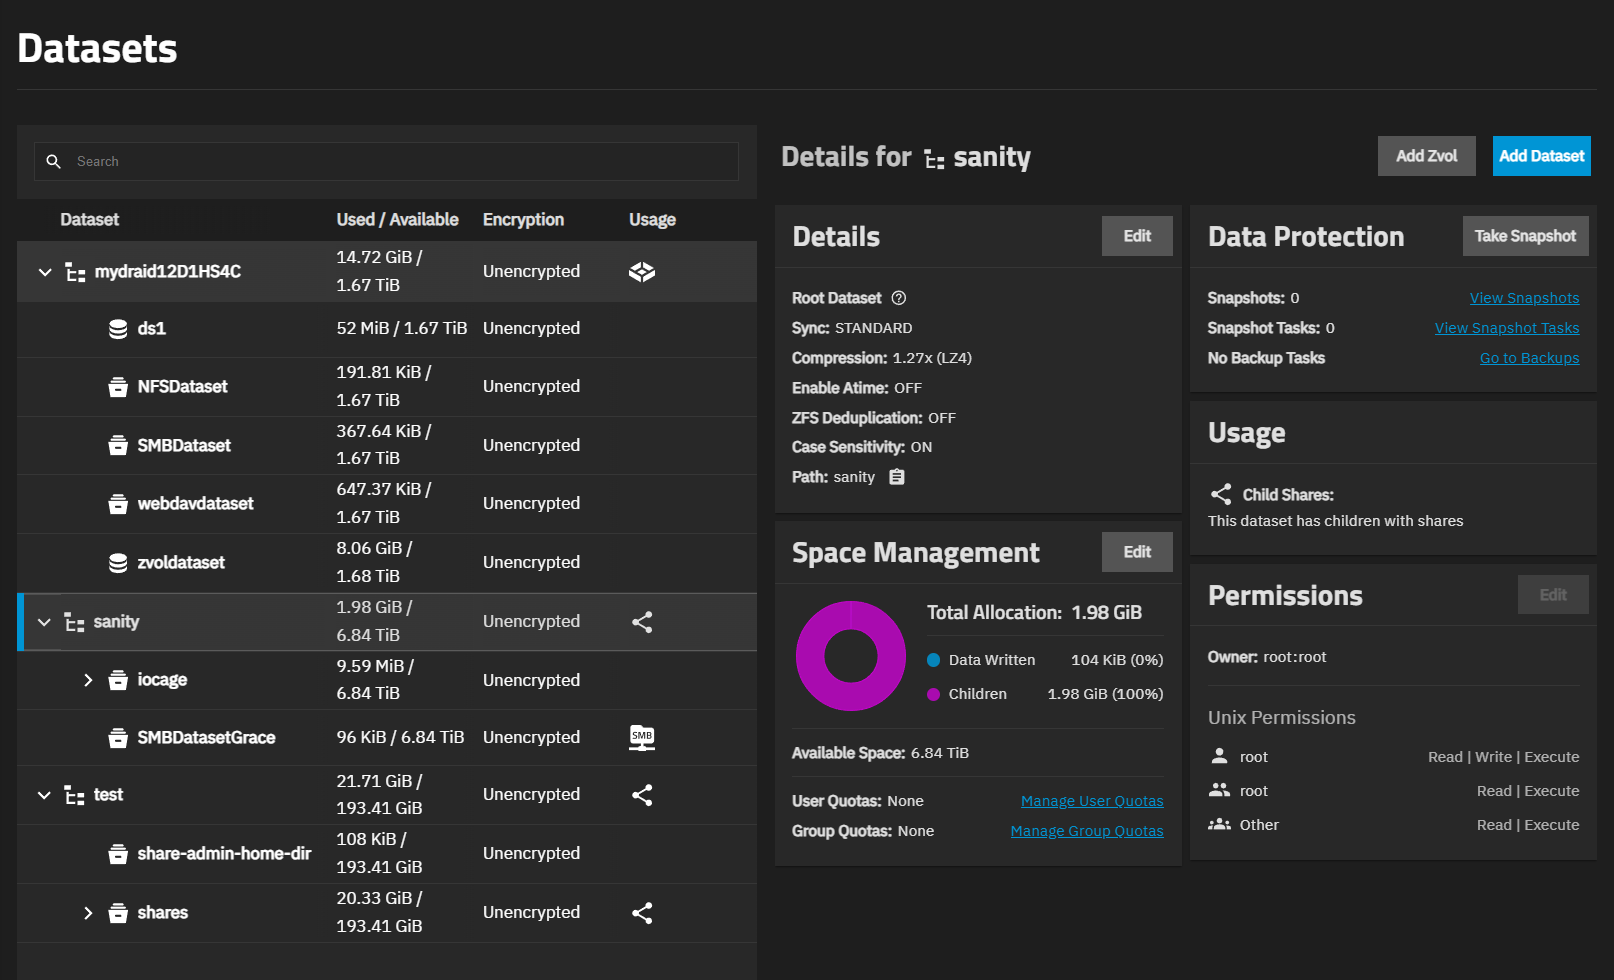
Go to Datasets and create or identify a standard dataset to hold the migrated disk, for example tank/vms.
The rename in step 3 fails if the destination dataset does not exist.
Go to System > Shell and list the volumes on the pool.
sudo zfs list -t volume -r -o name,volsize,used,origin poolnameWhere poolname is the name of the pool that contains the legacy VM disks.
An entry under poolname
/.ix-virt/virtual-machines/ with a.block extension and a USED value close to its VOLSIZE is a VM root disk. These zvols are sparse, so USED reflects only what the guest operating system wrote to the disk. Use VOLSIZE to match a disk against the sizes you recorded while running TrueNAS 25.10.A
.block entry with a USED value of about 56K is an empty placeholder, not the VM disk. This happens for a VM whose disk was imported from an existing image file rather than created blank. For this VM, the actual disk is a default_-prefixed entry under poolname/.ix-virt/custom/ with a USED value close to its VOLSIZE. A custom volume can also belong to a container rather than a VM. Confirm which instance a volume came from before you move it.Move each VM disk into the dataset from step 1.
sudo zfs rename tank/.ix-virt/virtual-machines/TrueNAS.block tank/vms/TrueNASWhere tank is the pool name, TrueNAS.block is the name of the VM disk from step 2, and tank/vms/TrueNAS is the destination path in the dataset from step 1.
Then promote the disk if the ORIGIN column showed a snapshot in step 2.
sudo zfs promote tank/vms/TrueNASWhere tank/vms/TrueNAS is the disk you just renamed.
A renamed disk with an ORIGIN value is still a clone of an image snapshot inside
.ix-virt until you promote it. Promoting the disk removes that dependency.Do not rename a disk after you attach it to a VM in step six. The VM stores the full zvol path, and renaming the zvol leaves the VM pointing at a path that no longer exists.Give the disk a device node.
sudo zfs set volmode=default tank/vms/TrueNASWhere tank/vms/TrueNAS is the disk you moved in step 3.
Legacy VM disks are created with
volmode=none, which hides them from the rest of the system. Without this step, the disk does not appear in step 6 and the VM cannot start.(Recommended) Set the disk cache properties to match a natively-created VM zvol.
sudo zfs set primarycache=all secondarycache=all tank/vms/TrueNASWhere tank/vms/TrueNAS is the disk you moved in step 3.
Legacy VM disks carry
primarycache=metadataandsecondarycache=metadata. These settings do not prevent the VM from working, but setting them toallmatches the zvol settings TrueNAS uses when you create a VM disk directly.Go to Virtual Machines, click Add, and enter the CPU, memory, and guest operating system settings you recorded while running TrueNAS 25.10.
If you did not record these values, select settings that match the original VM as closely as possible. Set Boot Method to UEFI. Legacy VMs always used UEFI, and the migrated disk does not start under Legacy BIOS.
On the Disks screen, select Use existing disk image, then select the disk you moved in step 3 from Select Existing Zvol.
Complete the wizard.
Set the device order for the CD-ROM device, if you attached installation media to the new VM. Click on the VM to expand it, click Devices, edit the disk device, and set the Device Order of the disk device to a value below the Device Order of the CD-ROM device.
This makes the VM start from the migrated disk instead of the CD-ROM device.
Click on the VM to expand it, then use the Running toggle to start it.
Confirm the VM starts and has network access. TrueNAS does not carry over the original UEFI variables, so a VM that stops at the UEFI shell needs the boot entry selected from the firmware boot menu once.