



TrueNAS Early Release Documentation
This content follows TrueNAS 27 releases.
Use the Product and Version selectors above to view content specific to a stable software release.
Managing Self-Encrypting Drives (SED)
6 minute read.
UI management of Self-Encrypting Drives (SED) is an Enterprise-licensed feature in TrueNAS 25.04 (and later) that requires an active SED license. SED configuration options are not visible in the TrueNAS Community Edition. Community users wishing to implement SEDs can continue to do so using the command line sedutil-cli utility.
- Legacy interface for older ATA devices (Not recommended for security-critical environments!)
- TCG Opal 1 legacy specification
- TCG Opal 2 standard for newer consumer-grade devices
- TCG Opalite, which is a reduced form of OPAL 2
- TCG Pyrite Version 1 and Version 2 are similar to Opalite, but with hardware encryption removed
Pyrite provides a logical equivalent of the legacy ATA security for non-ATA devices. Only the drive firmware protects the device.Pyrite Version 1 SEDs do not have PSID support and can become unusable if the password is lost.
- TCG Enterprise is designed for systems with many data disks. These SEDs cannot unlock before the operating system boots.
- TCG Ruby 1.0
See this Trusted Computing Group and NVM Express® joint white paper for more details about these specifications.
TrueNAS implements the security capabilities of sedutil-cli for TCG-compliant devices.
You can configure a SED before or after assigning the device to a pool.
By default, SEDs are not locked until the administrator takes ownership of them. Ownership is taken by explicitly configuring a global or per-device password in the web interface and adding the password to the SEDs. Adding SED passwords in the web interface also allows TrueNAS to automatically unlock SEDs on boot.
A password-protected SED protects the data stored on the device when the device is physically removed from the system. This allows secure disposal of the device without having to first wipe the contents. Repurposing a SED on another system requires the SED password or a full cryptographic erase with PSID revert.
TrueNAS supports setting a global password for all detected SEDs or setting individual passwords for each SED. Using a global password for all SEDs is strongly recommended to simplify deployment and avoid maintaining separate passwords for each SED.
SED passwords are used during initial setup and for unlocking SEDs.
A system configuration backup includes SED passwords only when you download the configuration file with the Export Password Secret Seed option selected. For a full list of what a configuration backup includes, see Configuration Backup Contents.
To configure global SED settings, go to the System > Advanced Settings screen and locate the Self-Encrypting Drive card.
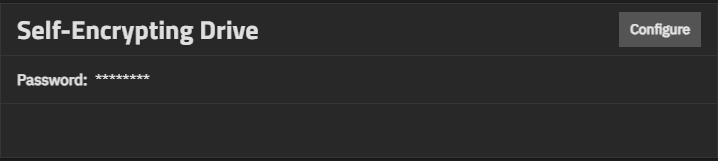
Click Configure to open the Self-Encrypting Drive configuration screen.
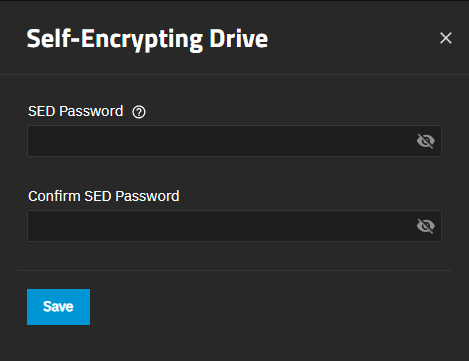
Enter the global SED password in SED Password and in Confirm SED Password.
Click Save.
Remember SED passwords! If you lose the SED password, you cannot unlock SEDs or access their data. After configuring or modifying SED passwords, always record and store them in a secure location!
If your system is equipped with and licensed for SEDs, the Pool Creation Wizard shows SED encryption settings. Selecting the Self Encryption Drives (SED) radio button sets up SED global encryption for SED disks in the pool and shows the Global SED Password and Confirm SED Password fields.
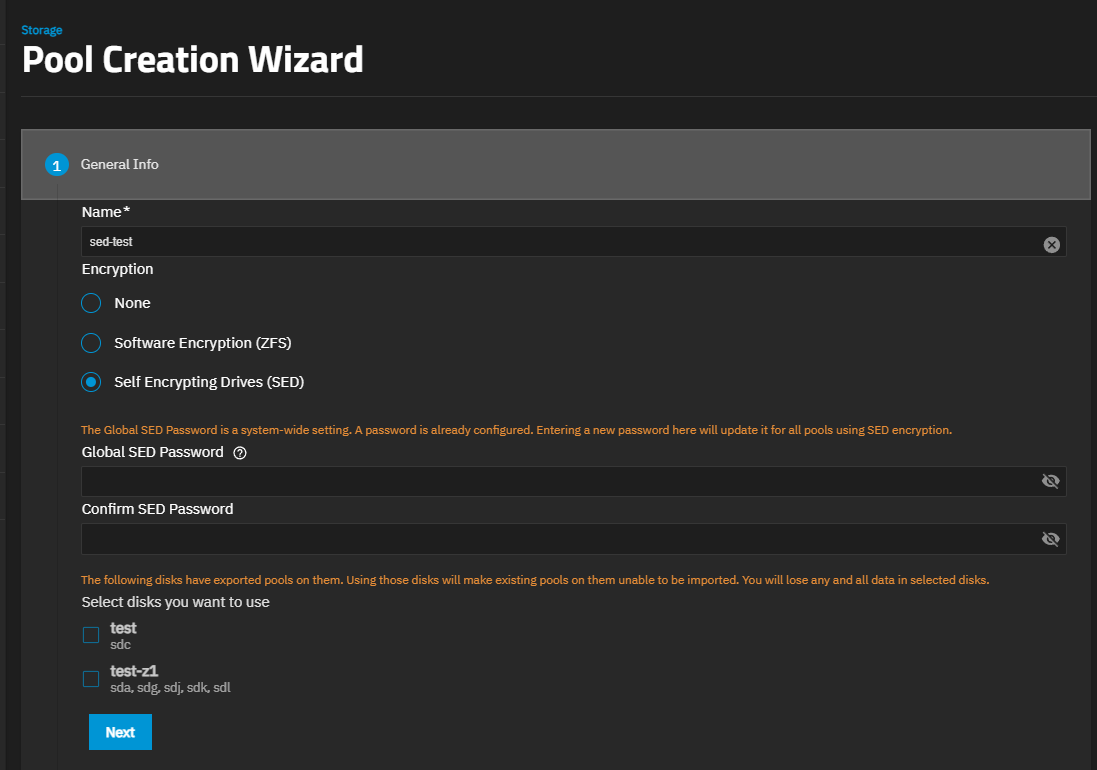
The Global SED Password is a system-wide setting. A message shows above this field indicating if a password is already configured, and that entering a new password updates it for all pools using SED encryption.
If the global SED password is already configured, you do not have to enter and confirm a new password on this screen. Entering and confirming a global SED password here resets the global SED password applied to all SED disks in all pools in the TrueNAS system.
To configure individual, per-disk SED passwords, go to Storage and click Disks in the top right of the screen to open the Disks screen. Click the row or for a confirmed SED to expand the row. Click Edit to open the Edit Disk screen.
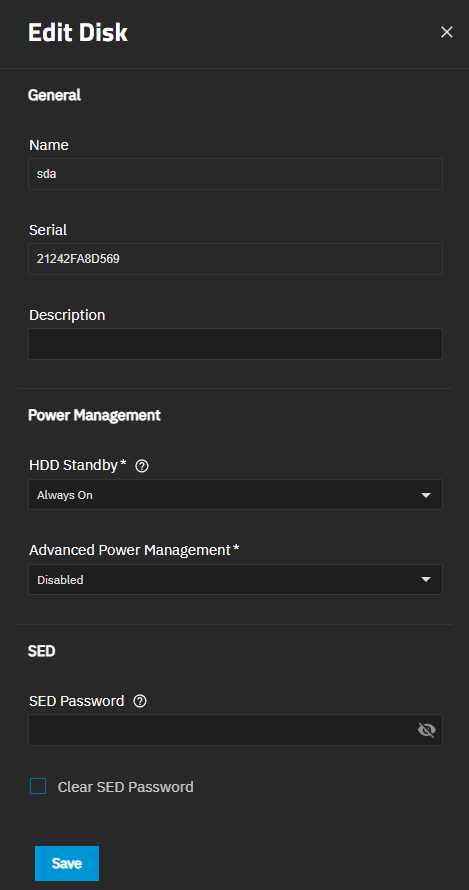
Enter the password in the SED Password to assign an individual SED password. If both an individual and global SED password are present, the individual SED password overrides the global password for the disk it is configured on.
Select Clear SED Password to clear the existing password, and click Save. Reopen the Edit Disk screen to enter and save a new password.
Repeat this process for each SED and any SEDs added to the system in the future.
When SED devices are detected during system boot, TrueNAS checks for configured global and device-specific passwords.
Unlocking SEDs allows a pool to contain a mix of SED and non-SED devices. Devices with individual passwords are unlocked with their password. Devices without a device-specific password are unlocked using the global password.
Improper use of thesedutil-clican be destructive to data and passwords. Keep backups and use with caution.
Additional SED management options are available using a shell session and the sedutil-cli utility.
Enter sedutil-cli -h or see the sedutil-cli.8 man page for more information.
Importing SED Drives
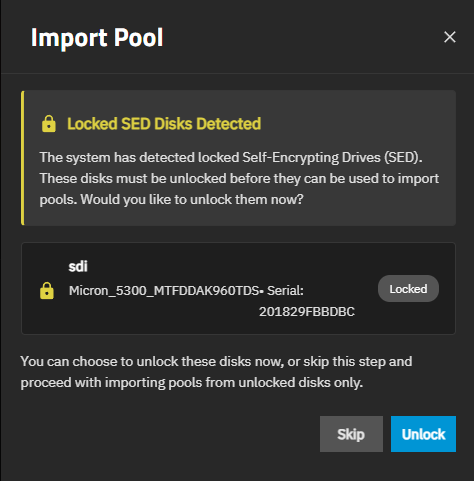
When importing SED drives into a pool, if TrueNAS finds SED-locked disks, it stops and shows information about locked disks and provides the option to unlock or skip unlocking and proceeding with the import. If skipped, the disks remain locked and inaccessible until they are unlocked with the global SED password or any individual SED password applied to the disk.
Use the individual disk SED password when the disk is locked with an individual password; otherwise, use the global SED password to unlock it.
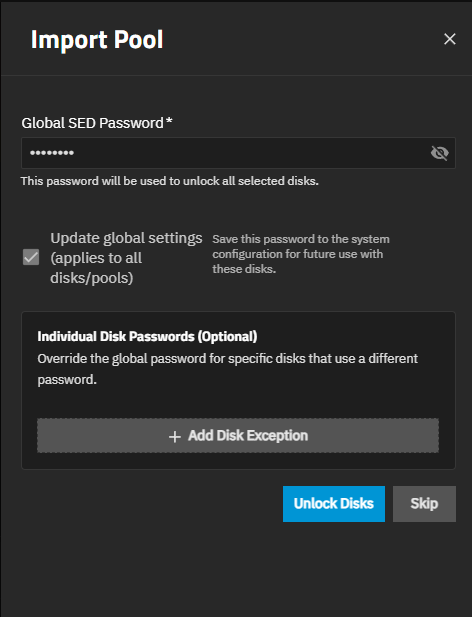
Unlock the Import Pool screen initiates the unlock process for the SED disks to make the data on them accessible after import, and it shows the Global SED Password and Individual Disk Passwords (Optional) fields, and the Add Disk Exceptions option.
The Skip on the unlocked SED disk screen where you enter the individual disk SED passwords allows you to exit out of the unlock SED process and proceed with the pool import. To proceed with unlocking the disks, click Unlock Disks.
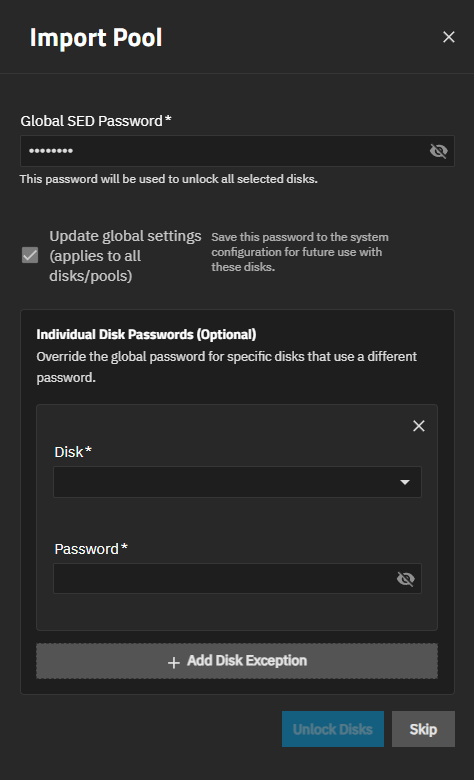
Add Disk Exception expands to show the Disk Name and Password fields that, when entered, overrides the global SED password for the added disk(s). The x icon is the Remove disk exception function. Use it to remove the disk exception fields and activate the Unlock Disks button.
The Update global settings (applies to all disks/pools) option is selected by default. This indicates the password is saved to the system configuration for future use with these disks.