






TrueNAS Stable Version Documentation
This content follows TrueNAS 25.10 (Goldeye) releases.
Use the Product and Version selectors above to view content specific to a different software release.
Managing Certificates
4 minute read.
The Certificates screen shows information for certificates, certificate signing requests (CSRs), and ACME DNS-authenticators configured on the system, and provides the ability to import or edit them. TrueNAS comes equipped with an internal, self-signed certificate that enables encrypted access to the web interface, but users can make custom certificates for authentication and validation while sharing data.
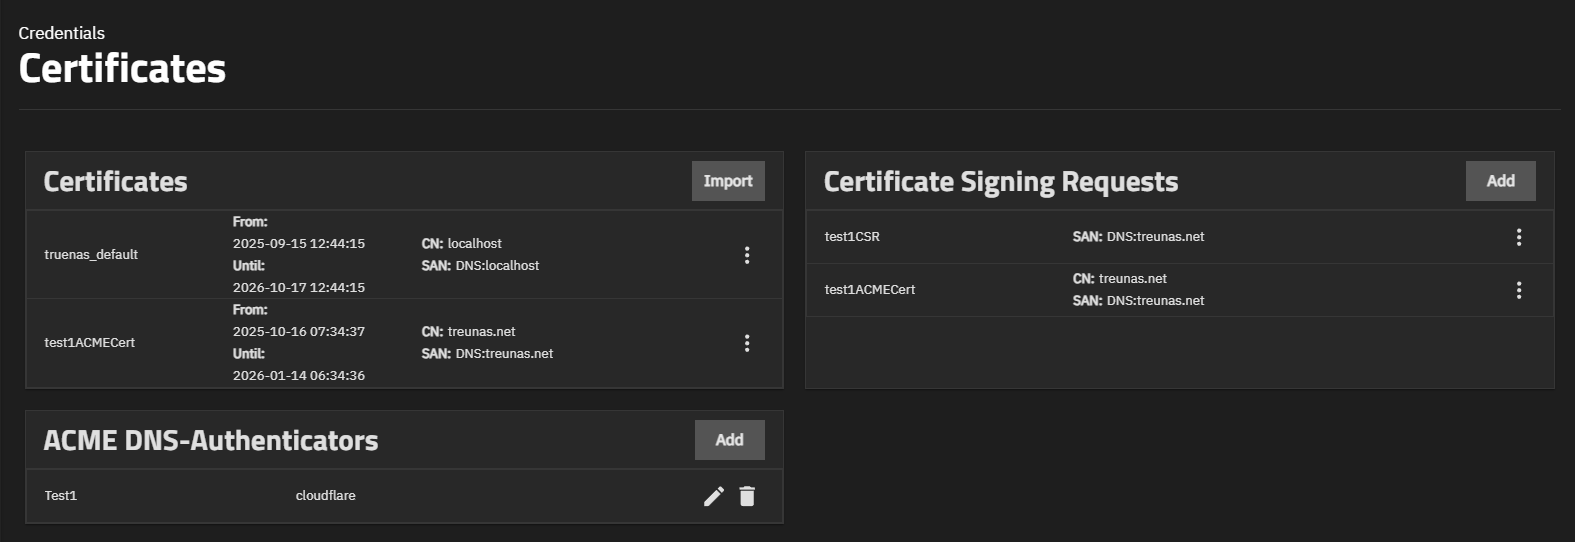
The TrueNAS Connect service automatically creates a default truenas_connect_ certificate after registering your TrueNAS system in the TrueNAS Connect service. The certificate shows in the Certificates widget on the Credentials > Certificates screen.
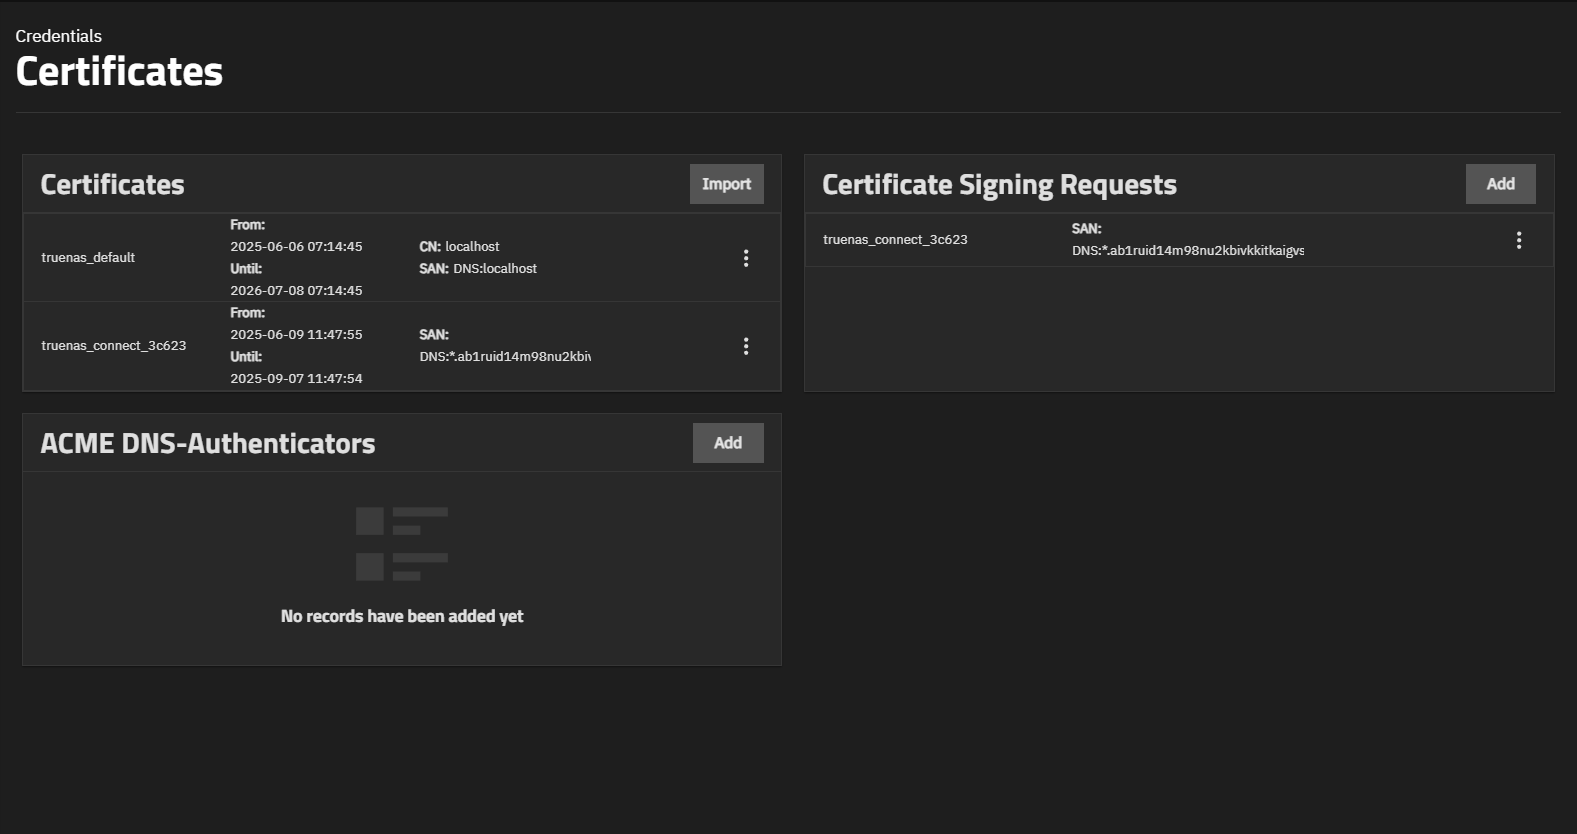
This certificate provides secure SSL access between the TrueNAS server and the TrueNAS Connect service. If not listed on the Certificates screen, choose the truenas_default certificate. For apps where certificates are used, you should see and be able to select the TNC certificate and get a full secure connection for the apps.
By default, TrueNAS comes equipped with an internal, self-signed certificate that enables encrypted access to the web interface, but users can import and edit existing certificates.
To add a certificate to TrueNAS, click Import on the Certificates widget to open the Import Certificates screen.
First, enter a name as a certificate identifier. A name can include the dash (-) or underscore (_) special characters.
Select Add To Trusted Store if you want to add the imported certificate to the trusted store in TrueNAS.
Copy/paste the certificate into the Certificate field, and the private key part of the certificate into the Private Key field.
Enter or copy/paste the password associated with the private key into the Password and Confirm Password fields.
Click Import to add the certificate to TrueNAS.
TrueNAS allows you to rename a certificate or to add it to the TrueNAS trusted store.
Click on the icon, then select Edit on the dropdown list. The Edit Certificate screen for that certificate opens.
Enter a new name for the certificate.
Select Add To Trusted Store to add the certificate to the TrueNAS trusted store.
Click Save.
TrueNAS uses a self-signed default certificate (truenas_default) to encrypt access to the web interface. Browsers show a warning for self-signed certificates because no external authority verifies them. This warning becomes an error after the certificate expires.
Check the Until and Lifetime fields on the Edit Certificate screen for the current GUI certificate before it expires. See Certificates Screens for details. TrueNAS automatically renews an unmodified default certificate shortly before it expires. An expired truenas_default certificate usually means the system was offline through the renewal window, or the certificate subject, such as the Common Name or SAN, was changed from its default values. Renaming the certificate or adding it to the trusted store does not affect automatic renewal.
TrueNAS 25.10 removed the internal certificate authority (CA) functionality that could sign a new certificate for you. Replace an expired certificate using one of the following two options, then set the new certificate as the GUI certificate.
Create a CSR in TrueNAS, then have it signed by a trusted CA. Options include free public CAs like Let’s Encrypt and ZeroSSL, paid commercial CAs like DigiCert and Sectigo, and internal CAs like Active Directory Certificate Services or step-ca. Public CAs validate domain ownership and require a domain name reachable from the internet. Internal CAs don’t have that requirement, but need to already exist in your environment. Import the signed result back into TrueNAS as a certificate.
See Managing Certificate Signing Requests to create the CSR, and Adding Certificates to import the signed certificate.
For a domain-validated certificate through Let’s Encrypt, TrueNAS can complete the CSR, signing, and renewal steps automatically using ACME. This requires a public domain name pointed at your TrueNAS system. See Creating ACME Certificates for the full procedure.
If a valid certificate and private key are already available from an external CA, for example one issued by an enterprise CA, import them directly. See Adding Certificates for the procedure.
After you import or create a new certificate, TrueNAS does not switch to it automatically. Go to System > General Settings and click Settings in the GUI widget. Select the new certificate from the GUI SSL Certificate dropdown, then click Save. Select the Confirm checkbox, then click Continue to restart TrueNAS and apply the new certificate.
Click on the icon, then select Edit or Download on the dropdown list. On the Edit Certificate screen for the selected certificate, click View/Download Certificate to open a window with the certificate string. Click View/Download Key to open a window with the certificate private key.
To copy the certificate or private key to the clipboard, click on the clipboard icon. Click Download to put a copy of the certificate or private key on your server.
Keep the certificates and private keys in a secure area where you can back them up.