TrueNAS SCALE Documentation Archive
This content follows the TrueNAS SCALE 24.04 (Dragonfish) releases. Archival documentation is provided for reference only and not actively maintained.
Use the Product and Version selectors above to view content specific to different TrueNAS software or major version.
iSCSI Services Screen
14 minute read.
The iSCSI screen displays settings to configure iSCSI block shares.
The iSCSI configuration screens display seven tabs, one for each of the share configuration areas.
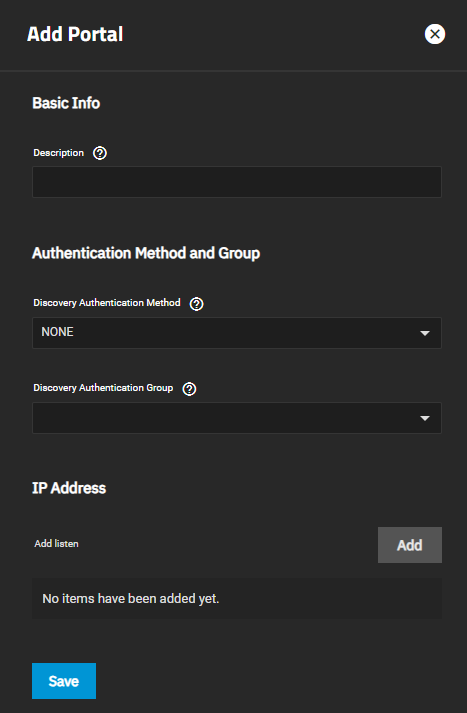
The Add button at the top of the Sharing > iSCSI screen works with the currently selected tab or screen. For example, if Portals is the current tab/screen, the Add button opens the Add Portal screen.
The more_vert on configure tab screens with list views display the Edit and Delete options. Edit opens the Edit screen for the selected tab screen. For example, when on the Portals tab/screen, the Sharing > iSCSI > Portals > Edit screen opens.
The Delete option opens the delete dialog for the screen currently selected.
The Add and Edit screens display the same settings.
The Target Global Configuration displays configuration settings that apply to all iSCSI shares. There are no add, edit, or delete options for this screen. It opens after you click Configure on the Block (iSCSI) Share Target widget on the Sharing screen. It also opens when you click Config Service.
The System Settings > Services > iSCSI displays the Target Global Configuration and all the other configuration screens after you click the iSCSI Config option on the Services screen.
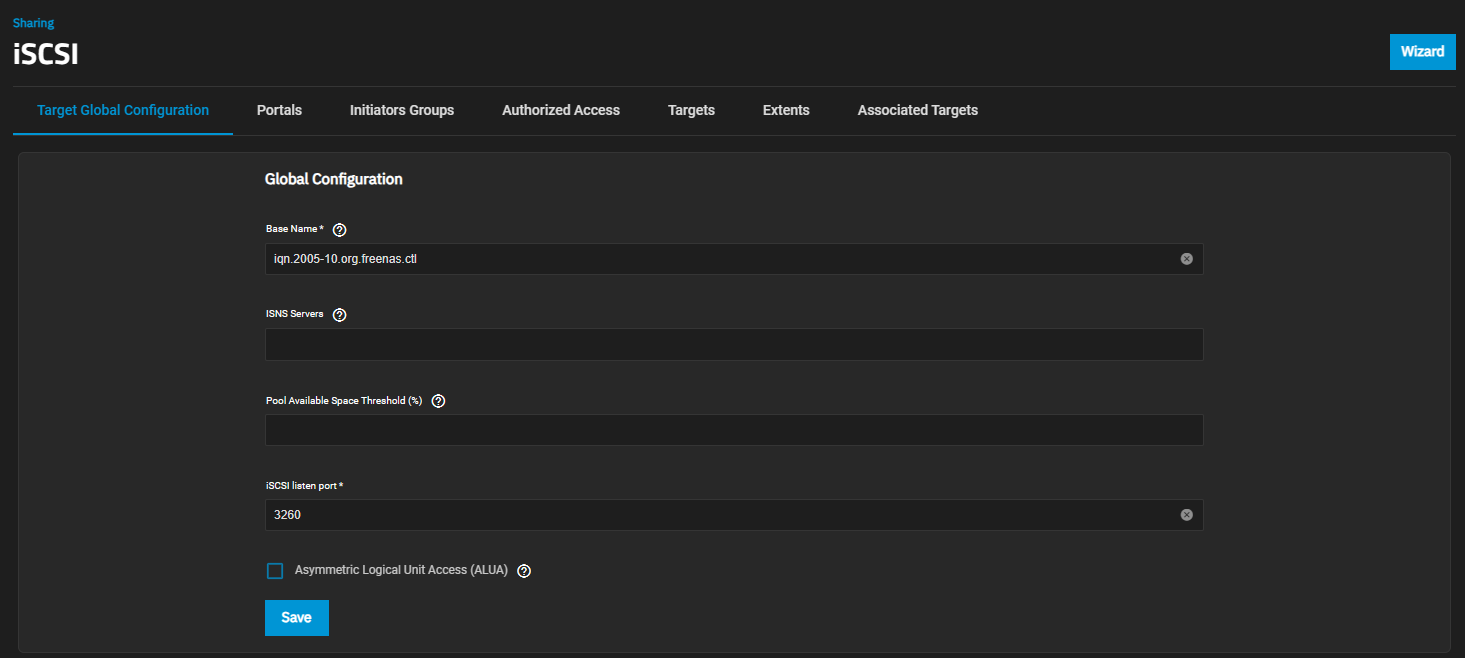
| Setting | Description |
|---|---|
| Base Name | Enter a name using lowercase alphanumeric characters. Allowed characters include the dot (.), dash (-), and colon (:). See the “Constructing iSCSI names using the iqn.format” section of RFC3721. |
| ISNS Servers | Enter host names or IP addresses of the ISNS servers to register with the iSCSI targets and portals of the system. Separate entries by pressing Enter. |
| Pool Available Space Threshold (%) | Enters a value for the threshold percentage that generates an alert when the pool has this percent space remaining. This is typically configured at the pool level when using zvols or at the extent level for both file and device-based extents. |
| iSCSI listen port | The TCP port number that the controller uses to listen for iSCSI logins from host iSCSI initiators. |
| Asymmetric Logical Unit Access (ALUA) | Enable ALUA on TrueNAS only if it is also supported by and enabled on client computers. This option only shows on Enterprise-licensed systems. ALUA only works when enabled on both the client and server. |
The configuration tabs Portals screen displays a list of portal ID groups on the TrueNAS system.
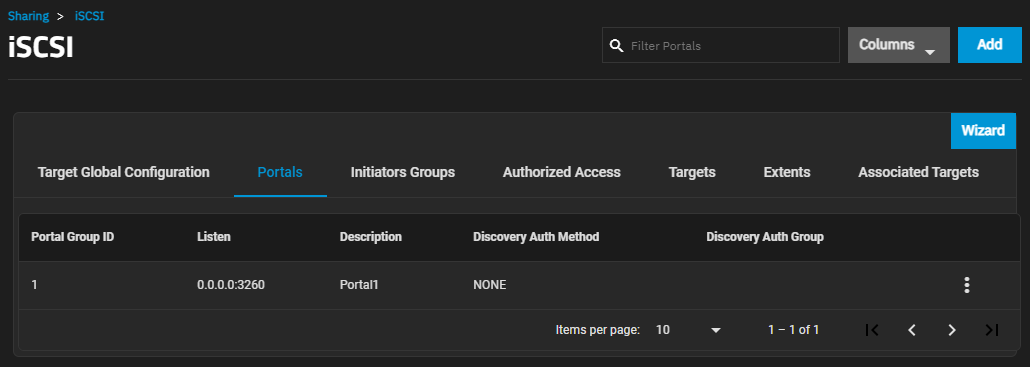
The more_vert next to the portal displays the Edit and Delete options. Delete opens the Delete dialog for the selected portal ID. Click Confirm and then Delete to delete the selected portal.
Add opens the Add Portal screen. Edit opens the Edit Portal screen. Both screens have the same setting options.

| Setting | Description |
|---|---|
| Description | Enter an optional description. Portals are automatically assigned a numeric group. |
| Setting | Description |
|---|---|
| Discovery Authentication Method | Select the discovery method you want to use for authentication from the dropdown list. iSCSI supports multiple authentication methods that targets can use to discover valid devices. None allows anonymous discovery. If set to None, you can leave Discovery Authentication Group set to None or empty. If set to CHAP or Mutual CHAP, you must enter or create a new group in Discovery Authentication Group. |
| Discovery Authentication Group | Select the discovery authentication group you want to use from the dropdown list. This is the group ID created in Authorized Access. Required when the Discovery Authentication Method is CHAP or Mutual CHAP. Select None or Create New. Create New displays additional setting options. |
| Setting | Description |
|---|---|
| IP Address | Select the IP addresses the portal listens to. Click Add to add IP addresses with a different network port. 0.0.0.0 listens on all IPv4 addresses, and :: listens on all IPv6 addresses. |
| Port | TCP port used to access the iSCSI target. The default is 3260. |
| Add | Adds another IP address row. |
The Initiators Groups screen display settings to create new authorized access client groups or edit existing ones in the list.
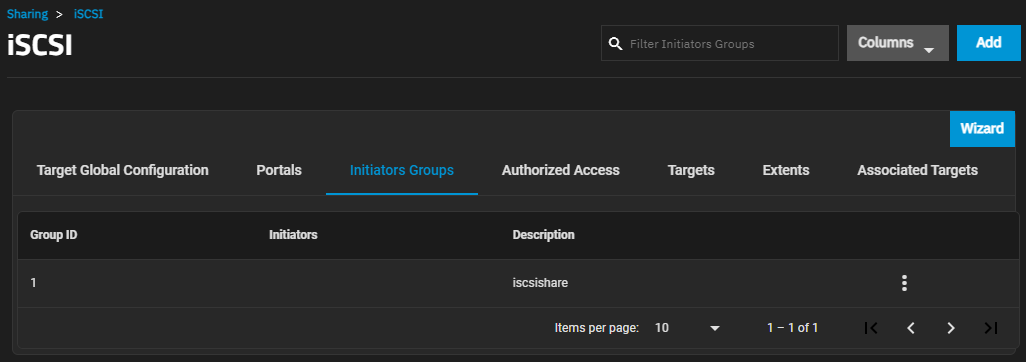
The more_vert next to the initiator group displays the Edit and Delete options. Delete opens the Delete dialog for the selected group ID. Click Confirm and then Delete to delete the selected portal.
Add opens the Sharing > iSCSI > Initiators > Add screen. Edit opens the Sharing > iSCSI > Initiators > Edit screen. Both screens have the same setting options.
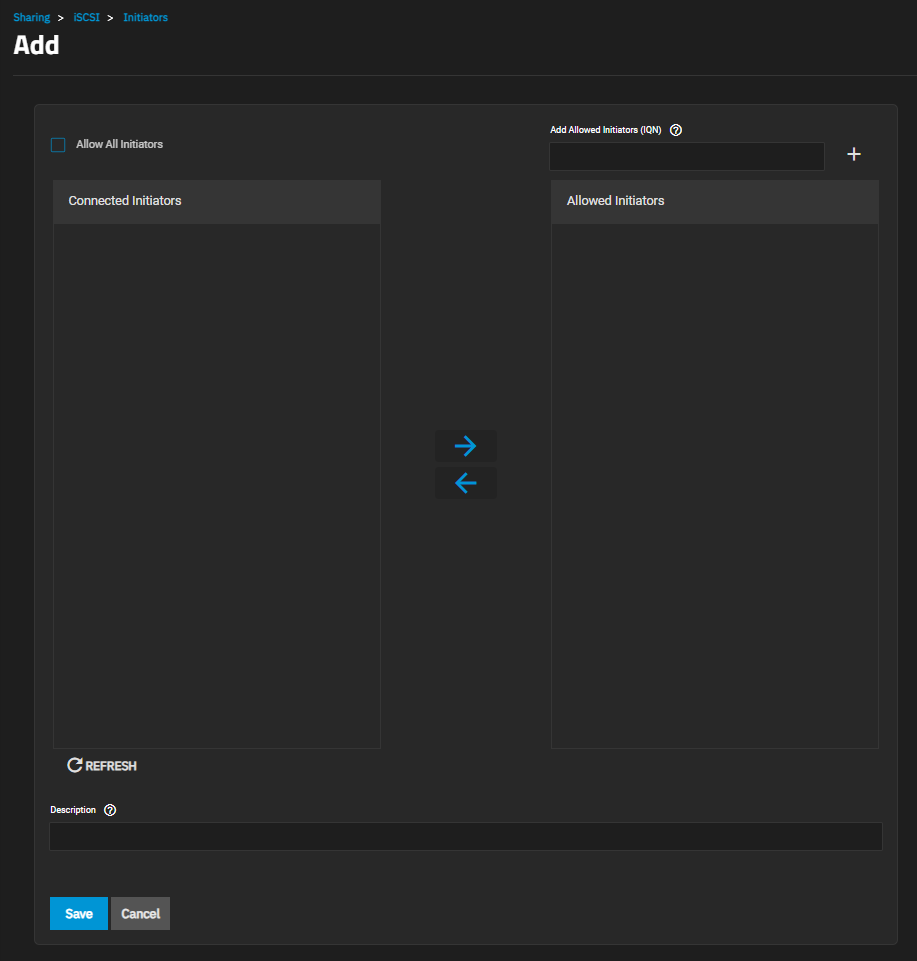
| Setting | Description |
|---|---|
| Allow All Initiators | Select to allows all initiators. |
| Allowed Initiators (IQN) | Enter initiators allowed access to this system. Enter an iSCSI Qualified Name (IQN) and click + to add it to the list. Example: iqn.1994-09.org.freebsd:freenas.local. |
| Description | Enter any notes about the initiators. |
The Authorized Access screen displays settings to create new authorized access networks or edit existing ones in the list.
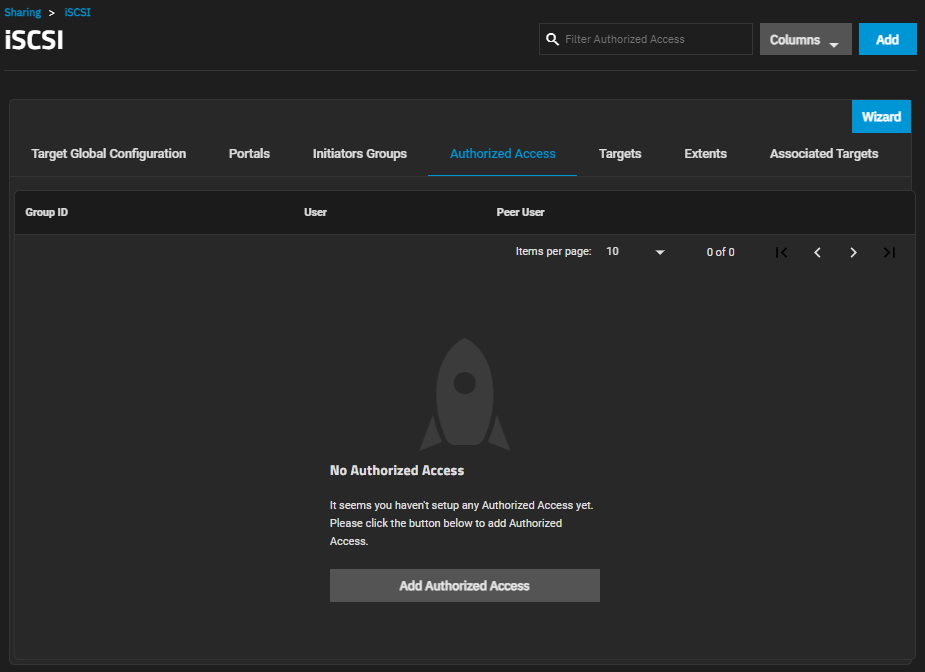
If you have not set up authorized access yet, the No Authorized Access screen displays with the Add Authorized Access button in the center of the screen. Add Authorized Access or Add at the top of the screen opens the Add Authorized Access screen.
After adding authorized access to the system, the Authorized Access screen displays a list of users.
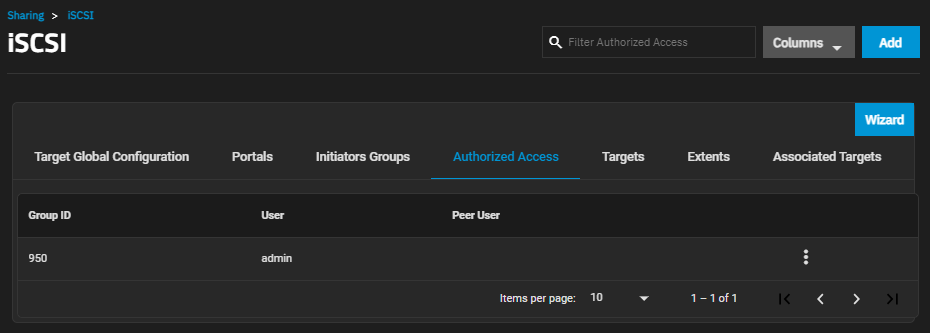
Add opens the Add Authorized Access screen.
The more_vert next to each entry displays two options, Edit and Delete. Edit opens the Edit Authorized Access screen, and Delete opens a dialog to delete the authorized access for the selected user. The Add and Edit screens display the same settings.
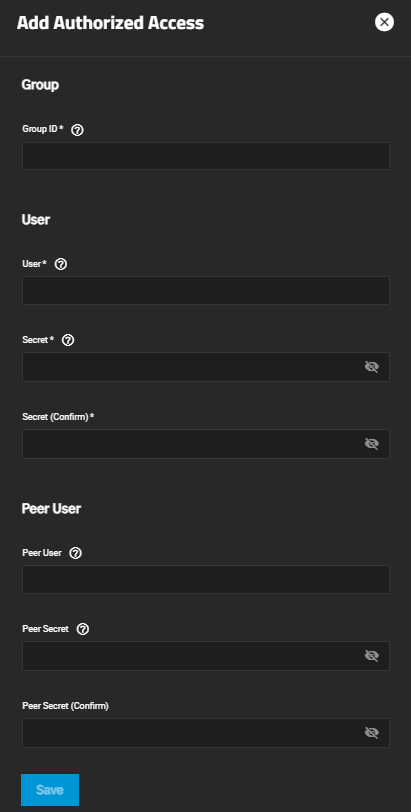
| Setting | Description |
|---|---|
| Group ID | Enter a number. This allows configuring different groups with different authentication profiles. Example: all users with a group ID of 1 inherit the authentication profile associated with Group 1. |
| Setting | Description |
|---|---|
| User | User account to create CHAP authentication with the user on the remote system. Many initiators use the initiator name as the user name. |
| Secret | Enter the user password. Secret must be at least 12 and no more than 16 characters long. The screen displays a “password does not match” error until you enter the same password in Secret (Confirm). |
| Secret (Confirm) | Enter the same password to confirm the user password. |
| Setting | Description |
|---|---|
| Peer User | Optional. Enter only when configuring mutual CHAP. Usually the same value as User. |
| Peer Secret | Enter the mutual secret password. Required if entering a Peer User. Must be a different password than the password in Secret. |
| Peer Secret (Confirm) | Enter the same password to confirm the mutual secret password. |
The Targets screen displays settings to create new TrueNAS storage resources or edit existing ones in the list.
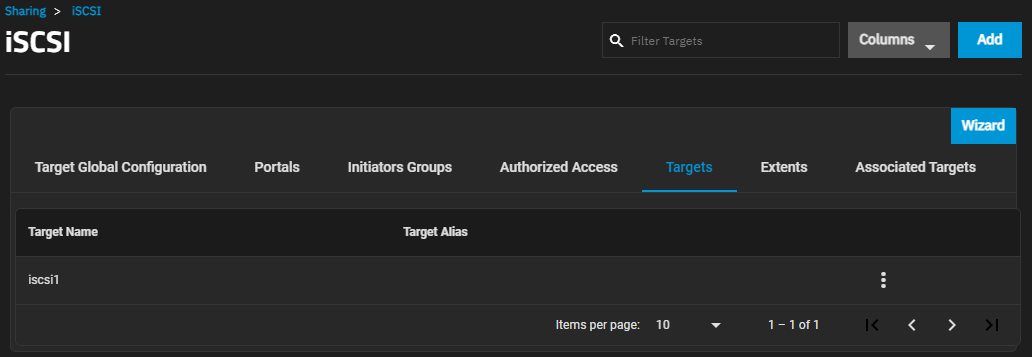
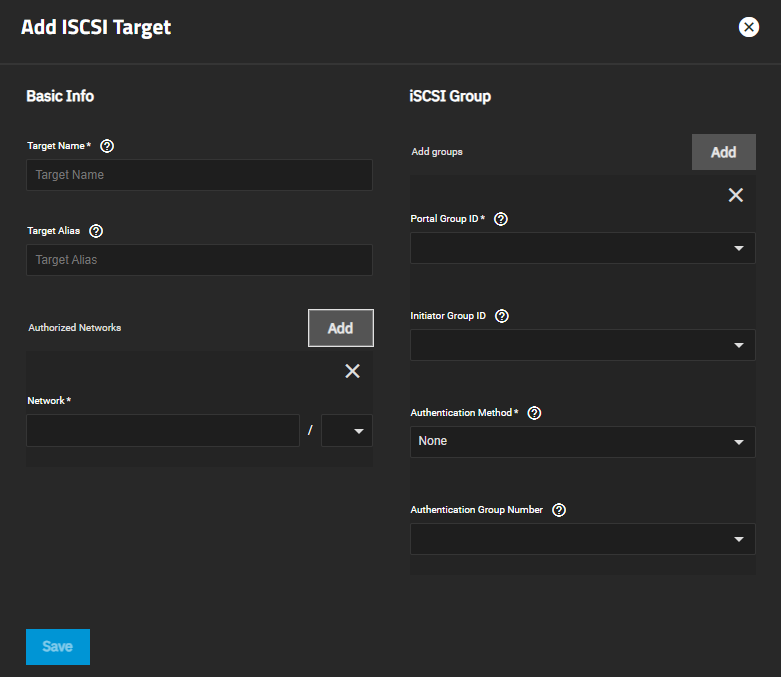
Add opens the Add iSCSI Targets screen.
The more_vert next to each entry displays two options, Edit and Delete. Edit opens the Edit iSCSI Targets screen, and Delete opens a dialog to delete the select target. The Add iSCSI Targets and Edit iSCSI Targets screens display the same settings.
The Add iSCSI Target and Edit iSCSI Target screens display the same settings, but the current settings populate the Edit iSCSI Target screen settings for the selected share.
To access the Add iSCSI Target screen from the Sharing > iSCSI screen, while on the Targets tab, click Add at the top of the screen. To access the Edit iSCSI Target screen from the Sharing > iSCSI screen, while on the Targets tab, click more_vert next to the share and then click Edit.
The Extents screen displays settings to create new shared storage units or edit existing ones in the list.
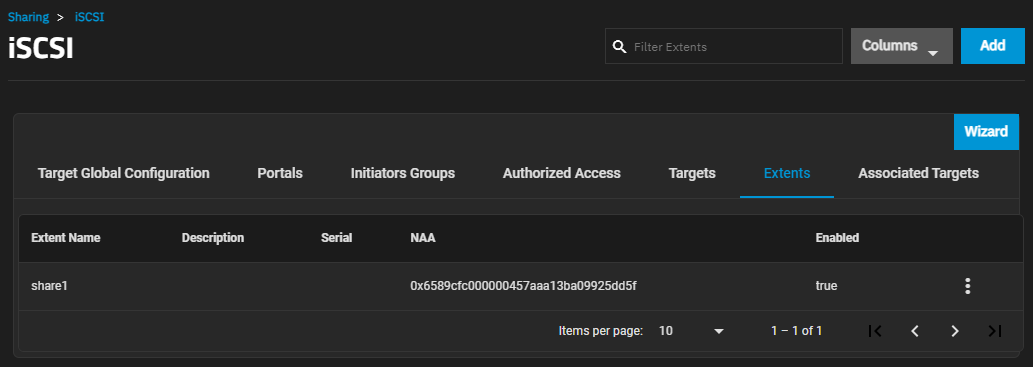
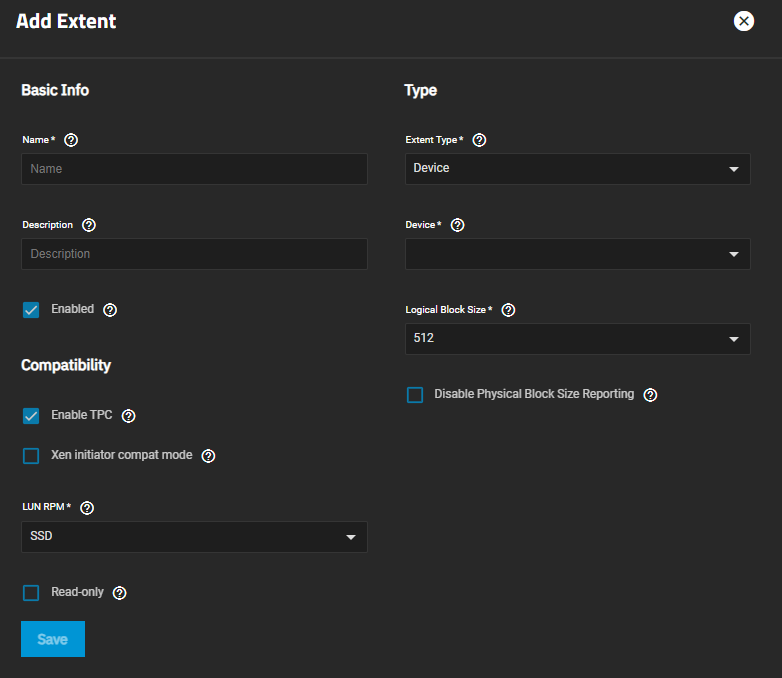
Add opens the Add Extent screen.
The more_vert next to each entry opens two options, Edit and Delete. Edit opens the Edit Extent screen, and Delete opens a dialog to delete the extents for the selected user. The Add and Edit screens display the same settings.
| Setting | Description |
|---|---|
| Name | Enter a name for the extent. An Extent where the size is not 0, cannot be an existing file within the pool or dataset. |
| Description | Enter any notes about this extent. |
| Enabled | Select to enable the iSCSI extent. |
| Setting | Description |
|---|---|
| Extent Type | Select the extent (zvol) option from the dropdown list. Device provides virtual storage access to zvols, zvol snapshots, or physical devices. File provides virtual storage access to a single file. Device provides virtual storage access to zvols, zvol snapshots, or physical devices. File provides virtual storage access to a single file. |
| Device | Required. Displays if Extent Type is set to Device. Select the unformatted disk, controller, or zvol snapshot. |
| Path to the Extent | Displays when Extent Type is set to File. Click the to browse an existing file. Create a new file by browsing to a dataset and appending /{filename.ext} to the path. Users cannot create extents inside a jail root directory. |
| Filesize | Only appears if File is selected. Entering 0 uses the actual file size and requires that the file already exists. Otherwise, specify the file size for the new file. |
| Logical Block Size | Enter a new value or leave it at the default of 512 unless the initiator requires a different block size. |
| Disable Physical Block Size Reporting | Select if the initiator does not support physical block size values over 4K (MS SQL). |
| Setting | Description |
|---|---|
| Enable TPC | Select to allow an initiator to bypass normal access control and access any scannable target. This allows xcopy operations that are otherwise blocked by access control. |
| Xen initiator compat mode | Select when using Xen as the iSCSI initiator. |
| LUN RPM | Select the option from the dropdown list. Options are UNKNOWN, 5400, 7200, 10000 or 15000. Do not change this setting when using Windows as the initiator. Only change LUN RPM in large environments where the number of systems using a specific RPM is needed for accurate reporting statistics. |
| Read-only | Select to prevent the initiator from initializing this LUN. |
The Associated Targets screen displays settings to create new associated TrueNAS storage resources or edit existing ones in the list.
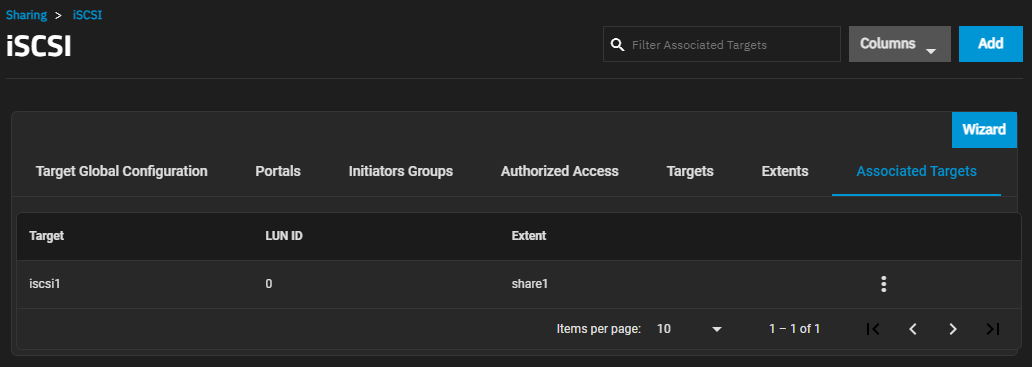
Add opens the Add Associated Target screen.
The more_vert next to each entry displays two options, Edit and Delete. Edit opens the Edit Associated Target screen, and Delete opens a dialog to delete the associated targets for the selected user. The Add and Edit screens display the same settings.
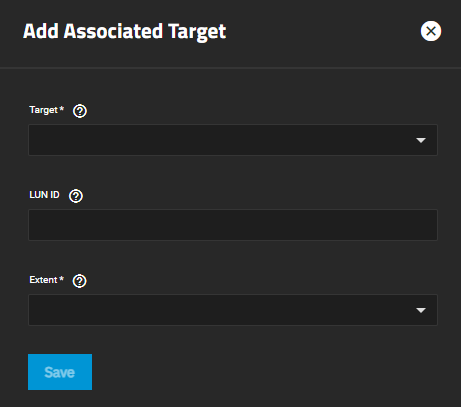
| Setting | Description |
|---|---|
| Target | Required. Select an existing target. |
| LUN ID | Select the value or enter a value between 0 and 1023. Some initiators expect a value below 256. Leave this field blank to automatically assign the next available ID. |
| Extent | Required. Select an existing extent. |


