TrueNAS SCALE Documentation Archive
This content follows the TrueNAS SCALE 24.04 (Dragonfish) releases. Archival documentation is provided for reference only and not actively maintained.
Use the Product and Version selectors above to view content specific to different TrueNAS software or major version.
Managing Local Groups
3 minute read.
TrueNAS offers groups as an efficient way to manage permissions for many similar user accounts. See Users for managing users. The interface lets you manage UNIX-style groups. If the network uses a directory service, import the existing account information using the instructions in Active Directory.
To see saved groups, go to Credentials > Local Groups.
By default, TrueNAS hides the system built-in groups. To see built-in groups, click the Show Built-In Groups toggle. The toggle turns blue and all built-in groups display. Click the Show Built-In Groups toggle again to show only non-built-in groups on the system.
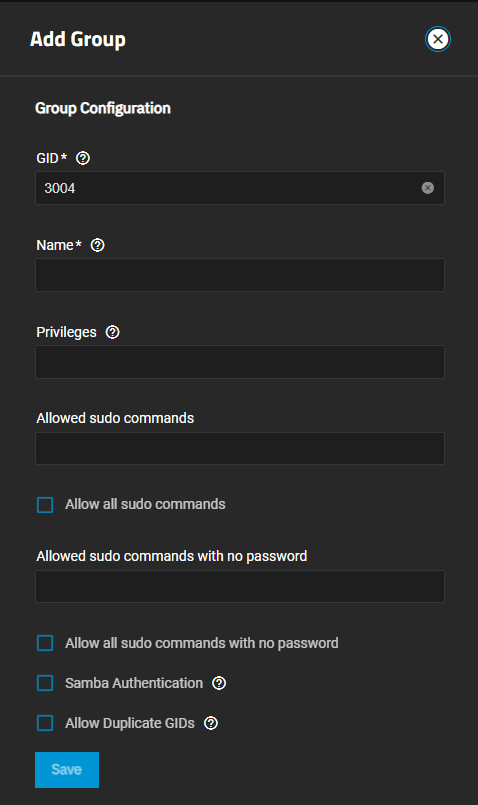
To create a group, go to Credentials > Local Groups and click Add.
Enter a unique number for the group ID in GID that TrueNAS uses to identify a Unix group. Enter a number above 3000 for a group with user accounts or enter the default port number as the GID for a system service.
Enter a name for the group. The group name cannot begin with a hyphen (-) or contain a space, tab, or any of these characters: colon (:), plus (+), ampersand (&), hash (#), percent (%), carat (^), open or close parentheses ( ), exclamation mark (!), at symbol (@), tilde (~), asterisk (*), question mark (?) greater or less than (<) (>), equal (=). The dollar sign ($) can be the last character in a group name.
Group names must also align with the Portable Filename Character Set defined by The Open Group.
Allowed sudo commands, Allow all sudo commands, Allowed sudo commands with no password and Allow all sudo commands with no password grant members of the group limited root-like permissions using the sudo command.
Use Allowed sudo commands or Allowed sudo commands with no password to list specific sudo commands allowed for group members.
Enter each command as an absolute path to the ELF (Executable and Linkable Format) executable file, for example /usr/bin/nano.
Exercise caution when allowing sudo commands, especially without password prompts. We recommend limiting this privilege to trusted users and specific commands to minimize security risks.
To allow Samba permissions and authentication to use this group, select Samba Authentication.
To allow more than one group to have the same group ID (not recommended), select Allow Duplicate GIDs. Use only if absolutely necessary, as duplicate GIDs can lead to unexpected behavior.
Click anywhere on a row to expand that group and show the group management buttons.
Use Members to manage membership and Edit or Delete to manage the group.
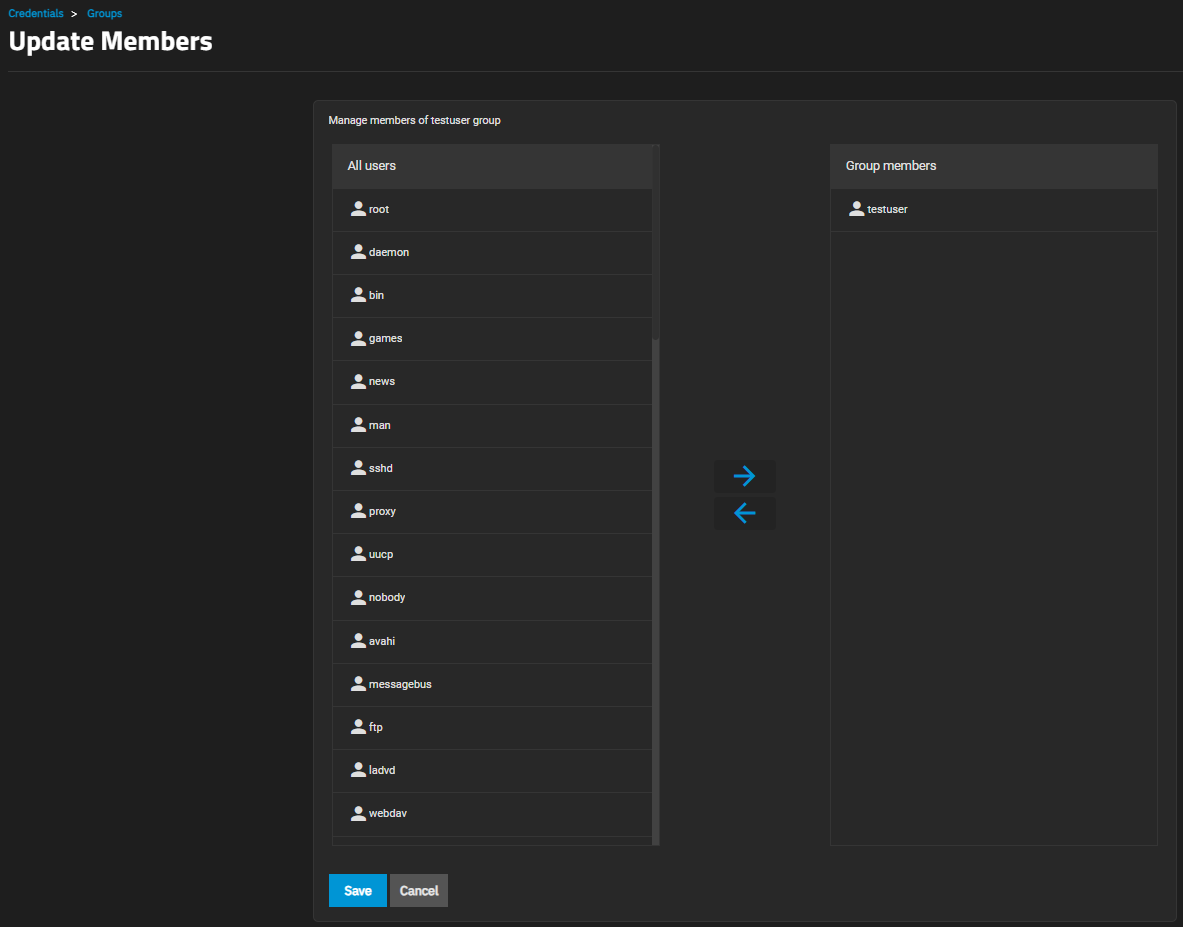
To manage group membership, go to Credentials > Local Groups, expand the group entry, and click Members to open the Update Members screen.
To add a user account to the group, select the user and then click the right arrow .
To remove a user account from the group, select the user and then click the left arrow .
To select multiple users, press Ctrl and click on each entry.
Click Save.
To edit an existing group, go to Credentials > Local Groups, expand the group entry, and click edit Edit to open the Edit Group configuration screen. See Local Group Screens for details on all settings.


