TrueNAS SCALE Documentation Archive
This content follows the TrueNAS SCALE 24.04 (Dragonfish) releases. Archival documentation is provided for reference only and not actively maintained.
Use the Product and Version selectors above to view content specific to different TrueNAS software or major version.
Configuring LDAP
2 minute read.
TrueNAS has an Open LDAP client for accessing the information on an LDAP server. An LDAP server provides directory services for finding network resources like users and their associated permissions.
You can have either Active Directory or LDAP configured on SCALE but not both.
To configure SCALE to use an LDAP directory server:
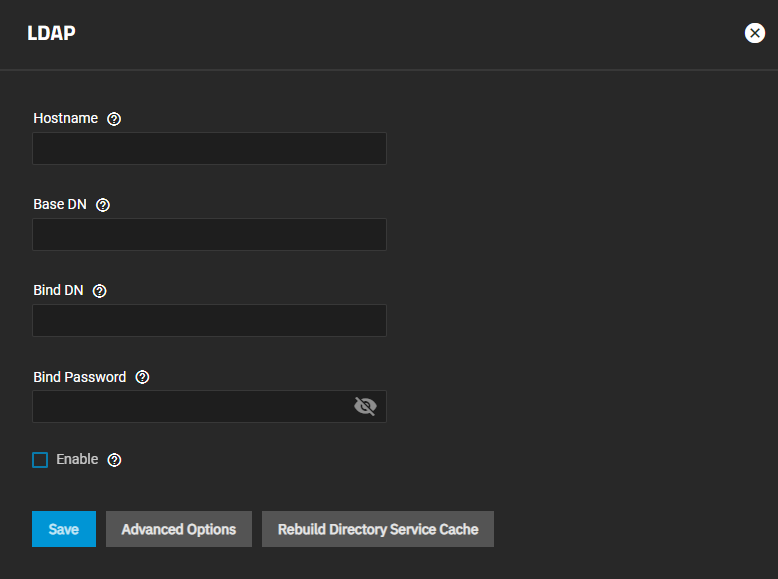
Go to Credentials > Directory Services and click Configure LDAP.

Enter your LDAP server host name. If using a cloud service LDAP server, do not include the full URL.
Enter your LDAP server base DN. This is the top of the top level of the LDAP directory tree to use when searching for resources.
Enter the bind DN (administrative account name for the LDAP server) and the bind password.
Select Enable to activate the server
Click Save.
If you want to further modify the LDAP configuration, click Advanced Options. See the LDAP UI Reference article for details about advanced settings.
To disable LDAP but not remove the configuration, clear the Enable checkbox. The main Directory Services screen returns to the default view showing the options to configure Active Directory or LDAP. To enable LDAP again, click Configure LDAP to open the LDAP screen with your saved configuration. Select Enable again to reactivate your LDAP directory server configuration.
To remove the LDAP configuration, click Settings to open the LDAP screen. Clear all settings and click Save.


