TrueNAS SCALE Documentation Archive
This content follows the TrueNAS SCALE 24.04 (Dragonfish) releases. Archival documentation is provided for reference only and not actively maintained.
Use the Product and Version selectors above to view content specific to different TrueNAS software or major version.
Updating MinIO from 1.6.58
5 minute read.
Application maintenance is independent from TrueNAS SCALE version release cycles. This means app version information, features, configuration options, and installation behavior at the time of access might vary from those in documented tutorials.
In TrueNAS 24.04 (Dragonfish), the Apps feature is provided using Kuberenetes. To propose documentation changes to a Kubernetes-based app available in TrueNAS 24.04 (Dragonfish), click Edit Page in the top right corner.
Future versions of TrueNAS, starting with 24.10 (Electric Eel), provide the Apps feature using Docker. See the TrueNAS Apps Marketplace for more information.
See Updating Content for more guidance on proposing documentation changes.
This article applies to the public release of the S3 MinIO community application in the charts train of the TRUENAS catalog.
MinIO fails to deploy if you update your version 2022-10-24_1.6.58 Minio app to 2022-10-29_1.6.59 or later using the TrueNAS web UI.
Your app logs display an error similar to the following:
ERROR Unable to use the drive /export: Drive /export: found backend type fs, expected xl or xl-single: Invalid arguments specified.
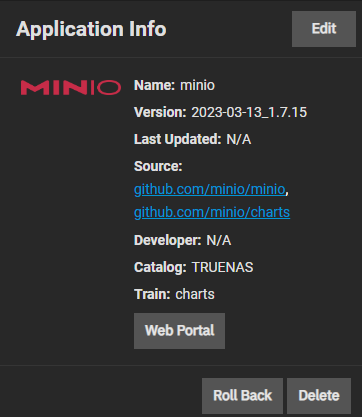
If you get this error after upgrading your MinIO app, use the app Roll Back function, found on the Application Info widget on the Installed applications screen, and return to 2022-10-24_1.6.58 to make your MinIO app functional again.
You need WSL2 (Windows Subsystem for Linux) if you are using a Windows computer.
If your system has sharing (SMB, NFS, iSCSI) configured, disable the share service before adding and configuring a new MinIO deployment. After completing the installation and starting MinIO, enable the share service.
When adding a new MinIO deployment, verify your storage settings are correct in the MinIO application configuration. If not set, click Install and enter the required information.
To manually update your MinIO application:
- Create a new MinIO deployment.
- Download the MinIO client.
- Add both TrueNAS MinIO deployments to mc.exe.
- Port both configurations into the new deployment.
- Restart the MinIO service.
- Port bucket data into the new deployment.
- Port Identity and Access Management settings.
- Move objects and data.
- Delete the old app.
Follow the instructions here to make a new, up-to-date MinIO deployment in TrueNAS. Make sure it is version 2022-10-29_1.6.59 or later.
Download the MinIO Client here for your OS and follow the installation instructions. The MinIO Client (mc) lets you create and manage MinIO deployments via your system command prompt.
Open a terminal or CLI.
If you are on a Windows computer, open PowerShell and enter wsl to switch to the Linux subsystem.
Change directories to the folder that contains
Add your old deployment to mc by entering: ./mc alias set old-deployment-name http://IPaddress:port/ rootuser rootpassword.
Add your new deployment to mc using the same command with the new alias: ./mc alias set new-deployment-name http://IPaddress:port/ rootuser rootpassword.
To port your configuration from your old MinIO deployment to your new, export your old MinIO app configurations by entering ./mc.exe admin config export old-deployment-name > config.txt.
MinIO Client exports the config file to the current directory path.
Next, import the old app config file into the new app by entering: ./mc.exe admin config import old-deployment-name < config.txt.
Restart the new MinIO app to apply the configuration changes.
./mc.exe admin service restart new-minio-deployment
Export the old app bucket metadata by entering ./mc.exe admin cluster bucket export old-minio-deployment.
Import the metadata into the new app with ./mc.exe admin cluster bucket import new-minio-deployment cluster-metadata.zip
Export the old app IAM settings by entering ./mc.exe admin cluster iam export old-minio-deployment.
Import the IAM settings into the new app with ./mc.exe admin cluster iam import new-minio-deployment alias-iam-info.zip.
Create buckets in your new MinIO app to move data and objects to.
Move the objects and data from your old MinIO app to your new one using ./mc.exe mirror --preserve --watch source/bucket target/bucket.
Repeat for every bucket you intend to move.
After moving all data from the old app to the new one, return to the TrueNAS UI Apps screen and stop both MinIO apps.
Delete the old MinIO app. Edit the new one and change the API and UI Access Node Ports to match the old MinIO app.
Restart the new app to finish migrating.
When complete and the app is running, restart any share services.


