TrueNAS SCALETrueNAS SCALE Version Documentation
This content follows the TrueNAS SCALE 23.10 (Cobia) releases. Use the Product and Version selectors above to view content specific to different TrueNAS software or major version.

Adding and Managing VM Devices

  8 minute read.

Last Modified 2023-12-20 10:02 EST

Managing Devices

After creating the VM, the next step is to add virtual devices for that VM.

Go to Virtualization > Virtual Machines and locate the VM you want to modify. Click anywhere on a VM entry on the Virtual Machines widget to expand it and show the options for the VM.

Click Devices to open the devices screen associated with the VM. From this screen, you can edit, add, or delete devices. Click the more_vert icon at the right of each listed device to see device options.
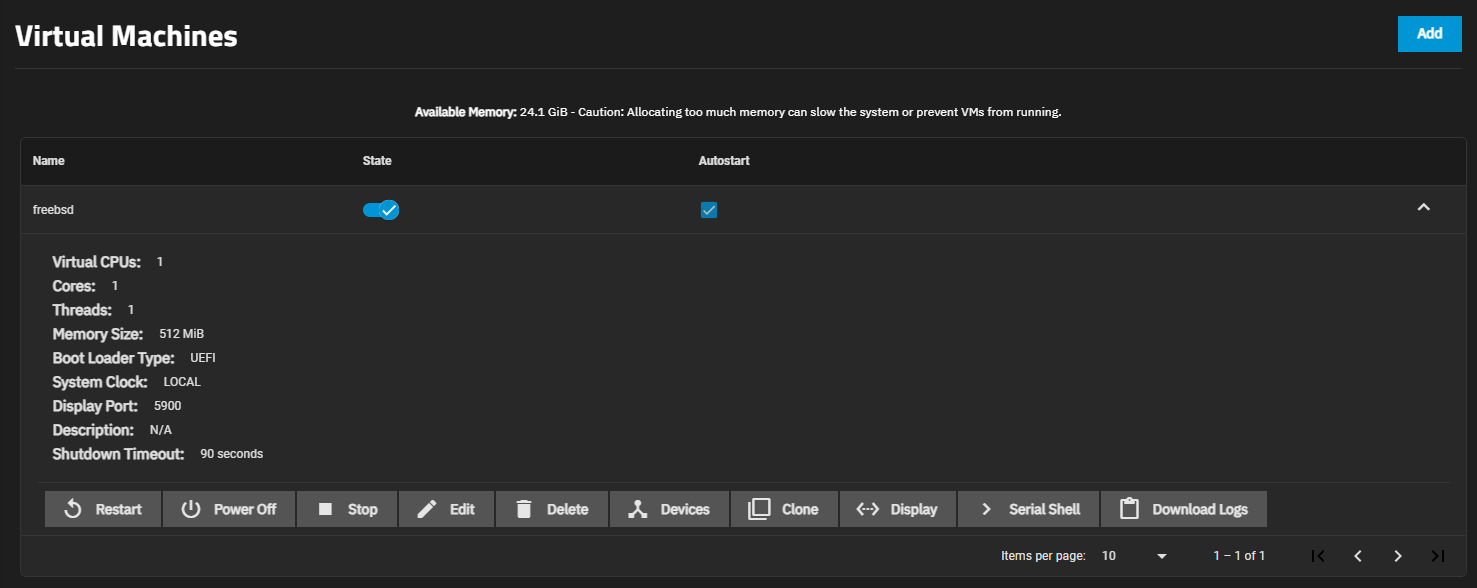
VMRunningOptionsSCALE

The devices for the VM display as a list.

Device notes:

  • A virtual machine attempts to boot from devices according to the Device Order, starting with 1000, then ascending.
  • A CD-ROM device allows booting a VM from a CD-ROM image like an installation CD. The CD image must be available in the system storage.
  • With a Display device, remote clients can connect to VM display sessions using a SPICE client, or by installing a 3rd party remote desktop server inside your VM. SPICE clients are available from the SPICE Protocol site.

Before adding, editing, or deleting a VM device, stop the VM if it is running. Click the State toggle to stop or restart a VM.

Editing a Device

Select Edit to open the Edit type Device screen where type is the device type selected. You can change the type of virtual hard disk, the storage volume to use, or change the device boot order.

To edit a VM device:

  1. Stop the VM if it is running.

  2. Click on the name of the VM to expand it, then click Devices to open the list of devices for the selected VM.

  3. Click on the more_vert icon at the right of the listed device you want to edit, then select Edit. The Edit Device screen opens.

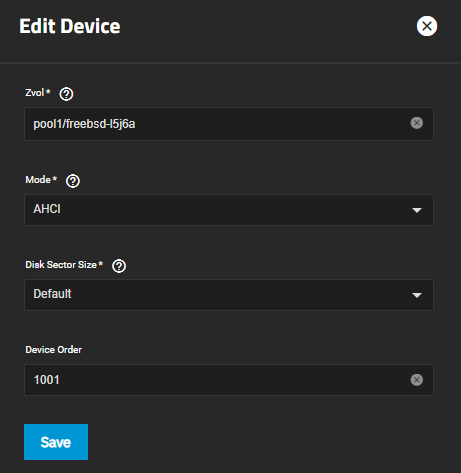
    EditDeviceDiskScreen

  4. Select the path to the zvol you created when setting up the VM on the Zvol dropdown list.

  5. Select the type of hard disk emulation from the Mode dropdown list. Select AHCI for better software compatibility, or select VirtIO for better performance if the guest OS installed in the VM has support for VirtIO disk devices.

  6. (Optional) Specify the dis sector size in bytes in Disk Sector Size. Leave set to Default or select either 512 or 4096 byte values from the dropdown list. If unset, the sector size uses the ZFS volume values.

  7. Specify the boot order or priority level in Device Order to move this device up or down in the sequence. The lower the number the higher the priority in the boot sequence.

  8. Click Save.

You can now go to Virtualization > Virtual Machines and click on the State toggle button to restart the VM.

Deleting a Disk Device

Deleting a device removes it from the list of available devices for the selected VM.

To delete a VM device:

  1. Stop the VM if it is running.

  2. Click on the name of the VM to expand it, then click Devices to open the list of devices for the selected VM.

  3. Click on the more_vert icon at the right of the listed device you want to edit, then select Delete. The Delete Virtual Machine dialog opens.

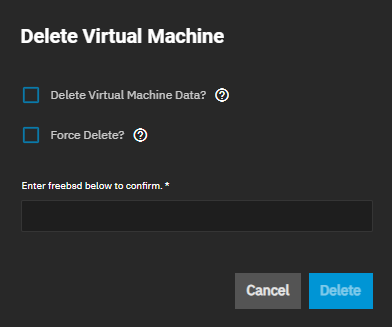
    DeleteVirtualMachine

  4. Select Delete zvol device to confirm you want to delete the zvol device. Select Force Delete if you want the system to force the deletion of the zvol device, even if other devices or services are using or affiliated with the zvol device.

  5. Click Delete Device.

Changing the Device Order

  1. Stop the VM if it is running.
  2. Click on the name of the VM to expand it, then click Devices to open the list of devices for the selected VM
  3. Click Edit.
  4. Enter the number that represents where in the boot sequence you want this device to boot in the Devices Order field. The lower the number, the higher the device is in the boot sequence.
  5. Click Save.

You can now go to Virtualization > Virtual Machines and restart the VM.

Adding a CD-ROM Device

Select CD-ROM in Device Type on the Add Device screen and set a boot order.

  1. Stop the VM if it is running, then expand the VM, and select Devices.

  2. Click Add and select CD-ROM from the Device Type dropdown list.

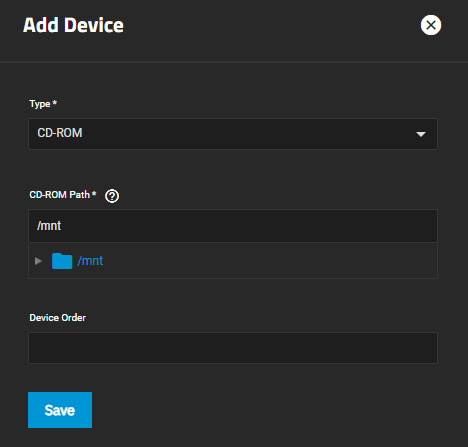
    VMAddDeviceCDROM

  3. Specify the mount path. Click on the to the left of /mnt and at the pool and dataset levels to expand the directory tree. Select the path to the CD-ROM device.

  4. Specify the boot sequence in Device Order.

  5. Click Save.

You can now go to Virtualization > Virtual Machines and restart the VM.

Adding a NIC Device Type

Select NIC in the Device Type on the Add Devicecreen to add a network interface card for the VM to use.

  1. Stop the VM if it is running, then expand the VM, and select Devices.

  2. Click Add and select NIC from the Device Type dropdown list.

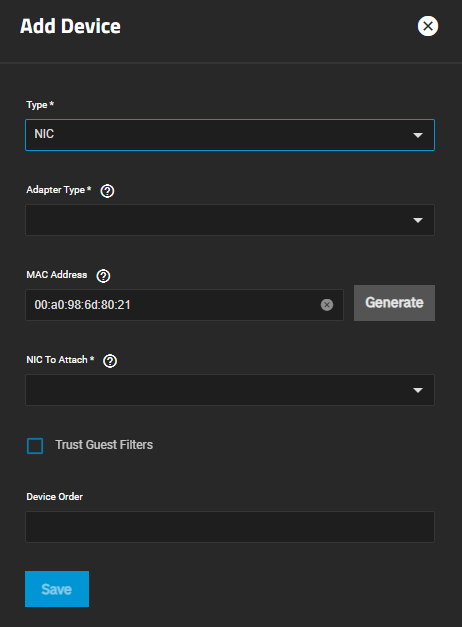
    VMAddDeviceNIC

  3. Select the adapter type. Choose Intel e82585(e1000) for maximum compatibility with most operating systems. If the guest OS supports VirtIO paravirtualized network drivers, choose VirtIO for better performance.

  4. Click Generate to assign a new random MAC address to replace the random default address, or enter your own custom address.

  5. Select the physical interface you want to use from the NIC To Attach dropdown list.

  6. (Optional) Select Trust Guest Filters to allow the virtual server to change its MAC address and join multicast groups. This is required for the IPv6 Neighbor Discovery Protocol (NDP).

    Setting this attribute has security risks. It allows the virtual server to change its MAC address and receive all frames delivered to this address. Determine your network setup needs before setting this attribute.

  7. Click Save.

You can now go to Virtualization > Virtual Machines and restart the VM.

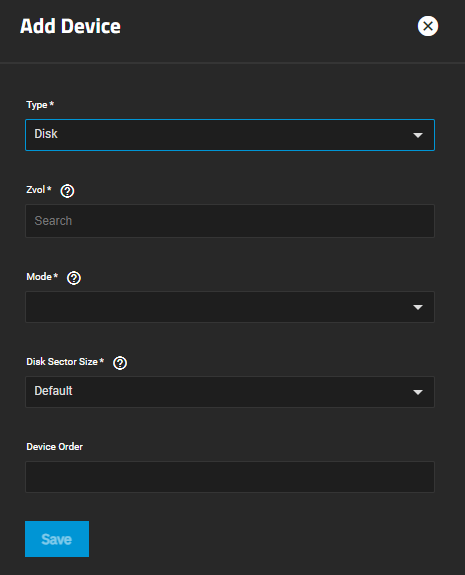
Add a Disk Device Type

Select Disk in Device Type on the Add Device screen to configure a new disk location, drive type and disk sector size, and boot order.

  1. Stop the VM if it is running, then expand the VM, and select Devices.

  2. Click Add and select Disk from the Device Type dropdown list.

    VMAddDeviceDisk

  3. Select the path to the zvol you created when setting up the VM using the Zvol dropdown list.

  4. Select the hard disk emulation type from the Mode dropdown list. Select AHCI for better software compatibility, or VirtIO for better performance if the guest OS installed in the VM supprots VirtIO disk devices.

  5. Specify the sector size in bytes in Disk Sector Size. Leave set to Default or select either 512 or 4096 from the dropdown list to change it. If the sector size remains unset it uses the ZFS volume values.

  6. Specify the boot sequence order for the disk device.

  7. Click Save.

You can now go to Virtualization > Virtual Machines to restart the VM.

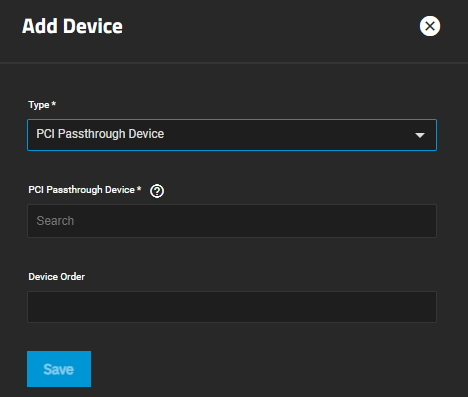
Adding a PCI Passthrough Device

Select PCI Passthrough Device in the Device Type on the Add Device screen to configure the PCI passthrough device and boot order.

Depending upon the type of device installed in your system, you may see a warning: PCI device does not have a reset mechanism defined. You may experience inconsistent or degraded behavior when starting or stopping the VM. Determine if you want to proceed with this action in such an instance.
  1. Stop the VM if it is running, then expand the VM, and select Devices.

  2. Click Add and select PCI Passthrough Device from the Device Type dropdown list.

  3. Enter a value in PCI Passthrough Device using the format of bus#/slot#/fcn#.

    VMAddDevicePCIpass

  4. Specify the boot sequence order for the PCI passthrough device.

  5. Click Save.

You can now go to Virtualization > Virtual Machines to restart the VM.

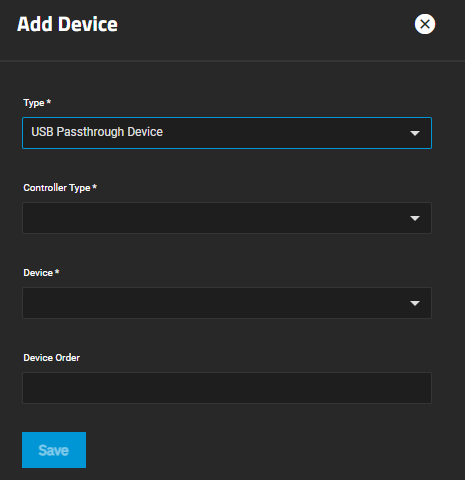
Adding a USB Passthrough Device

Select USB Passthrough Device as the Device Type on the Add Device screen to configure the USB passthrough device, and set a boot order.

  1. Stop the VM if it is running, then expand the VM, and select Devices.

  2. Click Add and select USB Passthrough Device from the Device Type dropdown list.

    VMAddDeviceUSBpass

  3. Select the Controller Type from the dropdown list.

  4. Select the hub controller type from the Device dropdown list. If the type is not listed, select Specify custom, enter the Vendor ID and Product ID.

  5. Specify the boot sequence order.

  6. Click Save.

You can now go to Virtualization > Virtual Machines to restart the VM.

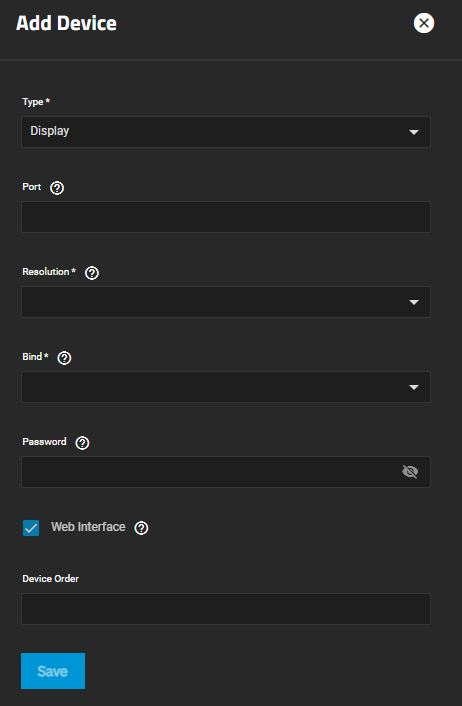
Adding a Display Device

Select Display as Device Type on the Add Device screen to configure a new display device.

  1. Stop the VM if it is running, then expand the VM, and select Devices.

  2. Click Add and select Display from the Device Type dropdown list.

    VMAddDeviceDisplay

  3. Enter a fixed port number in Port. To allow TrueNAS to assign the port after restarting the VM, set the value to zero (leave the field empty).

  4. Specify the display session settings: a. Select the screen resolution to use for the display from the Resolution dropdown. b. Select an IP address for the display device to use in Bind. The default is 0.0.0.0. c. Enter a unique password for the display device to securely access the VM.

  5. Select Web Interface to allow access to the VNC web interface.

  6. Click Save.

You can now go to Virtualization > Virtual Machines to restart the VM.

Display devices have a 60 second inactivity timeout. If the VM display session appears unresponsive, try refreshing the browser tab.

Related Content