TrueNAS Documentation Archive
This content follows the TrueNAS 23.10 (Cobia) releases. Archival documentation is provided for reference only and not actively maintained. Use the Product and Version selectors above to view content specific to different TrueNAS software or major version.
Accessing NAS From a VM
5 minute read.
Last Modified 2024-04-24 14:31 EDTIf you want to access your TrueNAS SCALE directories from a VM, you have multiple options. If your system has more than one physical interface, you can assign your VMs to a NIC other than the primary one your TrueNAS server uses. This method makes communication more flexible, but does not offer the potential speed of a bridge.
If you have only one physical interface, you must create a bridge interface for the VM to use.
If the only interface you have is a single physical interface, complete the following steps in order to create a network bridge:
- If you have apps running, disable them before proceeding.
- Clear the DHCP checkbox on the single physical interface you have, but don’t apply the changes.
- Create a bridge interface and add your physical interface as a member. Configure relevant networking options such as DHCP.
- Then apply the changes and connect to the UI with the new networking settings.
- These steps are outlined below.
Go to Virtualization, find the VM you want to use to access TrueNAS storage, and toggle it off.

Go to Network > Interfaces and find the active interface you used as the VM parent interface. Note the interface IP Address and subnet mask. Click the interface.
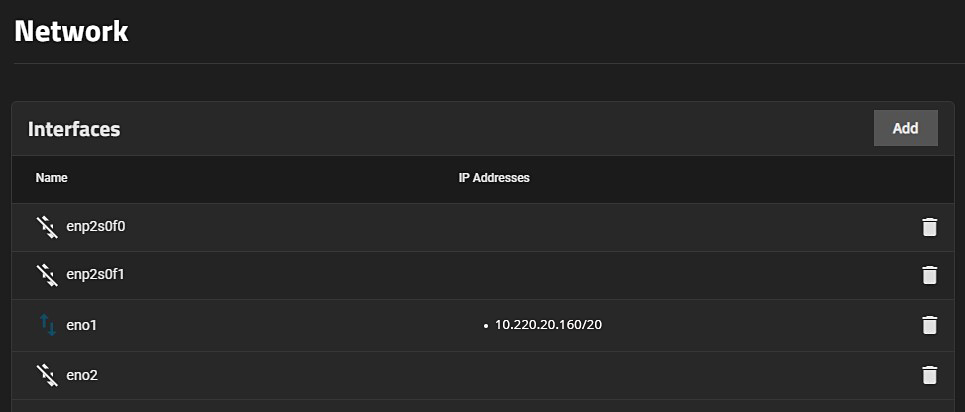
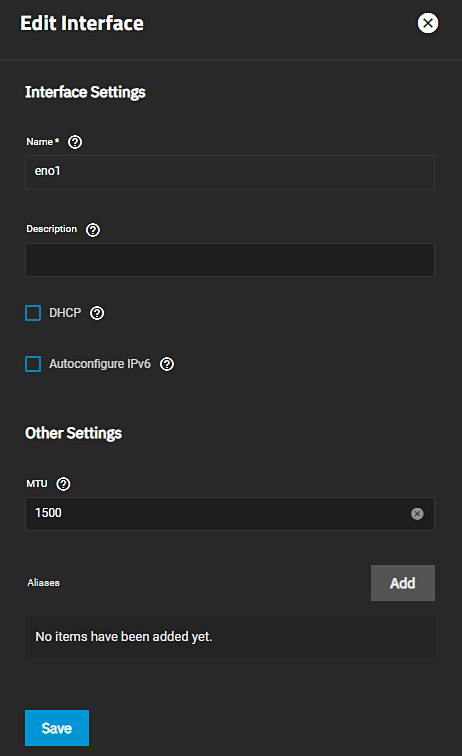
The Edit Interface screen appears. If selected, clear the DHCP checkbox. Note the IP address and mask under Aliases. Click the X next to the listed alias to remove the IP address and mask. The Aliases field now reads No items have been added yet. Click Save.
The Interfaces widget displays the edited interface with no IP information.

To set up a bridge interface, from the Network screen:
- Click Add in the Interfaces widget. The Add Interface configuration screen displays.
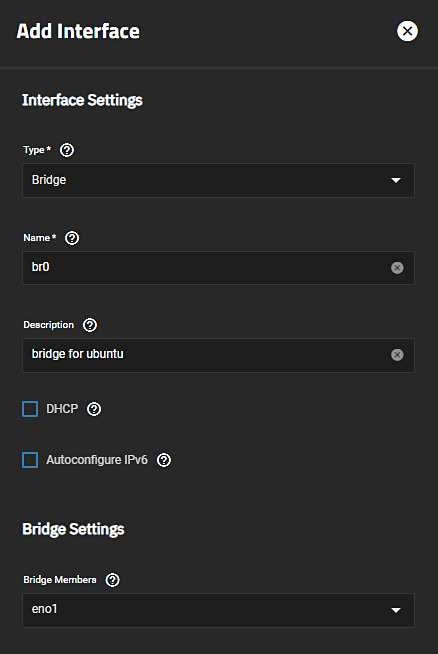
Select Bridge from the Type dropdown list. You cannot change the Type field value after you click Save.
Enter a name for the interface. Use the format bondX, vlanX, or brX where X is a number representing a non-parent interface. Read-only when editing an interface. You cannot change the Name of the interface after you click Save.
(Optional but recommended) Enter any notes or reminders about this particular bridge in the Description field.
Select the interfaces on the Bridge Members dropdown list.
Next to Aliases click Add to enter the IP address for this bridge interface. (Optional) click Add to display an additional IP address field for each additional IP address you want to add.
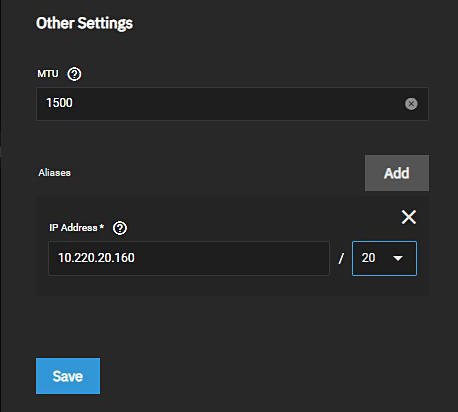
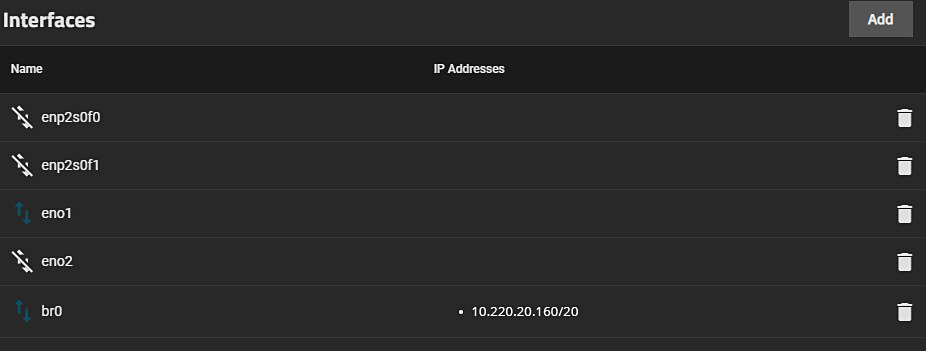
- Click Save when finished. The created bridge shows in Interfaces with its associated IP address information.
To determine if network changes are suitable, click Test Changes.
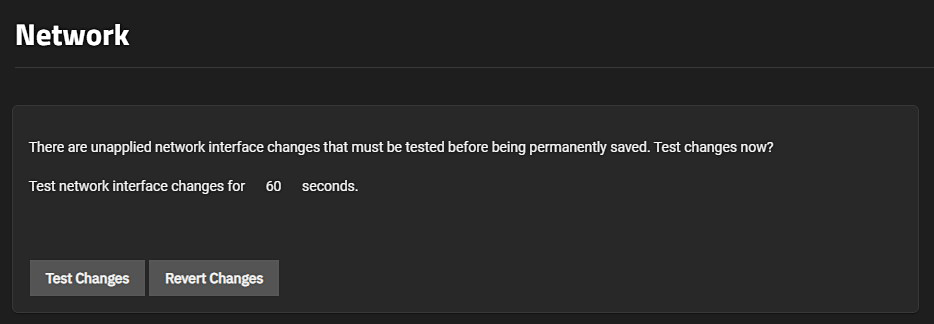
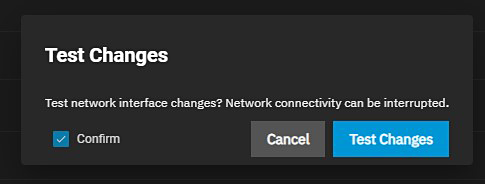
Once TrueNAS finishes testing the interface, click Save Changes if you want to keep the changes. Click Revert Changes to discard the changes and return to the previous configuration.

The new bridge interface displays with associated IP information.
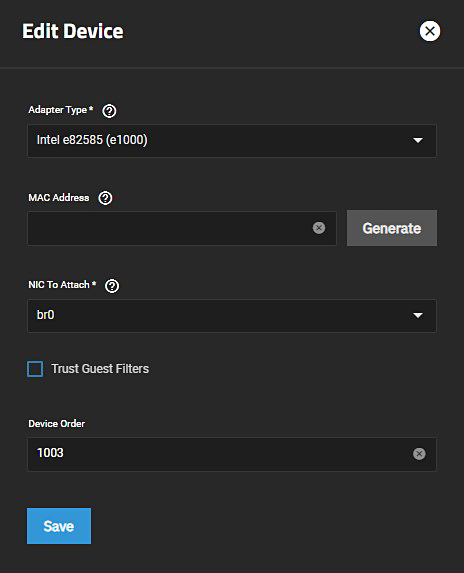
Go to Virtualization, expand the VM you want to use to access TrueNAS storage, and click Devices. Click more_vert in the NIC row and select Edit. Select the new bridge interface from the Nic to Attach dropdown list, then click Save.
You can now access your TrueNAS storage from the VM. You might have to set up shares or users with home directories to access certain files.
Related Content
- Adding and Managing VMs
- Adding and Managing VM Devices
- Installing SCALE
- Configuring Virtualization and Apps in TrueNAS SCALE
- Virtualization Screens


