TrueNAS Documentation Archive
This content follows the TrueNAS 23.10 (Cobia) releases. Archival documentation is provided for reference only and not actively maintained. Use the Product and Version selectors above to view content specific to different TrueNAS software or major version.
Setting Up a Network Bridge
2 minute read.
Last Modified 2024-03-19 08:38 EDTIn general, a bridge refers to various methods of combining (aggregating) multiple network connections into a single aggregate network. TrueNAS uses bridge(4) as the kernel bridge driver. Bridge(8) is a command for configuring the kernal bridge in Linux. While the examples focus on the deprecated brctl(8) from the bridge-utilities package, we use ip(8) and bridge(8) from iproute2 instead. Refer to the FAQ section that covers bridging topics more generally.
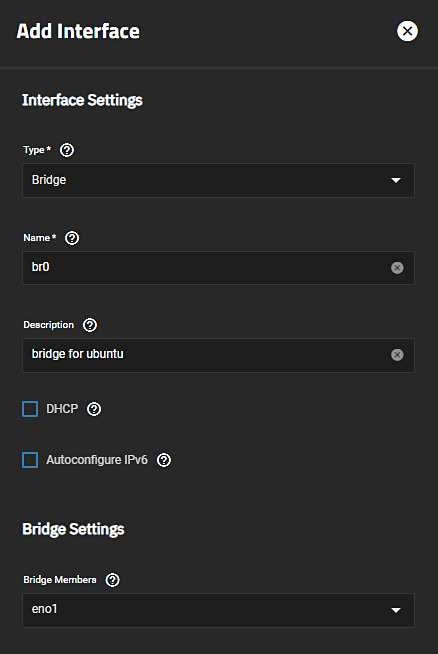
To set up a bridge interface, from the Network screen:
- Click Add in the Interfaces widget. The Add Interface configuration screen displays.

Select Bridge from the Type dropdown list. You cannot change the Type field value after you click Save.
Enter a name for the interface. Use the format bondX, vlanX, or brX where X is a number representing a non-parent interface. Read-only when editing an interface. You cannot change the Name of the interface after you click Save.
(Optional but recommended) Enter any notes or reminders about this particular bridge in the Description field.
Select the interfaces on the Bridge Members dropdown list.
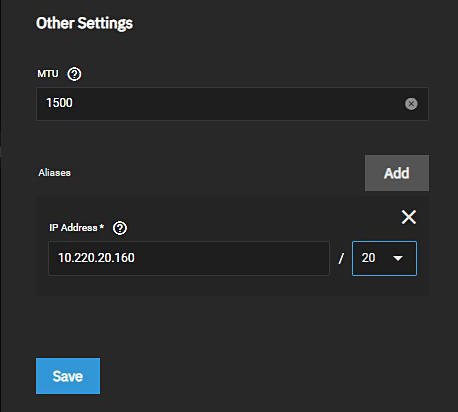
Next to Aliases click Add to enter the IP address for this bridge interface. (Optional) click Add to display an additional IP address field for each additional IP address you want to add.

- Click Save when finished. The created bridge shows in Interfaces with its associated IP address information.
Related Content
- Network Interface Screens
- Managing Interfaces
- Setting Up a Link Aggregation
- Setting Up a Network VLAN
- Configuring Static Routes
- Setting Up Static IPs


