TrueNAS Documentation Archive
This content follows the TrueNAS 23.10 (Cobia) releases. Archival documentation is provided for reference only and not actively maintained. Use the Product and Version selectors above to view content specific to different TrueNAS software or major version.
Setting Up Storage
5 minute read.
Last Modified 2024-03-19 08:38 EDTNow that you are logged in to the web interface, it is time to set up TrueNAS storage. These instructions describe a simple mirrored pool setup, where half the selected disks are used for storage and the other half for data protection. However, there are a many different configuration possibilities for your storage environment! You can read more about these options in the in-depth Creating Storage Pools.
At minimum, the system needs at least two disks of identical size to create a mirrored storage pool. While a single-disk pool is technically allowed, it is not recommended. The disk used for the TrueNAS installation does not count toward this minimum.
You can configure data backups in several ways and have different requirements. Backing data up in the cloud requires a 3rd party cloud storage provider account. Backing up with replication requires you to have additional storage on the TrueNAS system or (ideally) another TrueNAS system in a different location.
Your system must have at least one storage pool configured.
After installing SCALE, enter the IP address assigned by DHCP (displayed in the Console Setup Menu) into a browser window to access the SCALE sign-in splash screen. Log in to SCALE.
Begin by configuring your first storage pool.
See Creating Storage Pools for more information on how to plan for and create pools in SCALE. If you want to create additional pools with other disks not assigned to a pool, you can do that now or as you have a need for them.
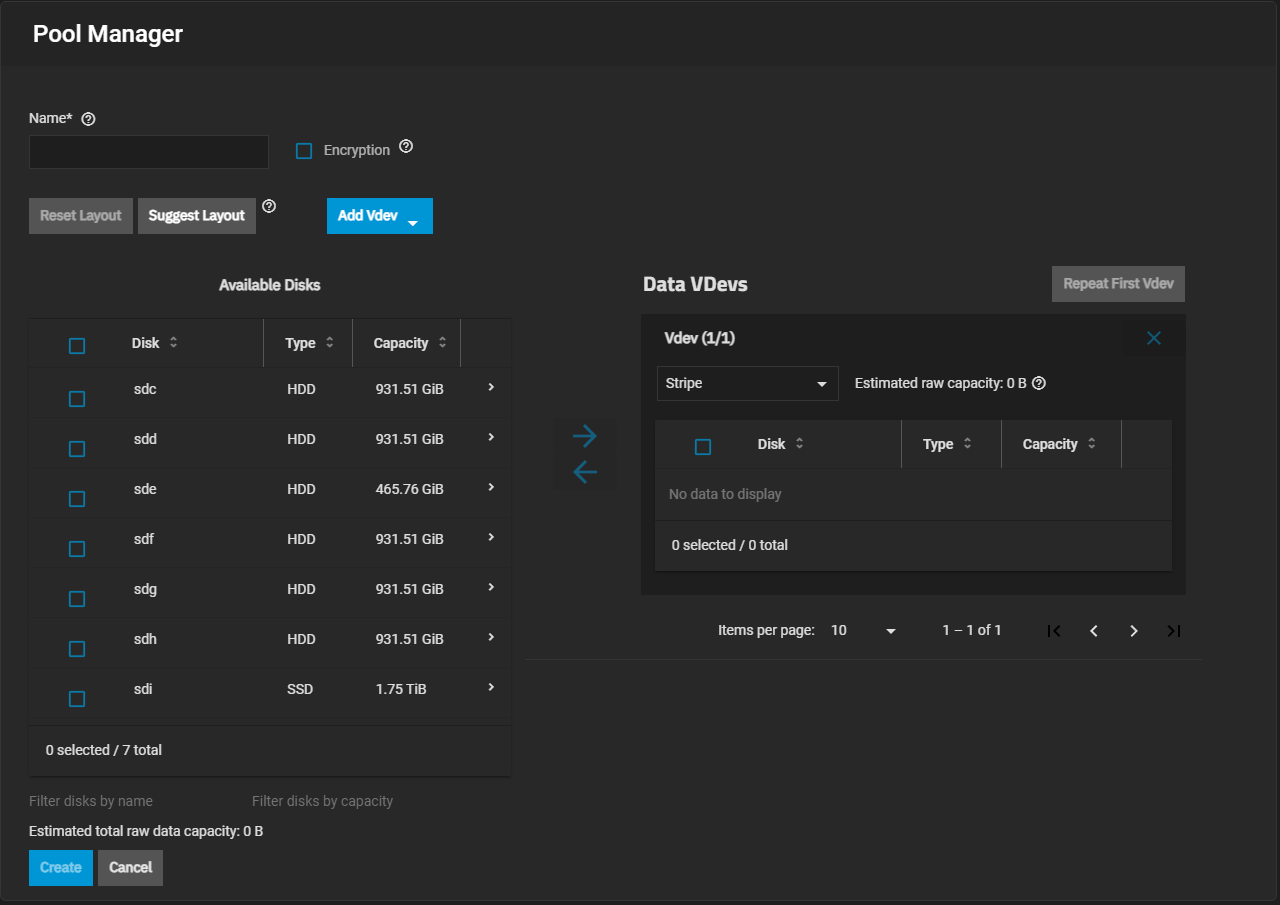
To create a pool using the Pool Manager you:
- Enter a name.
- Move disks to a data VDEV.
- Add any other VDEV to the pool you want to include and then add disks to them.
- Click Create
You access the Pool Manager from the Storage Dashboard.
Click Storage on the main navigation panel on the left of the screen.
Click Create Pool (Legacy) to open the Pool Manager screen for new pools.
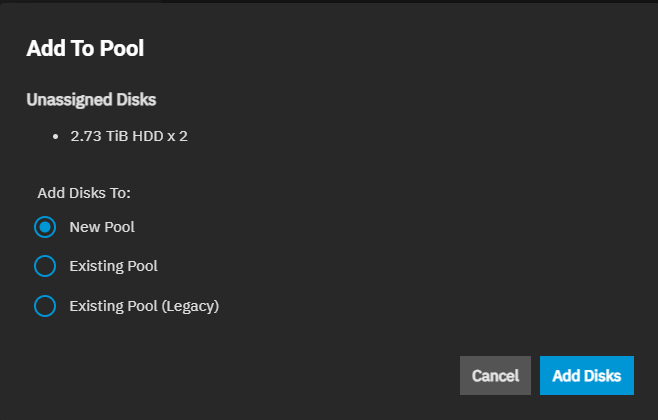
If you already have a pool created on your system you can use either the Create Pool button at the top right of the screen or click the Add To Pool button on the Unassigned Disks widget to create a new pool.
The root dataset of the first pool you create automatically becomes the system dataset.
After adding your first pool, you can move on to creating datasets for data sharing, applications you plan to deploy, or other use cases.
New pools have a root dataset that allows further division into new non-root parent and child datasets or into storage volumes (zvols). A dataset is a file system that stores data and has specific permissions.
A zvol is a virtual block device (like a virtual disk drive) that has a predefined storage size. Zvols are generally used with the iSCSI sharing protocol and also virtual machines (VMs) for their data storage needs.
To create a dataset or zvol, you can click Datasets on the main navigation panel or go to Storage and click Manage Datasets on the Usage widget for a specific pool to open the Datasets screen.
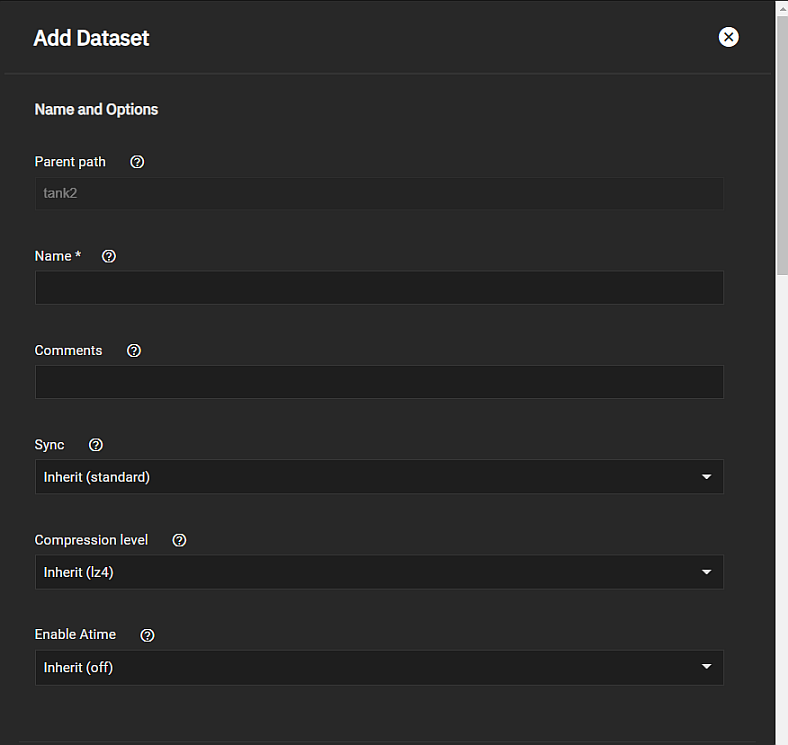
To create a dataset using the default settings, go to Datasets. Default settings include the settings datasets inherit from the parent dataset.
Select a dataset (root, parent, or child), then click Add Dataset.
Enter a value in Name.
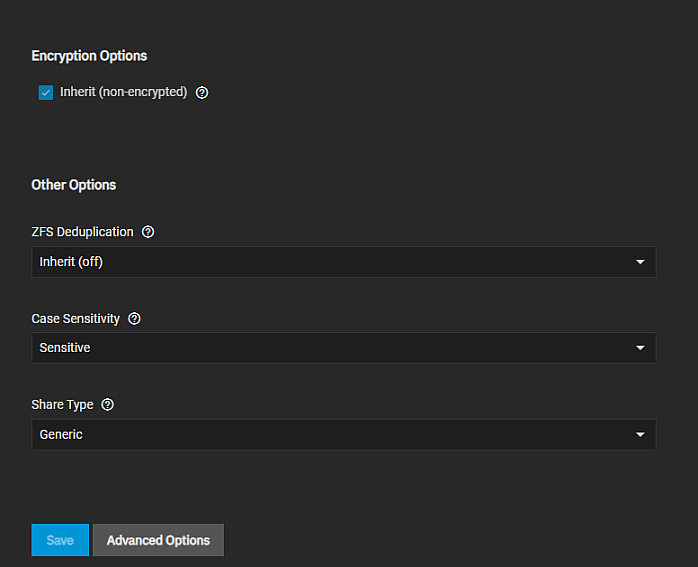
Select either Sensitive or Insensitive from the Case Sensitivity dropdown.
Select the Share Type, then click Save. Options are Generic, Multiprotocol, SMB, or Apps.
You can create datasets optimized for SMB shares or with customized settings for your dataset use cases.
If you plan to deploy container applications, the system automatically creates the ix-applications dataset, but it is not used for application data storage. If you want to store data by application, create the dataset first, then deploy your application. When creating a dataset for an application, select App as the Share Type setting. This optimizes the dataset for use by an application.
Review the Share Type and Case Sensitivity options on the configuration screen before clicking Save. You cannot change these or the Name setting after clicking Save.
Organize the pool with as many datasets or zvols you need according to your access and data sharing requirements before moving data into the pool.
See Adding or Managing Datasets for more information on configuring datasets, or Adding or Managing Zvols for more information on zvols.
After you finish creating your initial pool and the datasets or zvols, you can continue building and organizing your TrueNAS pools and datasets or move on to configuring how the system shares data
If you do not plan to set up data sharing, you can set up backup solutions for your system and stored data.
Related Configuration Articles
- First Time Login
- Adding a License and Proactive Support
- Migrating TrueNAS CORE to SCALE (Enterprise HA)
- Configuring SCALE Using the UI
- Setting Up Data Sharing
- Backing Up TrueNAS
- Preparing for Clustering
- Configuring Virtualization and Apps in TrueNAS SCALE


