TrueNAS SCALETrueNAS SCALE Documentation Archive
This content follows the TrueNAS SCALE 22.12 (Bluefin) releases. Archival documentation is provided for reference only and not actively maintained.
Use the Product and Version selectors above to view content specific to different TrueNAS software or major version.

Applications Screens

The Applications screen displays with Installed Applications by default.

The first time you select Apps on the main feature navigation panel, the Applications screen displays the Choose a pool for Apps dialog. Select a pool from the dropdown list, then click Choose to set that pool for application data storage.

Applications Screen Options

The options at the top right of the Applications screen change with the screen tab selected.

AppsScreenHeaderSCALE

Bulk Actions

The Bulk Action option at the top right of the Installed Applications screen allows you to select more than one or all installed apps on your system. After selecting the apps, use the other action buttons to either Start, Stop, or Delete the selected apps.

Select All places a checkmark in the top left corner of the widget for each installed application. Toggles to Unselect All. Start starts all selected apps and displays the Success dialog for each app after it starts without issue. Stop stops all selected apps and displays a Success dialog for each app after it stops without issue.

The Upgrade option allows you to select multiple apps, and if there are updates available, you can update the apps to the most recent version of the application.

Settings

Settings displays at the top right of all four Applications screensand has three options.

Choose Pool opens the Choose a pool window. Advanced Settings opens the Kubernetes Settings configuration screen. Unset Pool opens a dialog confirming the pool is unset.

Choose Pool Window

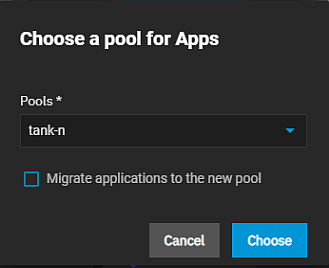
Selecting Choose Pool on the Settings list opens a different Choose a pool for Apps window than the one that first displays before you add your first application. Use the Settings > Choose Pool option to change the pool .
AppsSettingsChoosePool

Migrate applications to the new pool starts moving your application data from the existing pool to the new pool specified after you click Choose. Select Migrate applications to the new pool if you change your applications pool and want to migrate data from the existing pool to the new one.

Kubernetes Settings Screen

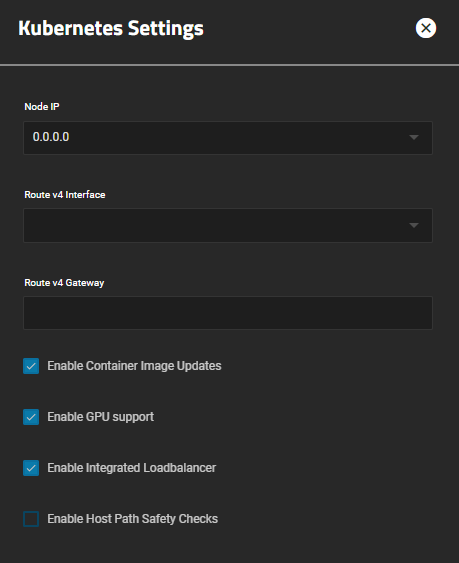
The Advanced Settings option opens the Kubernetes Settings configuration screen.

AppsAdvancedSettingsKubernetesSettings

SettingDescription
Node IPSelect the IP address for the node from the dropdown list.
Route v4 InterfaceSelect the network interface from the dropdown list.
Route v4 GatewayEnter the IP address for the route v4 gateway.
Enable Container Image UpdatesSelect to enable container image updates.
Enable GPU supportSelect to enable GPU support. The maximum number of apps that can use an Intel GPU is five.
Enable Integrated LoadbalancerSelect to enable the integrated loadbalancer. The default uses servicelb. When disabled, you can use metallb and specify any IP from the local network.
Enable Host Path Safety ChecksEnabled by default. Select to enable TrueNAS SCALE to perform safety checks to ensure app host path volumes are secure.

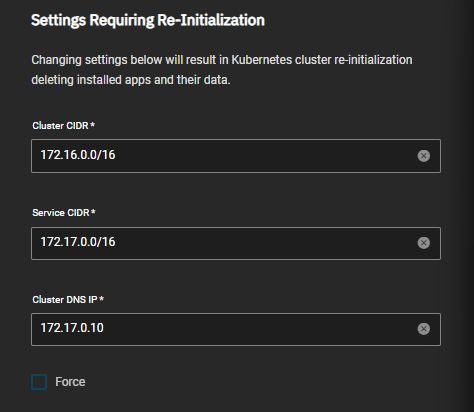
Settings Requiring Re-Initialization

AppsAdvancedSettingsKubernetesSettingsReInitialization

SettingDescription
Cluster CIDRRequired. Enter the IP address and CIDR number for the Kubernetes cluster.
Service CIDRRequired. Enter the IP address and CIDR number for the Kubernetes service.
Cluster DNS IPRequired. Enter the IP address for the cluster DNS.
ForceSelect to force bypassing pool validation during Kubernetes reinitialization.

Unset Pool

The Unset Pool option under Settings displays a confirmation dialog. Click UNSET to unset the pool. When complete, a Success dialog displays.

Refresh All

Opens a Refreshing counter showing the refresh options status. When complete, the Task Manager displays the status of each app refresh operation.

Add Catalog

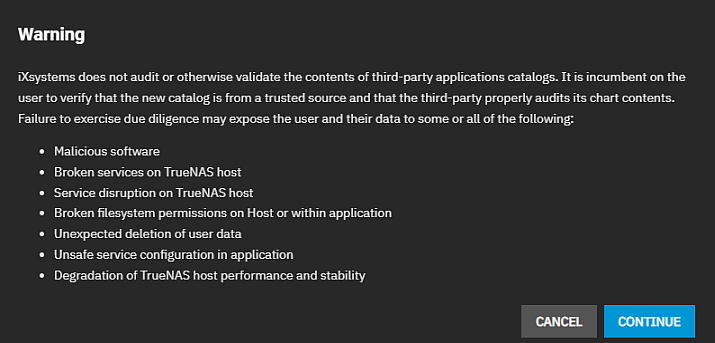
Add Catalog at the top of the Manage Catalogs screen opens a warning dialog before it opens the Add Catalog screen.

AddCatalogWarningSCALE

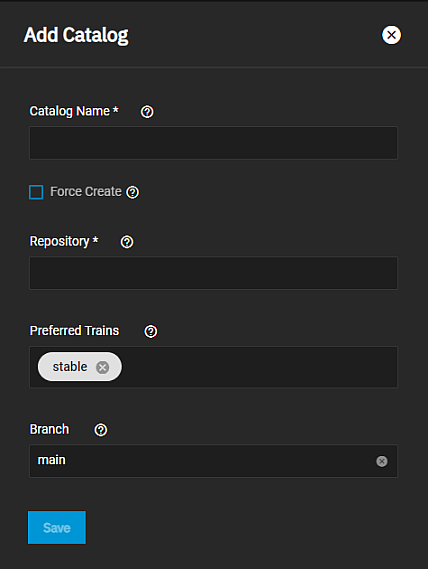
Click CONTINUE to open the Add Catalog screen.

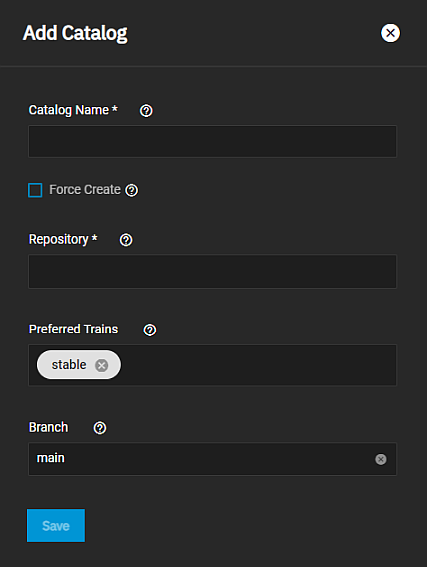
ManageCatalogsAddCatalogScreen

FieldDescription
Catalog Nameenter the name the TrueNAS uses to look up the catalog. For example, truecharts.
Force CreateSelect to add the catalog to the system even if some trains are unhealthy.
RepositoryEnter the valid git repository URL. For example, https://github.com/truecharts/catalog.
Preferred TrainsThe trains TrueNAS uses to retrieve available applications for the catalog. The default is stable (and optionally: incubator).
BranchSpecify the git repository branch TrueNAS should use for the catalog. The default is main.

Pull Image

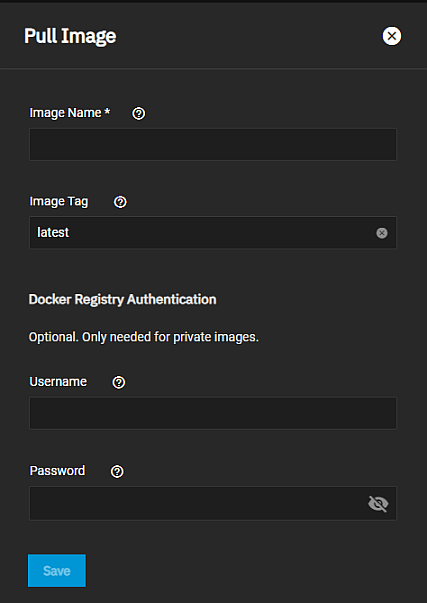
The Pull Image option at the top right of the Manage Docker Images screen opens the Pull Image screen.

AppsManageDockerImagesPullImage

SettingDescription
Image NameEnter the name of the image to pull. The format for the name is registry/repo/image.
Image TagEnter the image tag. For example, latest.

Docker Registry Authentication Settings

These settings are optional and only necessary for private images.

SettingDescription
UsernameEnter the input user name.
PasswordEnter the input user password.

Launch Docker Image

Launch Docker Image opens the Docker Image wizard, where you can configure third-party applications not listed on the Available Applications screen. These docker image options derive from the Kubernetes container options. See Launch Docker Image Screens for more information.

Installed Applications Screen

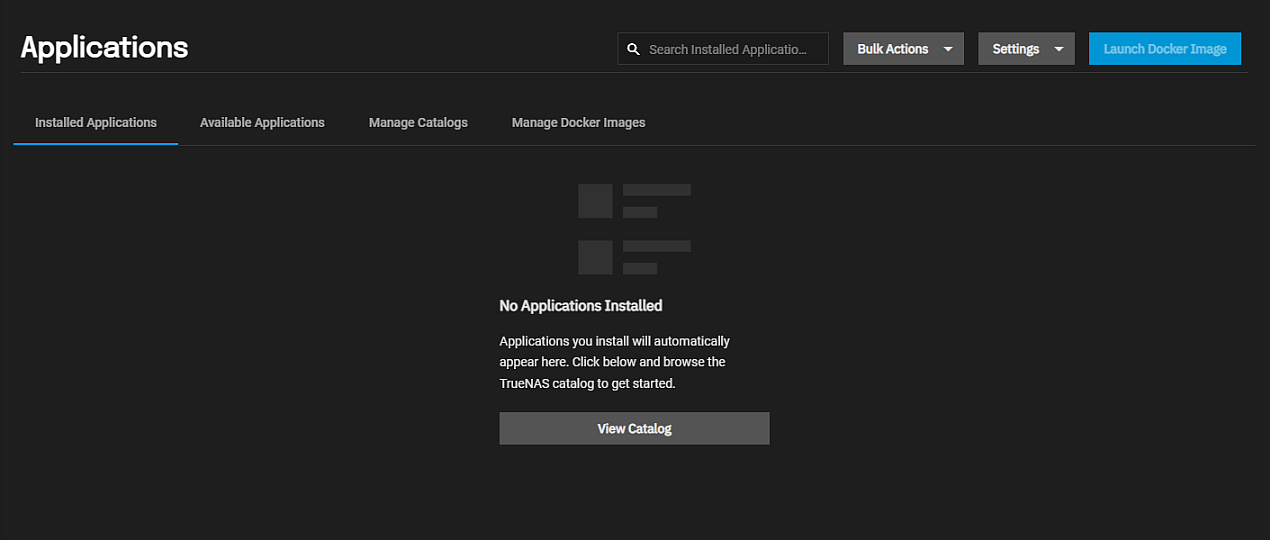
The No Applications Installed screen displays before you install your first application. View Catalog opens the Available Applications screen.

AppsInstalledApplicationsViewCatalog

After installing your application(s), this screen displays the application(s).

InstalledApplicationsWithApps

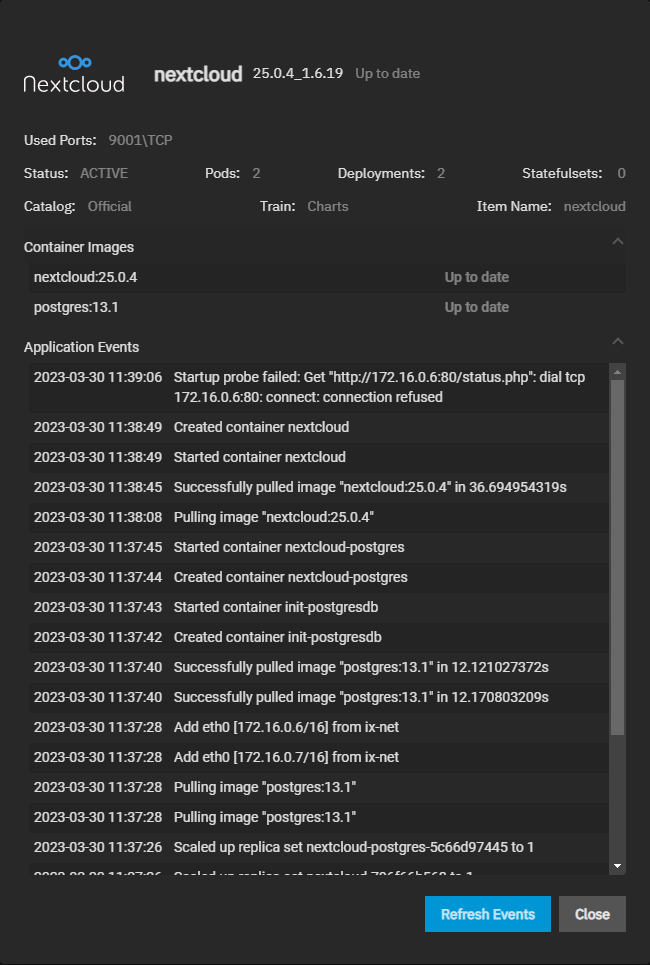
Click the application name in the app widget to open the app summary screen. The app summary screen displays information on the app version, ports, status, pods, deployments, statefulsets, catalog, update train, and name. The application summary screen also has dropdowns that list the active container images and application events. The Refresh Events button updates the list with the latest events.

AppsSummaryScreen

Click the on the application widget to open the action options dropdown list. Options are:

Choose Pod Shell Window

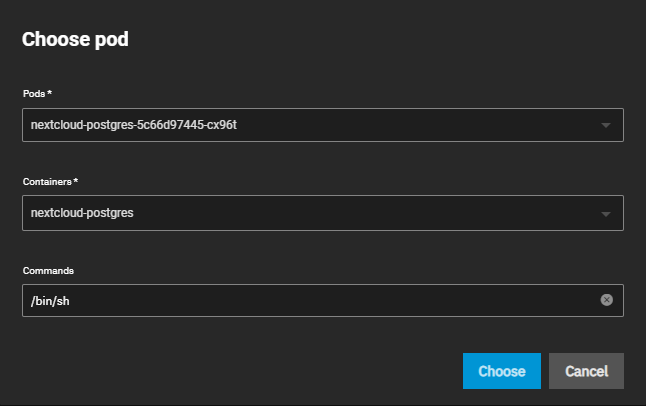
The Choose Pod Shell window lets you choose which pod or active container and shell commands to use when the Applications > Pod Shell screen displays.

AppsChoosePodWindow

SettingDescription
PodsRequired. Select the pod installed from the dropdown list.
ContainersRequired. Select the container from the dropdown list.
CommandsEnter the shell command.

Select Choose to open the Applications > Pod Shell screen.

Pod Shell Screen

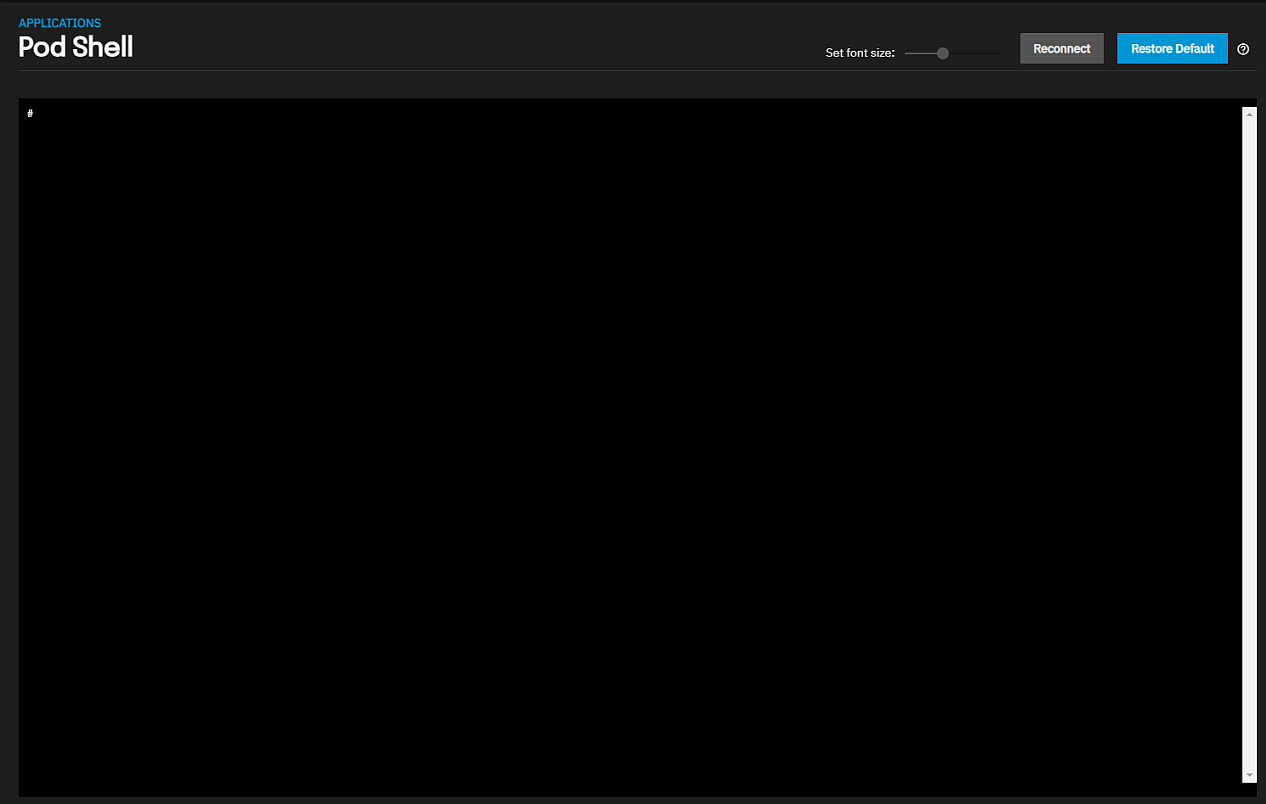
The Pod Shell screen allows users to enter TrueNAS CLI commands to access information about their applications.

AppsPodShellWindow

The following are example commands to access information on an active container. You can also use the System Settings > Shell to access the same information.

To view container namespaces: k3s kubectl get namespaces. To view pods by namespace: k3s kubectl get -n <NAMESPACE> pods. To access container shell: k3s kubectl exec -n <NAMESPACE> --stdin --tty <POD> -- /bin/bash. To view details about all containers: k3s kubectl get pods,svc,daemonsets,deployments,statefulset,sc,pvc,ns,job --all-namespaces -o wide. To get container status: k3s kubectl describe -n <CONTAINER NAMESPACE> <POD-ID>.

Choose Log Window

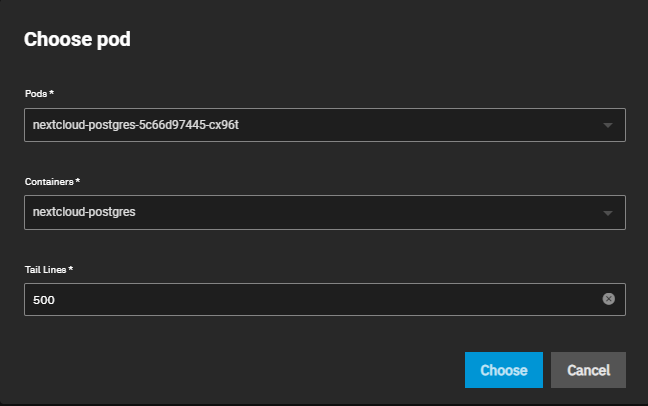
The Logs option opens the Choose Log window.

AppsChooseLogWindow

SettingDescription
PodsSelect the pod from the dropdown list to open the shell screen with the log for this pod.
ContainersSelect the containers from the dropdown list to include in the log shell screen.
Tail LinesEnter the number of log file lines to include in the shell screen for the log file.

Pod Log Window

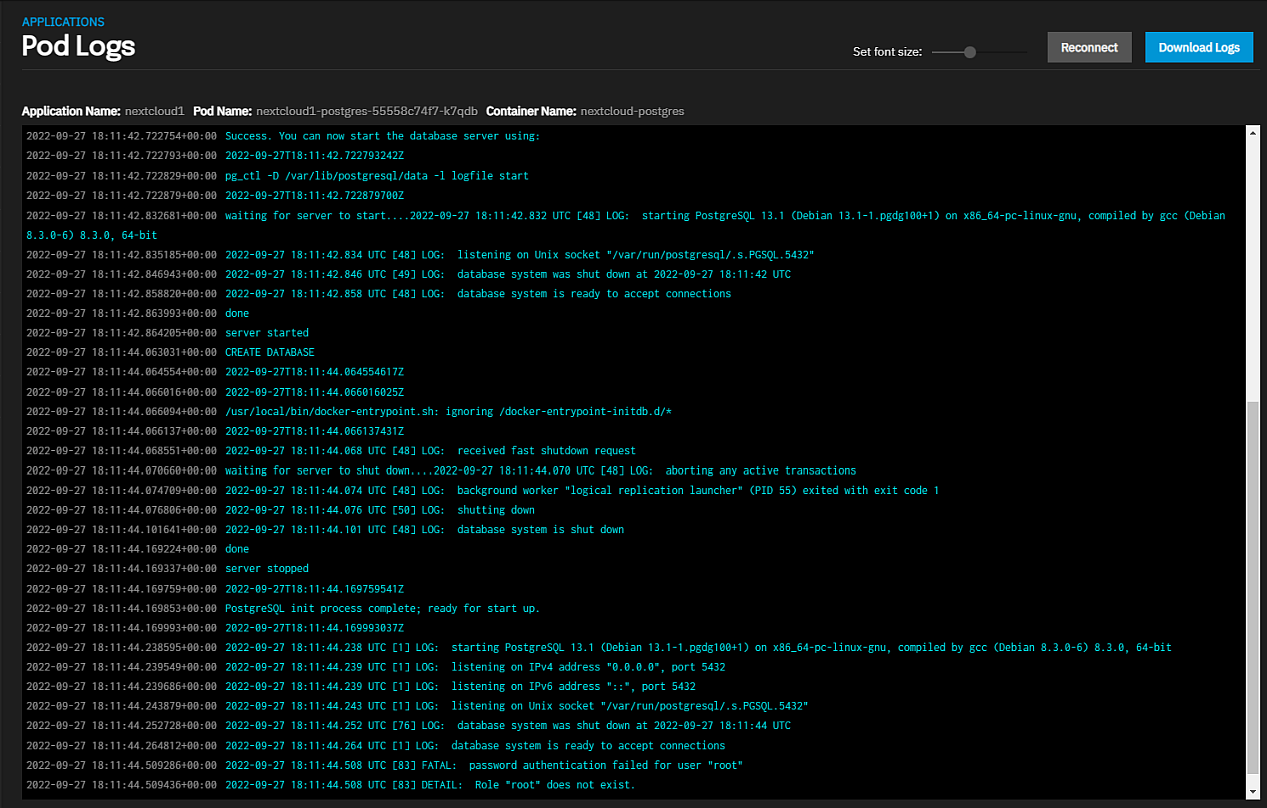
The Pod Log shell screen displays the information selected in the Choose Log window.

ApplicationsPodLogsScreen

Use the Set font size slider to increase or decrease the font size displayed on the screen. Reconnect re-establishes a connection with the application service. Download Logs downloads the logs to your server.

Delete Application

The Delete dialog for stopped applications includes two confirmation options, a Confirm option and a Delete docker images used by the app option.
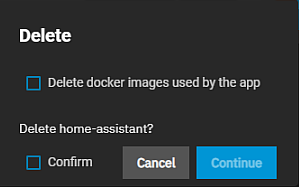
DeleteStoppedAppDialog

Delete docker images used by the app deletes the docker image the app uses when you delete the app. If you do not delete the image, it remains on the Manage Docker Images list until you delete it.

Confirm activates the Delete button.

Available Applications

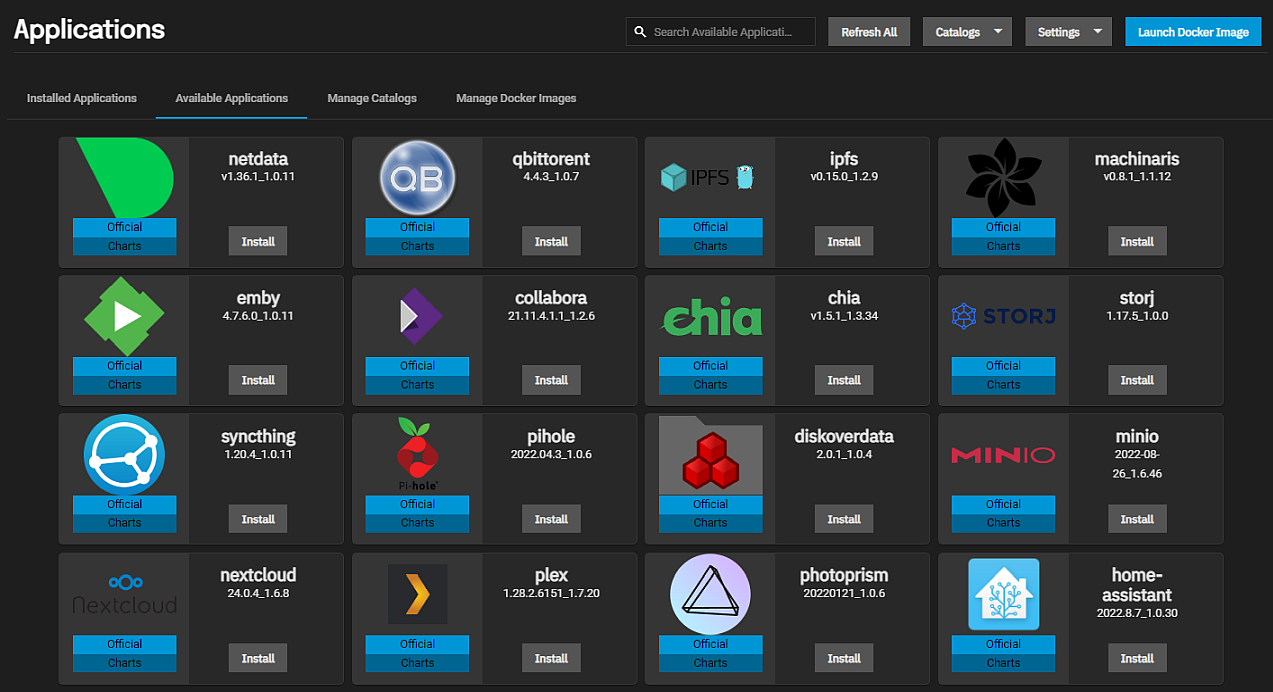
The Available Applications screen displays the widgets for all applications in the Official catalog.

AvailableApplicationsScreen

The Install button on each application card opens the configuration wizard for that application.

Click on the application icon or name to open an appname Application Summary window that includes information on the Catalog, Categories, Train, Status, and Versions for that application.

Manage Catalogs

The Manage Catalog screen displays the application catalogs installed on TrueNAS SCALE. The Official catalog contains all the applications listed on the Available Applications screen.

The options at the top right of the screen include the Refresh All and Add Catalog options.

ApplicationsManageCatalogsScreen

The more_vert to the right of each catalog displays the catalog options Edit, Refresh, Delete or Summary.

Edit Catalog Screen

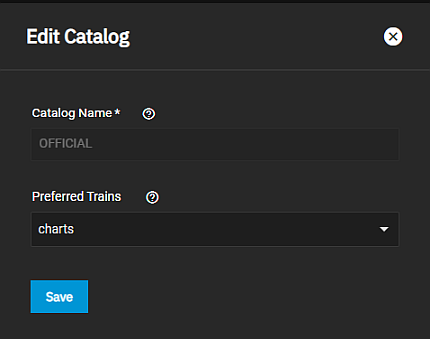
The Edit Catalog screen settings specify the name and train the UI should use to look up the catalog and retrieve applications for the catalog.

The Official catalog name is not editable, but you can change the train.

ApplicationsEditCatalog

SettingDescription
Catalog NameEnter a name TrueNAS should use to look up the catalog.
Preferred TrainSelect the train(s) the UI should use to retrieve available applications for the catalog from the dropdown list. Options are charts, test, enterprise, and community.

Refresh Catalog

Opens a Refreshing counter that shows the status of the refresh operation. You can minimize the counter while the process continues.

Delete Catalog

Opens a confirmation dialog before deleting the catalog. The Official catalog Delete option is inactive. You cannot delete the official catalog.

Catalog Summary Window

The Summary option for each catalog listed on Manage Catalogs opens the Name Catalog Summary window where Name is the name of the catalog. The summary displays the catalog status, application, and train, and allows you to select the train and status you want to include in the summary.

Add Catalog opens the Add Catalog screen.

AddCatalogScreen

SettingDescription
TrainSelect the trains you want to include in the catalog summary information. Options are All, charts, test, enterprise or community.
StatusSelect the statuses you want to include in the catalog summary information. Options are All, Healthy, or Unhealthy. This is useful to filter the summary to locate trains or applications with the Unhealthy status.

Manage Docker Images

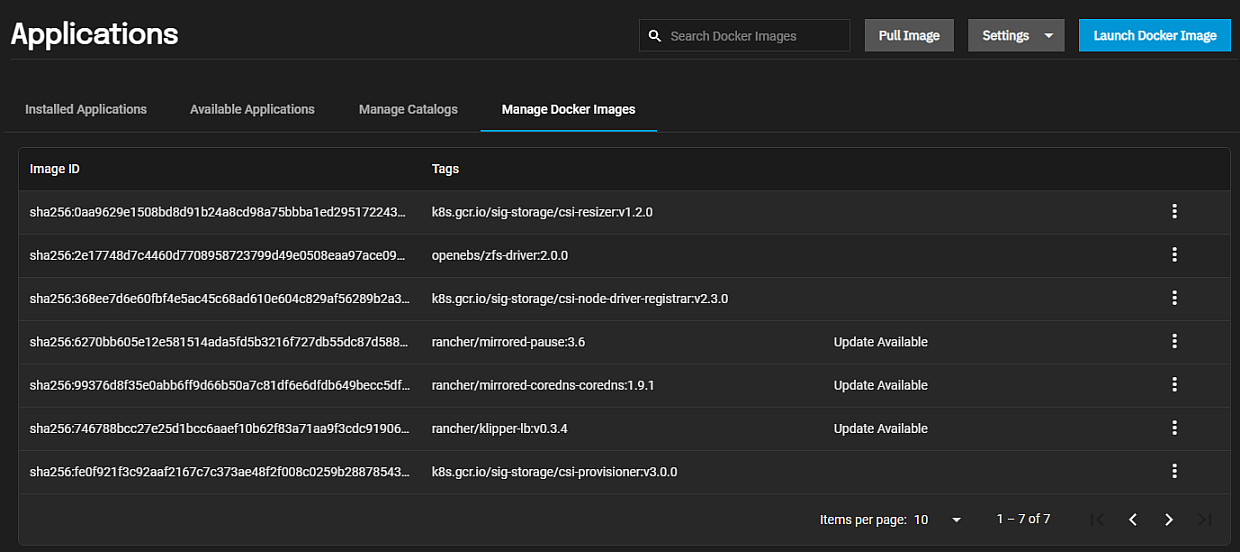
The Manage Docker Images button displays a list of Docker image IDs and tags on the system. The list shows Update Available for container images you can update.

ApplicationsManageDockerImagesScreen

Use the more_vert to display the options for each Docker image listed. Options are Update Image or Delete. Update Image is only available when the Docker image displays Update Available.

Update Image

Select Update to open the Choose a tag dialog. Select the image tag and click Choose.
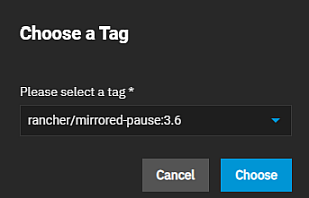
AppsUpdateDockerImageChooseATag

After updating the Docker image, the option becomes inactive until a new update becomes available.

Delete Image

The Delete dialog for images includes a pre-selected radio button for the docker image you selected to delete, a Confirm option and a Force delete option.
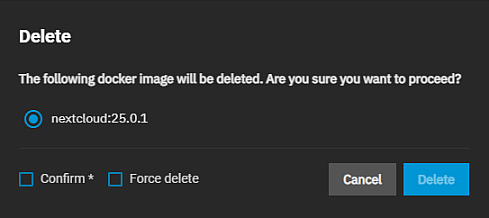
AppsManageDockerImageDelete

Confirm activates the Delete button.

Force delete adds the force flag to the delete-image operation. Select to avoid issues deleting an image. You can encounter problems if multiple regeistries reference the same Docker image.

For example, you can encounter issues deleting an image if the Docker hub registry and GitHub container registry reference it.

Related Content