TrueNAS SCALE Documentation Archive
This content follows the TrueNAS SCALE 22.12 (Bluefin) releases. Archival documentation is provided for reference only and not actively maintained.
Use the Product and Version selectors above to view content specific to different TrueNAS software or major versions.
Updating SCALE
7 minute read.
Last Modified 2023-11-30 08:15 ESTTrueNAS has several software branches (linear update paths) known as trains. SCALE is currently a Prerelease Train. Prerelease Trains have various preview/early build releases of the software.
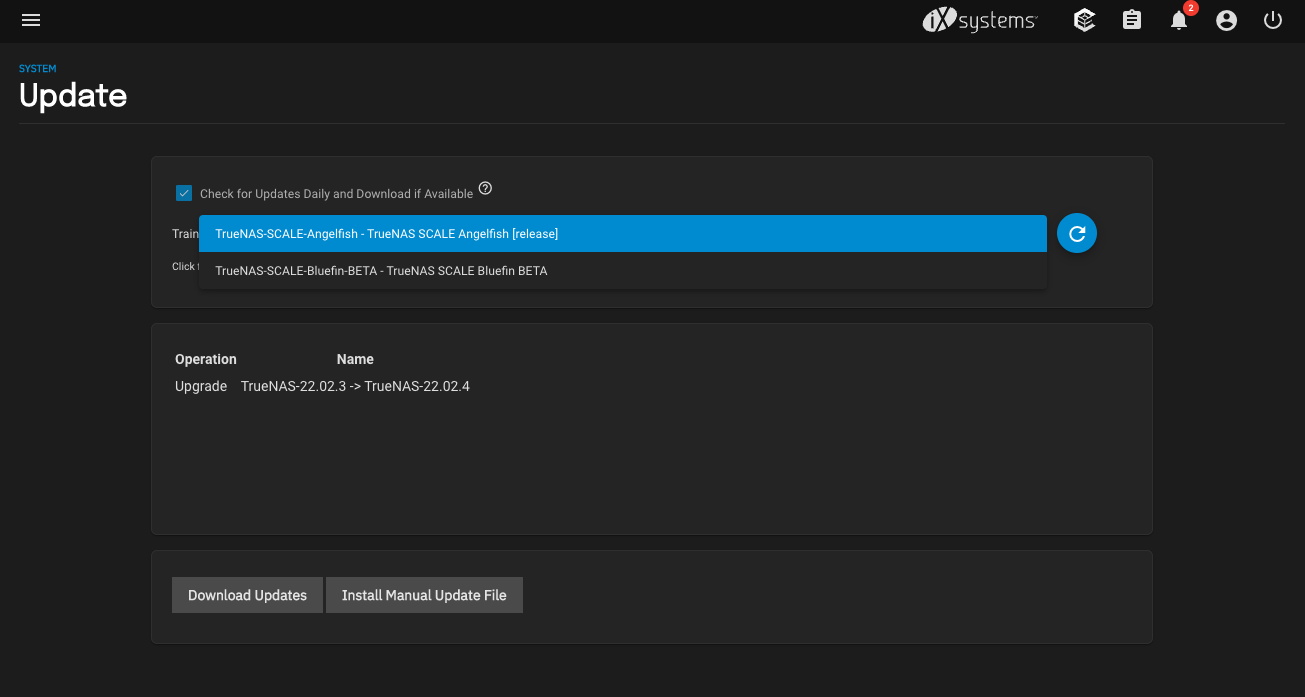
SCALE has several trains available for updates. However, the web interface only displays trains you can select as an upgrade. To view a list of the available trains, click on the arrow to the right of your current train.

For more information on other available trains, see TrueNAS Upgrades.
See the Software Status page for the latest recommendations for software usage. Bluefin and Nightlies are non-production trains. If you are using a non-production train, be prepared to experience bugs or problems. Testers are encouraged to submit bug reports and debug files at https://github.com/truenas/documentation/pull/1809/files#diff-ec4462e55ad21a92f5368a10510591a6ae7fe1ed297916798828c05f752ff25fR24.
The TrueNAS SCALE Update screen lets users update their system using two different methods: manual or automatic.
We recommend updating TrueNAS when the system is idle (no clients connected, no disk activity, etc). Most updates require a system reboot.
Update during scheduled maintenance times to avoid disrupting user activities.
All auxiliary parameters are subject to change between major versions of TrueNAS due to security and development issues. We recommend removing all auxiliary parameters from TrueNAS configurations before upgrading.

Select the Check for Updates Daily and Download if Available option to automatically download updates.
If an update is available, click Apply Pending Update to install it.
To do a manual update, click Download Updates and wait for the file to download to your system.
Download the SCALE Manual Update File.
To manually update TrueNAS, click Install Manual Update File and save your configuration.

Select a temporary location to store the update file and click Choose File. Select the
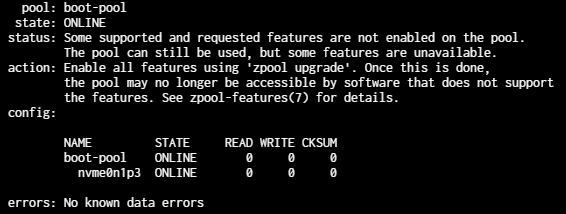
After updating, you might find that you can update your storage pools and boot-pool to enable some supported and requested features that are not enabled on the pool.
Go to System Settings > Shell and enter zpool status to show which pools you can update.

To update the pools, enter zpool upgrade poolname, where poolname is the name of the storage pool or boot-pool you want to update.
Upgrading pools is a one-way operation. After upgrading pools to the latest zfs features, you might not be able to boot into older versions of TrueNAS.
Upgrading from Bluefin to Cobia when applications are deployed is a one-way operation.
You cannot return to or roll back to an earlier SCALE release by simply activating an earlier release boot environment. You also cannot easily roll back app on-disk data after updating the structure to Cobia. After upgrading to Cobia, deployed apps do not work in the earlier release boot environment because the path to system dataset/ix-applications/docker does not exist in Cobia and is not restored when rolling back.
When apps are deployed in an earlier SCALE major version, you must take snapshots of all datasets that the deployed apps use, then create and run replication tasks to back up those snapshots. After rolling back to the earlier version from 23.10 (Cobia), these snapshots are used to restore the applications datasets to their pre-upgrade condition and allow previously installed apps to resume normal functionality.
At minimum, you need pre-upgrade snapshots of the ix-applications dataset and a recursive snapshot of ix-applications to get the docker dataset, and then snapshots of all datasets apps use as host paths. Without these snapshots, to downgrade to Bluefin requires deleting the app(s) and redeploying it/them.
It is recommended to use replication tasks to copy snapshots to a remote server used for backups of your data. If you do not have a remote server to store backup snapshots, you can create a new pool and dataset on the system for local replications, but this is not a recommended general backup strategy.
When you rollback the TrueNAS SCALE system from Cobia to an earlier SCALE major version, copy the snapshots from the remote backup server to the local system in a new temporary dataset. Create a new dataset on the same pool as the ix-applications dataset (the pool apps use).
Verify your Bluefin apps are running (not stopped or in the deploying state), and that you have access to your data and the application web portals.
Create and run replication tasks to a remote server. See Setting Up a Remote Replication Task for more information. Before upgrading to Cobia, create and replicate snapshots for:
- The ix-applications dataset to restore the migration JSON files to the earlier version.
- A recursive replication of the ix-applications dataset to see the docker snapshot.
- Snapshots of any datasets that deployed apps use for storage, such as the MinIO app data dataset.
If a Bluefin app uses host path(s) to existing datasets, such as with the MinIO and the /data dataset, create and run remote replication tasks for these datasets. If you nested these datasets for apps under a parent dataset, set up a recursive remote replication of the parent dataset to create the snapshots of all the nested child datasets the apps use.
Upgrade to Cobia and save the configuration file. This is always recommended so you can restore your system configuration if necessary.
Do not replicate remote backup snapshots into the ix-applications dataset! Create a dataset or use an existing dataset on the same pool as the ix-applications dataset to hold these snapshots.
Select the earlier release boot environment, make it the active boot environment, then reboot the system. See Managing Boot Environments for more information.
Go to the remote system and create and run a replication task to copy the snapshots back to the system you rolled back to an earlier SCALE release. Alternately, create a Pull replication task on the rolled-back system to bring the snapshots from the remote system to the local system.
Replicate each snapshot: the ix-applications, ix-applications/docker, and all snapshots of datasets set up as host paths in an application.
When moving a snapshot from a different pool on the same server, replicate to a dataset on the same pool as the ix-applications dataset (for example, tank/repsnaps if ix-applications is in the tank pool).
Go to the location of the snapshots, then:
a. Roll back to the ix-applications snapshot taken before the upgrade. This updates the migration JSON files to the pre-upgrade version of the files.
b. Locate the ix-applications/docker snapshot, click on it to expand it, then click Clone to Dataset. Rename the dataset to poolname/ix-applications/docker to create the missing docker dataset from this snapshot.
c. Roll back the snapshots for any dataset used as a host path in an application to the snapshots taken before the upgrade.
Go to Shell or open an SSH session and verify the docker dataset exists. Enter:
cd /mnt/poolname/ix-applicationsls
Where poolname is the name of the pool assigned as the pool for applications to use and with the ix-applications dataset.
The command output now show the docker dataset.
Reboot the system.
The applications now show on the Applications > Installed Applications screen. It takes a while for apps to return to the Active state.


