TrueNAS SCALE Documentation Archive
This content follows the TrueNAS SCALE 22.12 (Bluefin) releases. Archival documentation is provided for reference only and not actively maintained.
Use the Product and Version selectors above to view content specific to different TrueNAS software or major versions.
Configuring OpenVPN Service
4 minute read.
Last Modified 2024-03-19 08:47 EDTSCALE 22.12.3 deprecates several built-in features. SCALE 23.10 replaces deprecated features with applications that perform their roles. See SCALE Feature Deprecations for more details about feature deprecation and replacement.
To configure VPN service, go to Apps > Available Applications to locate and install a VPN application.
A virtual private network (VPN) is an extension of a private network over public resources. It lets clients securely connect to a private network even when remotely using a public network. TrueNAS provides OpenVPN as a system-level service to provide VPN server or client functionality. TrueNAS can act as a primary VPN server that allows remote clients to access system data using a single TCP or UDP port. Alternatively, TrueNAS can integrate into a private network, even when the system is in a separate physical location or only has access to publicly visible networks.
Before configuring TrueNAS as either an OpenVPN server or client, you need an existing public key infrastructure (PKI) with Certificates and Certificate Authorities created in or imported to TrueNAS.
In general, configuring TrueNAS OpenVPN (server or client) includes selecting networking credentials, setting connection details, and choosing additional security or protocol options.
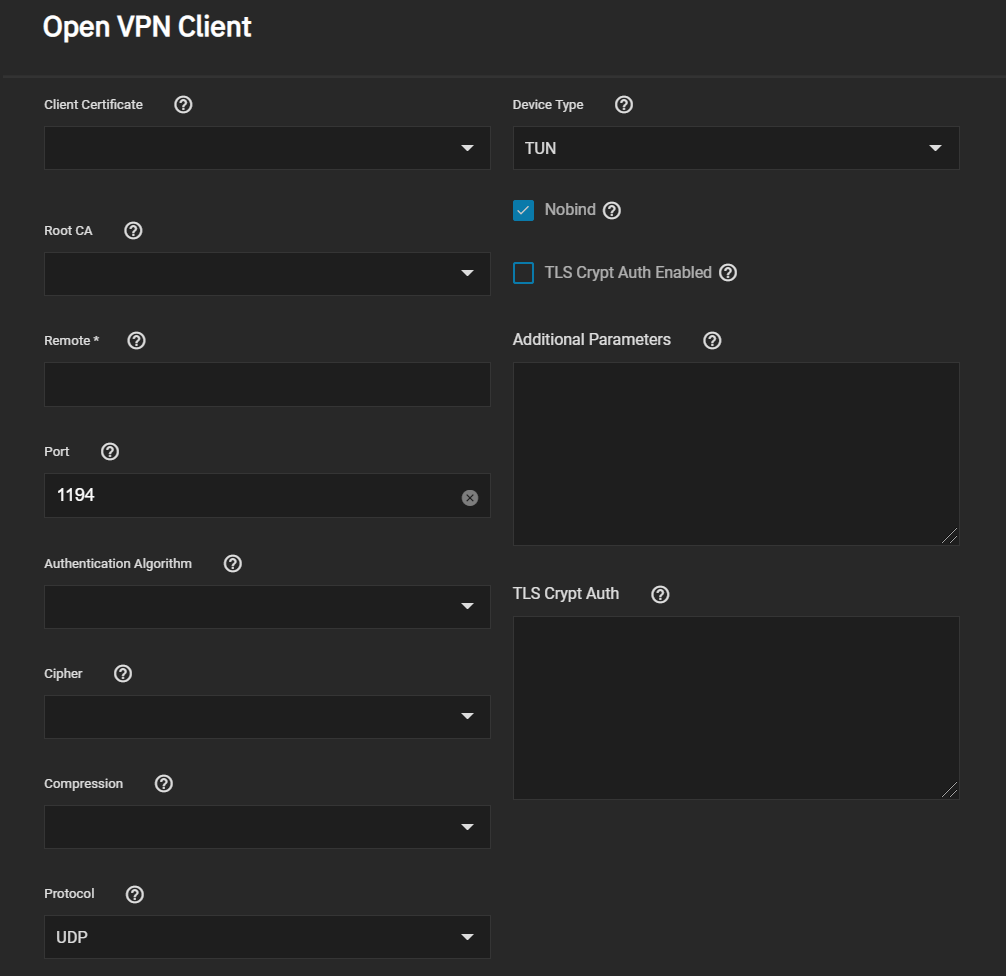
Go to System Settings > Services and find OpenVPN Client. Click the edit to configure the service.
Manage Certificates opens the Accounts > Certificates screen.
Choose the certificate to use as an OpenVPN client. The certificate must exist in TrueNAS and be active (unrevoked). Enter the Remote OpenVPN server’s hostname or IP address.
Continue to review and choose any other Connection Settings that fit your network environment and performance requirements. The Device Type must match the OpenVPN server Device Type. Nobind prevents using a fixed port for the client and is enabled by default so the OpenVPN client and server run concurrently.
Finally, review the Security Options and ensure they meet your network security requirements. If the OpenVPN server uses TLS Encryption, copy the static TLS encryption key and paste it into the TLS Crypt Auth field.
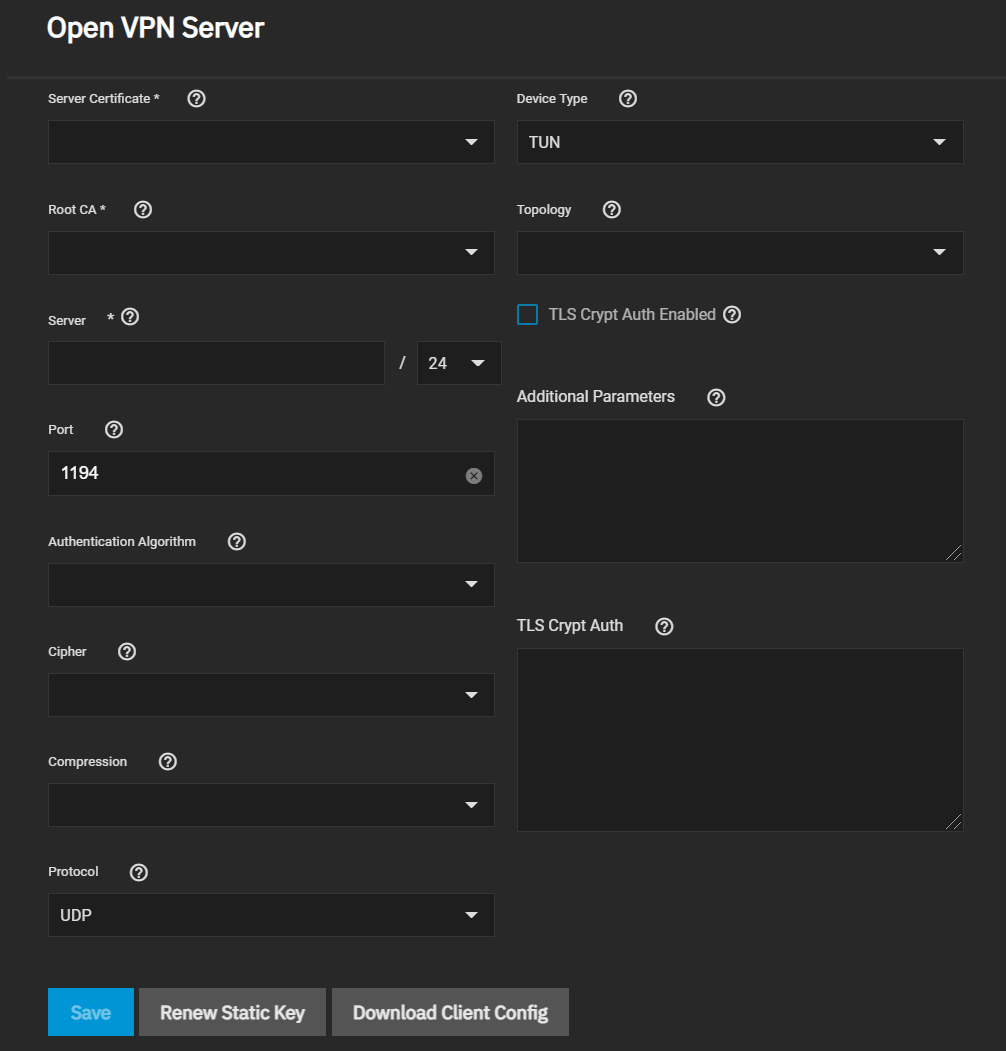
Go to System Settings > Services and find OpenVPN Server. Click the edit to configure the service.
Manage Certificates opens the Accounts > Certificates screen.
Choose a Server Certificate for the OpenVPN server. The certificate must exist in TrueNAS and be active (unrevoked).
Now define an IP address and netmask for the OpenVPN Server. Select the remaining Connection Settings that fit your network environment and performance requirements. If using a TUN Device Type, you can choose a virtual addressing topology for the server in Topology:
- NET30: Use one /30 subnet per client in a point-to-point topology. Use when connecting clients are Windows systems.
- P2P: Point-to-point topology that points the local server and remote client endpoints to each other. Each client gets one IP address. Use when none of the clients are Windows systems.
- SUBNET: The interface uses an IP address and subnet. Each client gets one IP address. Windows clients require the TAP-Win32 driver version 8.2 or newer. TAP devices always use the SUBNET Topology.
TrueNAS applies the Topology selection to any connected clients.
When TLS Crypt Auth Enabled is selected, TrueNAS generates a static key for the TLS Crypt Auth field after saving the options. To change this key, click Renew Static Key. Clients connecting to the server require the key. TrueNAS stores keys in the system database and includes them in client config files. We recommend always backing up keys in a secure location.
Finally, review the Security Options and choose settings that meet your network security requirements.
After configuring and saving your OpenVPN Server, generate client configuration files to import to any OpenVPN client systems connecting to this server. You need the certificate from the client system already imported into TrueNAS. To generate the configuration file, click Download Client Config and select the Client Certificate.


