
 TrueNAS Enterprise
 TrueNAS SCALE
 TrueNAS CORE
 Compare Editions
 TrueCommand
 Software Status
 FreeNAS
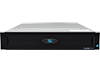 F-Series
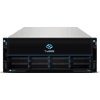 M-Series
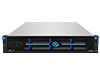 H-Series
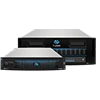 R-Series
 Mini Series
 Contact an Enterprise Specialist
TrueNAS SCALE Documentation Archive
This content follows the TrueNAS SCALE 22.12 (Bluefin) releases. Archival documentation is provided for reference only and not actively maintained.
Use the Product and Version selectors above to view content specific to different TrueNAS software or major versions.
Setting Up Static IPs
7 minute read.
Last Modified 2024-03-19 08:47 EDTThis article provides instructions on setting up a network interface with a static IP address or changing the main interface from a DHCP-assigned to a manually-entered static IP address. You must know the DNS name server and default gateway addresses for your IP address.
Disruptive Change!
You can lose your TrueNAS connection if you change the network interface that the web interface uses!
Command line knowledge and physical access to the TrueNAS system are often required to fix misconfigured network settings.
Multiple interfaces connected to a single TrueNAS system cannot be members of the same subnet.
You can combine multiple interfaces with Link Aggregation (LAGG) or a Network Bridge. Alternatively, you can assign multiple static IP addresses to a single interface by configuring aliases.
By default, during installation, TrueNAS SCALE configures the primary network interface for Dynamic Host Configuration Protocol (DHCP) IP address management. However, some administrators might choose to assign a static IP address to the primary network interface. This choice may be made if TrueNAS is deployed on a system that does not allow DHCP for security, stability, or other reasons.
In all deployments, only one interface can be set up for DHCP, which is typically the primary network interface configured during the installation process. Any additional interfaces must be manually configured with one or more static IP addresses.
Have the DNS name server addresses, the default gateway for the new IP address, and any static IP addresses on hand to prevent lost communication with the server. You have only 60 seconds to change and test these network settings before they revert back to the current settings, for example back to DHCP assigned if moving from DHCP to a static IP.
Back up your system to preserve your data and system settings.
As a precaution, grab a screenshot of your current settings in the Global Configuration widget.
If your network changes result in lost communication with the network and you need to return to the DHCP configuration, you can refer to this information to restore communication with your server. Lost communication could require you to reconfigure your network settings using the Console setup menu.
To view a demonstration of this procedure see the tutorial video in the Managing Global Configuration article.
To change an interface from using DHCP to a static IP address:
Click on the interface on the Interfaces widget to open the Edit Interface configuration screen and turn off DHCP.
Click Add in the Aliases section of the form and enter the new static IP. Select the CIDR number from the dropdown list.
Multiple interfaces cannot be members of the same subnet.
If an error displays or the Save button is inactive when setting the IP addresses on multiple interfaces, check the subnet and ensure the CIDR numbers differ.
Click Save.
The Network screen displays a new widget where you can select to either Test Changes or Revert Changes. If you have only one active network interface the system protects your connection to the interface by displaying the Test Changes dialog.
You have 60 seconds to test and save the change before the system discards the change and reverts back to the DHCP-configured IP address.
Check the name servers and default router information in the Global Information card. If the current settings are not on the same network, click Settings and modify each as needed to allow the static IP to communicate over the network.
Add the IP addresses for the DNS name servers in the Nameserver 1, Nameserver 2, and Nameserver 3 fields.
For home users, use 8.8.8.8 for a DNS name server address so you can communicate with external networks.
Add the IP address for the default gateway in the appropriate field. If the static network is IPv4 enter the gateway in IPv4 Default Gateway, if the static network is IPv6 use IPv6 Default Gateway.
Click Save.
Test the network changes. Click Test Changes. Select Confirm to activate Test Changes button.
The system attempts to connect to the new static IP address. If successful the Save Changes widget displays.
Click Save Changes to make the change to the static IP address permanent or click Revert Changes to discard changes and return to previous settings. The Save Changes confirmation dialog displays. Click SAVE. The system displays a final confirmation that the change is in effect.


Only one interface can use DHCP to assign the IP address and that is likely the primary network interface. If you do not have a existing network interface set to use DHCP you can convert an interface from static IP to DHCP.
To return to using DHCP:
Click Settings on the Global Configuration widget.
Clear the name server fields and the default gateway, and then click Save.
Click on the interface to display the Edit Interface screen.
Select DHCP.
Remove the static IP address from the IP Address field.
Click Apply.
Click Settings to display the Global Configuration configuration form and enter name server and default gateway addresses for the new DHCP-provided IP address.
Home users can enter 8.8.8.8 in the Nameserver 1 field.
Click Test Change. If the network settings are correct, the screen displays the Save Changes widget. Click Save Changes.
If the test network operation fails or the system times out, your system returns to the network settings before you attempted the change. Verify the name server and default gateway information to try again.
Related Content
- Network Interface Screens
- Managing Interfaces
- Setting Up a Network Bridge
- Setting Up a Link Aggregation
- Setting Up a Network VLAN
- Configuring Static Routes