TrueNAS SCALE Documentation Archive
This content follows the TrueNAS SCALE 22.12 (Bluefin) releases. Archival documentation is provided for reference only and not actively maintained.
Use the Product and Version selectors above to view content specific to different TrueNAS software or major versions.
Using 2FA (Two-Factor Authentication)
4 minute read.
Last Modified 2023-08-31 13:31 EDTTwo-factor authentication (2FA) is great for increasing security.
TrueNAS offers 2FA to ensure that entities cannot use a compromised administrator root password to access the administrator interface.
To use 2FA, you need a mobile device with the current time and date, and that has Google Authenticator installed. Other authenticator applications can be used, but you will need to confirm the settings and QR codes generated in TrueNAS are compatible with your particular app before permanently activating 2FA.
Two-factor authentication is time-based and requires a correct system time setting. Make sure Network Time Protocol (NTP) is functional before enabling is strongly recommended!
Unauthorized users cannot log in since they do not have the randomized 6-digit code.
Authorized employees can securely access systems from any device or location without jeopardizing sensitive information.
Internet access on the TrueNAS system is not required to use 2FA.
2FA requires an app to generate the 2FA code.
If the 2FA code is not working or users cannot get it, the system is inaccessible through the UI and SSH (if enabled). You can bypass or unlock 2FA using the CLI.
Set up a second 2FA device as a backup before proceeding.
Before you begin, download Google Authenticator to your mobile device.
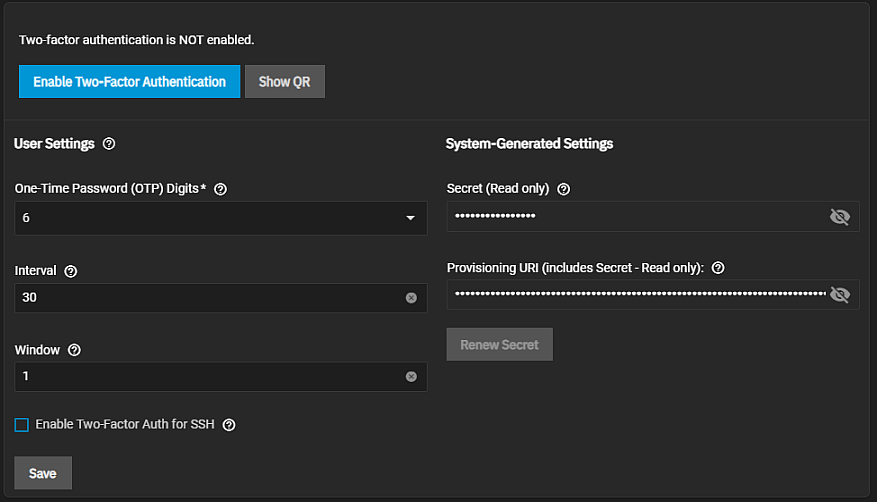
Go to Credentials > 2FA to open the Two-Factor Auth screen.

Click Enable Two Factor Authentication. The Enable Two-Factor Authentication confirmation dialog opens. Click Confirm.

Enable Two Factor Authentication toggles to Disable Two-Factor Authentication to turn 2FA off.
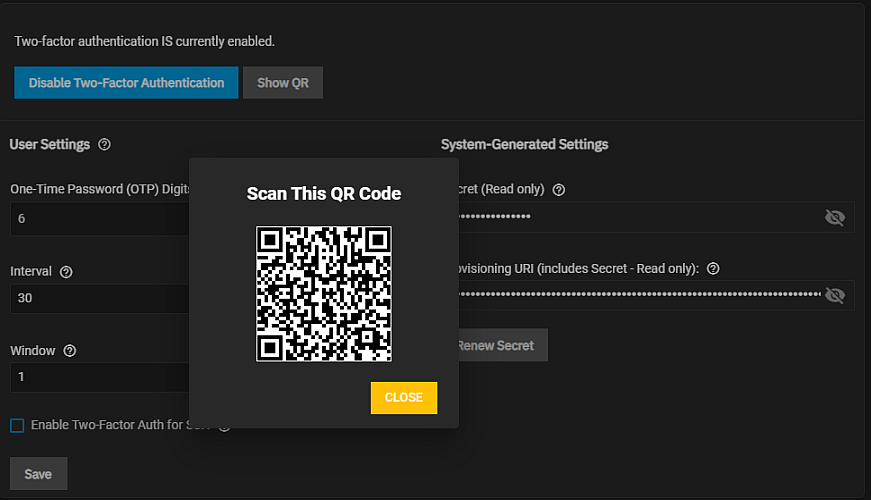
The Scan this QR Code dialog opens. Use Google Authenticator to scan the code.

Click Save. If you want to enable two-factor authentication for SSH logins, select Enable Two-Factor Auth for SSH before you click Save.
Start Google Authenticator on the mobile device and scan the QR code. After scanning the code click Close to close the dialog on the Two-Factor Auth screen.
Go to Credentials > 2FA to open the Two-Factor Auth screen. Click Disable Two-Factor Authentication.
If the device with the 2FA app is not available, you can use the system CLI to bypass 2FA with administrative IPMI or by physically accessing the system.
To unlock 2FA in the CLI, enter:
midclt call auth.twofactor.update '{ "enabled":false }'
After disabling 2FA, if you want to enable it again at some point in the future, go to Credentials > 2FA to open the Two-Factor Auth screen. Click Enable Two-Factor Authentication.
To change the system-generated Secret and Provisioning URI values, click Renew Secret. If you want to save these values in a text file, click the icon in the field to display the alphanumeric string and either enter or copy/paste the value into a text file. Keep all login codes in protected and backed up location.
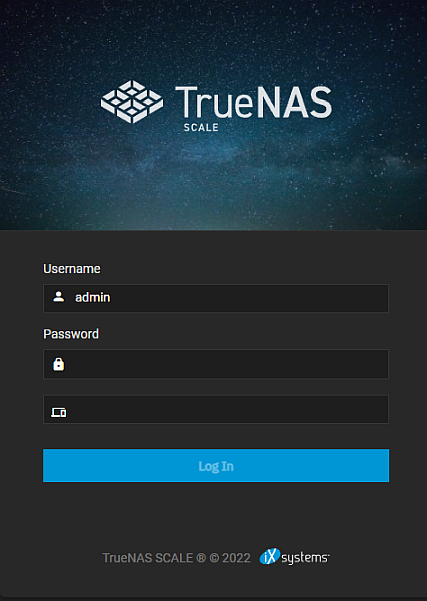
Enabling 2FA changes the login process for both the TrueNAS web interface and SSH logins.
The login screen adds another field for the randomized authenticator code. If this field is not immediately visible, try refreshing the browser.
Enter the code from the mobile device (without the space) in the login window and use the root User name and password.

If you wait too long, a new number code displays in Google Authenticator so you can retry.
Confirm that you set Enable Two-Factor Auth for SSH in Credentials > 2FA.
Go to System Settings > Services and edit the SSH service.
a. Set Log in as Root with Password, then click Save.
b. Click the SSH toggle and wait for the service status to show that it is running.
Open the Google Authentication app on your mobile device.
Open a terminal (such as Windows Shell) and SSH into the system using either the host name or IP address, the administrator account user name and password, and the 2FA code.

